Loopback Interface
Configuring the Loopback Interface in Cisco Secure Firewall
Introduction
Release 7.3 introduces the support for loopback interfaces on Firewall Threat Defense(FTD).
Background Information
Most deployments today have dual ISP connections, which provide redundancy in case one link fails. Site-to-Site VPN traffic from the firewall goes through the primary ISP connection. However, even though the second ISP connection provides redundancy, active VPN tunnels must be re-established at the time of the failure because the IP address used for VPN tunnels is the primary ISPs IP address. Upon failure, that IP address becomes unreachable, thus requiring establishing the VPN tunnels again with the secondary ISPs IP address. Any connections through the VPN tunnels may also have to be re-established. Loopback interfaces provide a way to keep the VPN tunnel established even if the primary ISP connection fails, thus avoiding the need to re-establish user connections through the VPN tunnel.
About Loopback Interfaces
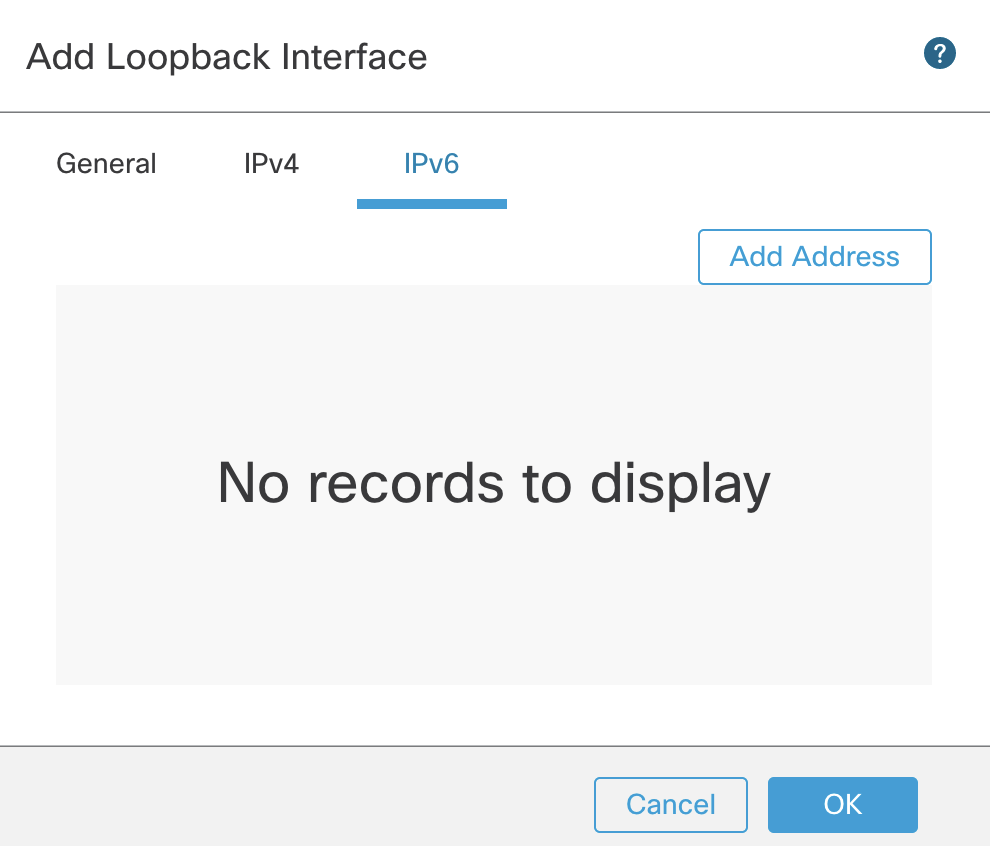
A loopback interface is a software interface that is considered stable once enabled. It remains in the Up state until the administrator shuts it down manually. And can be configured with both an IPv4 and an IPv6 address on the interface.
Loopback addresses can be distributed using any routing protocols like BGP, OSPF, and EIGRP. Static Routing may also be used on peers to reach the loopback address. So, a loopback interface can be reached through any of the physical interfaces on the device, depending upon the routing in your network.
Usage
A loopback interface can be used for the following:
A Tunnel Source for Virtual Tunnel Interface (VTI)
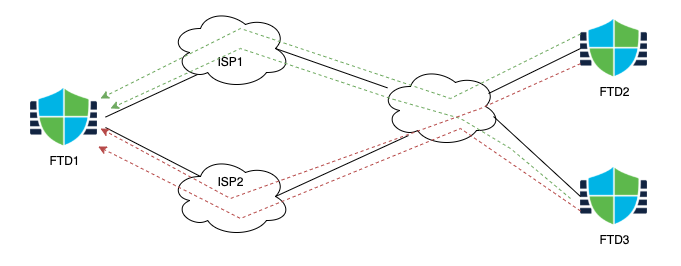
In the above setup, FTD1 is advertising its loopback interface over both ISP1 and ISP2. When both ISP1 and ISP2 are available the route for the loopback IP prefers the primary ISP (ISP1), so the VPN tunnels to FTD2 and FTD3 also use ISP1, as shown by green arrows. When ISP1 fails, the routing over the ISPs changes and now the loopback interface is reachable via ISP2, as shown by the red arrows. Since the loopback interface IP is still reachable (although through a different ISP), the VPN sessions remain connected.
IP Unnumbered for Virtual Tunnel Interfaces
To enable a VTI interface and use it for VPN, assign an IP address to the interface. If you have hundreds of VTI interfaces, then assigning an IP address to all the interfaces leads to a waste of IP addresses. Instead, you can configure the VTI interfaces to 'borrow' the IP address from a loopback interface to allow all VTI tunnels to use the same IP address and help preserve IP addresses.
Note
A loopback interface can be used as either a tunnel source or a borrow source, but not both.
Loopback interfaces cannot be used in access policies, platform settings, or to configure static routes. Hence, the loopback interface is not listed in those configurations.
Configuration
Adding a Loopback Interface
Step 1: Navigate to Devices > Device Management and Edit the device to which you want to add a loopback interface.
Step 2: Click on Add Interfaces > Loopback Interface

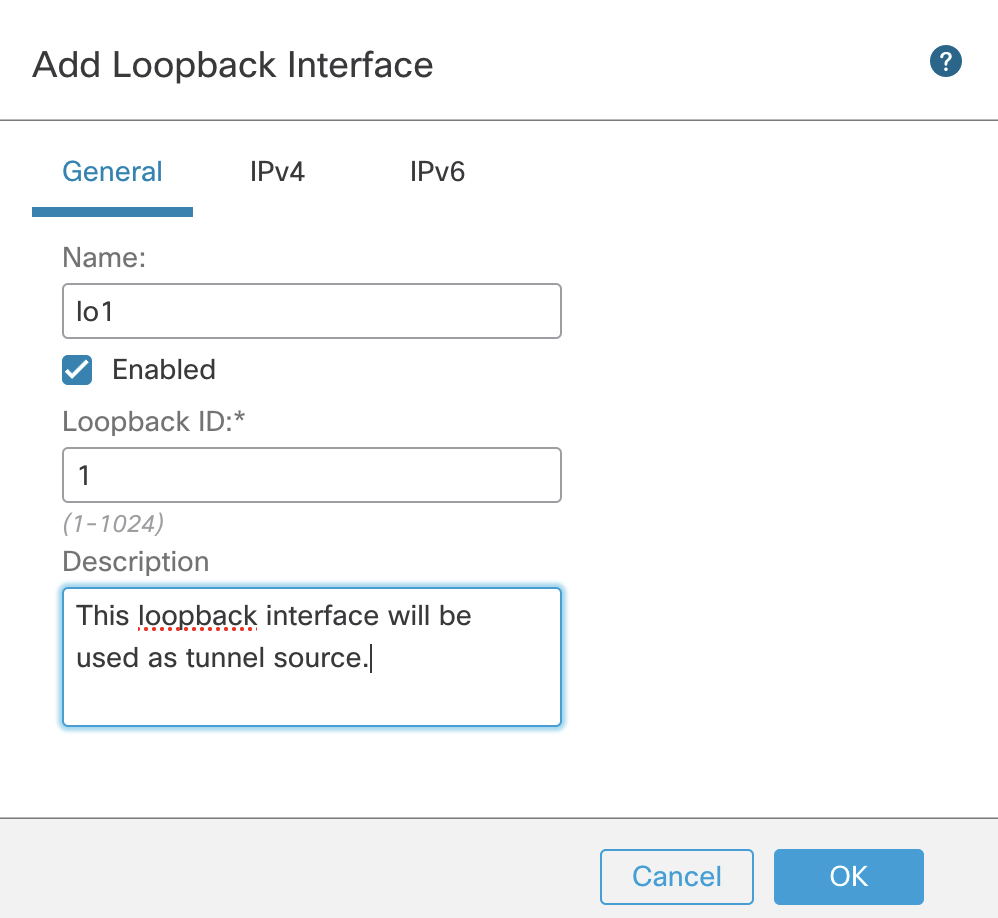
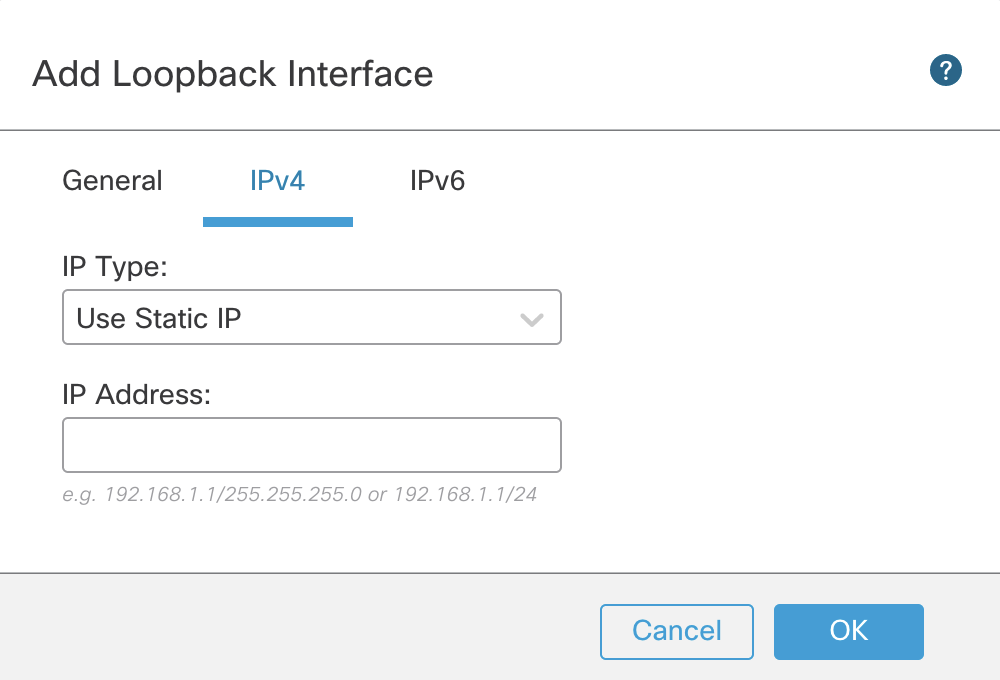
Step 3: In the pop-up window has three tabs. Provide the necessary details in each tabs:
-
General
- Name: The name for the interface used to refer to this interface
- Loopback ID: Enter a unique ID for the interface. A number between 1-10413
- Description: Provide a description of the interface (optional)
-
IPv4
- IP Type: Static (only static IP addresses are supported in version 7.3)
- IP Address: Enter the IP address in the format: IP/Netmask
Using the Loopback interface for VTI tunnels
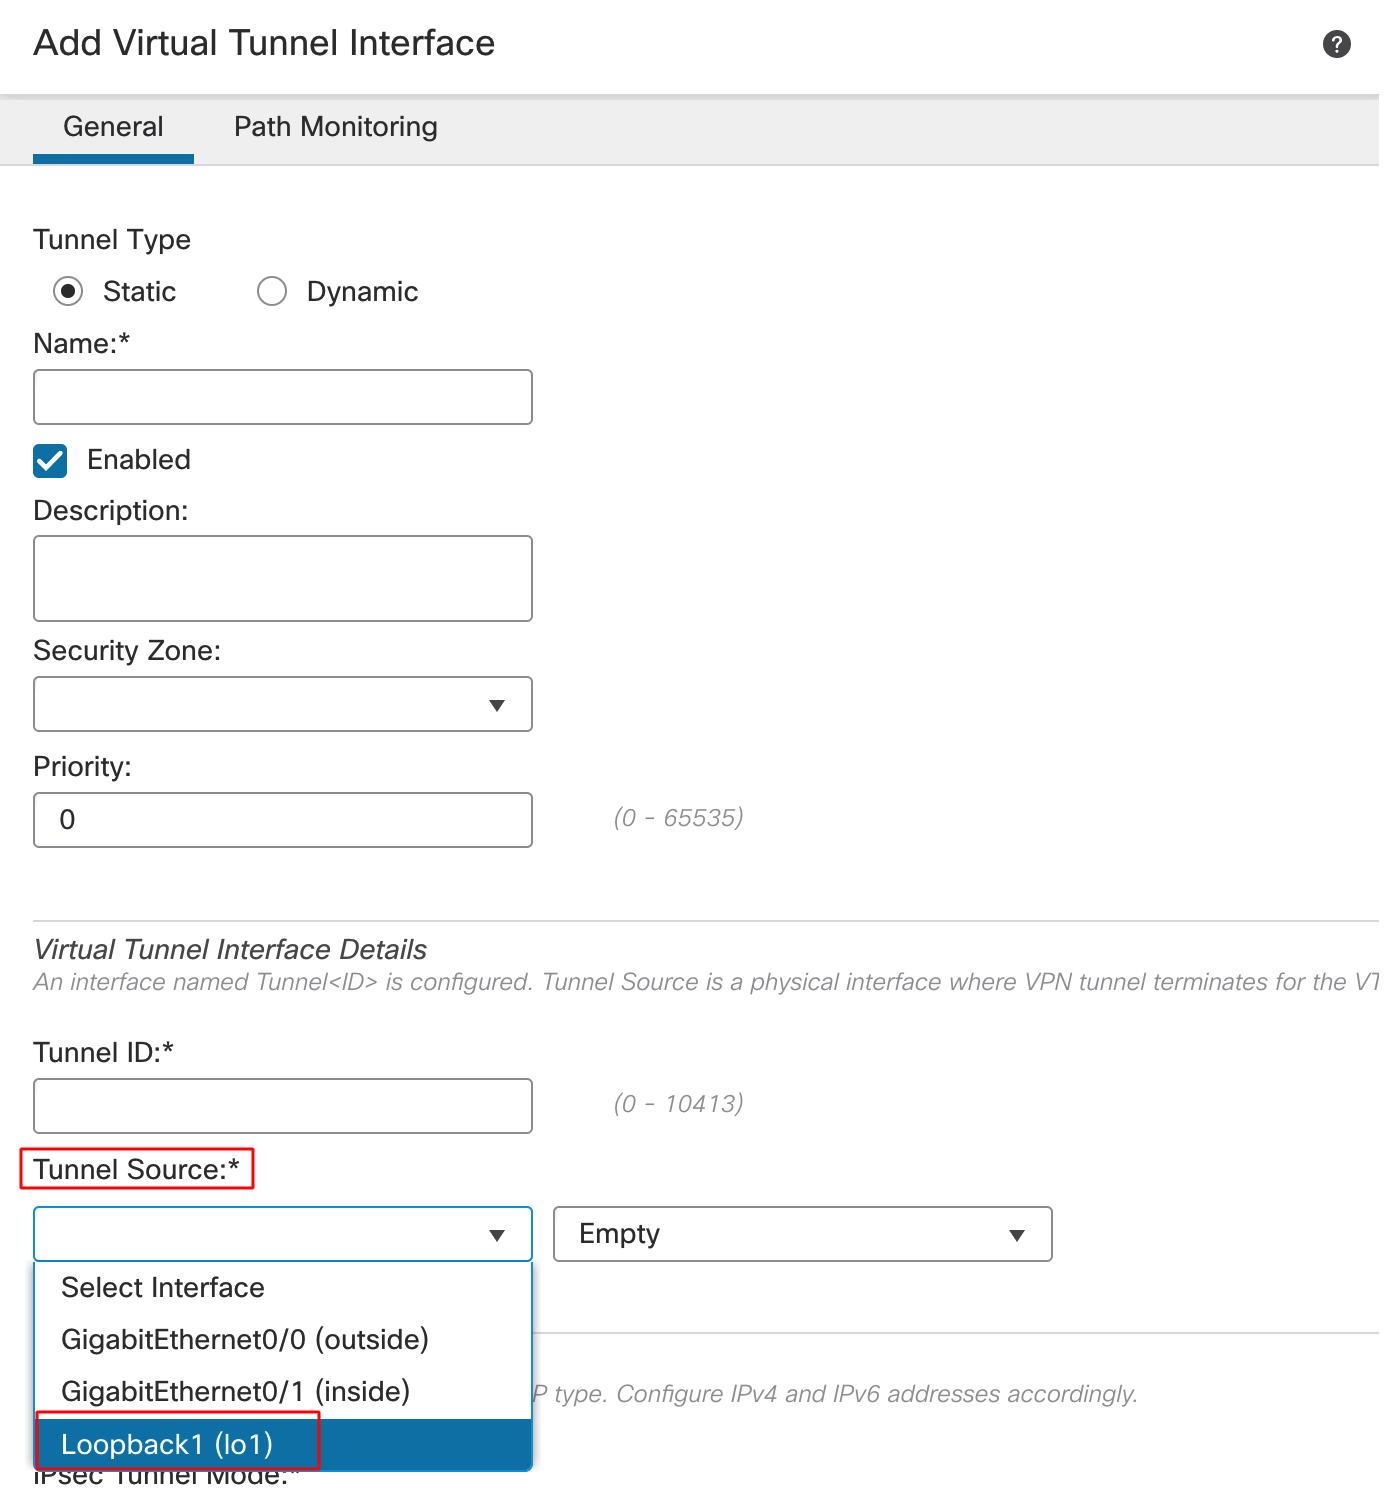
Step 1: To use a loopback interface as the source for VTI tunnels, edit the settings for the VTI interface. In the tunnel source drop-down select the Loopback interface as the source.
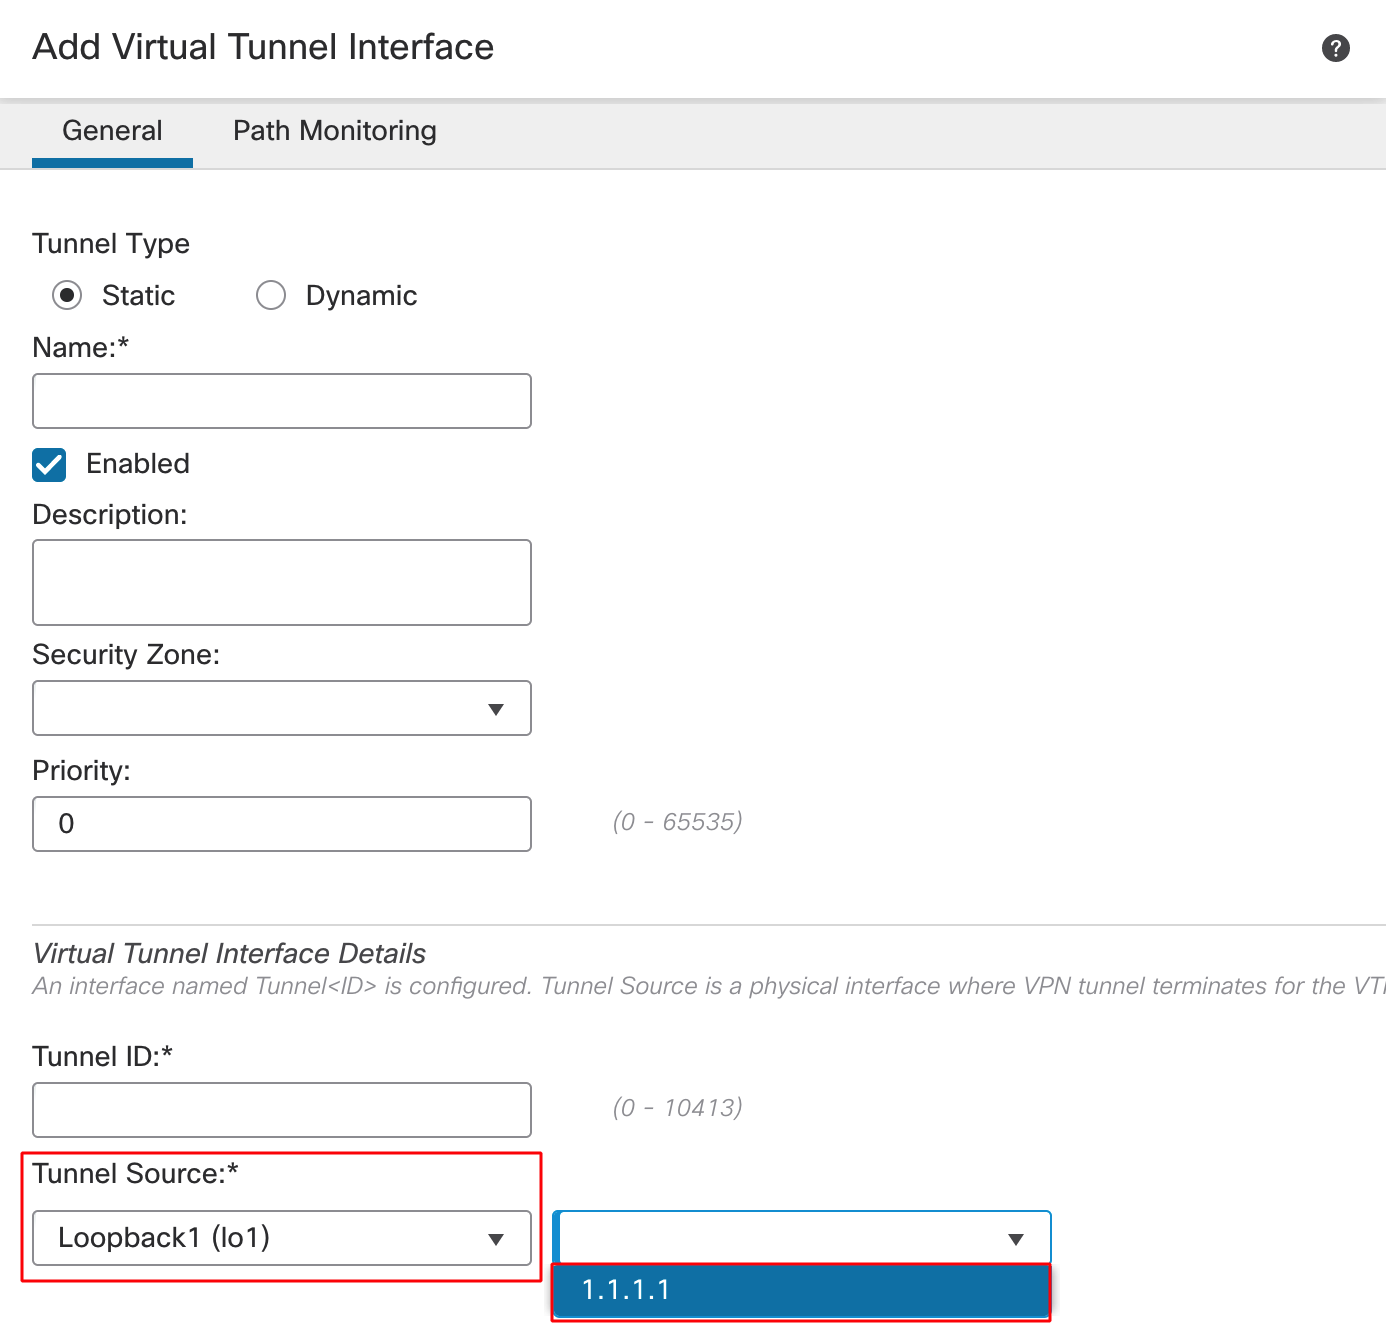
Step 2: After selecting the loopback interface as the tunnel source, select the IP address from the drop-down next to it.
Note
The drop down shows the IP address configured for the loopback interface.
Fill in other fields for the VTI as needed.
Using the Loopback Interface for IP Unnumbered
Step 1: To configure the IP unnumbered setting for the VTI interface, edit the settings for the VTI interface. In the IP address section, select Borrow IP (IP Unnumbered) and select the loopback interface.
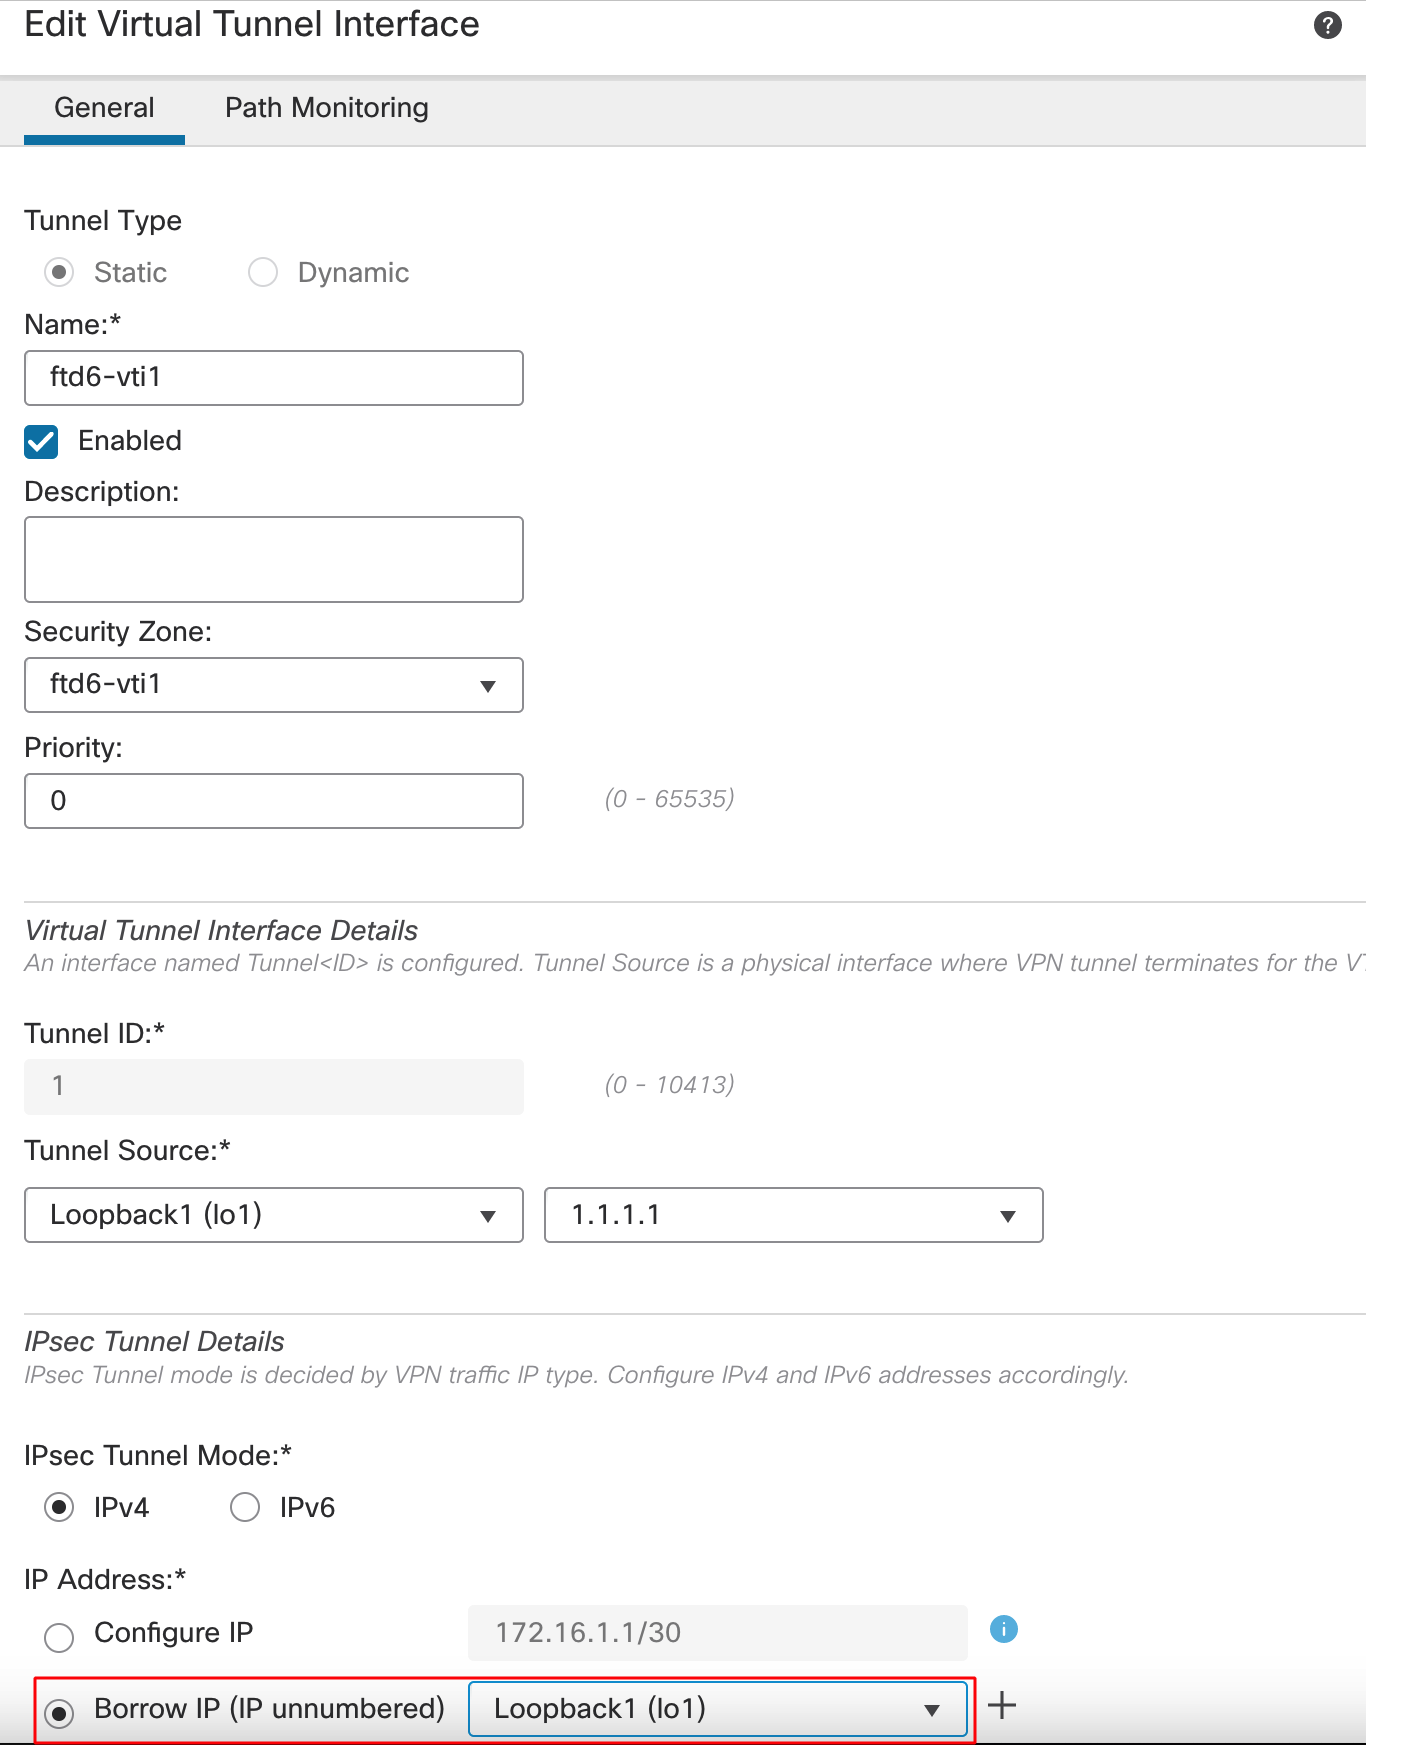
Fill in the other fields for the VTI as needed.
Verification and Troubleshooting
Show Commands
The show run interface loopback command shows the details of the loopback interface.
ftd# sh run int loopback 1
!
interface Loopback1
nameif lo1
ip address 1.1.1.1 255.255.255.255
Use the show run interface tunnel command to see how the loopback interface is being used.
ftd# show run interface tunnel 1
!
interface Tunnel1
nameif ftd-vti1
ip unnumbered lo2
tunnel source interface lo1
tunnel mode ipsec ipv4
Limitations
In Release 7.3, loopback interfaces cannot be used for management features like AAA, SSH, Syslog, etc., they can only be used for VTI tunnels.
Summary
Loopback interfaces are useful to avoid traffic flow disruption for VTI-based VPN tunnels as well as conserving the IP addresses in large VTI-based cases.
📚Additional Resources
Updated about 3 years ago
