Scenario 14 - Encrypted Visibility Engine
Objective
- What - The Encrypted Visibility Engine (EVE) is used to provide more visibility into the encrypted sessions without the need to decrypt them. In the previous versions, EVE had only a toggle button for enable/disable. Version 7.4 onwards, traffic learned via EVE can also be blocked based on the Encrypted Visibility Threat Score. In this lab, we will block EVE traffic based on the threat score.
- Why - Increased visibility into client applications, processes and other details of hosts. Block connections by malware processes. Decreased burden on security devices as less traffic needs to be decrypted.
- How - Review Connection Events, edit EVE Configuration, and Validate Block Events with Unified Event Viewer
Lab Tasks
These are the tasks in the scenario below. If you are familiar with the Secure Firewall you may do these on your own, or for step-by-step instructions see below.
- Task 1 - View the Unified and Connection Events going through NGFWTG
- Note the Encrypted Visibility Threat Confidence Score for which the traffic is getting blocked
- Task 2 - Edit EVE configuration
- Change the threshold of blocking traffic based on EVE from 'Very High' to '75'
- Task 3 - View Unified and Connection events with the new configuration
- Navigate to appid.cisco.com from blocked Encrypted Visibility FIngerprints and observe the malware processes
- Observe the ‘Client Application’ being updated with the ‘Encrypted Visibility process name’
- Observe the Encrypted Visbility Engine Dashboard
Lab Topology

Task 1 - View the Events
- Using the Quick Launch or the Google Chrome browser connect to the FMC web UI.
Login as admin/C1sco12345. These credentials should be pre-populated in the browser.
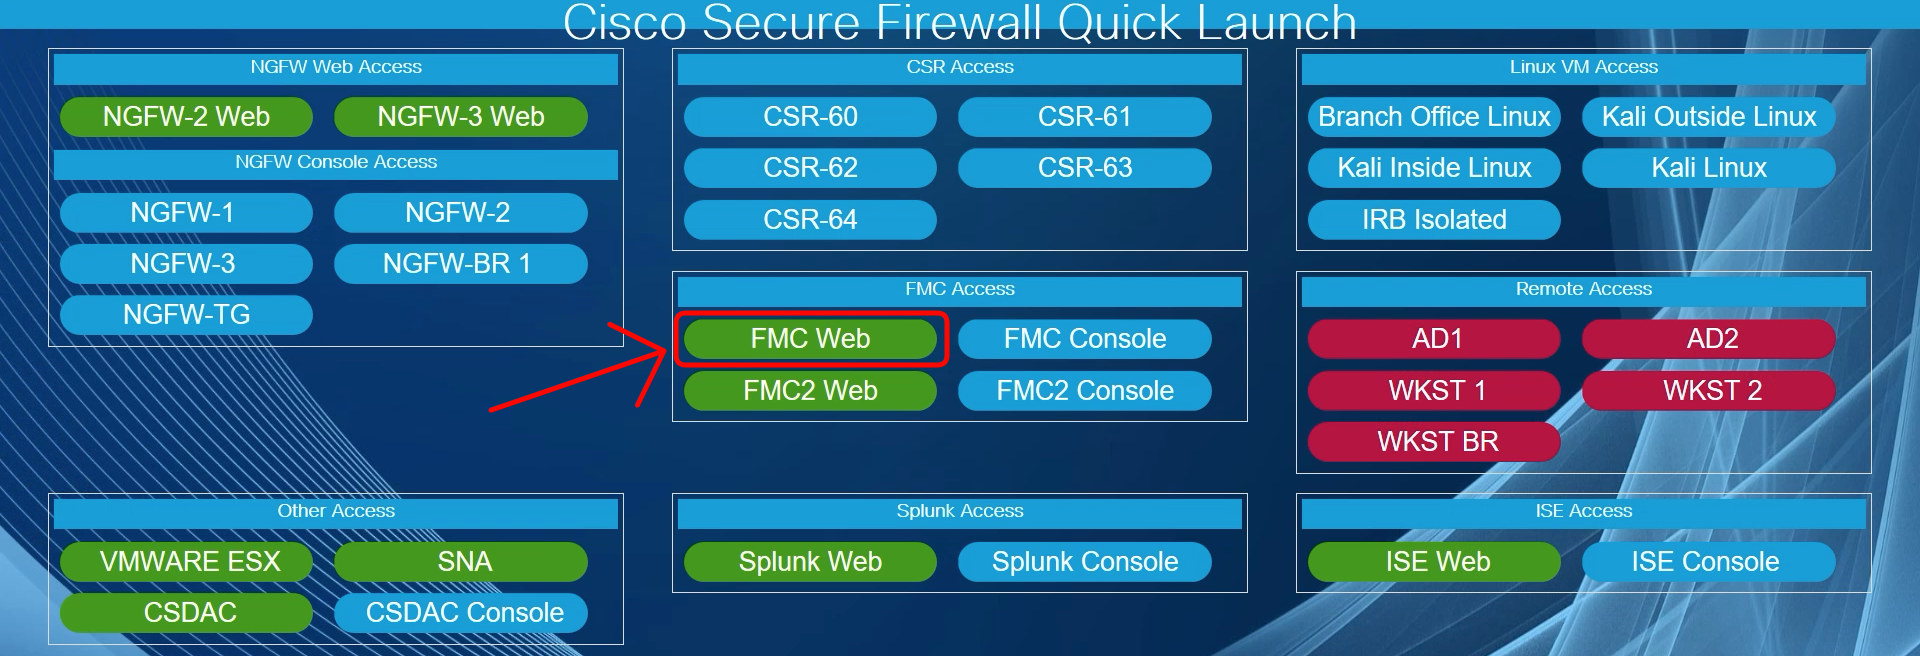
Quick Launch
- Navigate to Analysis > Connections > Events> Table View of Connection Events.
Click on x and add the columns - Encrypted Visibility Fingerprint, Encrypted Visibility Process Name, Encrypted Visibility Process Confidence Score, Encrypted Visibility Threat Confidence and Encrypted Visibility Threat Confidence Score by checking them. Click on Apply.
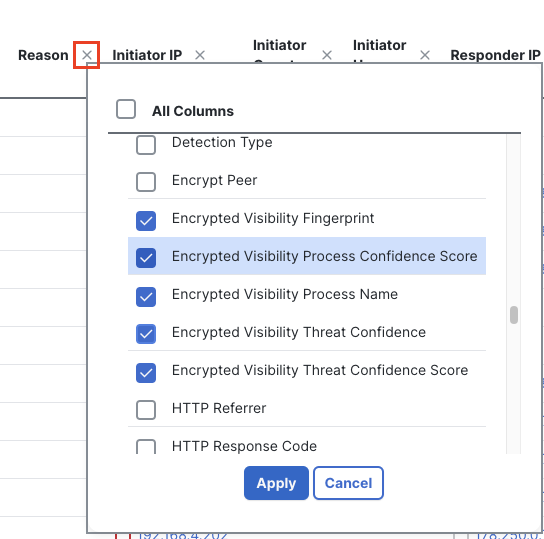
Enabling EVE columns in Connection Events
These fields are populated to the extreme right for which you have to drag the scrollbar to the extreme right. You can also disable unnecessary columns by clicking on x against any column and unchecking the unnecessary columns.
- Filter out the traffic by Device - ‘NGFWTG’ by clicking on Edit Search > Sections > Device > Type NGFWTG.
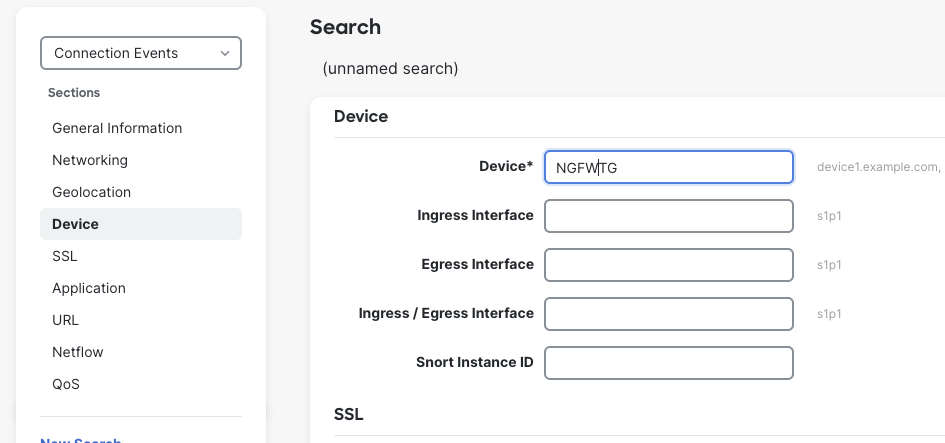
Filtering Traffic by NGFWTG
- Observe that the Action is Block for any traffic with Encrypted Visibility Threat Confidence Score greater than or equal to 99. Filter traffic with Reason 'Encrypted Visibility Block under Edit Search> Sections > General Information, to view all the blocked traffic.
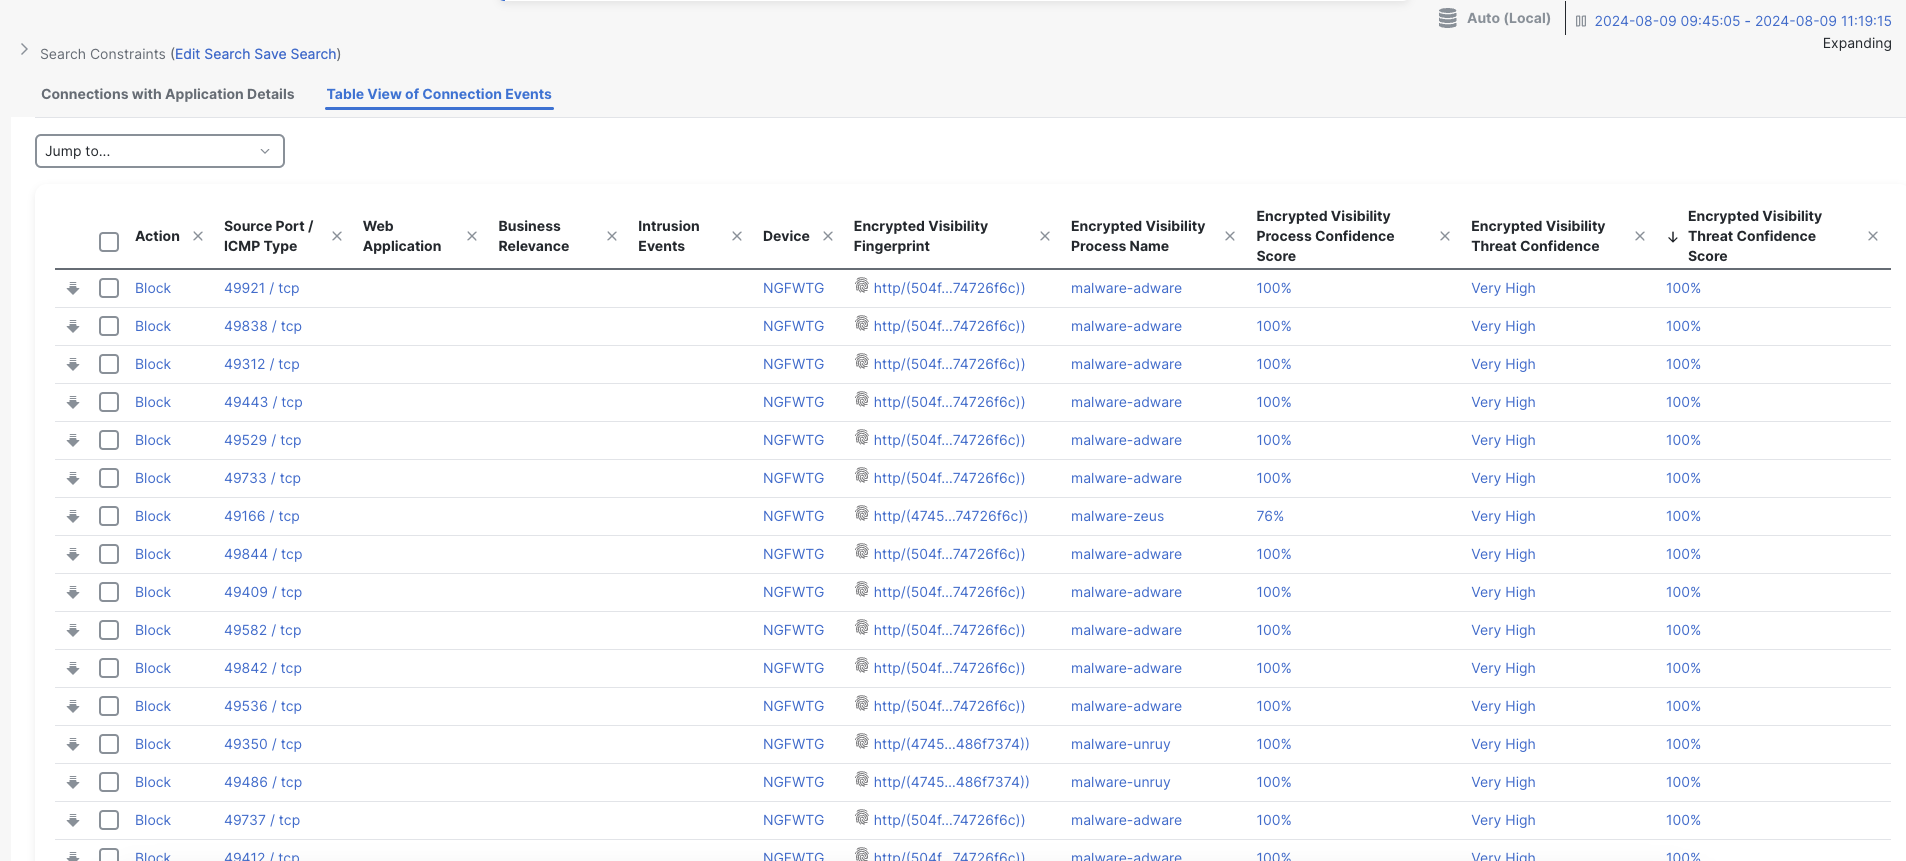
Connection Events
Note
Populating of the required events may take a while in the lab. Please wait for a while and refresh the event page a few times. Make sure that the time window is the last few hours by clicking on the time window on the right.
- Go to Analysis > Unified events and observe the same.
Make sure that the columns Encrypted Visibility Fingerprint, Encrypted Visibility Process Name, Encrypted Visibility Process Confidence Score, Encrypted Visibility Threat Confidence and Encrypted Visibility Threat Confidence Score are enabled. To enable columns on Unified events, click on the column selector on the extreme right-hand side and check the required columns. Click on Apply
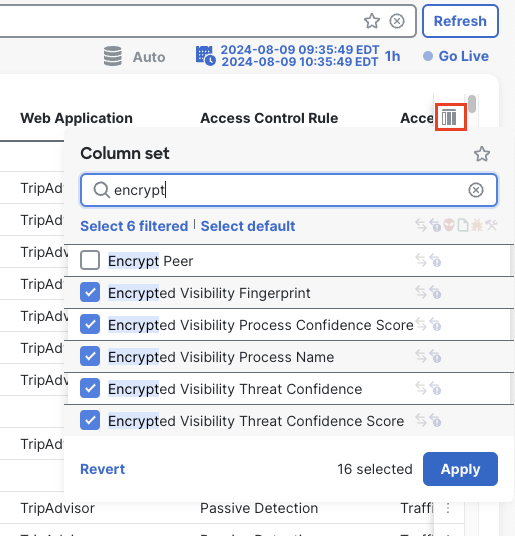
Enabling EVE columns in Unified Events
- Filter traffic by clicking on the search bar at the top and selecting Reasonthen type in Encrypted Visibility Block in the search box to view the blocked traffic.
Note: The Reason drop-down does not contain the Encrypted Visibility reasons so this must be manually entered.
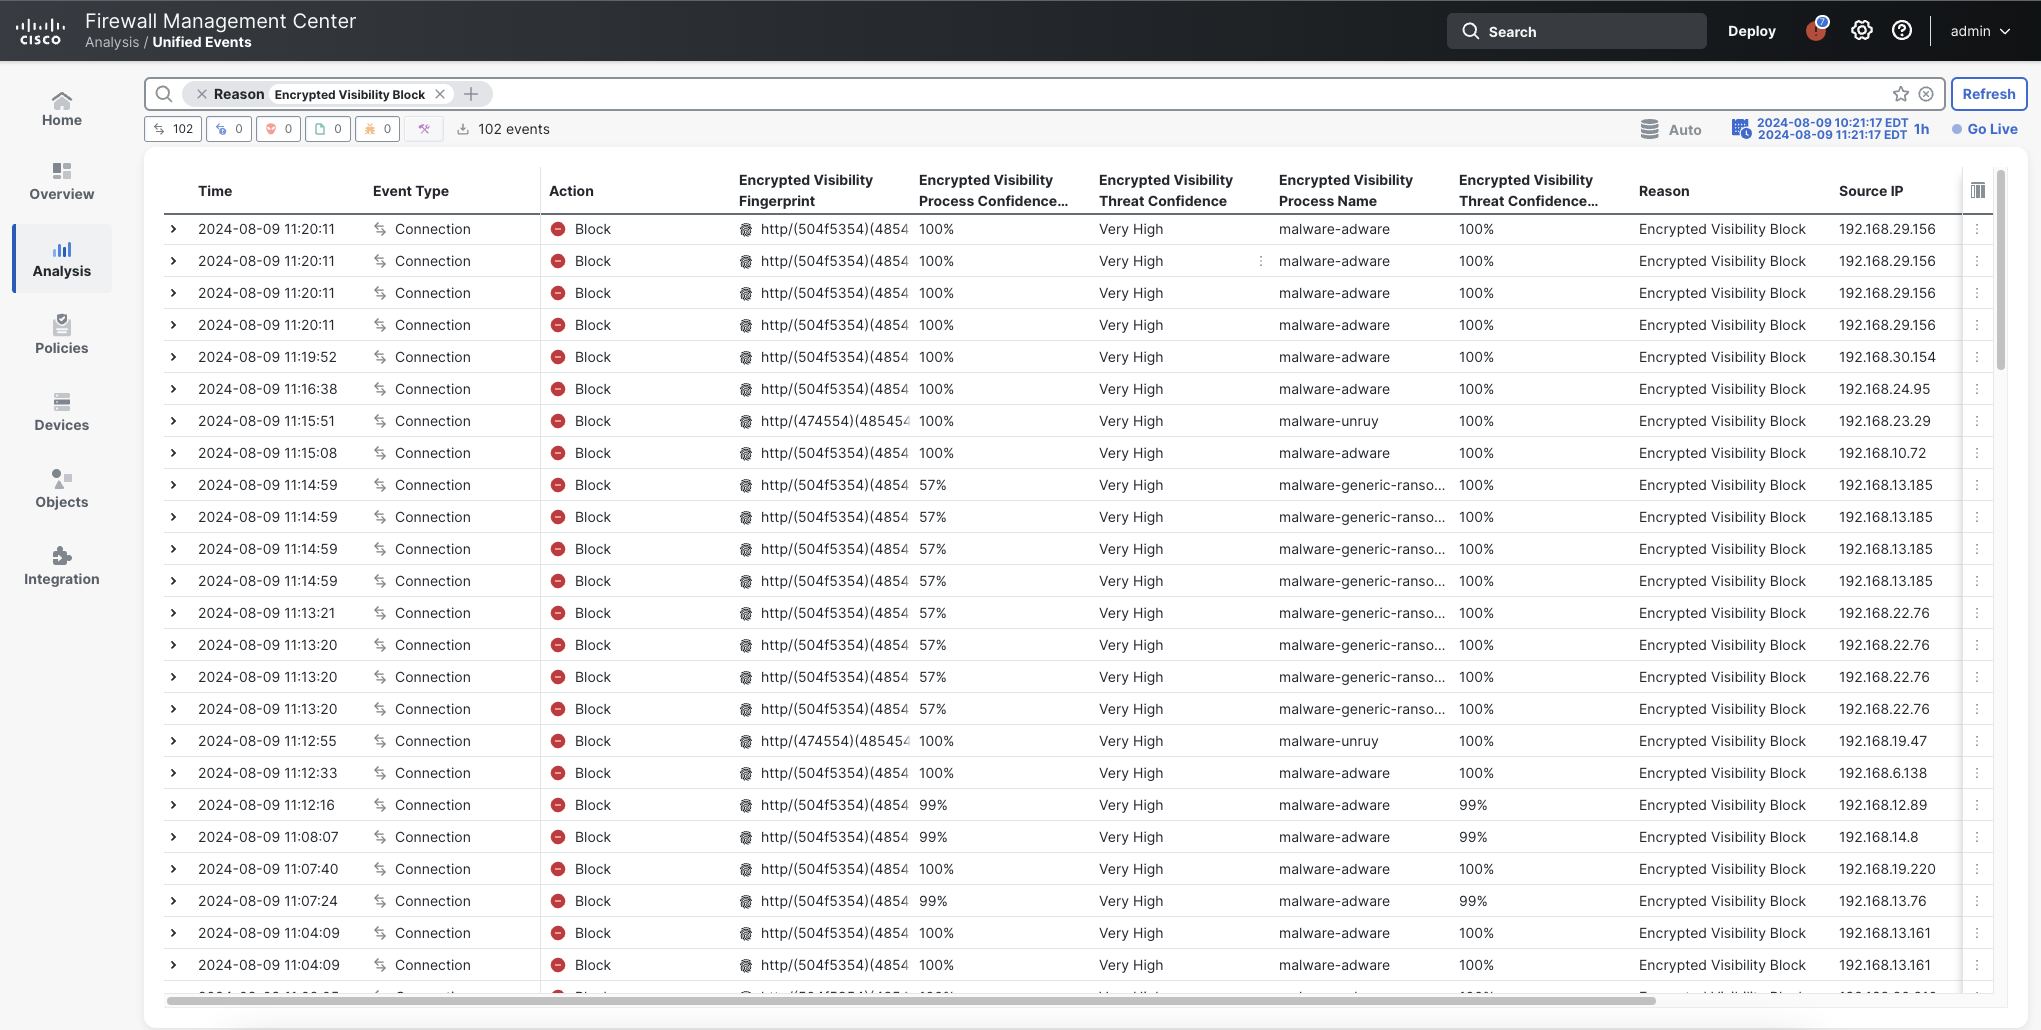
Unified Events
Task 2 - EVE configuration
- Navigate to Policies > Access Control> Access Control
- Click the Edit icon next to the Traffic Generator Policy.
- Since it is locked by the parent policy, navigate to Return to Access Control Policy Management > Parent Policy > Click on Edit icon
- Navigate to More > Advanced settings >Encrypted Visibility Engine. Click the edit (pencil) icon next to Encrypted Visibility Engine.
- Under Block Traffic based on EVE Score use the slider to turn on Advanced Mode. Then configure the blocking threshold to 75 .
- Click OK.
Note
Setting the block score to 75 is not recommended in production due to the potential for false positive events.
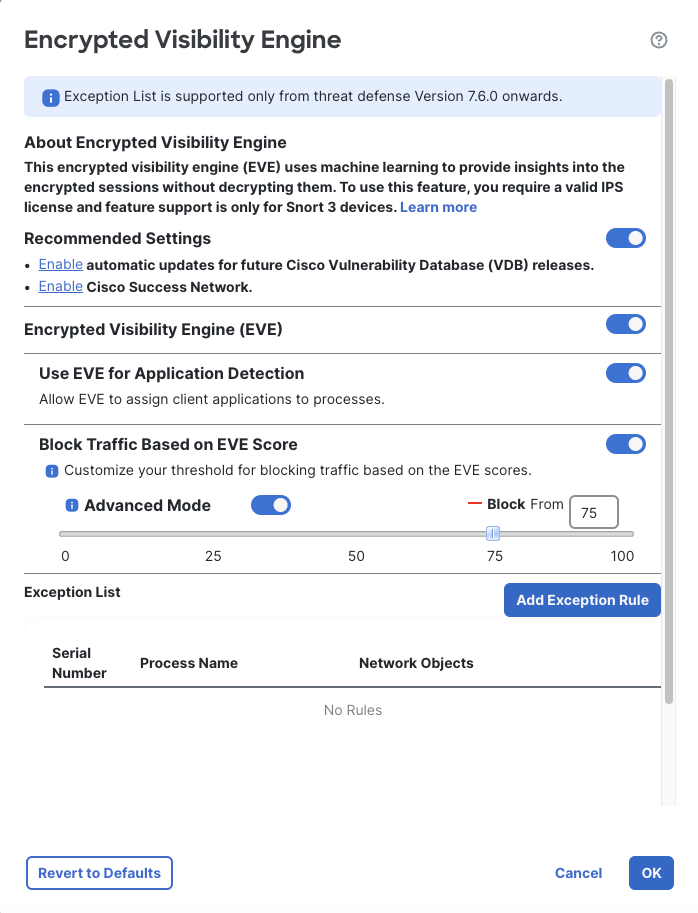
EVE configuration
- Click on Save and Deploy the changes by selecting Deploy > checking NGFWTG > Deploy
Task 3 - View events and statistics with the new configuration
- Under Unified events verify that traffic with Encrypted Visibility Threat Confidence Score greater than or equal to 75 is getting blocked with the reason Encrypted Visibility Block.
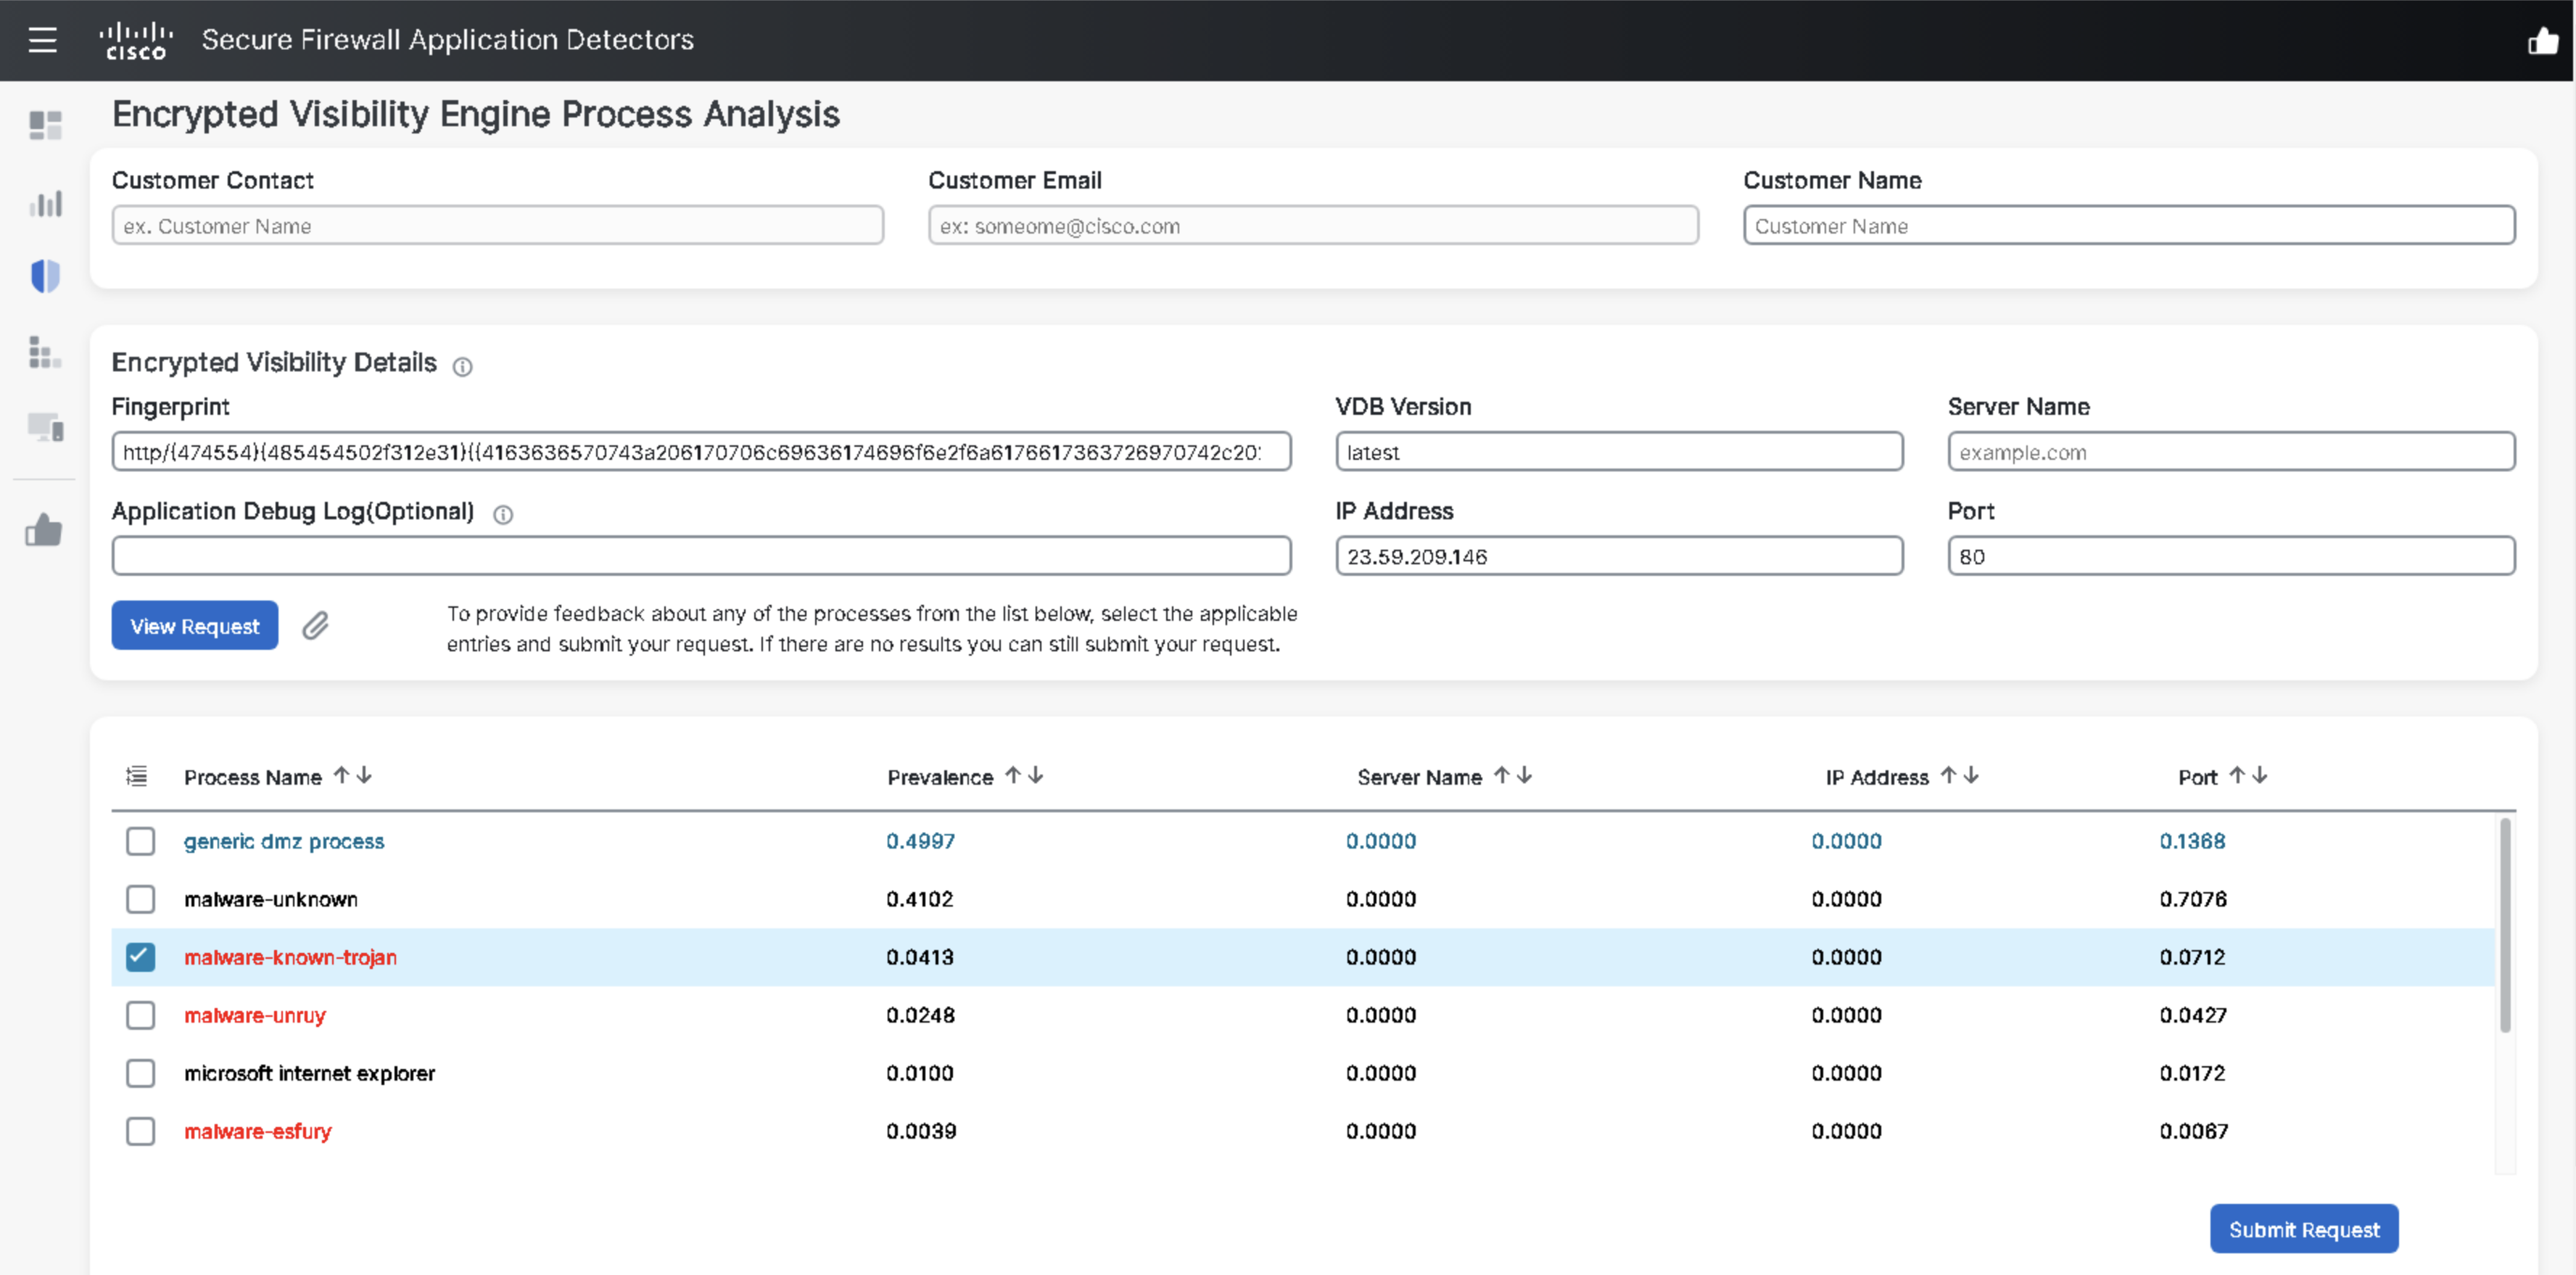
- Hover your mouse on one of the fingerprint values under the Encrypted Visibility Fingerprint column. Click on the three dots visible against it and then click on View Encrypted Visibility Engine Process Analysis which will redirect you to appid.cisco.com. Login to appid.cisco.com using your CEC credentials.
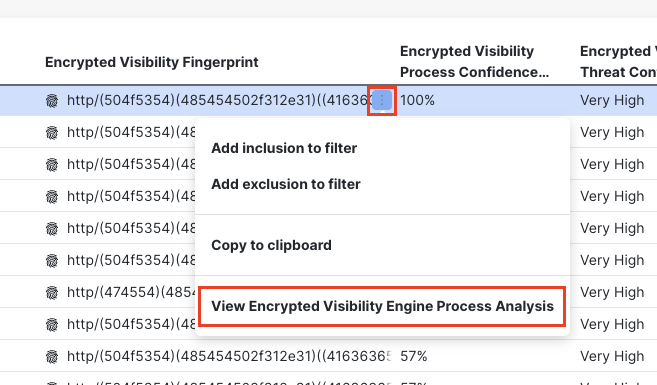
- Observe the details of that particular fingerprint. The malware processes are in red font.

appid.cisco.com
Under Unified events, observe that when Encrypted Visibility Process Confidence Score is high the Client Application is updated with the Encrypted Visibility process name.
Note
You may notice that there are a number of EVE processes with no corresponding client applications. This is because there are many processes identified by EVE that do not have a corresponding client application. Providing feedback via appid.cisco.com is a good way to assist the App ID team in addition additional process to application mappings.
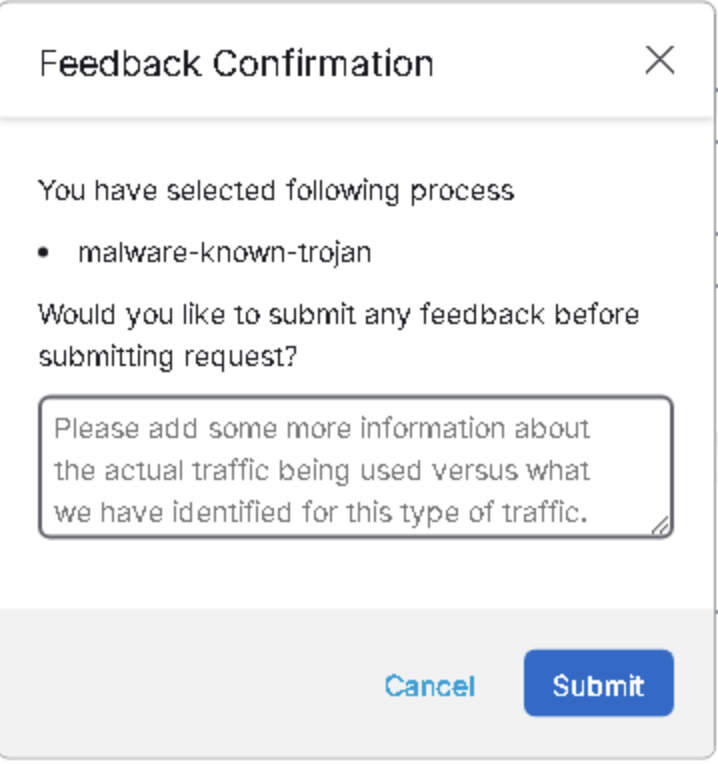
- Select a Process Name and click on Submit Request
Additional information can be added here. Click Cancel to close this dialog.
- Go back to Unified Events and filter traffic with Destination Port ‘443’
Note
Observe that EVE detections are triggered for HTTPS traffic. This is achieved by analyzing client hello in the packet.
- Filter traffic with Destination Port ‘80’ under the Unified events
Note
Observe that EVE detections are triggered for HTTP traffic. This is done by analyzing HTTP headers in the packet.
- Navigate to Overview > Dashboards
- Click the switch dashboard link and select Application Statistics
- Click the Encrypted Visibility Engine tab.
- Go to the drop-down menu Show the Last and change time window values as needed.
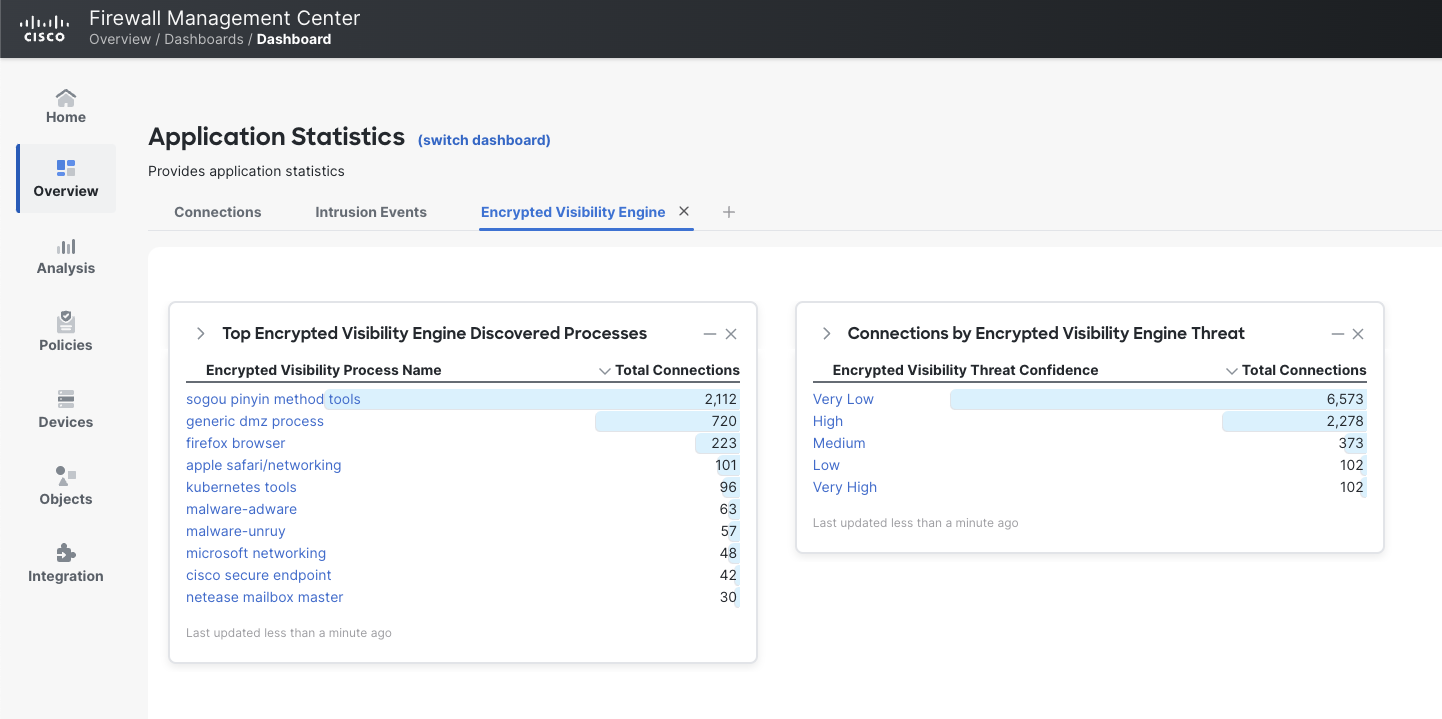
Encrypted Visibility Engine Dashboard
Tell us how we are doing
We are doing our best to ensure the scenarios in this lab guides are useful, clear and work as expected.
Please share your thoughts to help us improve or fix any problems you may run into..
Click here to provide your feedback or report an issue with this guide
Updated about 1 year ago

