
Encrypted Visibility Custom Application Detectors
Overview
The Encrypted Visibility Engine (EVE) provides a powerful means to identify client applications that are using TLS encryption without decrypting the traffic. This gives firewall administrators a valuable tool to control specific applications and enhance the security of their network.
When EVE identifies a process using the Client Hello fingerprint, it can then map this process to a known client application. While the number of client applications is in the hundreds and continues to grow, the number of EVE processes is much larger. This means you may see connection events where EVE identifies a process (Encrypted Visibility Process Name), but the Client Application still uses the generic SSL Client designation.
For example, in the events below, EVE has identified the client process as "docker" with a very high degree of confidence. However, the Client Application is still SSL Client. This Client Application is used in the Access Control or SSL policy rules for which there is currently no built-in mapping for the docker process to a Docker application.

EVE Unified Events
In this article, we will demonstrate how to create custom application detectors so you can control processes like Docker. In our example, we want to allow the Docker process to bypass outbound SSL decryption rules as our resigning certificate is not recognized. This is causing issues when accessing the Docker Hub.
Custom App Creation
Step 1: Identifying a Process/Application
The first step is identifying the process to map to an application. To do this, enable connection logging for the application traffic you want to evaluate. Then, analyze application traffic events (Analysis > Unified Events).
Add the Client Application, Encrypted Visibility Process Name, and Encrypted Visibility Process Confidence Score columns to the event view as shown below.
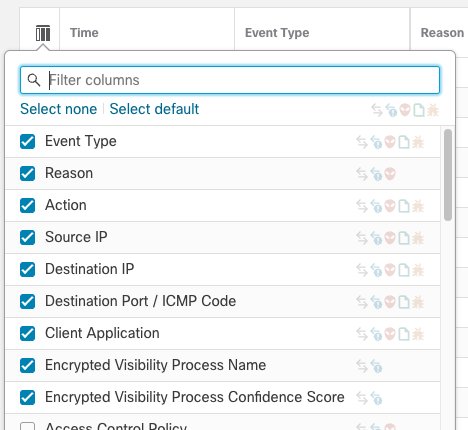
Unified Column Selection
You can search for the field names by typing your search text in to the Filter columns field at the top of the field selector drop-down.
Using the Unified search bar, search for the EVE process you want to create a custom application. Ensure that your process can be consistently identified by EVE and has a high process confidence score. In our case, the docker process is consistently identified with 99% confidence.
Make a note of the process confidence score and the exact Encrypted Visibility Process Name. This name is case-sensitive. In this case, they are:
Process name: docker
Confidence Score: 99%
Step 2: Create a Custom Detector
There are two components to a custom application detector, the Application, and the Application Detector. The Application is what you will see in the various FMC policies. This contains information such as:
- Application Name
- Description
- Business Relevance
- Risk
- Categories
- Tags
The Application Detector determines what traffic characteristics must be present to identify application traffic. This may consist of specific ports, bytes, or strings within the application traffic. Or in this case, it depends on the identification of a specific EVE process and confidence score.
In the steps below, we will create both the Application Detector and the Application at the same time. Because of this, it may look like we are duplicating effort, but in the end we will have an Application that is identified via an EVE Application Detector.
On the FMC, navigate to Policies > Application Detectors. Click the Create Custom Detector button.
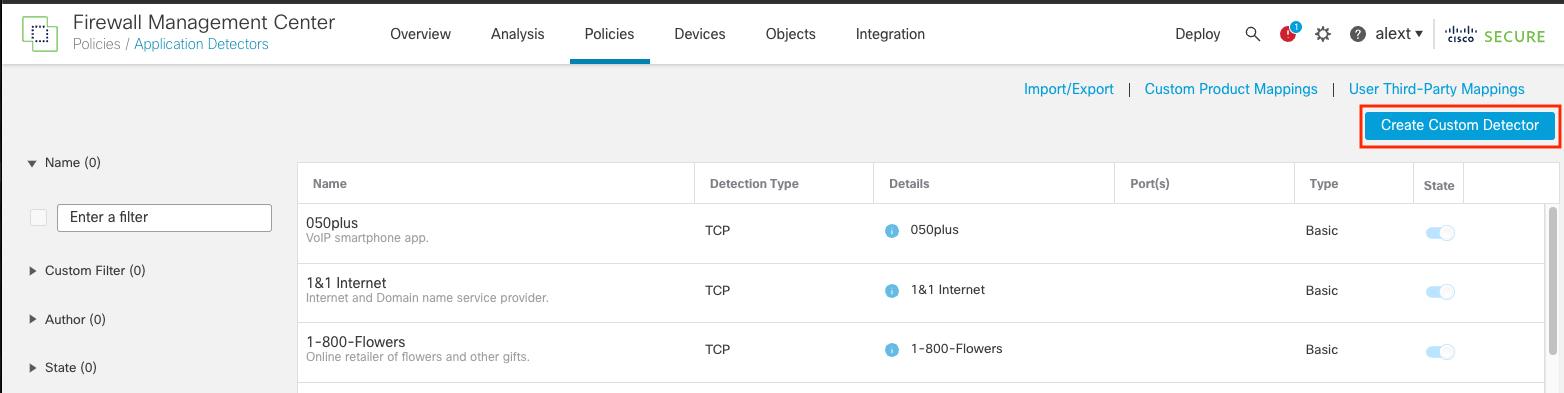
Policies > Application Detectors
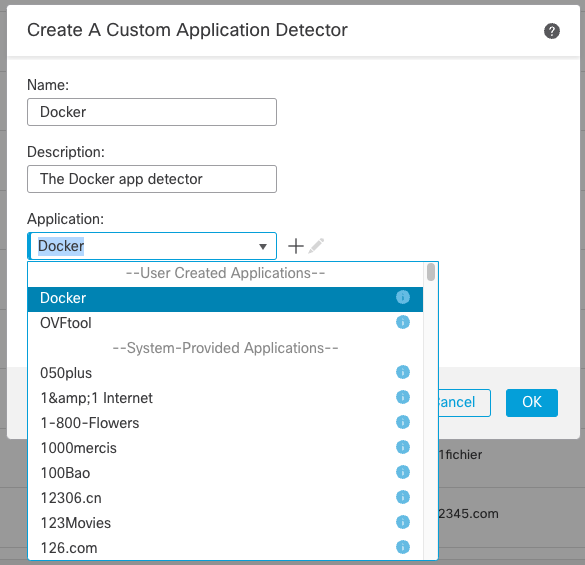
This brings up the Custom Application Detector dialog. We can name it whatever we want but to make things simple let's call it Docker.
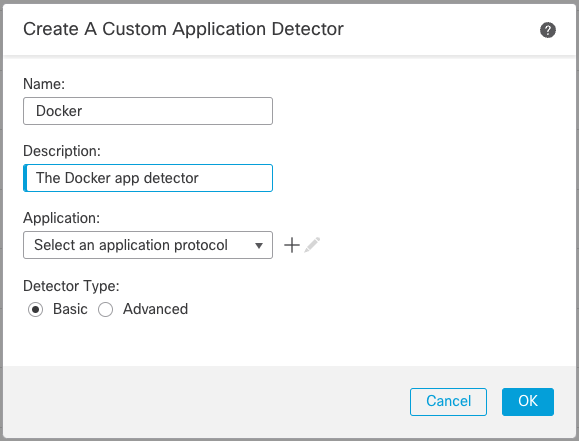
Application Detector Dialog
Step 3: Create the Docker Application
Click the + icon next to the Application drop-down to create a new Docker Application since one does not exist.
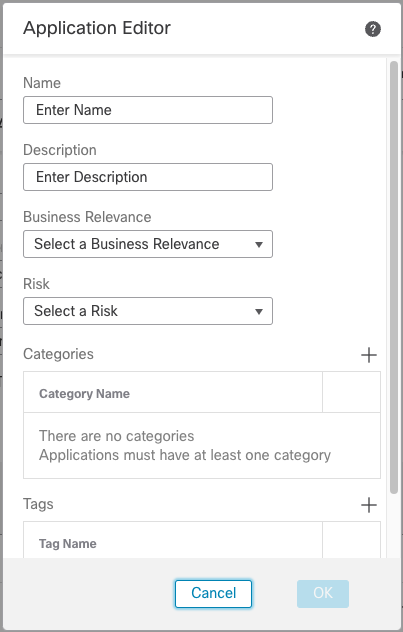
Application Editor Dialog
This is where we will describe the new Docker application. The information entered here is used and displayed in the Objects, Access Control, or SSL policy rules.
Name: Docker
Description: Docker application
Business Relevance: High
Risk: Low
Categories: (pick one or more categories that are appropriate)
Tags: SSL protocol, encrypted visibility engine
Most of the fields above are self-explanatory. The Tags field warrants some additional discussion. Tags are normally used for filtering applications based on flexible criteria. For example, all built-in EVE applications contain an "encrypted visibility engine" tag. So, if you wanted to view just applications that are supported by EVE, you could filter applications using this Tag.
The "SSL protocol" tag has additional significance. As mentioned, you can use application criteria in your Access Control or SSL policies. You may notice that the number of applications available in SSL policy rules is smaller than the number of applications in Access Control rules. This is because applications exposed in the SSL policy must have the "SSL protocol" tag. The SSL policy doesn't care about non-encrypted applications so these are not available as criteria for SSL rules.
For our Docker application if we want to use this application in an SSL rule we need to make sure it has the "SSL protocol" Tag assigned. We also added the "encrypted visibility engine" tag for good measure since this is an EVE application.
Step 4: Add the Docker Application to the Docker Application Detector
After adding your new Docker Application you will return to the Detector dialog where you can select it from the Application drop-down.
Select the new Docker Application
Step 5: Add a Detection Pattern
When you click OK you will then be taken to the Application Detector configuration screen. This is where you define the attributes of the application traffic to be identified as the Docker application. You can add detection patterns, packet captures, etc. here.
Click the Add button under Detection Patterns.
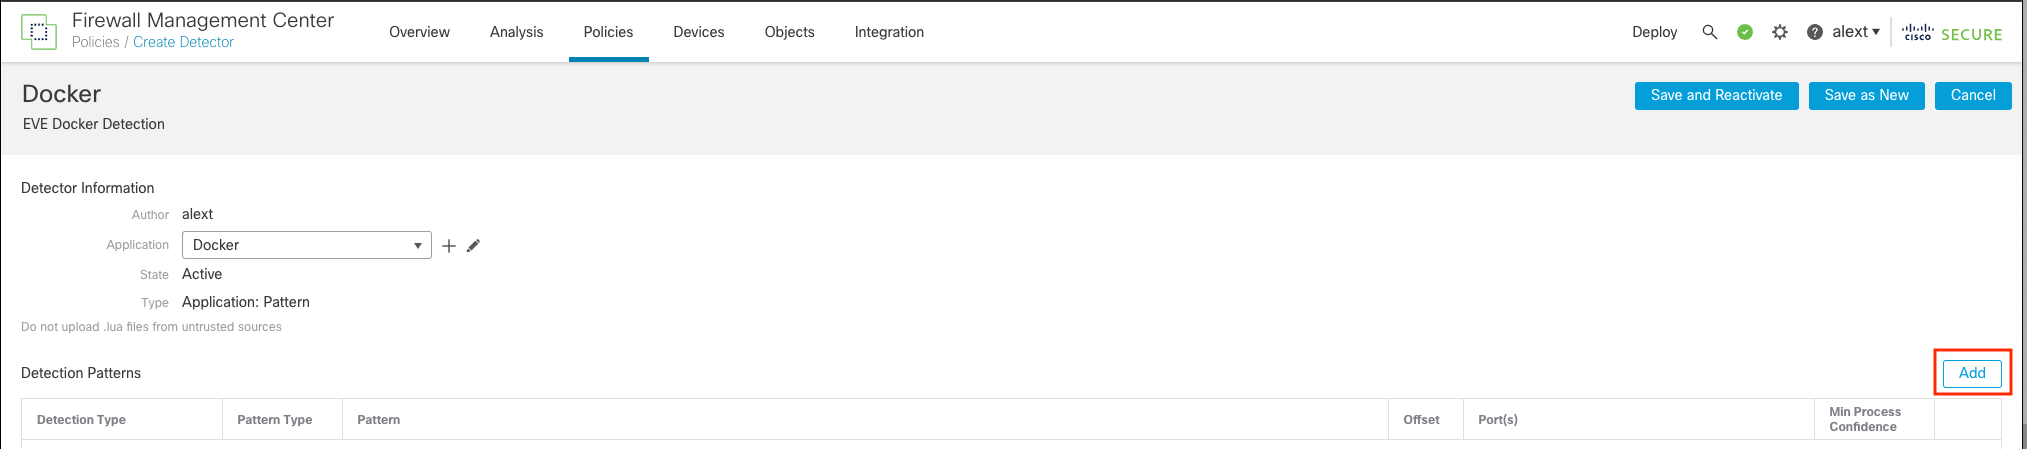
Adding Detection Patterns
The Add Pattern dialog appears.
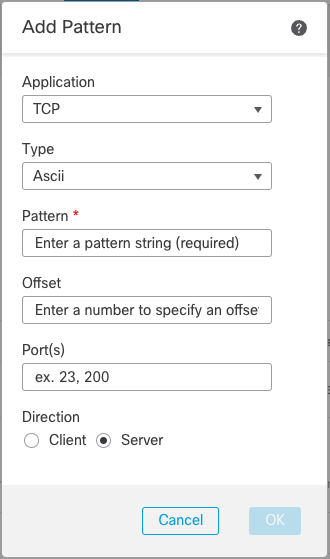
Add Pattern Dialog
Under the Application drop-down select Encrypted Visibility Engine. Once you do this, the dialog shrinks to something much more manageable.
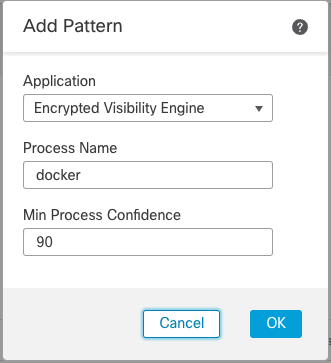
Add Pattern with EVE Selected
The fields are now limited to just the Process Name and the Min Process Confidence. Keep in mind that the Process Name is case sensitive, it must be exactly what you see in your event view.
Note
Keeping the confidence score high is a good idea, you should have some idea based on the events you captured on what this number should be - we will set it at 90%.
Step 6: Activate Your Detector
Once you click OK you will be returned to the main Detector list and your Application Detector has been added but it is not yet active.
To activate you need to find your application by searching for the Name or Author. An easy way to find your custom detectors is to expand the Author criteria and filter by your user name.
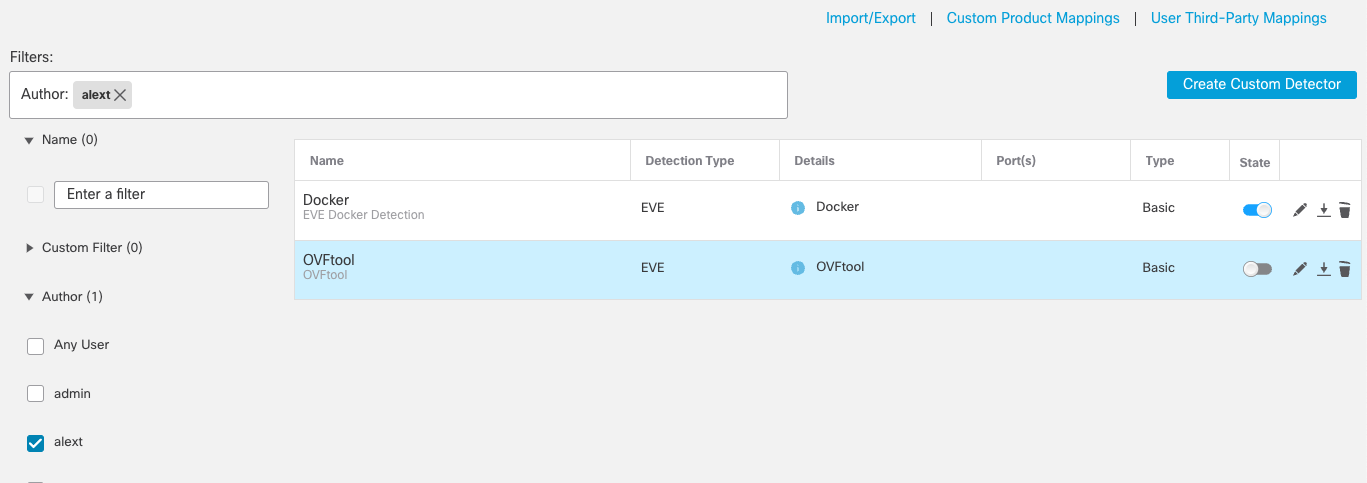
Selecting Detectors by Author
Next, click the toggle switch under the State column for your app to display the warning regarding a Snort restart on your devices.
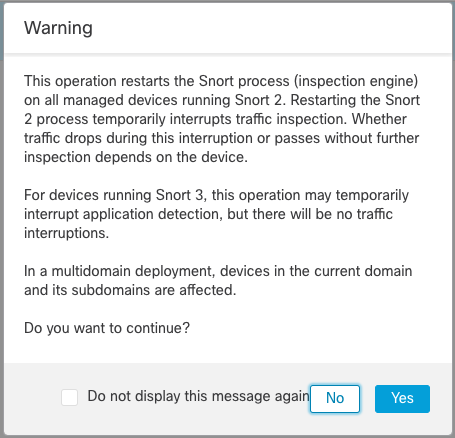
App Detector Warning
Note
Clicking "Yes" above will immediately deploy the detector changes to your managed devices. Be aware of the potential impact to your Snort 2 and Snort 3 devices.
Testing
After activating your custom application detector, the next step is to test your application and verify that it is being identified correctly. To do this, ensure you have connection logging enabled for the application traffic in your Access Control policy.
To do this, check the Log at End of Connection box on the Logging tab of the appropriate Access Control rule.
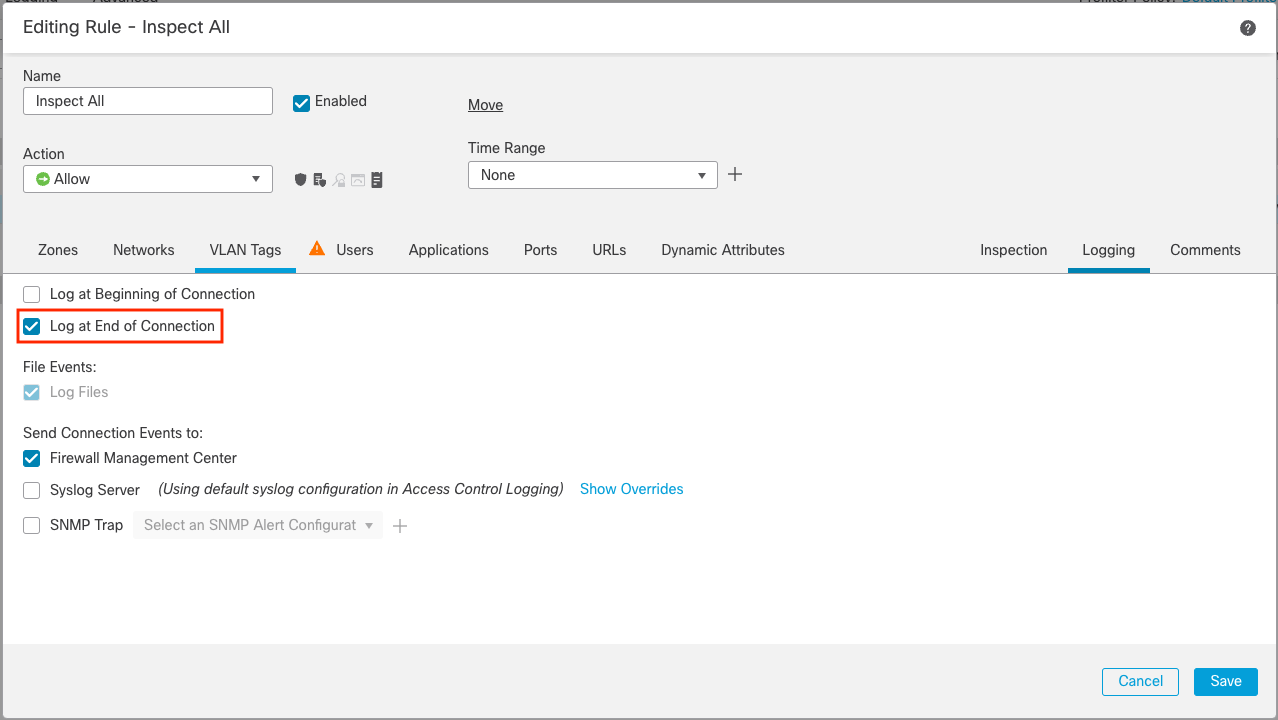
Access Control Rule Logging
Deploy the policy if needed and then test your application. You should see the connections with your process (docker in our example) and for the Client Application you should see your new Docker application instead of the generic SSL Client.
Previous application events looked like this:

But now they should look like this:

After verification, you can use this application in your Access Control or SSL policy rules.
In the example below we are adding the new Docker app to a "Do Not Decrypt" rule in our SSL policy.
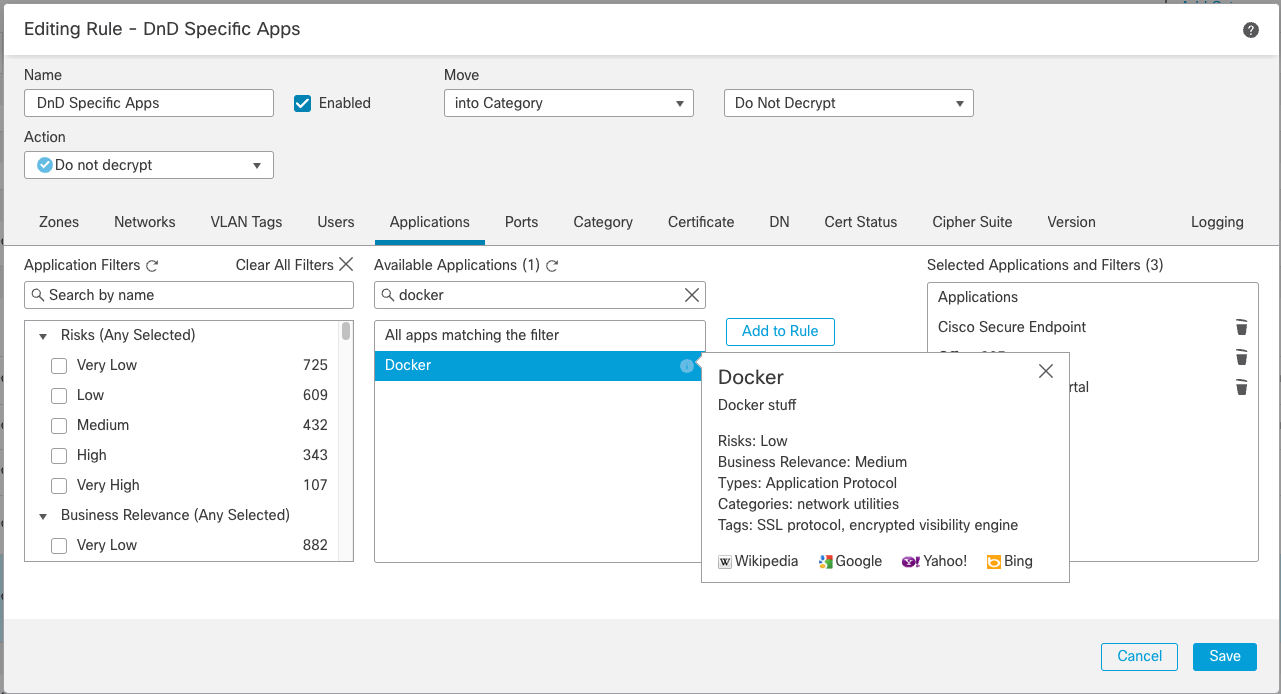
Note
Remember, for an application to appear in the Available Applications list in the SSL policy, it must have the SSL protocol tag.
Summary
The Encrypted Visibility Engine can identify thousands of processes based on the Client Hello fingerprint. However, while the number is growing, not all of these map to client applications. By using a custom application detector you can take advantage of the Encrypted Visibility Engine's extensive process identification even before a built-in application is available.
Updated almost 4 years ago