
VPN Certificate and SAML Authentication
Cisco Secure Firewall Remote Access VPN
Introduction
Release 7.2 of the Cisco Secure Firewall Management Center introduces Certificate and Security Assertion Markup Language (SAML) authentication for Remote Access (RA) VPN connection profiles. Each user is authenticated with both a client certificate and SAML server. The client certificates are installed on every users' machine and are validated by CA certificate(s) present on the firewall to verify identity. SAML is an open standard that allows identity providers (IdP) to pass authorization credentials to service providers. When a user logs into a SAML-enabled application, the service provider requests authorization from the appropriate IdP. The identity provider authenticates the user’s credentials and returns the authorization to the service provider. Once authorized, the user can use the application. In the case of certificate and SAML authentication, certificates are authenticated before SAML authentication.
VPN Certificate and SAML
You will need the following as prerequisites to configure VPN with a certificate and SAML authentication:
- A Certificate Authority server (CA Server) to issue the certificates for the client (user certificate) and the server (Cisco Secure Firewall)
- Duo security is used as the SAML-supported IdP for this example, but you can use any SAML 2.0 IdP. To get the Identity Provider Entity ID URL, IdP Signing Certificate, Sign-in and Sign-out URLs for your SAML IdP provider, you can visit the provider’s website, or they may provide that information in a metadata file.
Understanding the Duo Integration
Duo provides Single Sign-On (SSO) and Multi-factor Authentication (MFA) for the VPN users upon successful authentication. Duo SSO leverages all VPN users existing on the Active Directory (AD) which is used for the Primary Authentication.

Figure 1: SAML Authentication Flow Diagram
More information on how Duo SSO works and integrates with the SAML IDP is available here.
Configuration
Task 1: Adding a device certificate to Cisco Secure Firewall Threat Defense (FTD)
Step 1: Log into the Secure Firewall Management Center (FMC) and navigate to Devices > Certificates > Add Certificates. This certificate is used to validate the client certificate (Users PC certificate).
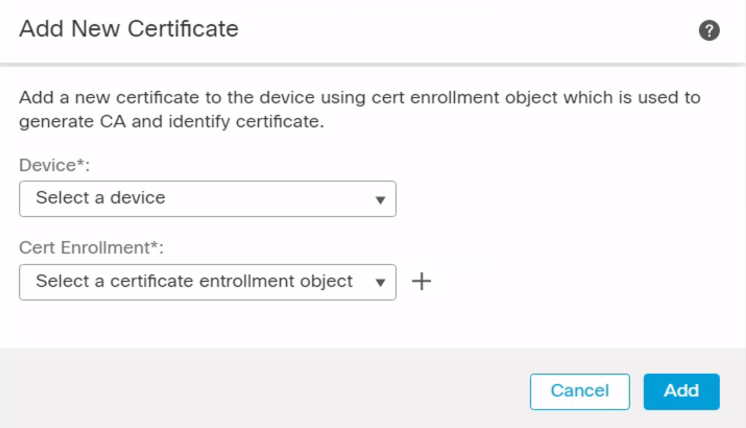
Figure 2: Add Certificate Dialogue Screen.
Step 2: Click Device > FTD device from the dropdown, and for certificate enrollment click on the + icon, enter the desired name, add the certificate content, and click Save.
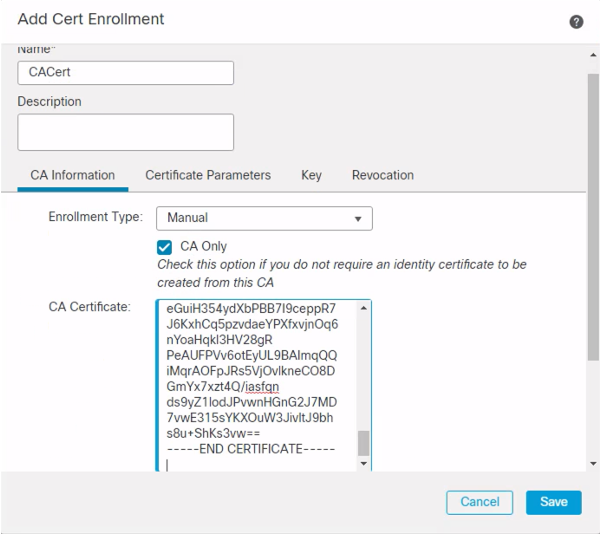
Figure 3: Add Cert Enrollment Dialogue Screen.
Step 3: Click the Add button to add the new Certificate to the device.
Task 2: Create a Secure Firewall Management Center SSO server object
Step 1: Navigate to Objects > Object Management > AAA Server > Single Sign-On-Server > Add Single Sign-on Server
Step 2: The Identity provider certificate is the certificate FTD uses to verify the messages signed by the IdP (Duo SSO). Click on the + icon next to the IdP certificate and add Cert Enrollment as shown in the figure below:
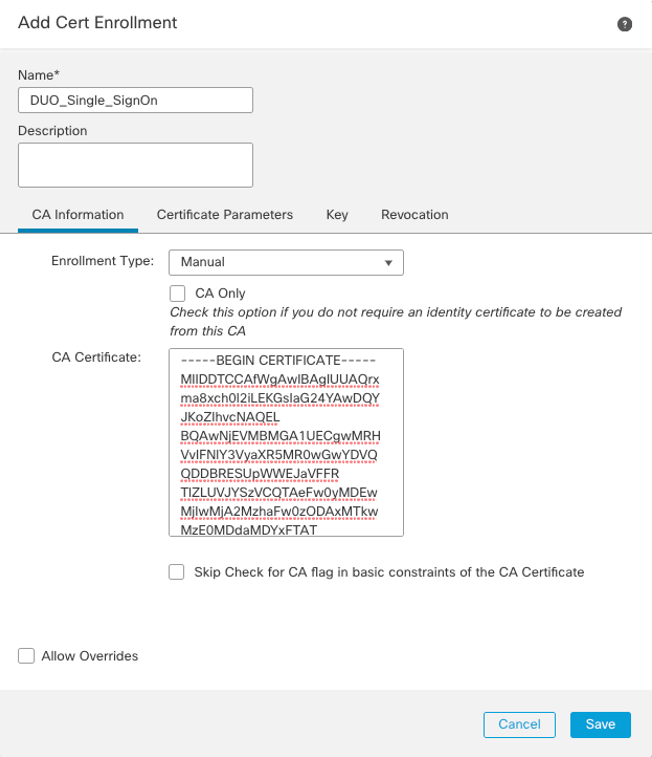
Figure 4: Add Cert Enrollment Dialogue Screen.
Step 3: The service provider certificate is used by FTD to sign the requests and build a circle of trust with IdP. Click + icon to add service provider certificate.
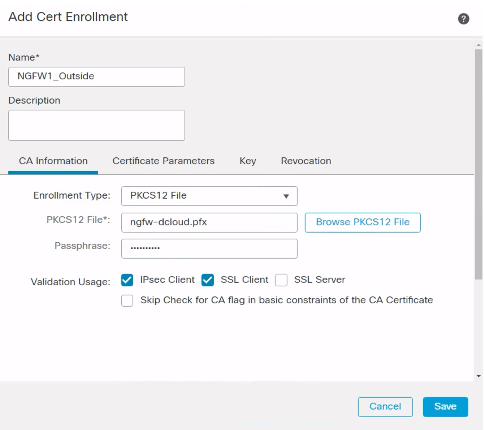
Figure 5: Add Cert Enrollment Dialogue Screen.
Step 4: Based on the URLs provided by the IdP, configure the SAML values on the New Single Sign-on Server by entering the Name and provided URLs for Identity Provider Entity ID, SSO URL, Logout URL, and Base URL and click Save.
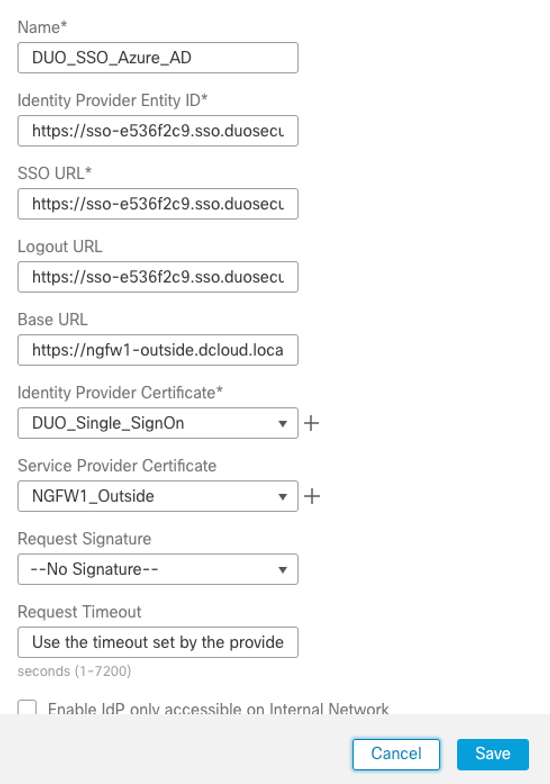
Figure 6: New Single Sign-On Server Dialogue Screen.
Task 3: Run the Remote Access VPN Wizard
Step 1: Navigate to Devices > VPN > Remote Access. Click Add to launch the wizard. Complete the Policy Assignment page of the wizard.
Select the appropriate firewall listed in Target Devices. Click Add and then Next in the bottom right corner.
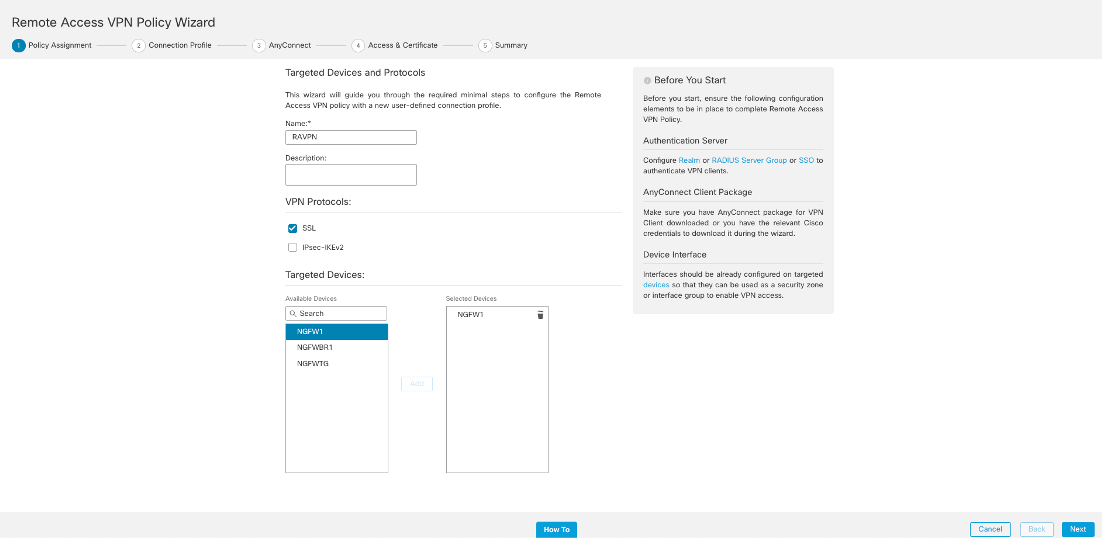
Figure 7: Remote Access VPN Policy Wizard
Step 2: Enter the Connection Profile Name In the Authentication Method, click Client Certificate & SAML, in Authentication Server, select the SSO object created earlier. In SAML Login Experience, select Default OS Browser or VPN client embedded browser.
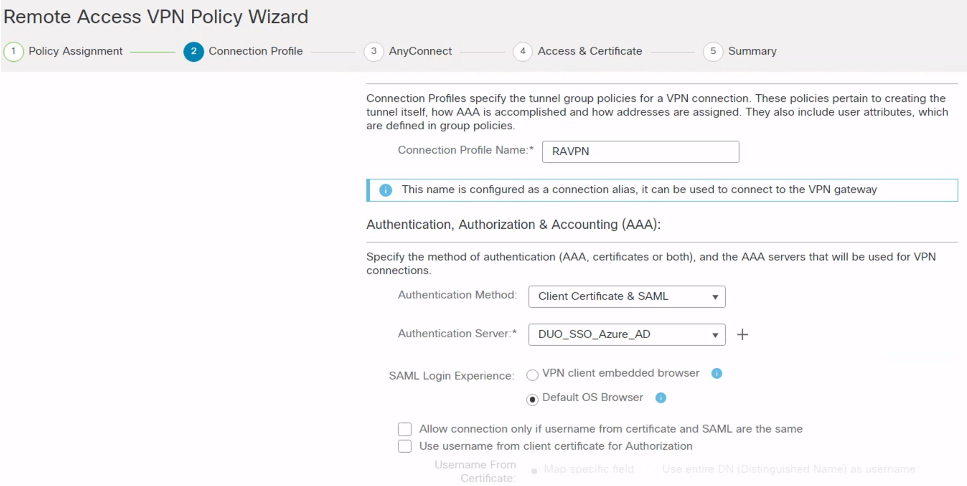
Figure 8: Remote Access VPN Policy Wizard, Connection Profile.
Step 3: Under Client Address Assignment, create and assign the IPv4 Address Pool to be assigned to the Remote Access VPN users. Click on the Pencil icon. Click on the + icon to the right of the IPv4 Address Pools field. In the Address Pools window, select the created VPN Pool, then click Add to add it to the Selected IPv4 Pools column, click OK.
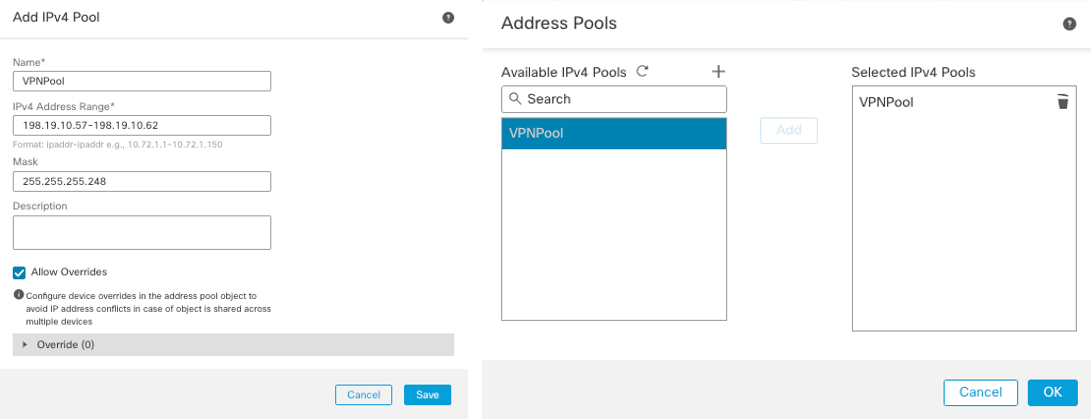
Figure 9: Add IPv4 Pool for Remote Access VPN.
Step 4: Under the Group Policy, verify the group policy configuration. Click on Edit Group Policy and configure the group policy as show below:
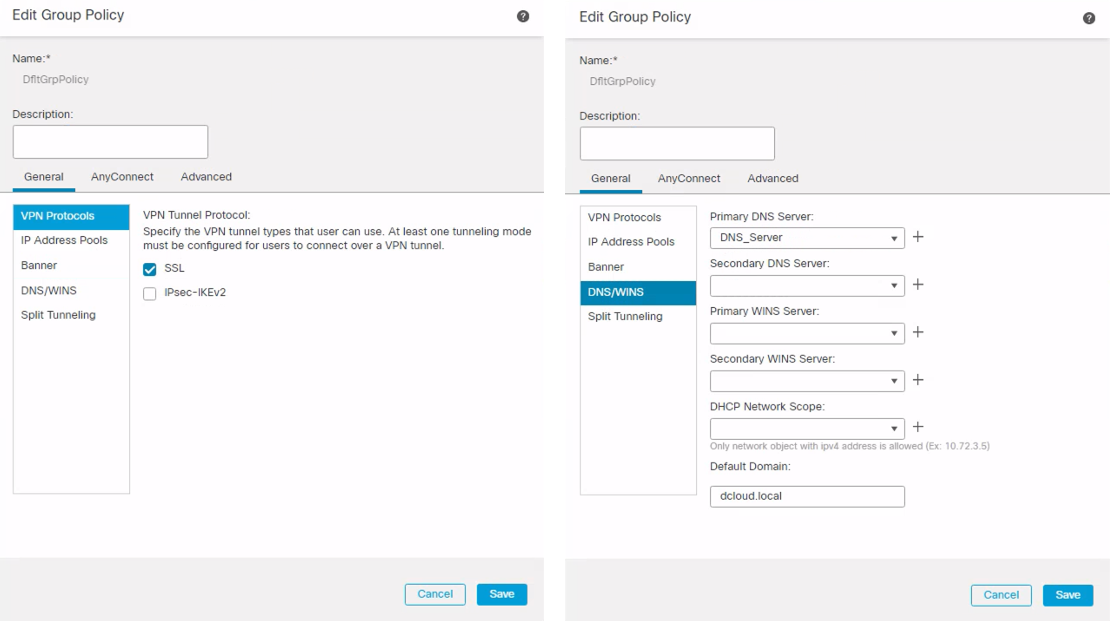
Figure 10: Edit Group Policy Dialogue.
Step 5: Under AnyConnect > Profile, click the + icon and browse to .xml file. These profiles contain configuration settings for the core client VPN functionality and for the optional client modules Network Access Manager, ISE posture, customer experience feedback, and Web Security.
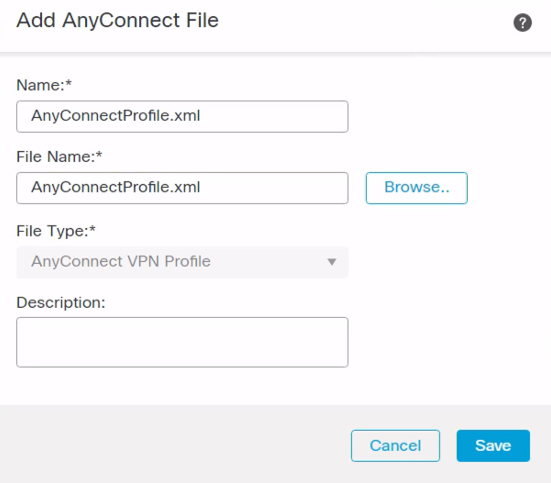
Figure 11: Add AnyConnect File Dialogue.
Step 6: Select AnyConnectProfile.xml from the Client Profile drop-down list.
Click Save to save the changes you made to DfltGrpPolicy and click Next.
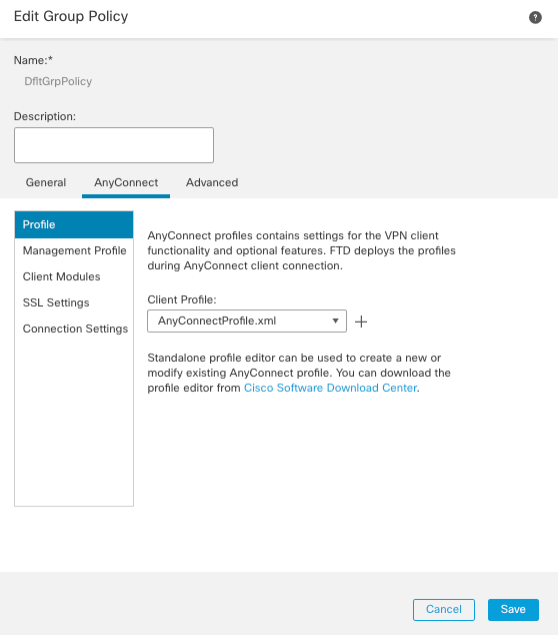
Figure 12: Edit Group Policy Dialogue Screen.
Task 4: Anyconnect Client Image Wizard Page
Step 1: Click + to add a new AnyConnect Image. Click Browse and select the .pkg file, this file can be downloaded from the Cisco software download page. Click Save
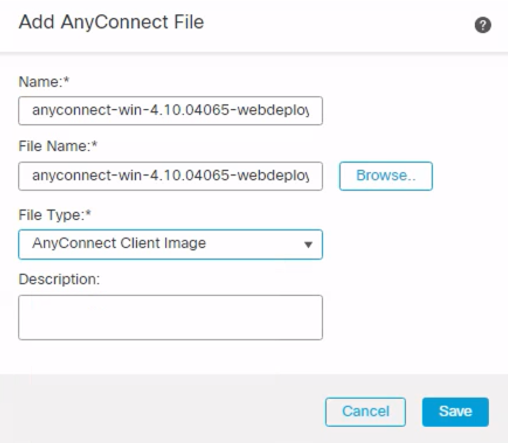
Figure 13: Add AnyConnect File Dialogue Screen.
Step 2: Enable the AnyConnect File Object Name checkbox and click Next.
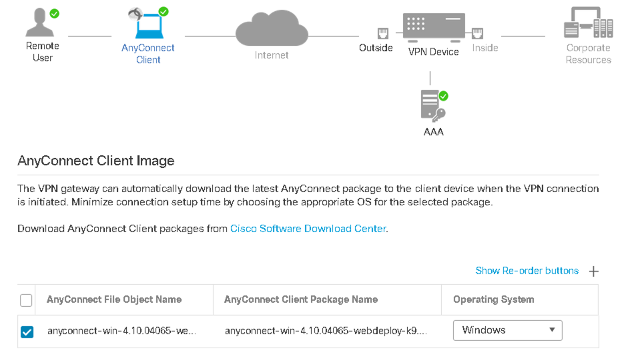
Figure 14: Remote Access VPN Policy Wizard, Anyconnect Client Image.
Task 5: Complete the Access & Certificate Wizard Page
Step 1: Select the NGFW interface to accept incoming VPN connections. Also, select the Server/FTD certificate used for identification of the VPN gateway to the remote access clients.
Select the Interface group/Security Zone and Certificate Enrollment and Click Next
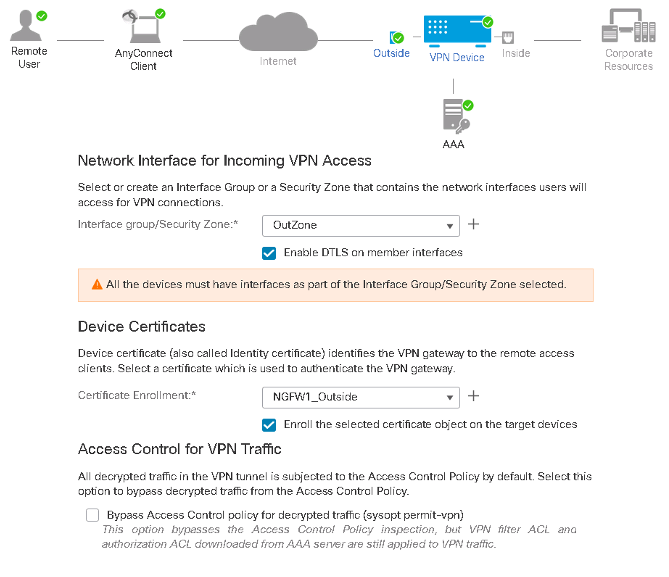
Figure 15: Remote Access VPN Policy Wizard, Network Interface and Device Certificate.
Step 2: Review the configuration on the Summary page. Click Finish.
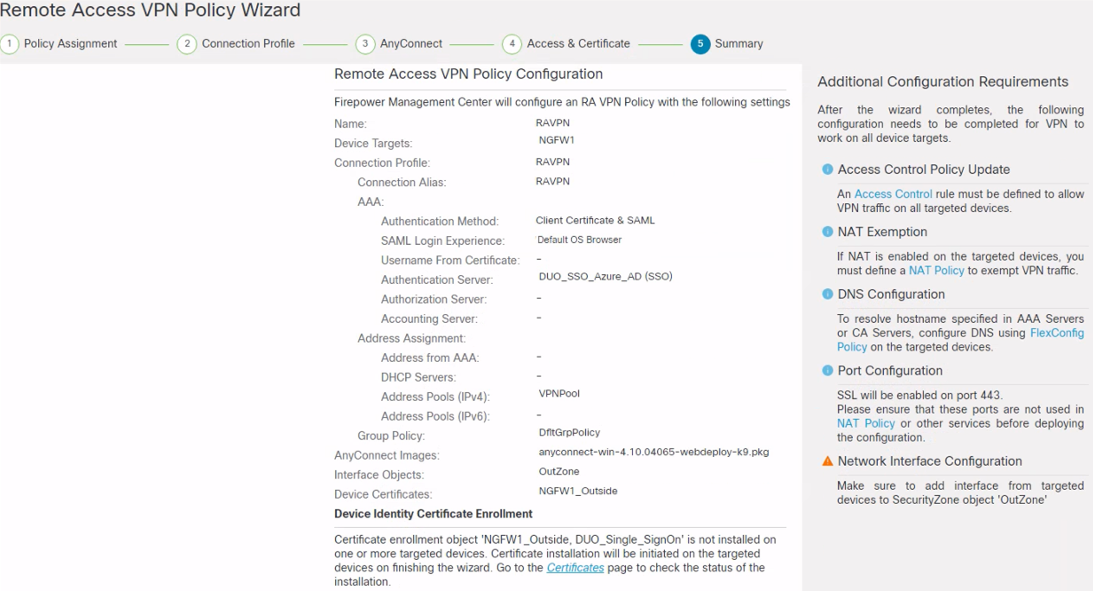
Figure 16: Remote Access VPN Policy Wizard, Summary.
Task 6: (Optional): Configuring the External Browser Package
When Default OS Browser is selected, the VPN client uses the system’s default browser for web authentication. This option enables single sign-on (SSO) between your VPN authentication and other corporate logins. Cisco uses a dedicated browser package that is compatible with all the endpoint Operating Systems. For administrators convenience, the default external browser package is enabled by default as an AnyConnect File Object. When Cisco updates the external browser package to include the latest updates, it can be uploaded to the FMC and pushed to FTD. The latest version of external browser can be downloaded from here.
Step 1: The default package is available at Objects > Object Management > VPN > Anyconnect File
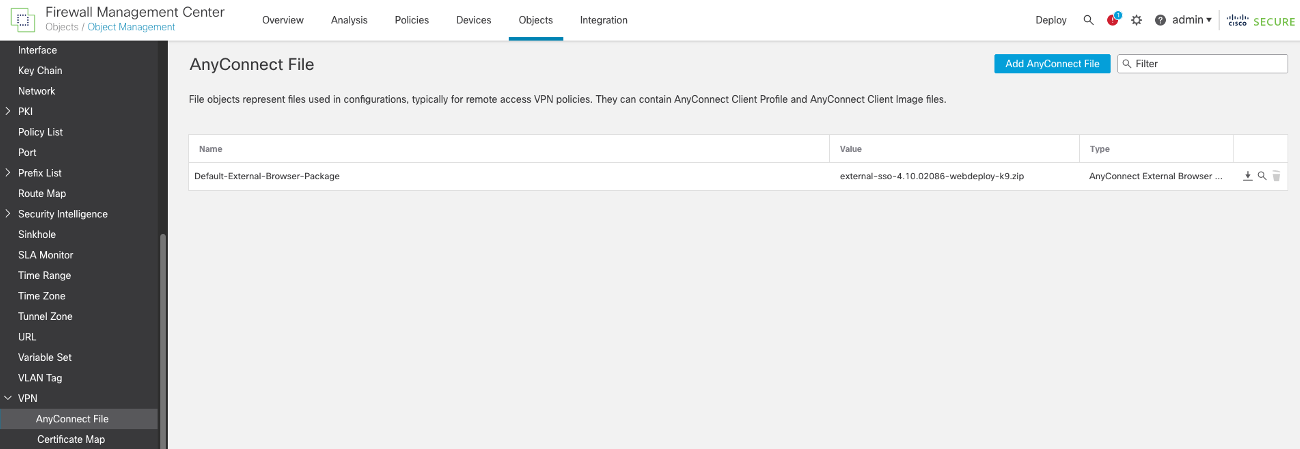
Figure 17: AnyConnect VPN File Object Management.
Step 2: To update external browser package, click Add Anyconnect File and select the Anyconnect External Browser Package file type.

Figure 18: AnyConnect External Browser Package Dialogue Screen.
Task 7: Deployment.
Once you have successfully created the NAT configuration and access lists required for this RA VPN, Click Deploy and click the Deploy icon for the FTD device.
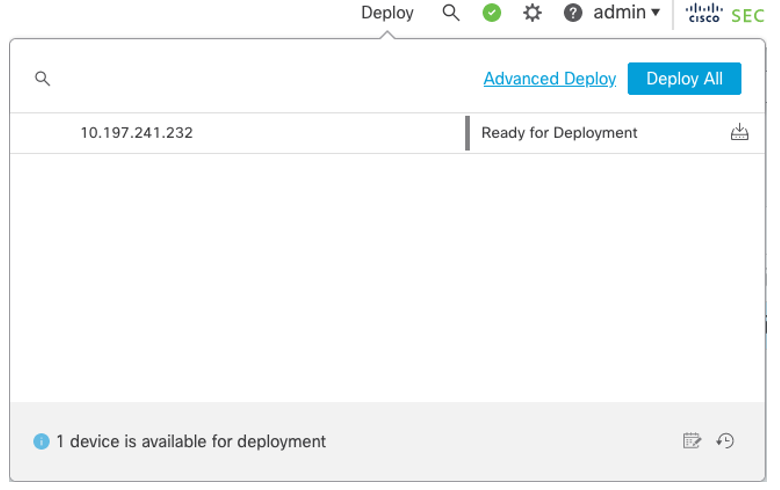
Figure 19: Deployment Dialogue Screen.
Verification
Step 1: Login to client PC and open Anyconnect and click connect:
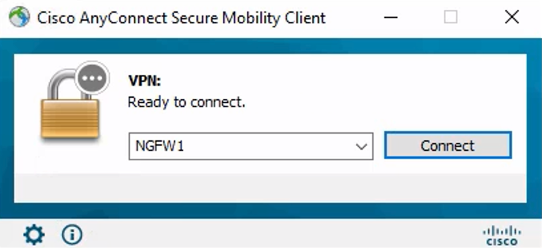
Figure 20: Anyconnect client on Windows.
Step 2: When prompted to send a Push or enter a passcode for completing the successful Anyconnect Login MFA.
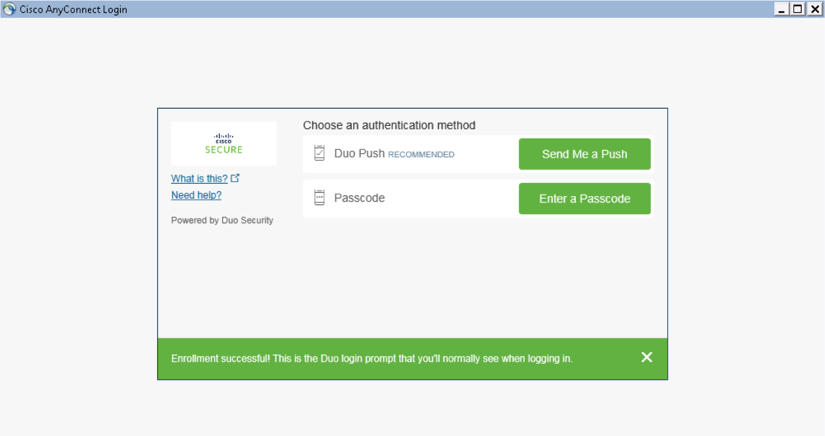
Figure 21: Duo IdP used as authentication via push in an external browser.
Step 3: Approve the push notification from the phone, and the AnyConnect login will succeed.
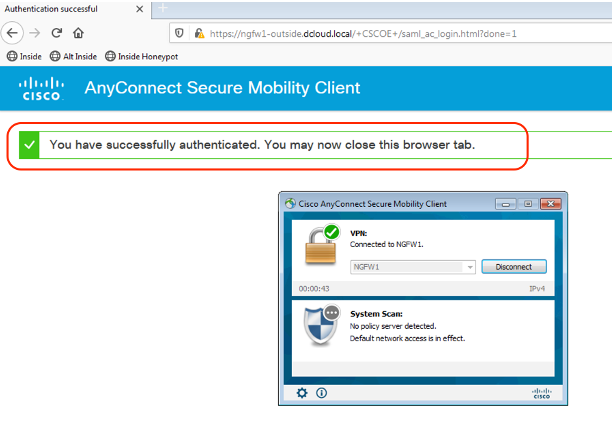
Figure 22: Successful authentication of remote access VPN via AnyConnect client.
Step 4: On FTD CLI, type the command show vpn-sessiondb detail anyconnect to view the details and statistics.
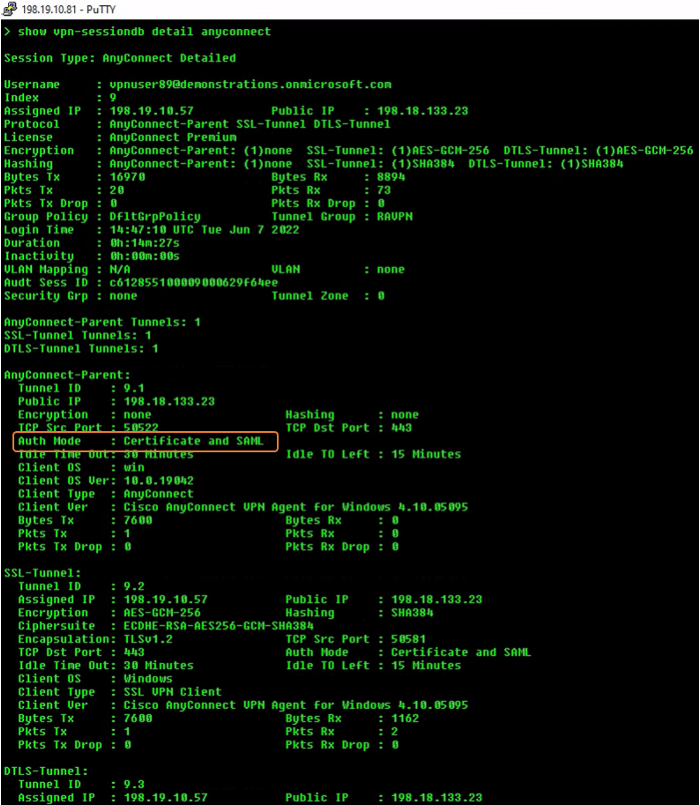
Figure 23: Authentication mode certificate and SAML shown via FTD CLI
Summary
This document provided an overview of remote access VPN configuration with SAML and certificate authentication for Cisco Secure Firewall to help administrators quickly configure RA VPN with SAML and Certificate authentication.
📚 Additional Resources
Updated over 3 years ago