
Azure AD User Identity With ISE
Introduction
Azure AD is a cloud-based identity & access management service enabling employees to access external resources, such as Microsoft 365, and thousands of other Software as a Service (SaaS) applications. By integrating Cisco Secure Firewall with Azure AD & ISE, administrators can receive Azure AD logins from ISE & enforce Access Control Policy based on Azure AD users and groups.
Background Information
Traditionally, administrators configure their policies based on IP addresses with no visibility into the user who has been assigned that IP address. This complicates the policy configuration since a user could have a different IP address based on location.
Since Cisco Secure Firewall Version 6.x administrators could integrate their Firewall with On prem Active Directory, and use the login information from ISE and enforce their policies based on the on prem AD users and groups. This removed the dependency on the IP addresses and now the user could be allowed or denied access to applications irrespective of the location they connect from or the IP address they get.
With Cisco Secure Firewall version 7.4 we have extended this functionality and now administrators can configure policies based on Azure AD user and group information as well.
End to End flow
• FTD does a Radius authentication with ISE for RAVPN users. (For 802.1x, the Switch/WLC will do the authentication)
• ISE sends OAuth ROPC request to AzureAD
• ISE receives the response from AzureAD
• ISE sends the login session (User and IP details) to FMC via pxGrid session topic
• Independently, FMC gets “User+Group” info from Azure AD.
• FMC combines the above two feeds and sends it to FTD for User/Group policy enforcement.
• FTD enforces the policy based on the User/Groups configured in the Access Rules.
Configuration
In this section we will look at the required configuration on Cisco Secure Firewall Management Centre as well as Azure to achieve this integration. We will then configure policies for VPN users and allow/deny traffic based on their Azure AD group membership.
Topology
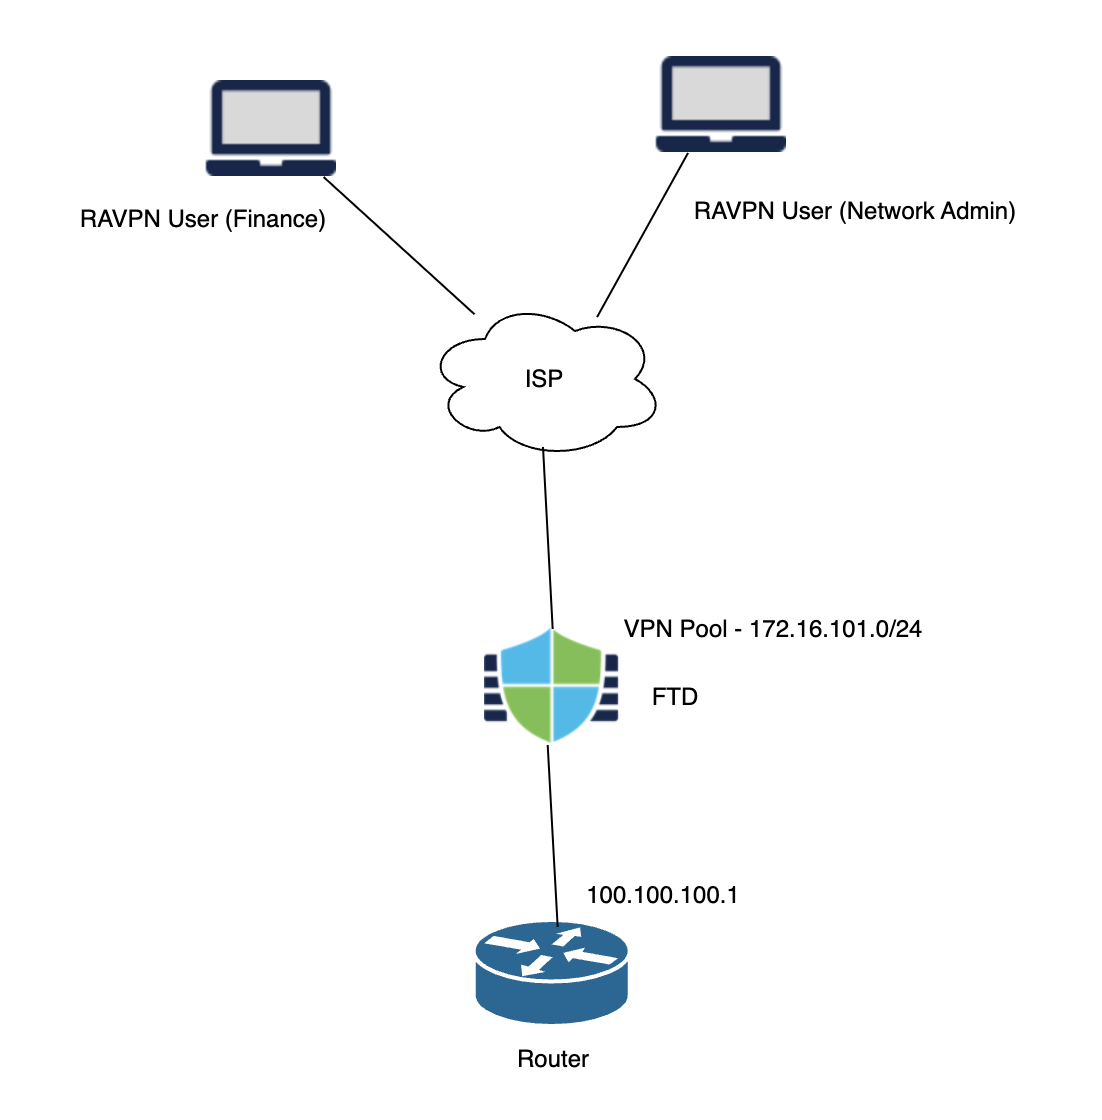
In this setup, we have two users belonging to two different groups in Azure AD. One user belongs to the Finance Group, and the second user belongs to the Network Admin Group. We will configure access control rules to allow SSH to the inside router only for the users belonging to the Network Admin Group. Both the users will connect to the FTD using an RAVPN connection and try to SSH to the Router on the inside. The Finance User will be denied access whereas the Network Admin User will be allowed access.
Configuring Azure AD
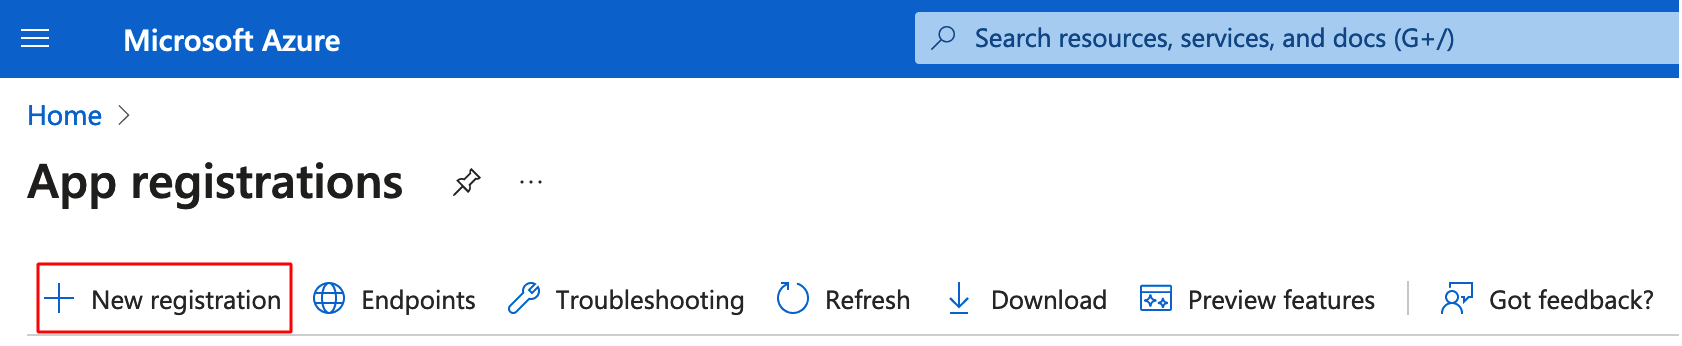
Step 1: Navigate to Azure Active Directory > App Registrations and click on New Registration to create Azure Directory Application

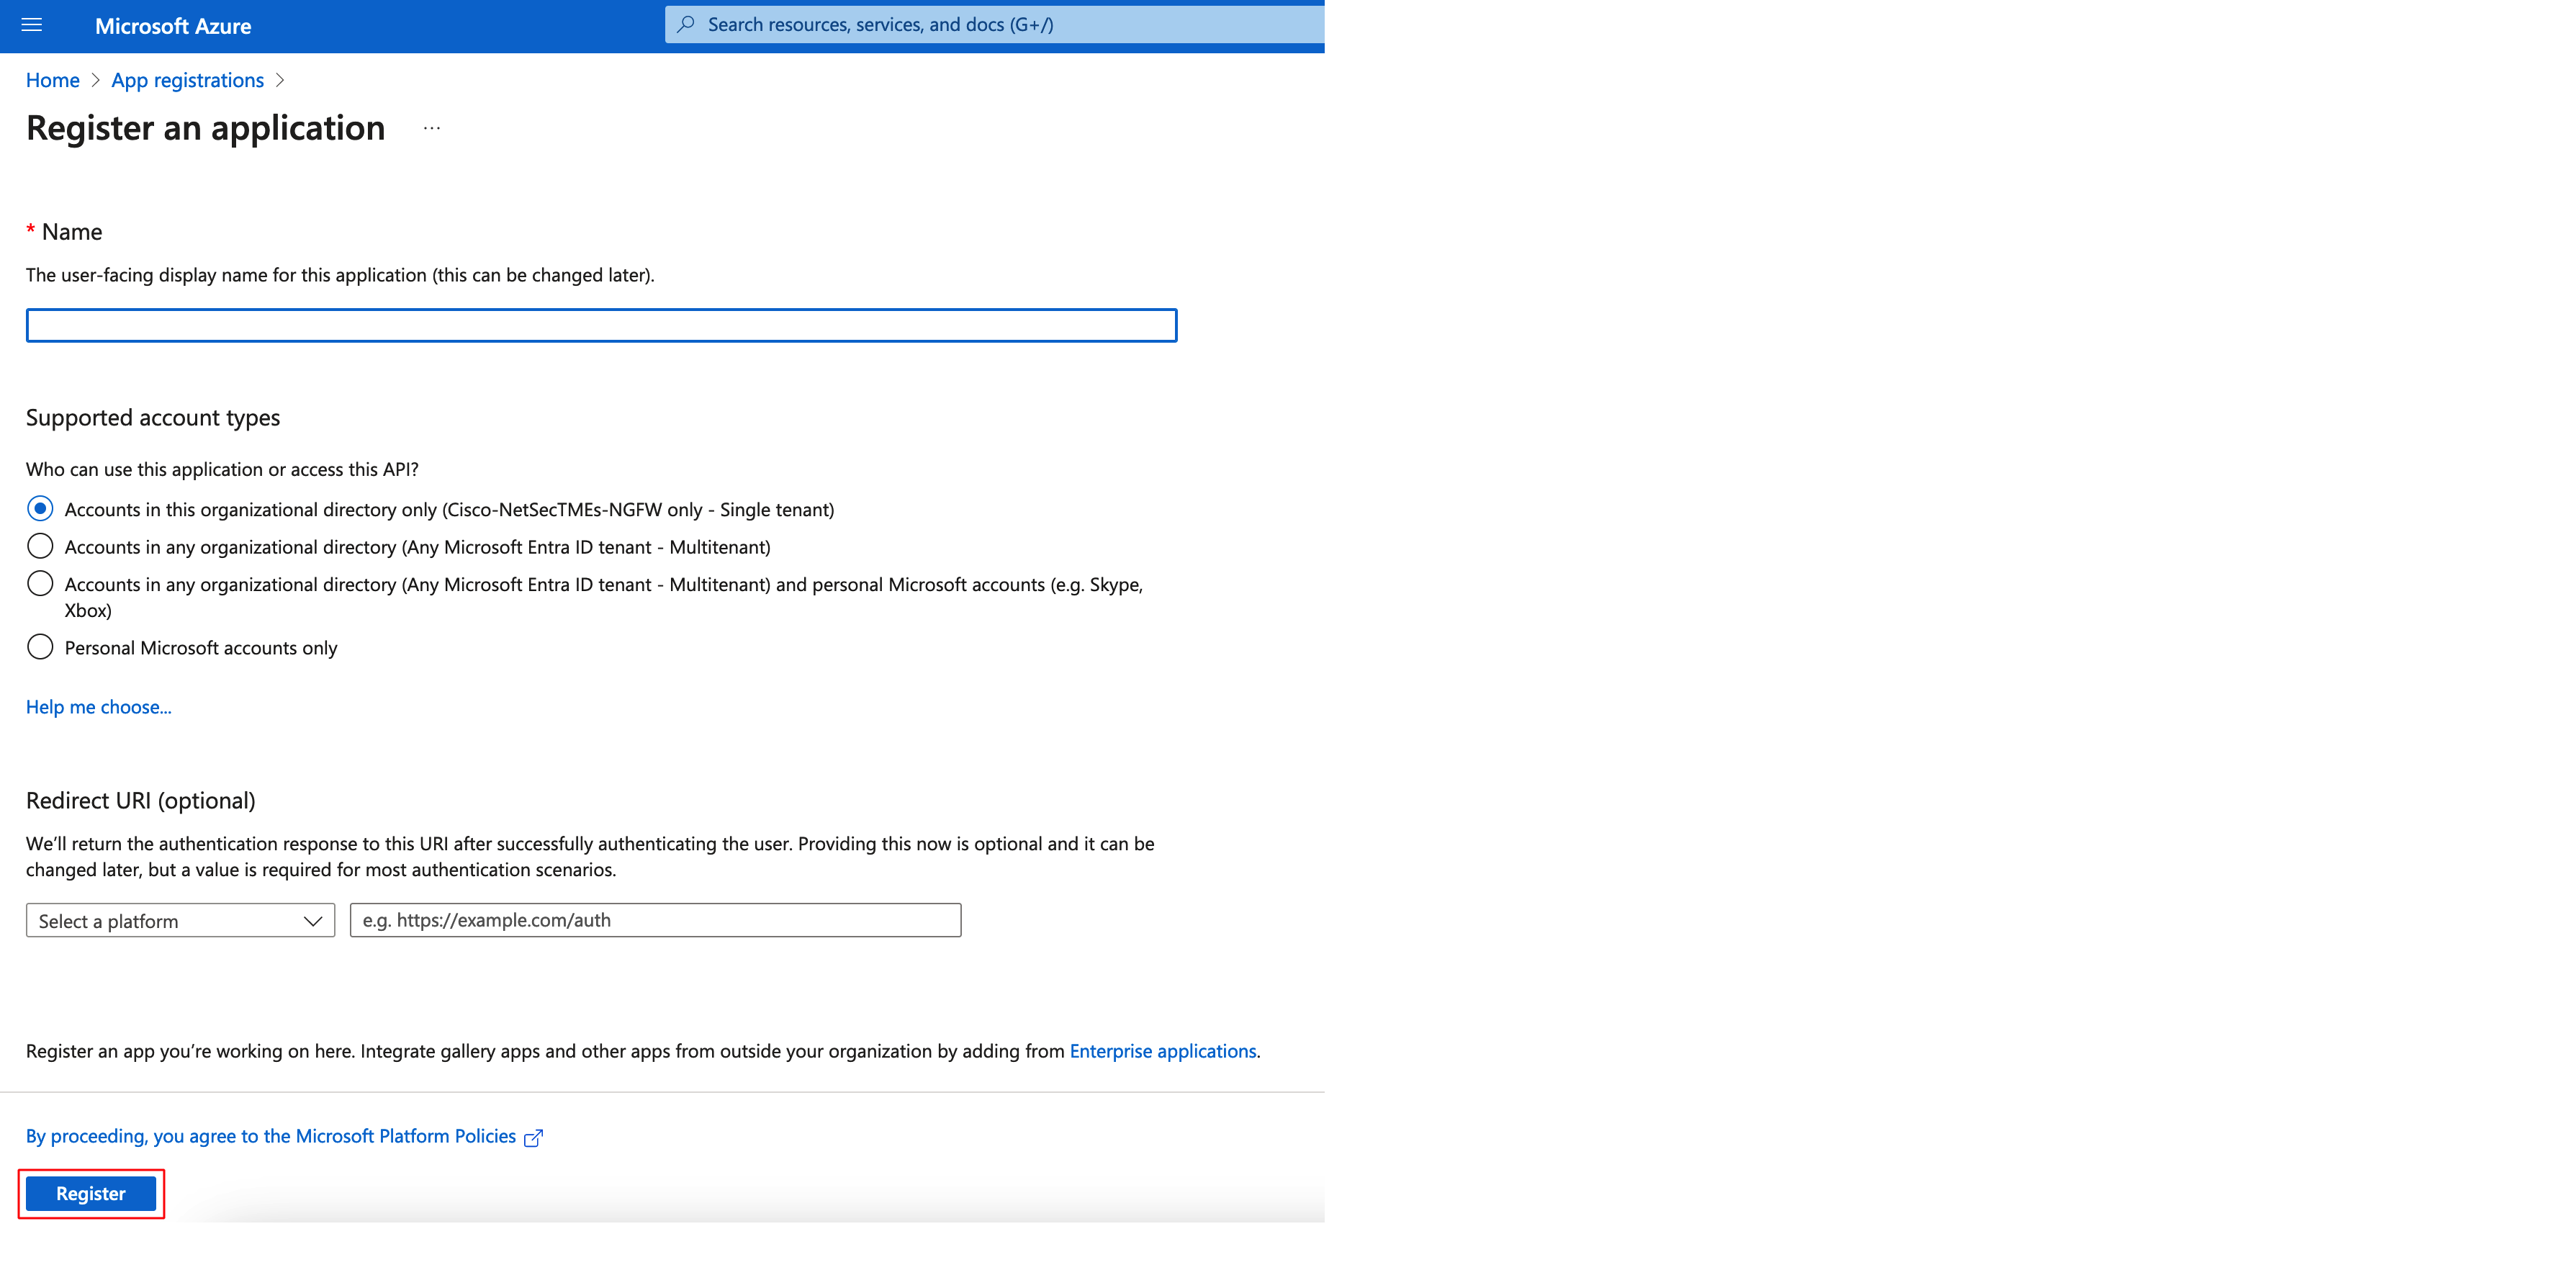
Step 2: Enter the name for the App and click Register. Other settings can be left at default or changed according to the needs.
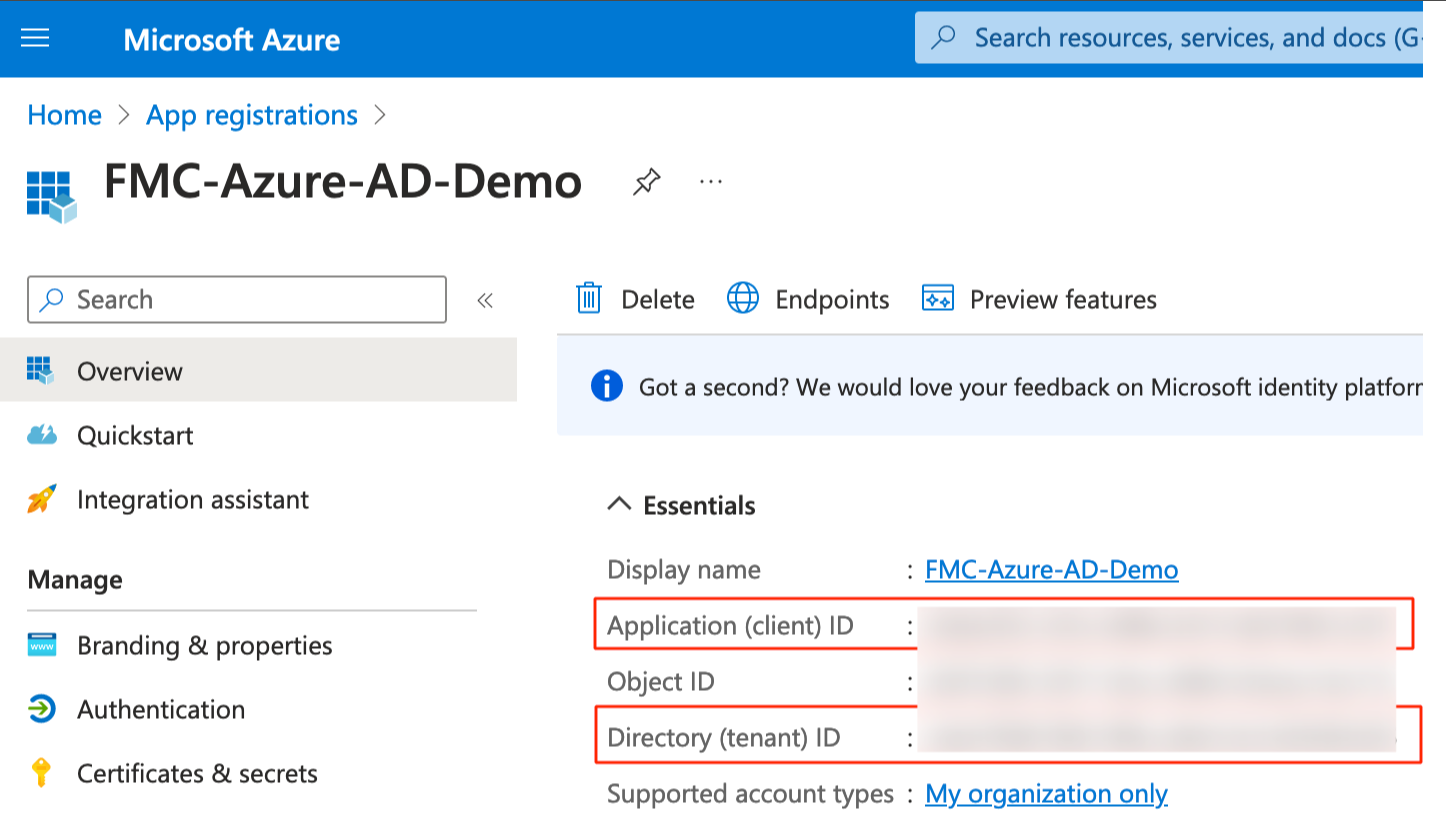
Step 3: Copy the Application (client) ID and Directory (Tenant) ID. These IDs will be used later for configuration on the FMC.
Step 4: Navigate to Certificates & secrets on the left menu bar and create a new client secret.
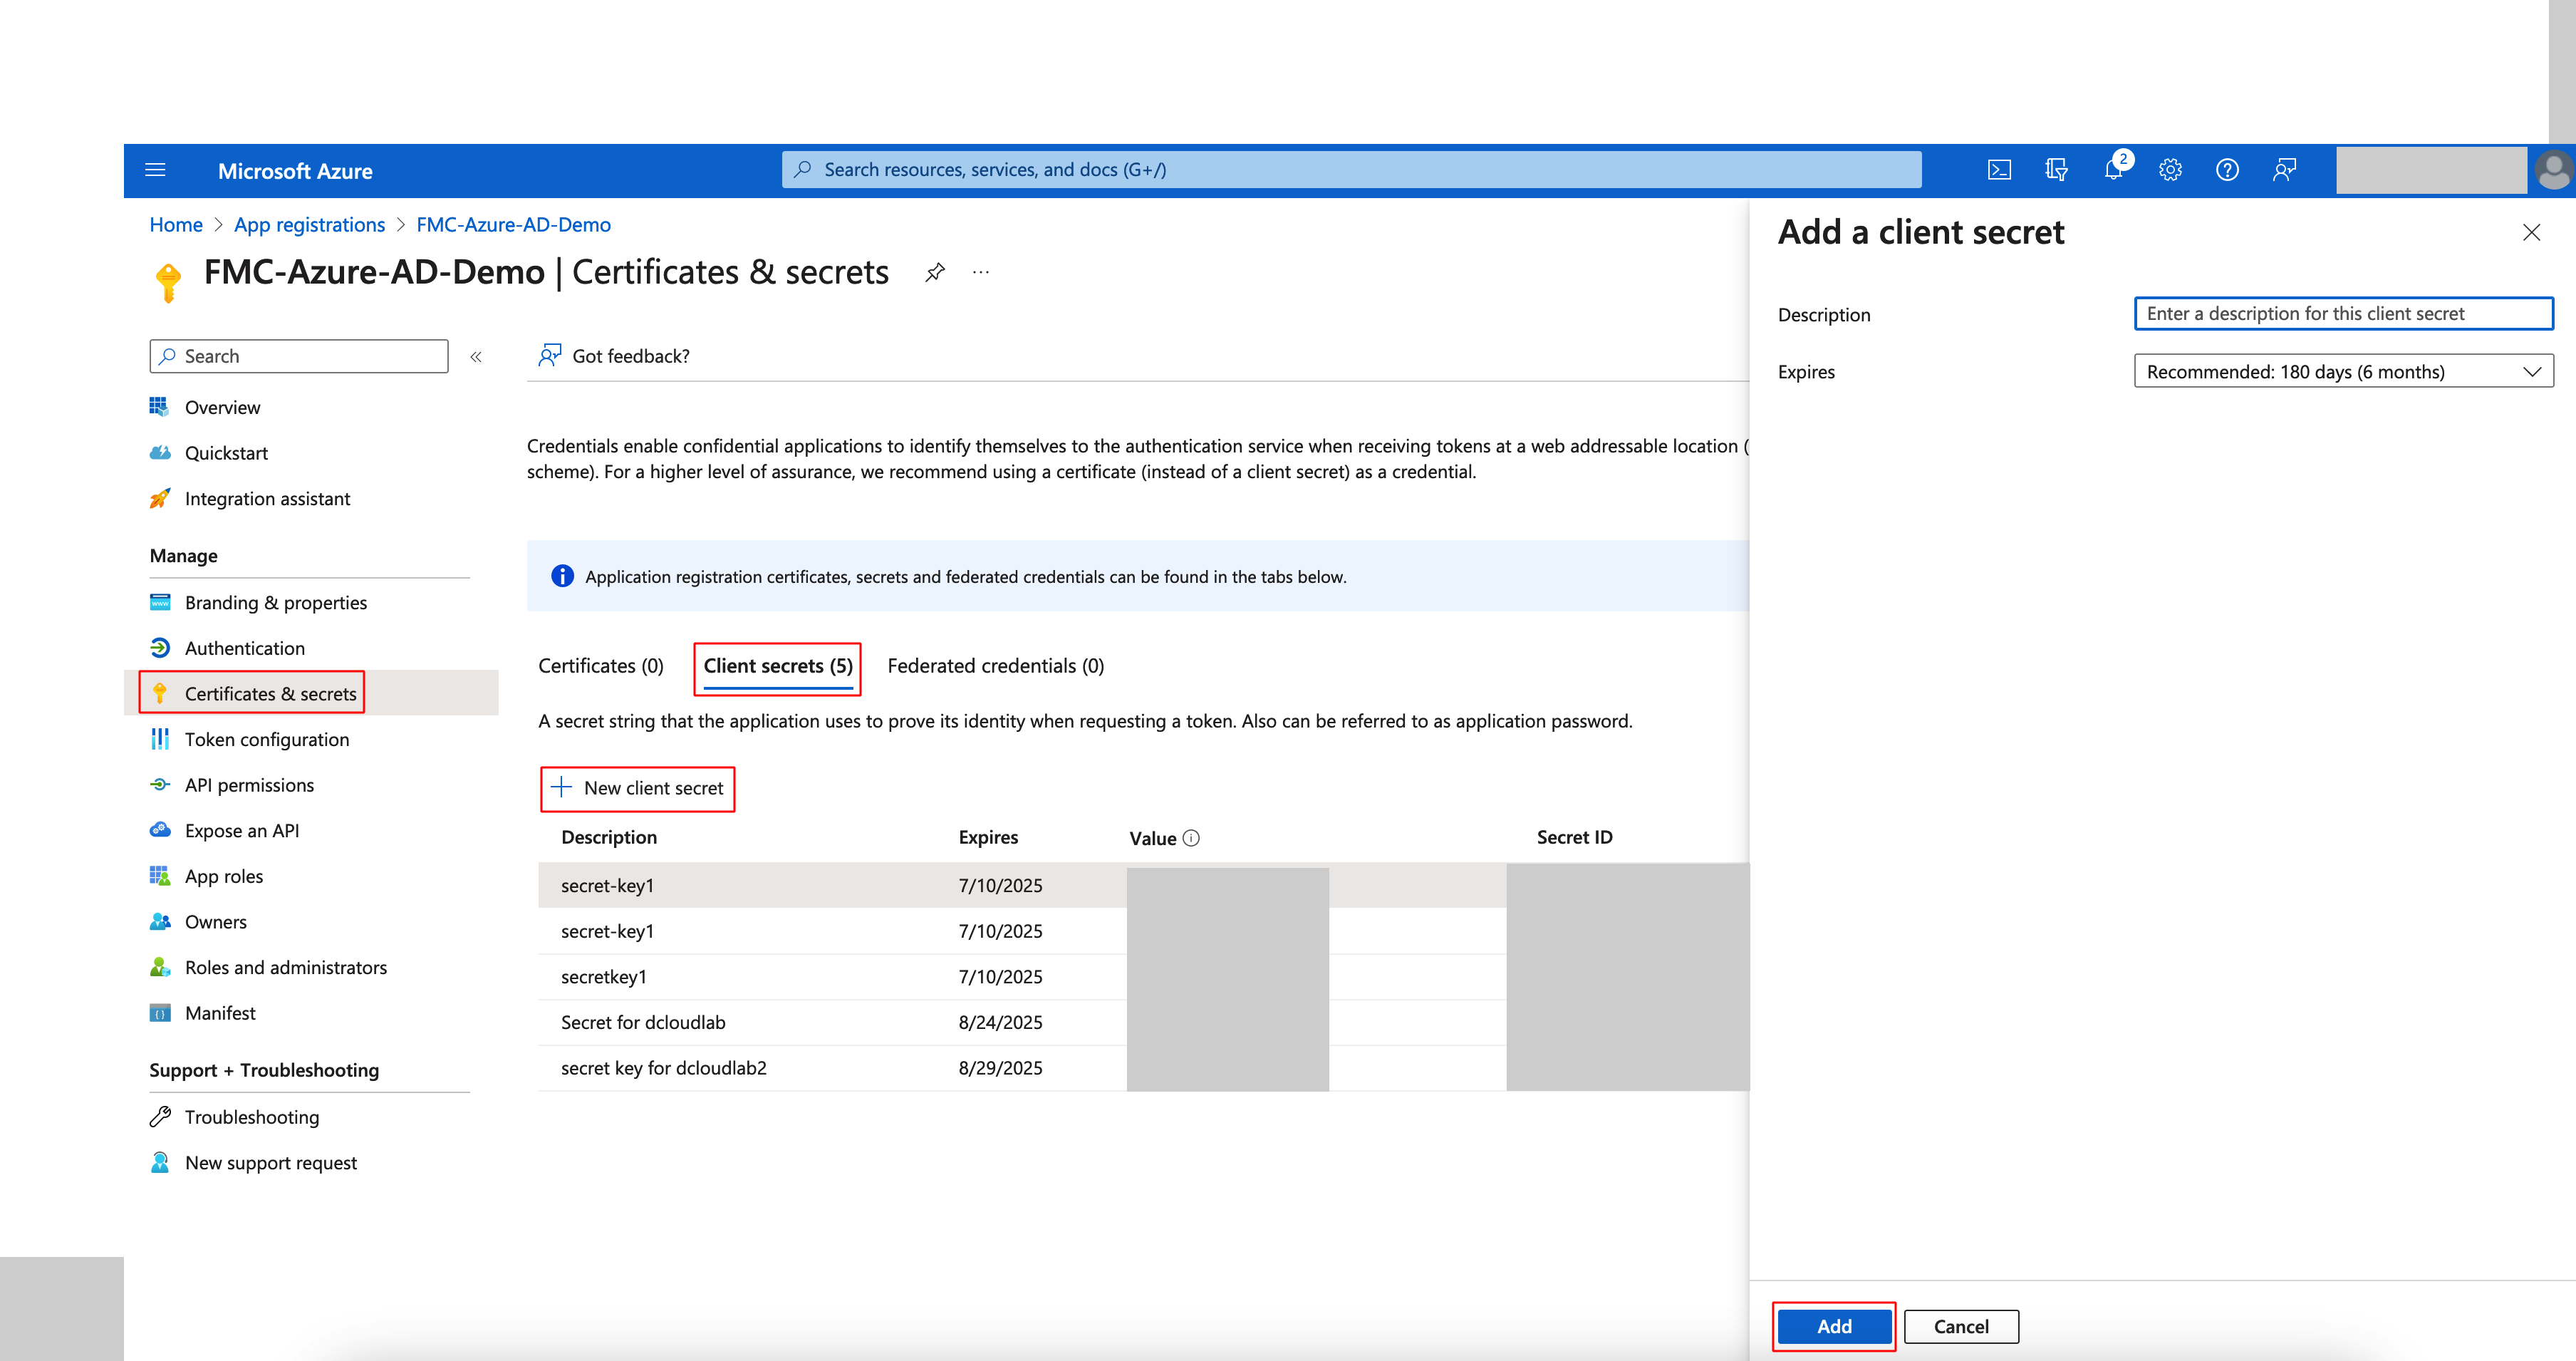
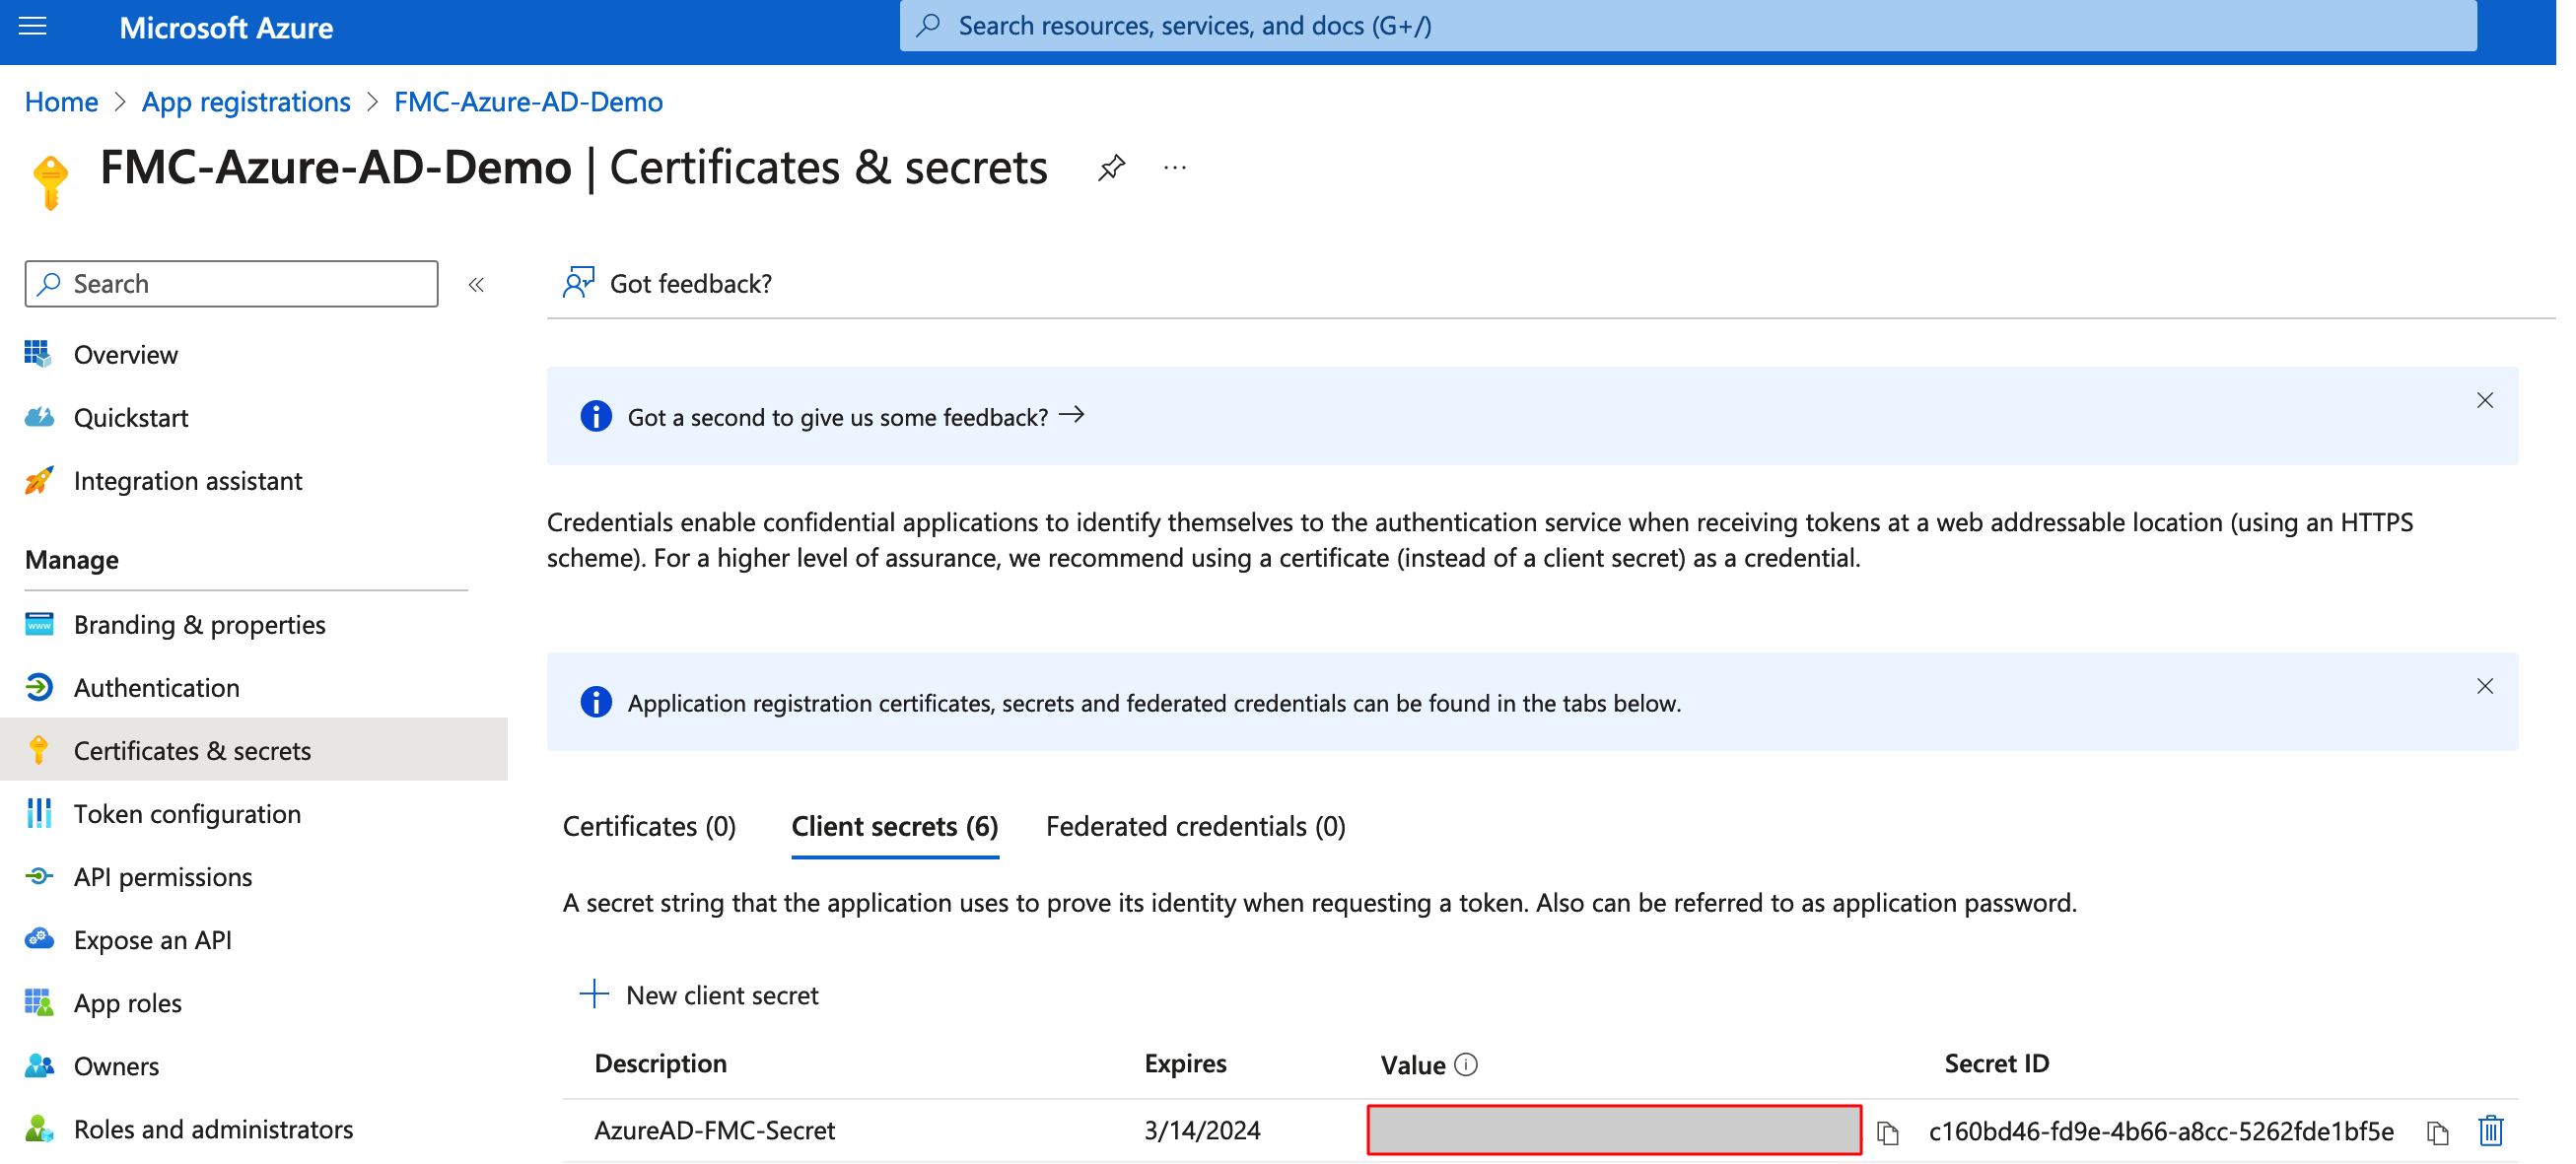
Step 5: Copy the Client Secret Value. This will be used later for configuration on the FMC.
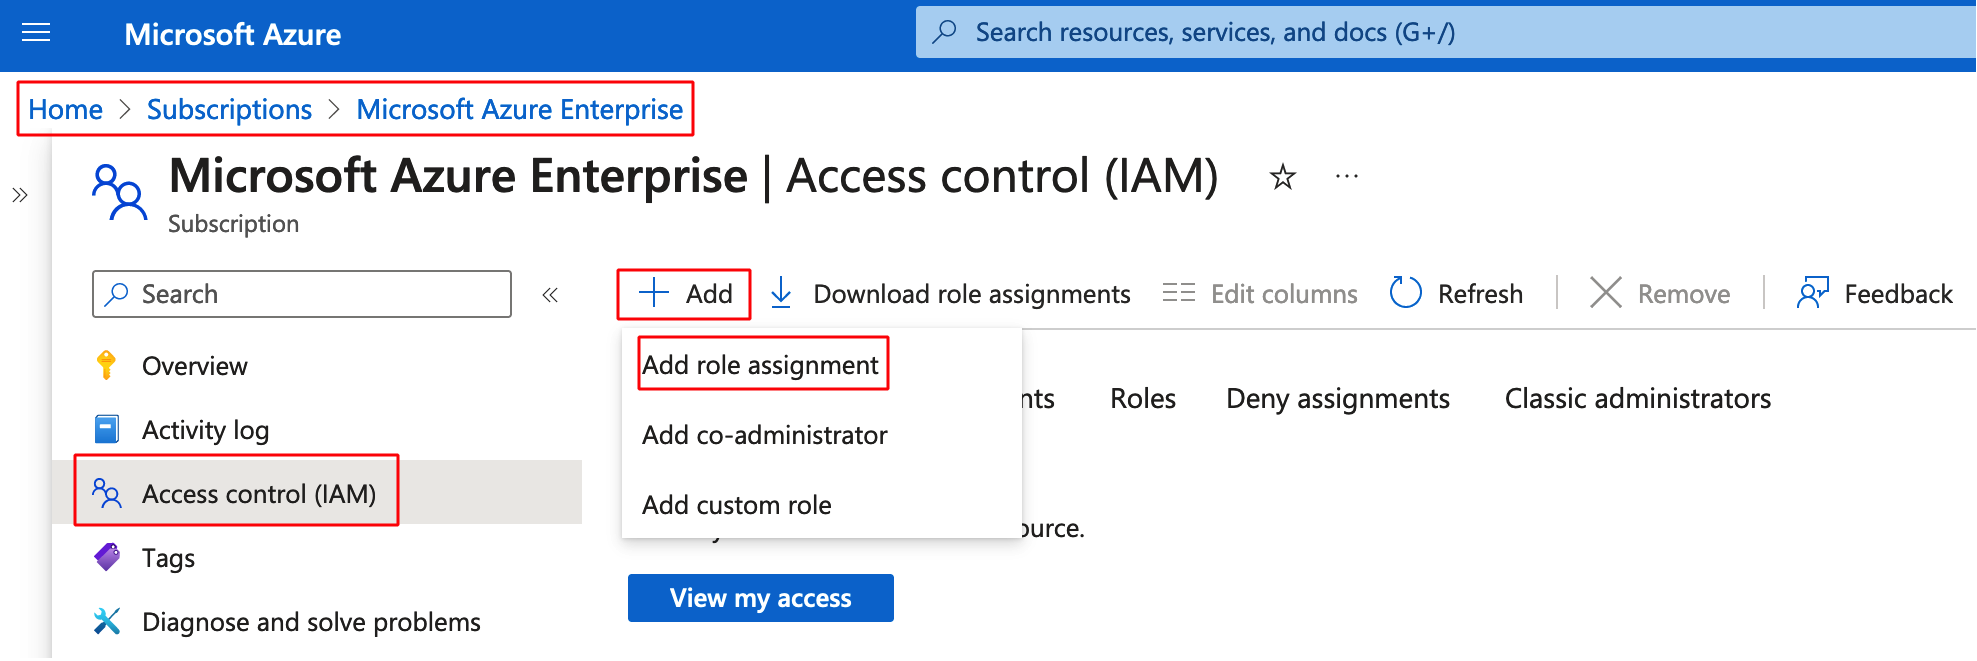
Step 6: Navigate to Home > Subscriptions > Microsoft Azure Enterprise > Access Control (IAM) and add a new Role Assignment
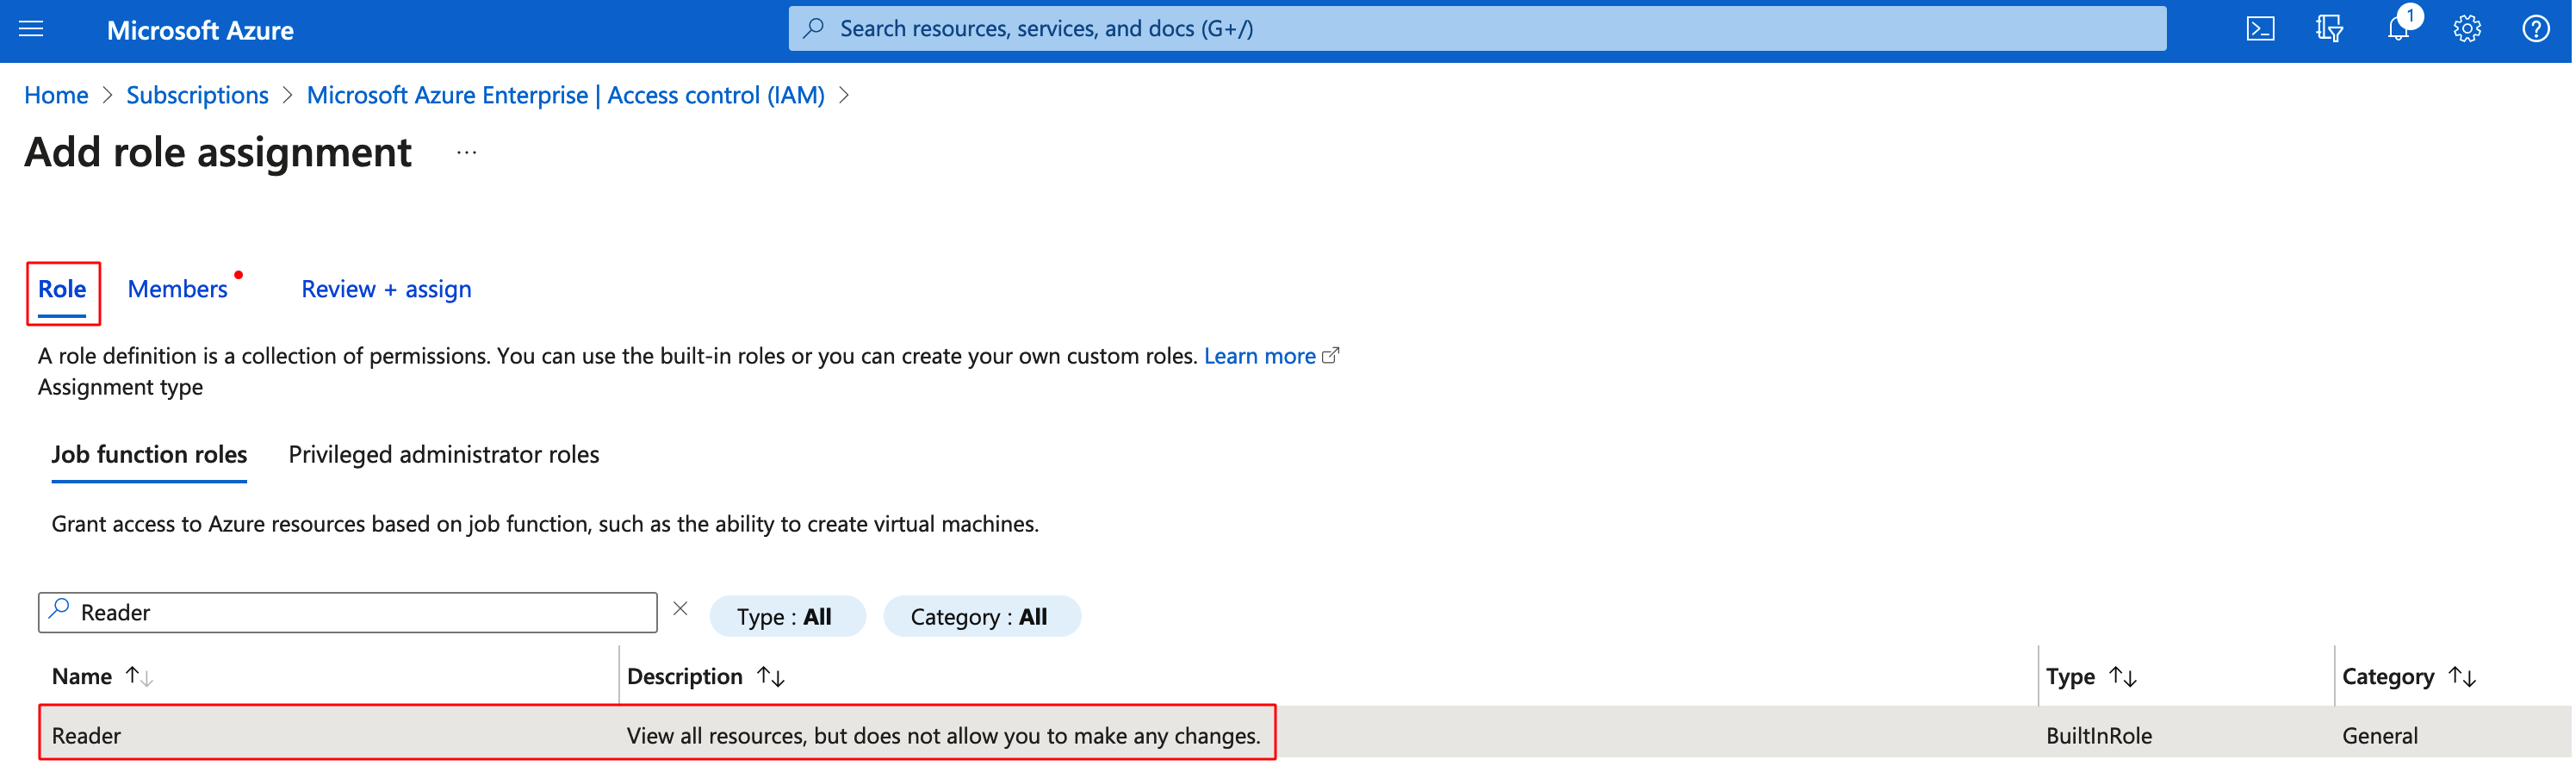
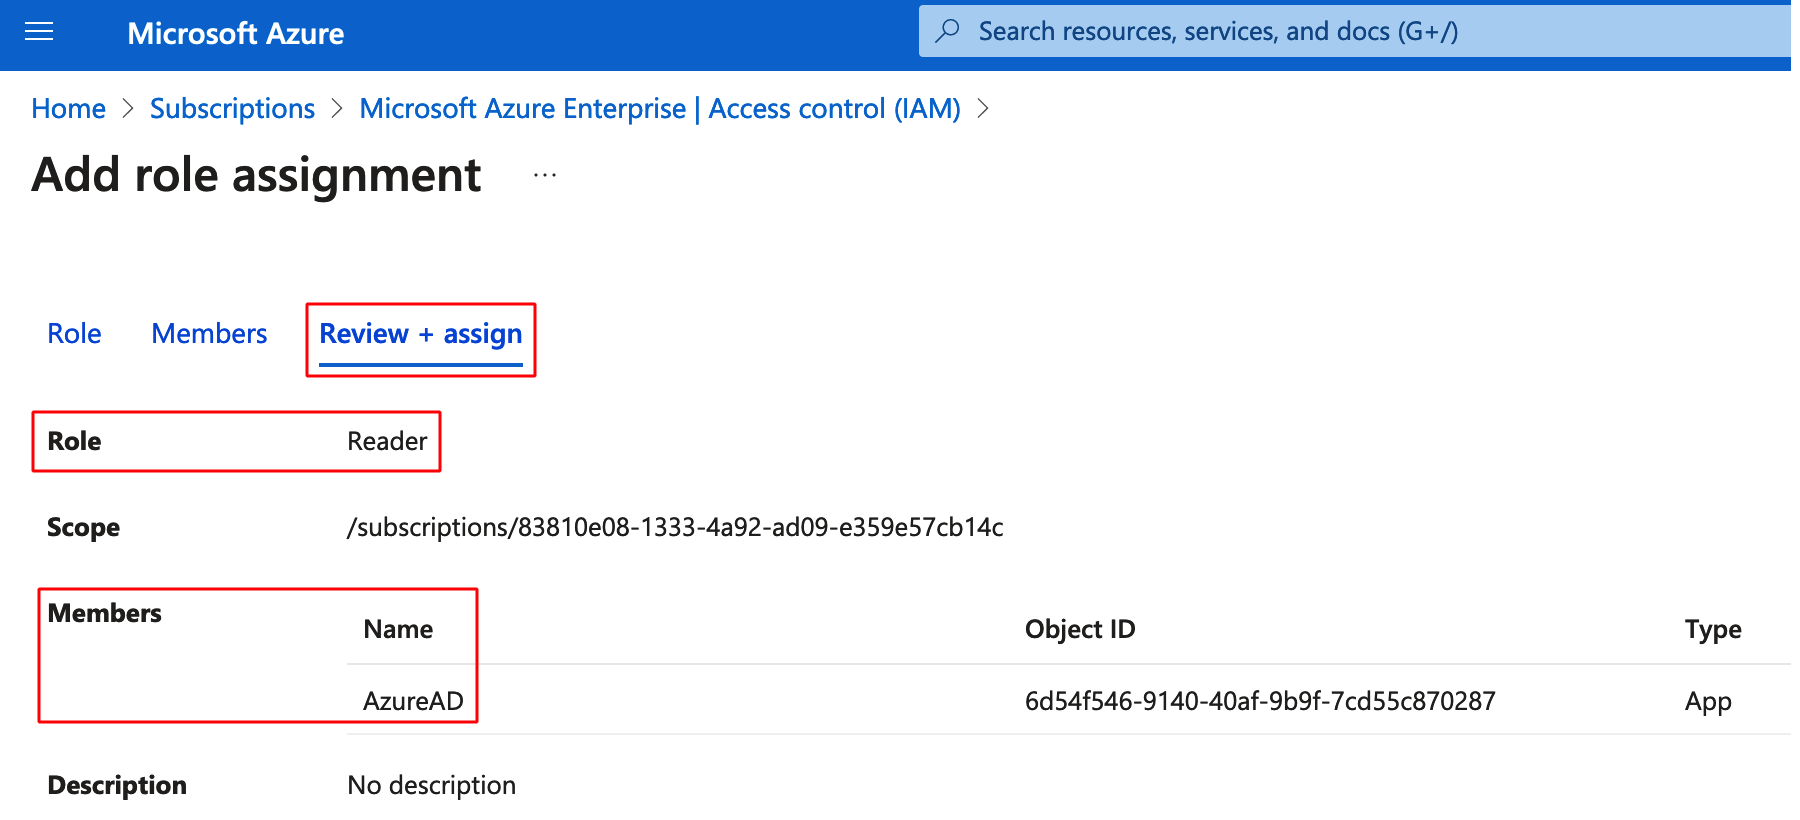
Step 7: Go to Role and select the role as Reader
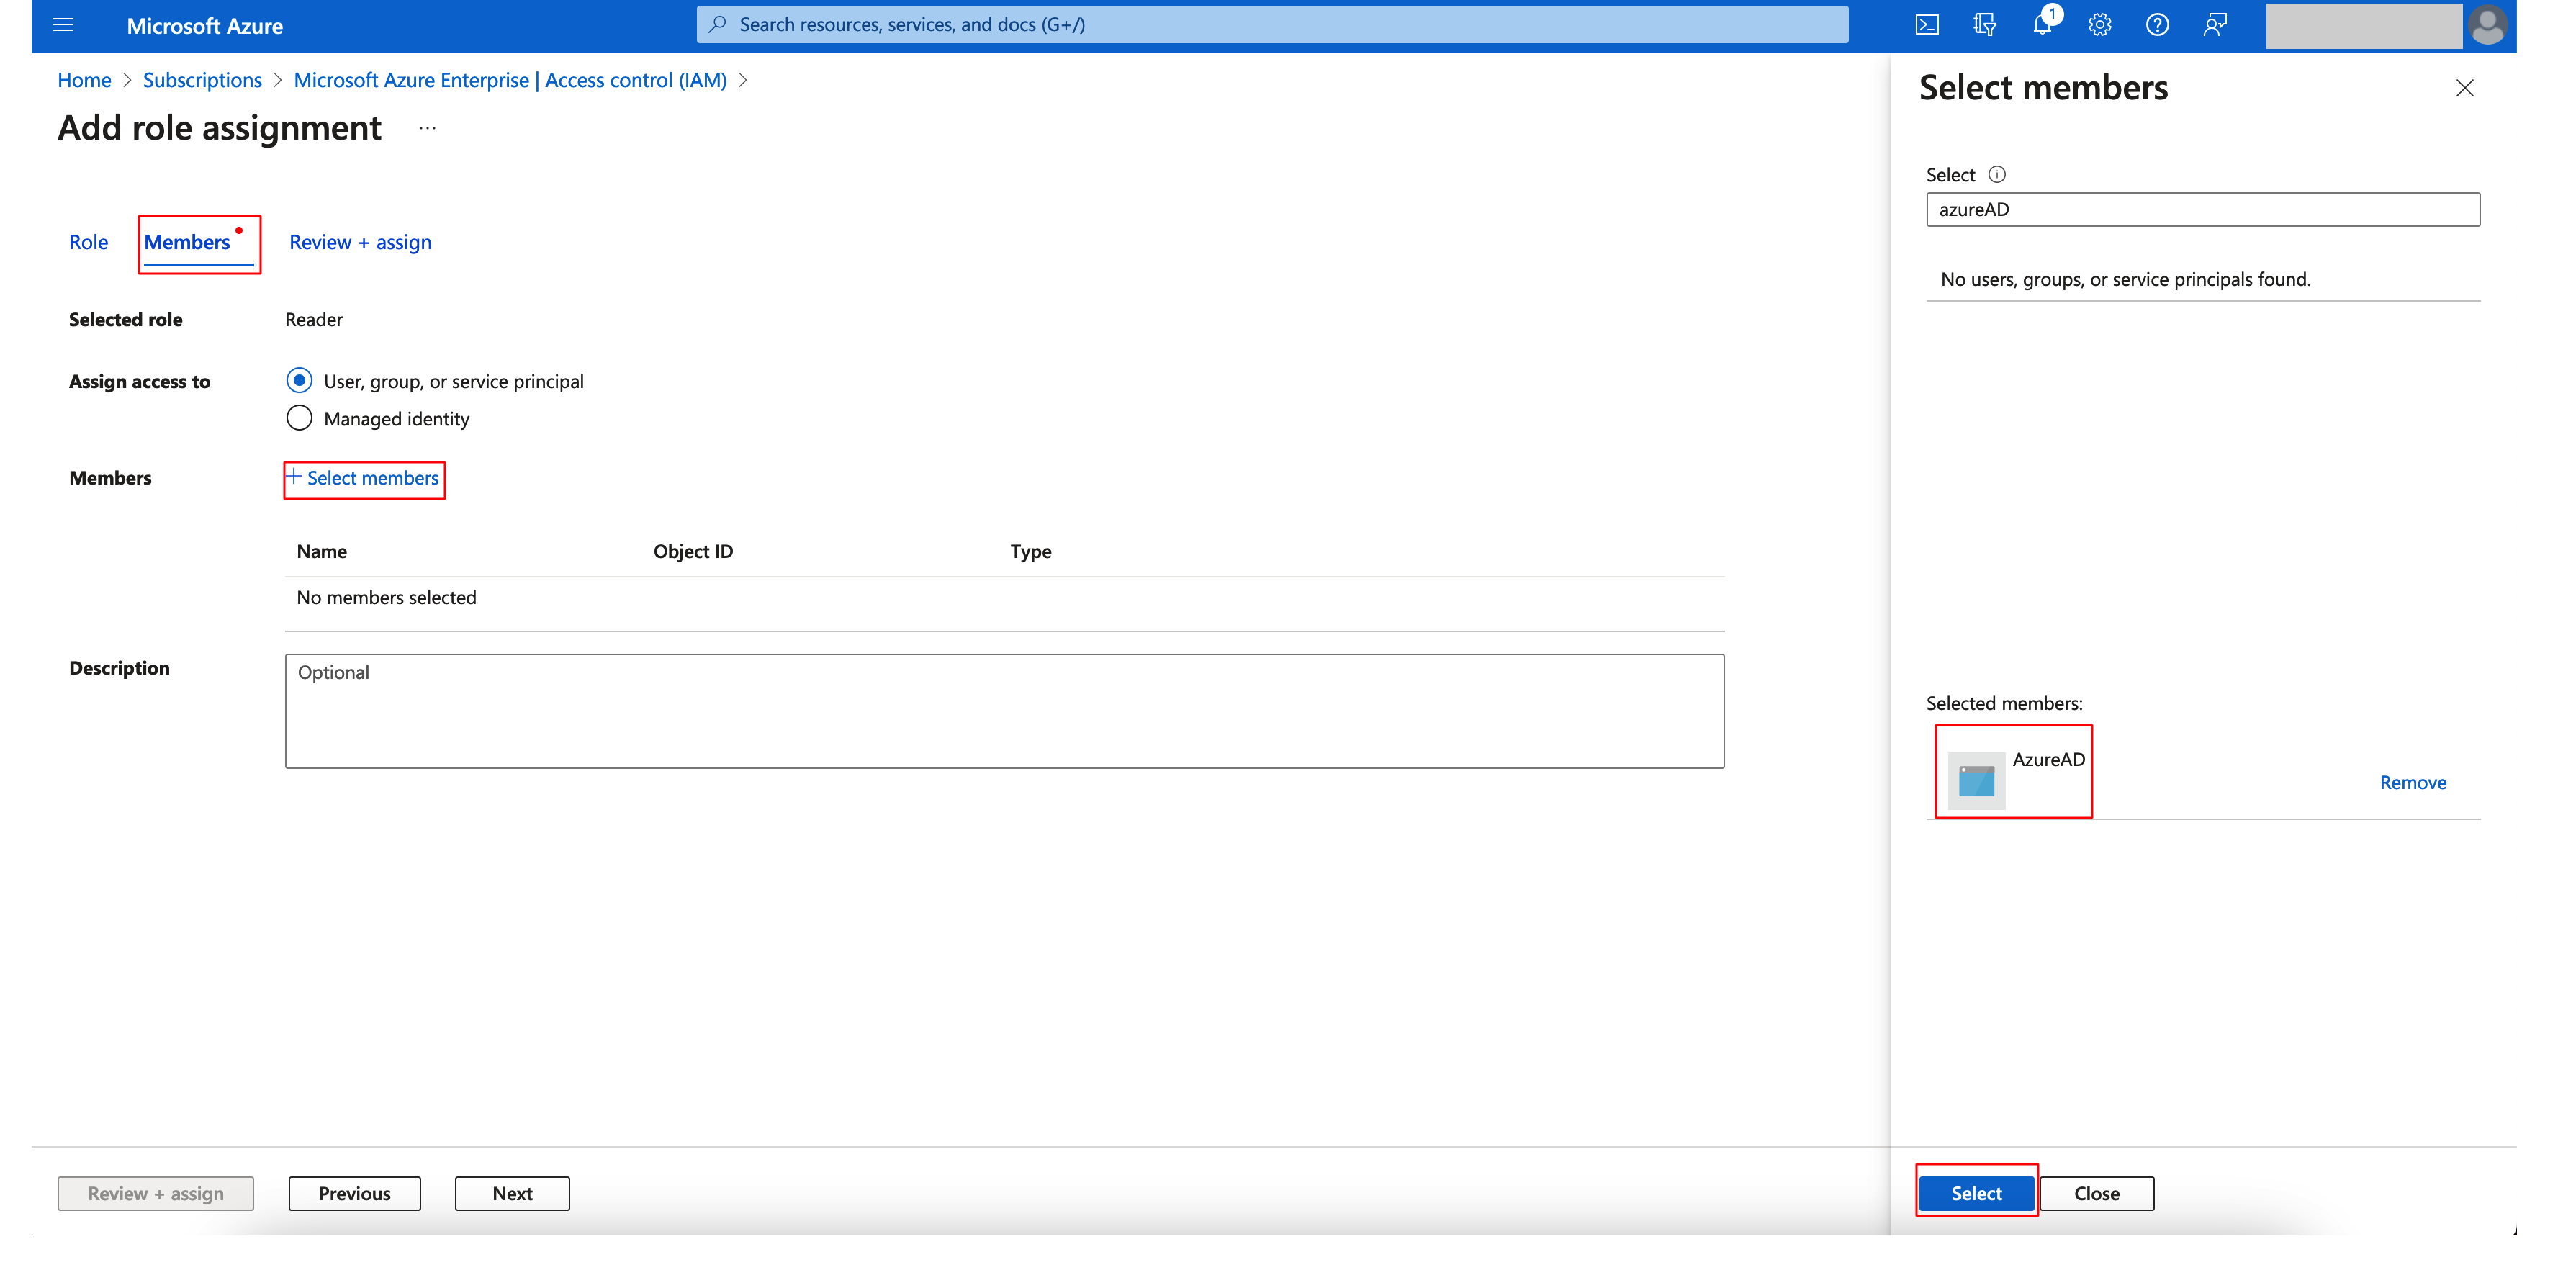
Step 8: Go to Members > Select members, select the newly created application and assign Reader role to the application.
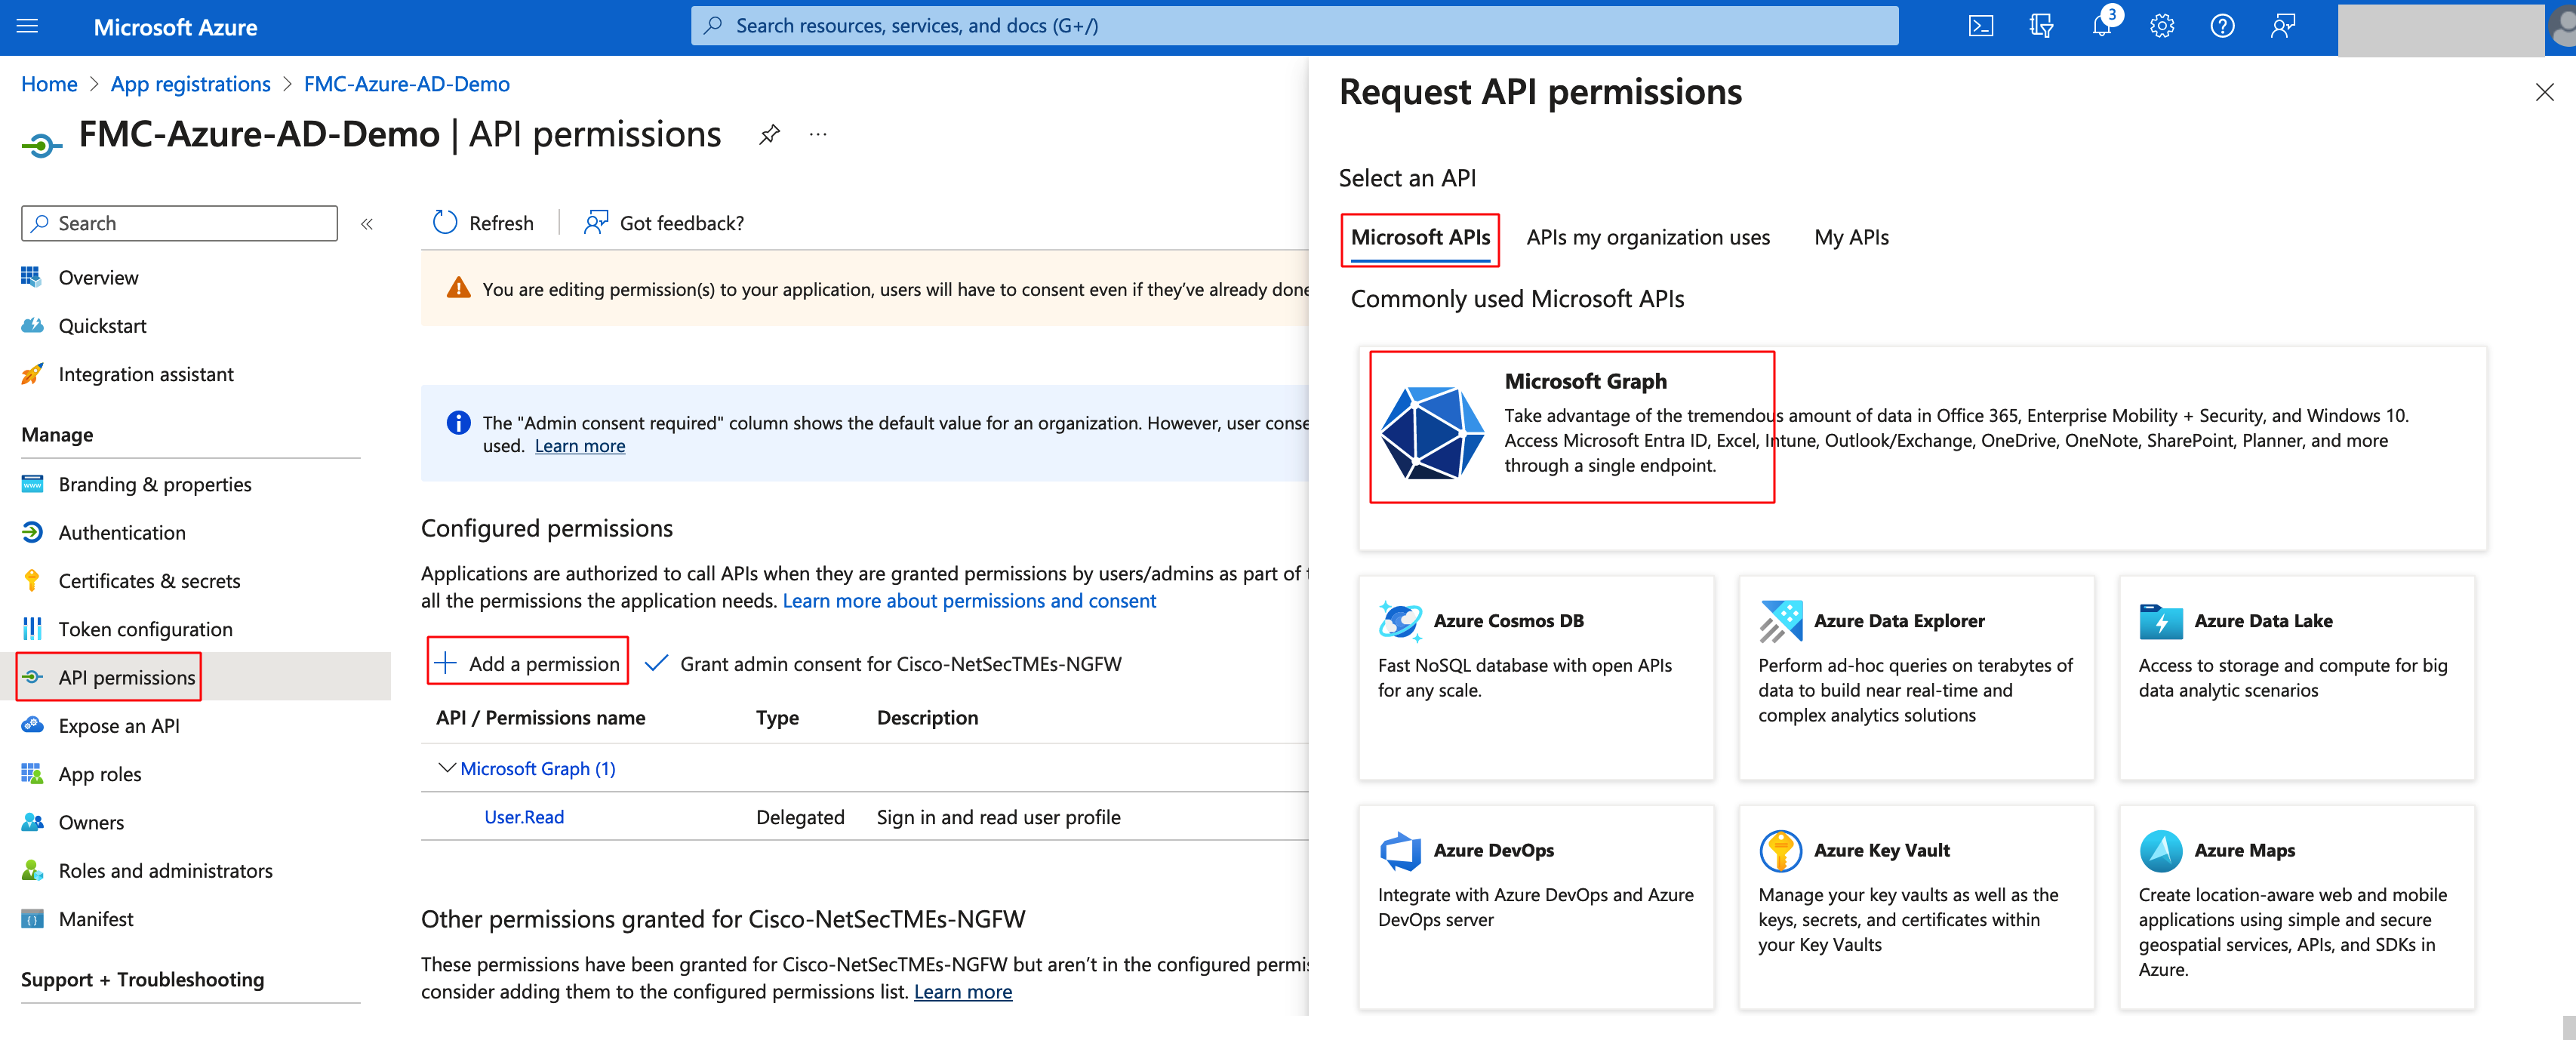
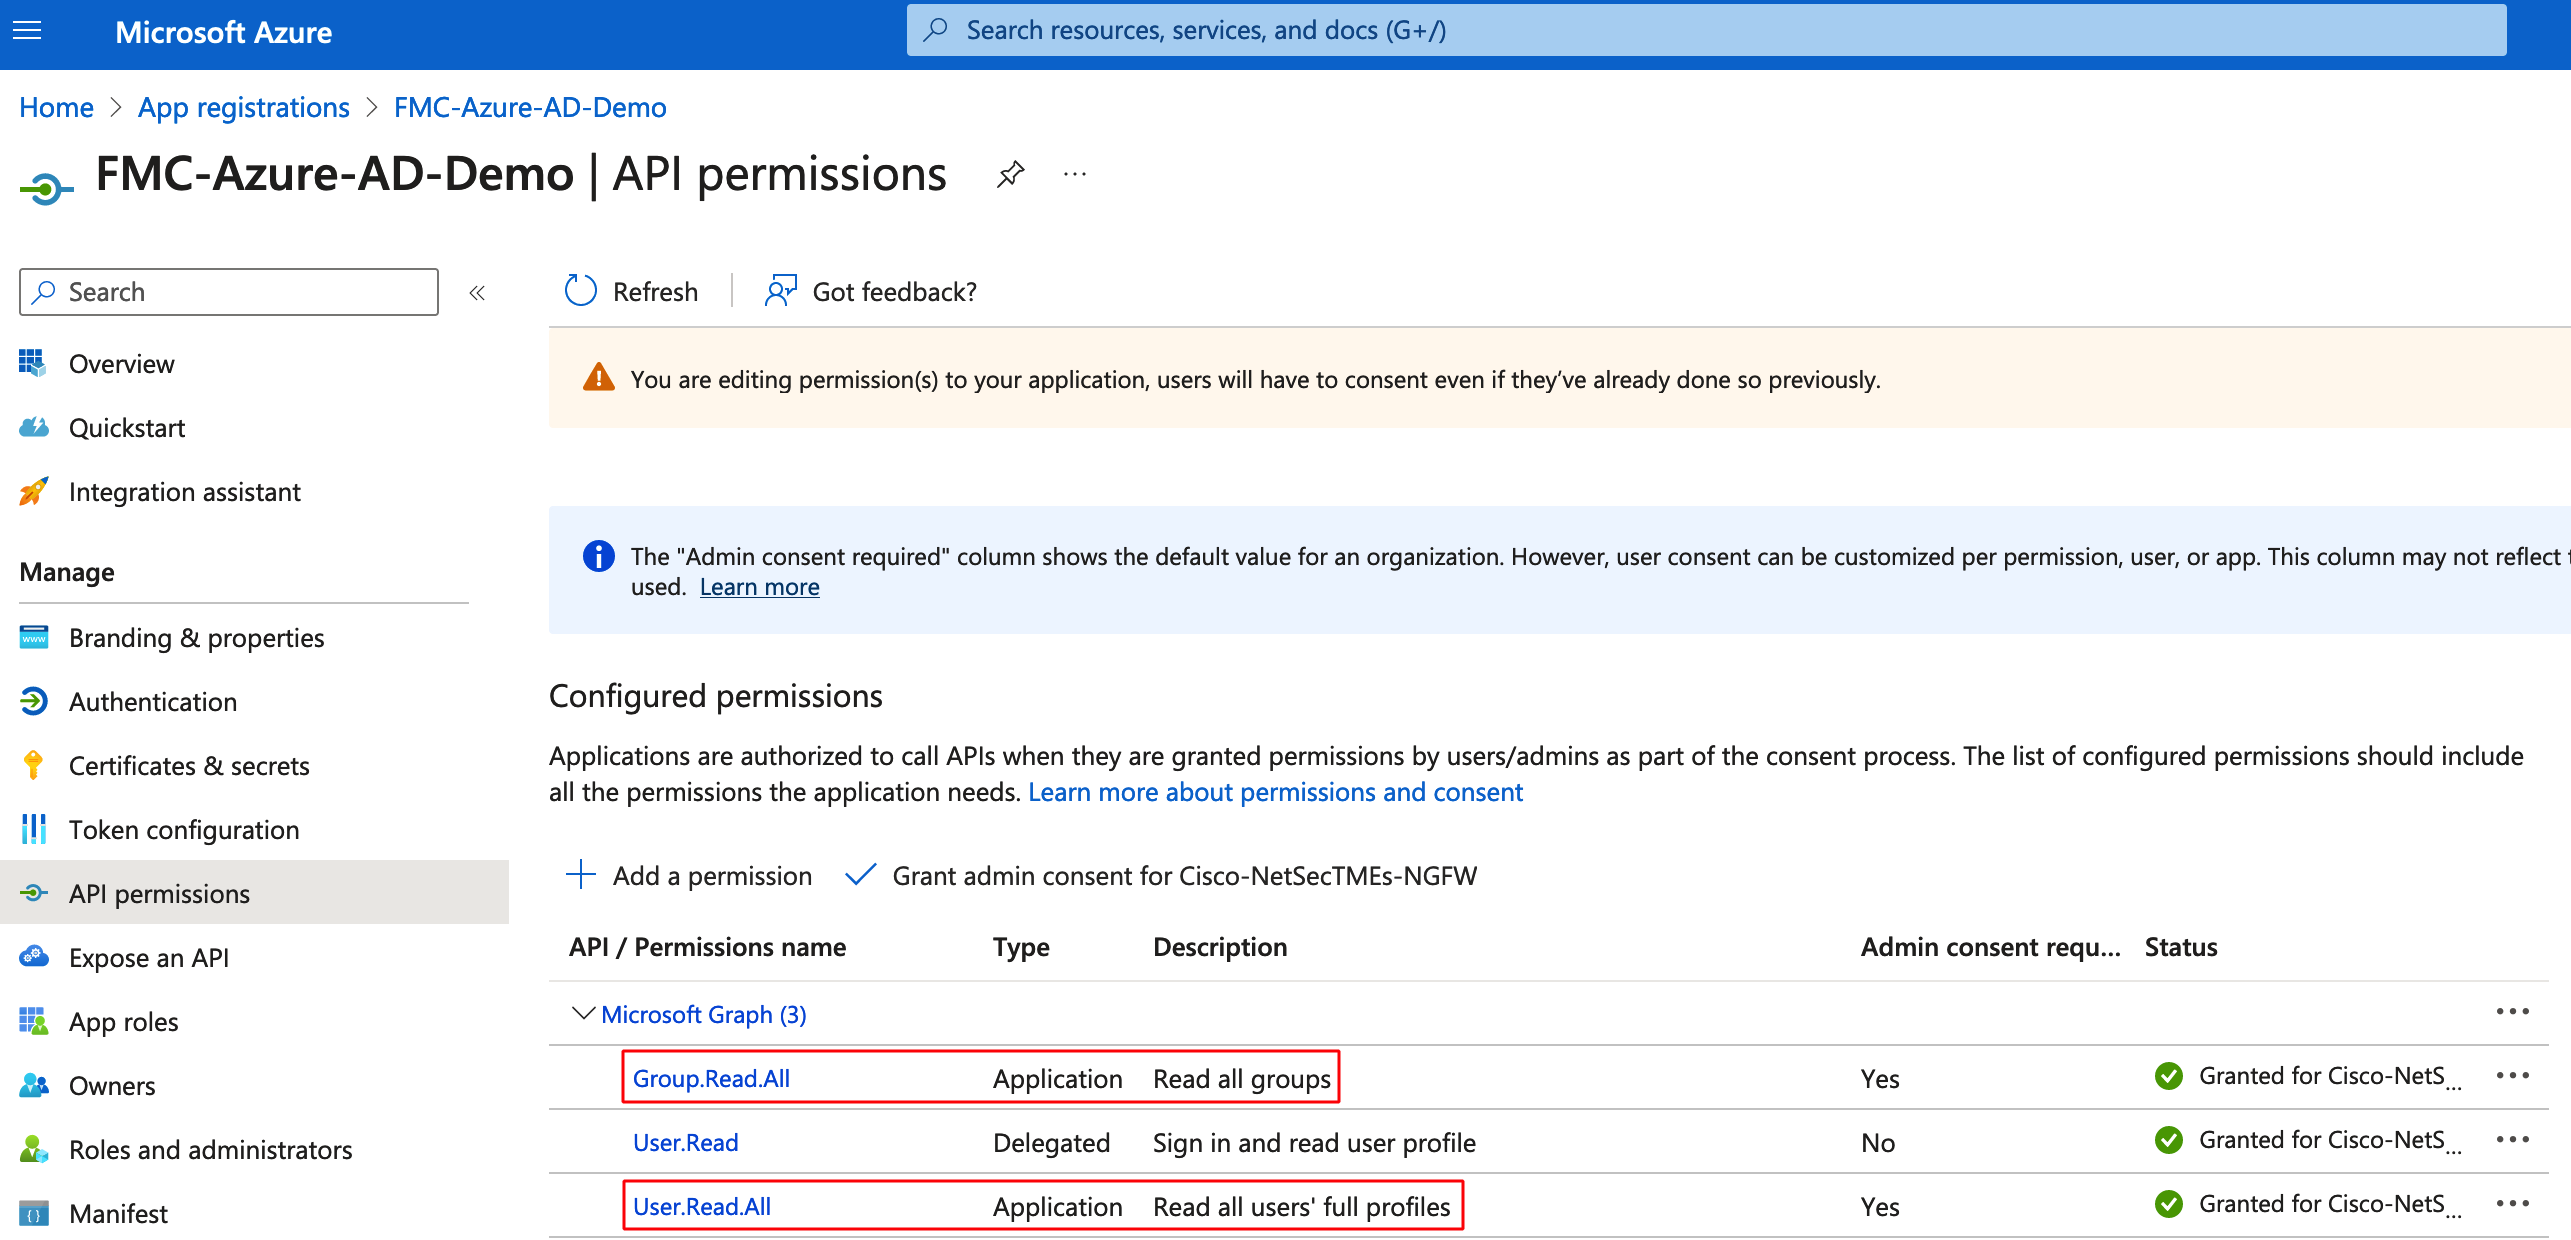
Step 9: Navigate to Applications > App Registrations and Select the created application. Then navigate to API Permissions in the left bar and assign User.Read.All and Group.Read.All Graph API permissions. These permissions are required for the FMC to get the users and groups information from Azure.
Note
The permission type should be Application
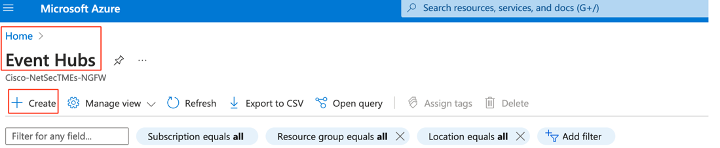
Step 10: Next we will configure event hubs in Azure so that FMC receives incremental user group membership updates by subscribing to the Azure Event Hubs. Navigate to Home > Event Hubs, click on Create, provide a name and fill in the other details like Location, Pricing Tier etc. as per your organization.
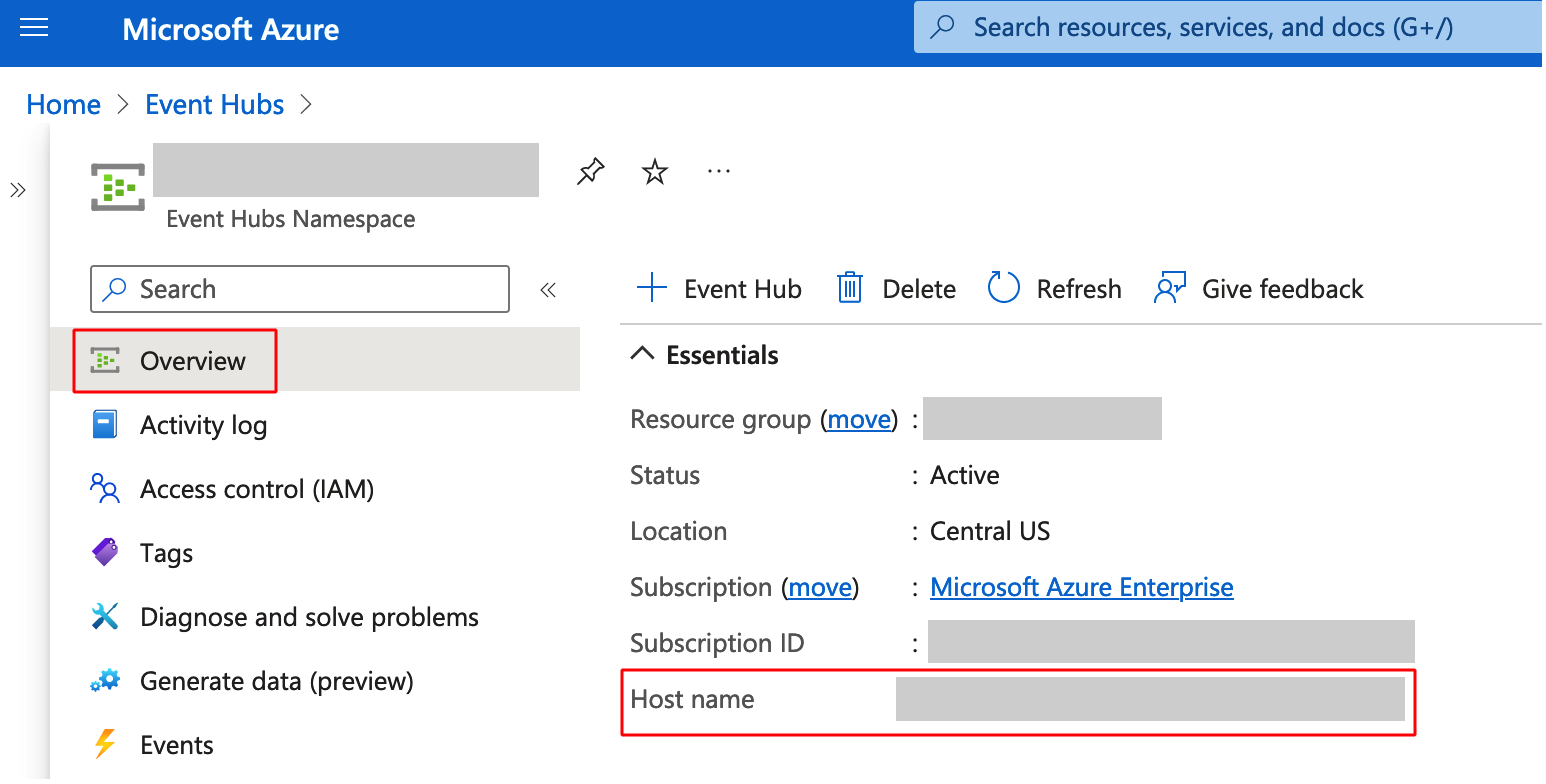
Step 11: Navigate to the Overview Tab of the newly created Event Hub and copy the Host name. This will be used later for configuration on the FMC.
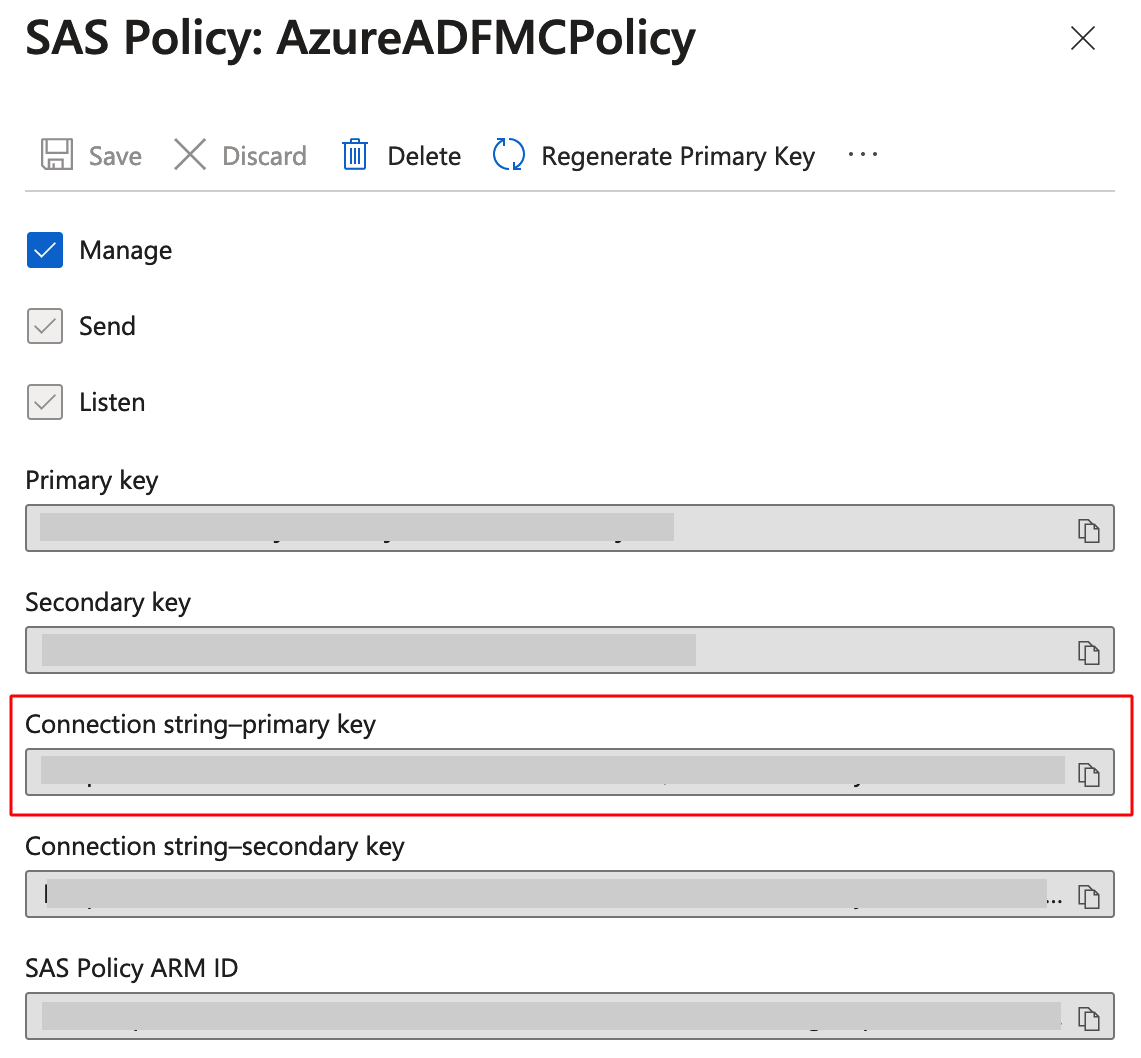
Step 12: Navigate to Shared access policies in the left menu and Add a new policy.

Step 13: Copy the Connection string-primary key. This will be later used for configuration on the FMC.
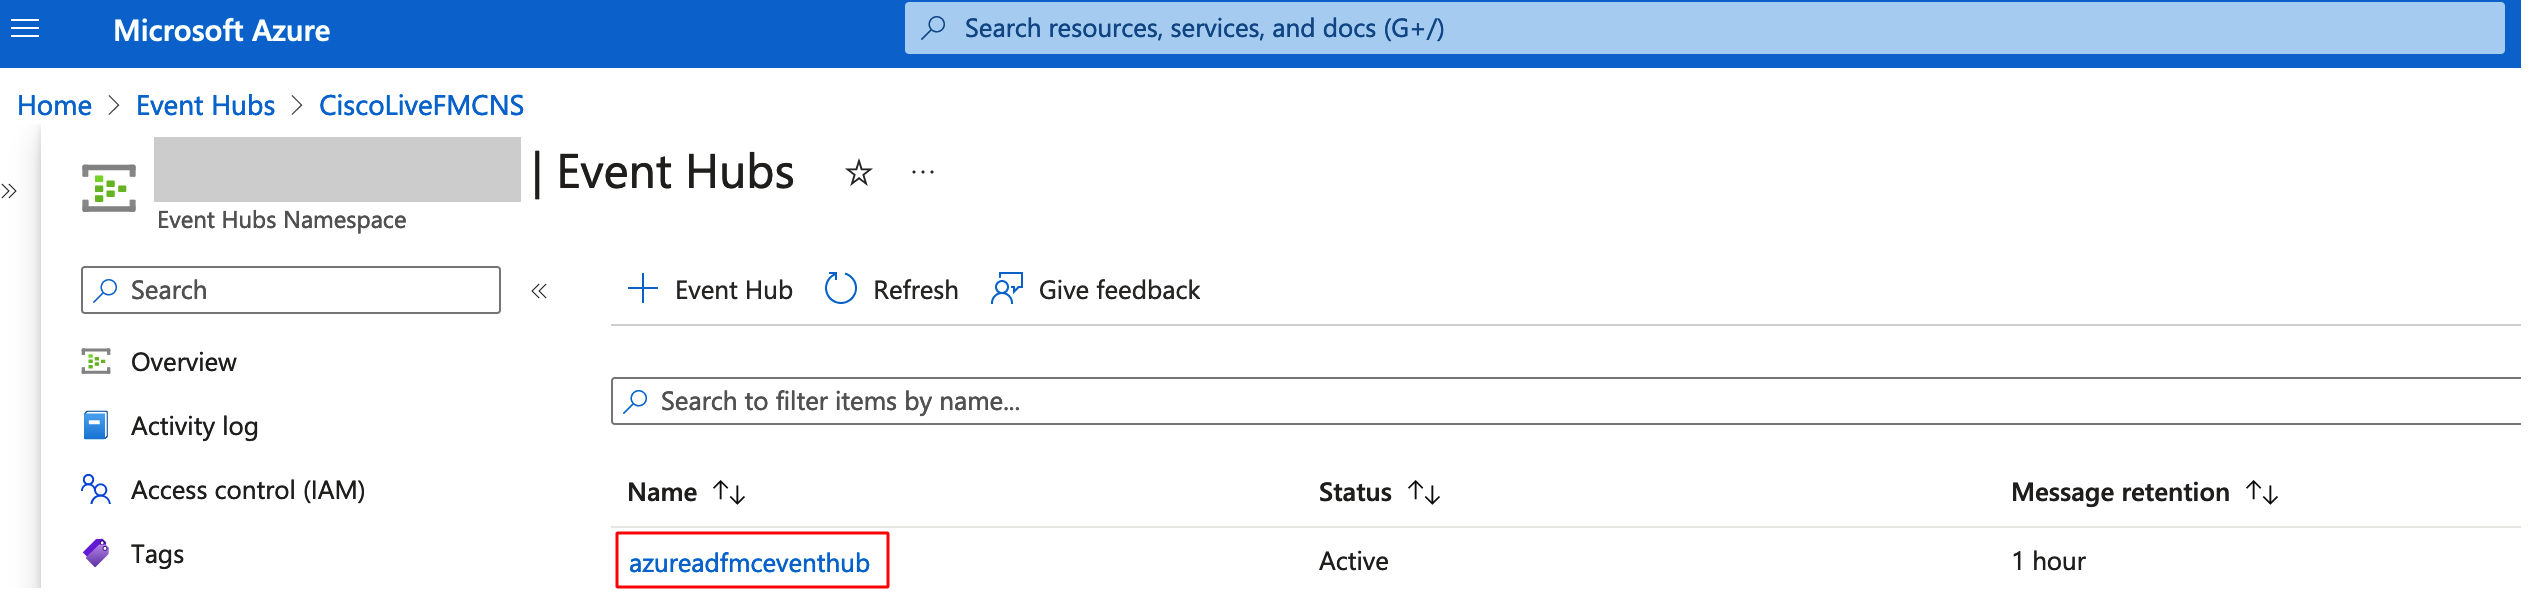
Step 14: Navigate to Event Hubs in the left menu and click on + Event Hub, and create a new Event Hub. Enter the details for the new event hub as needed.
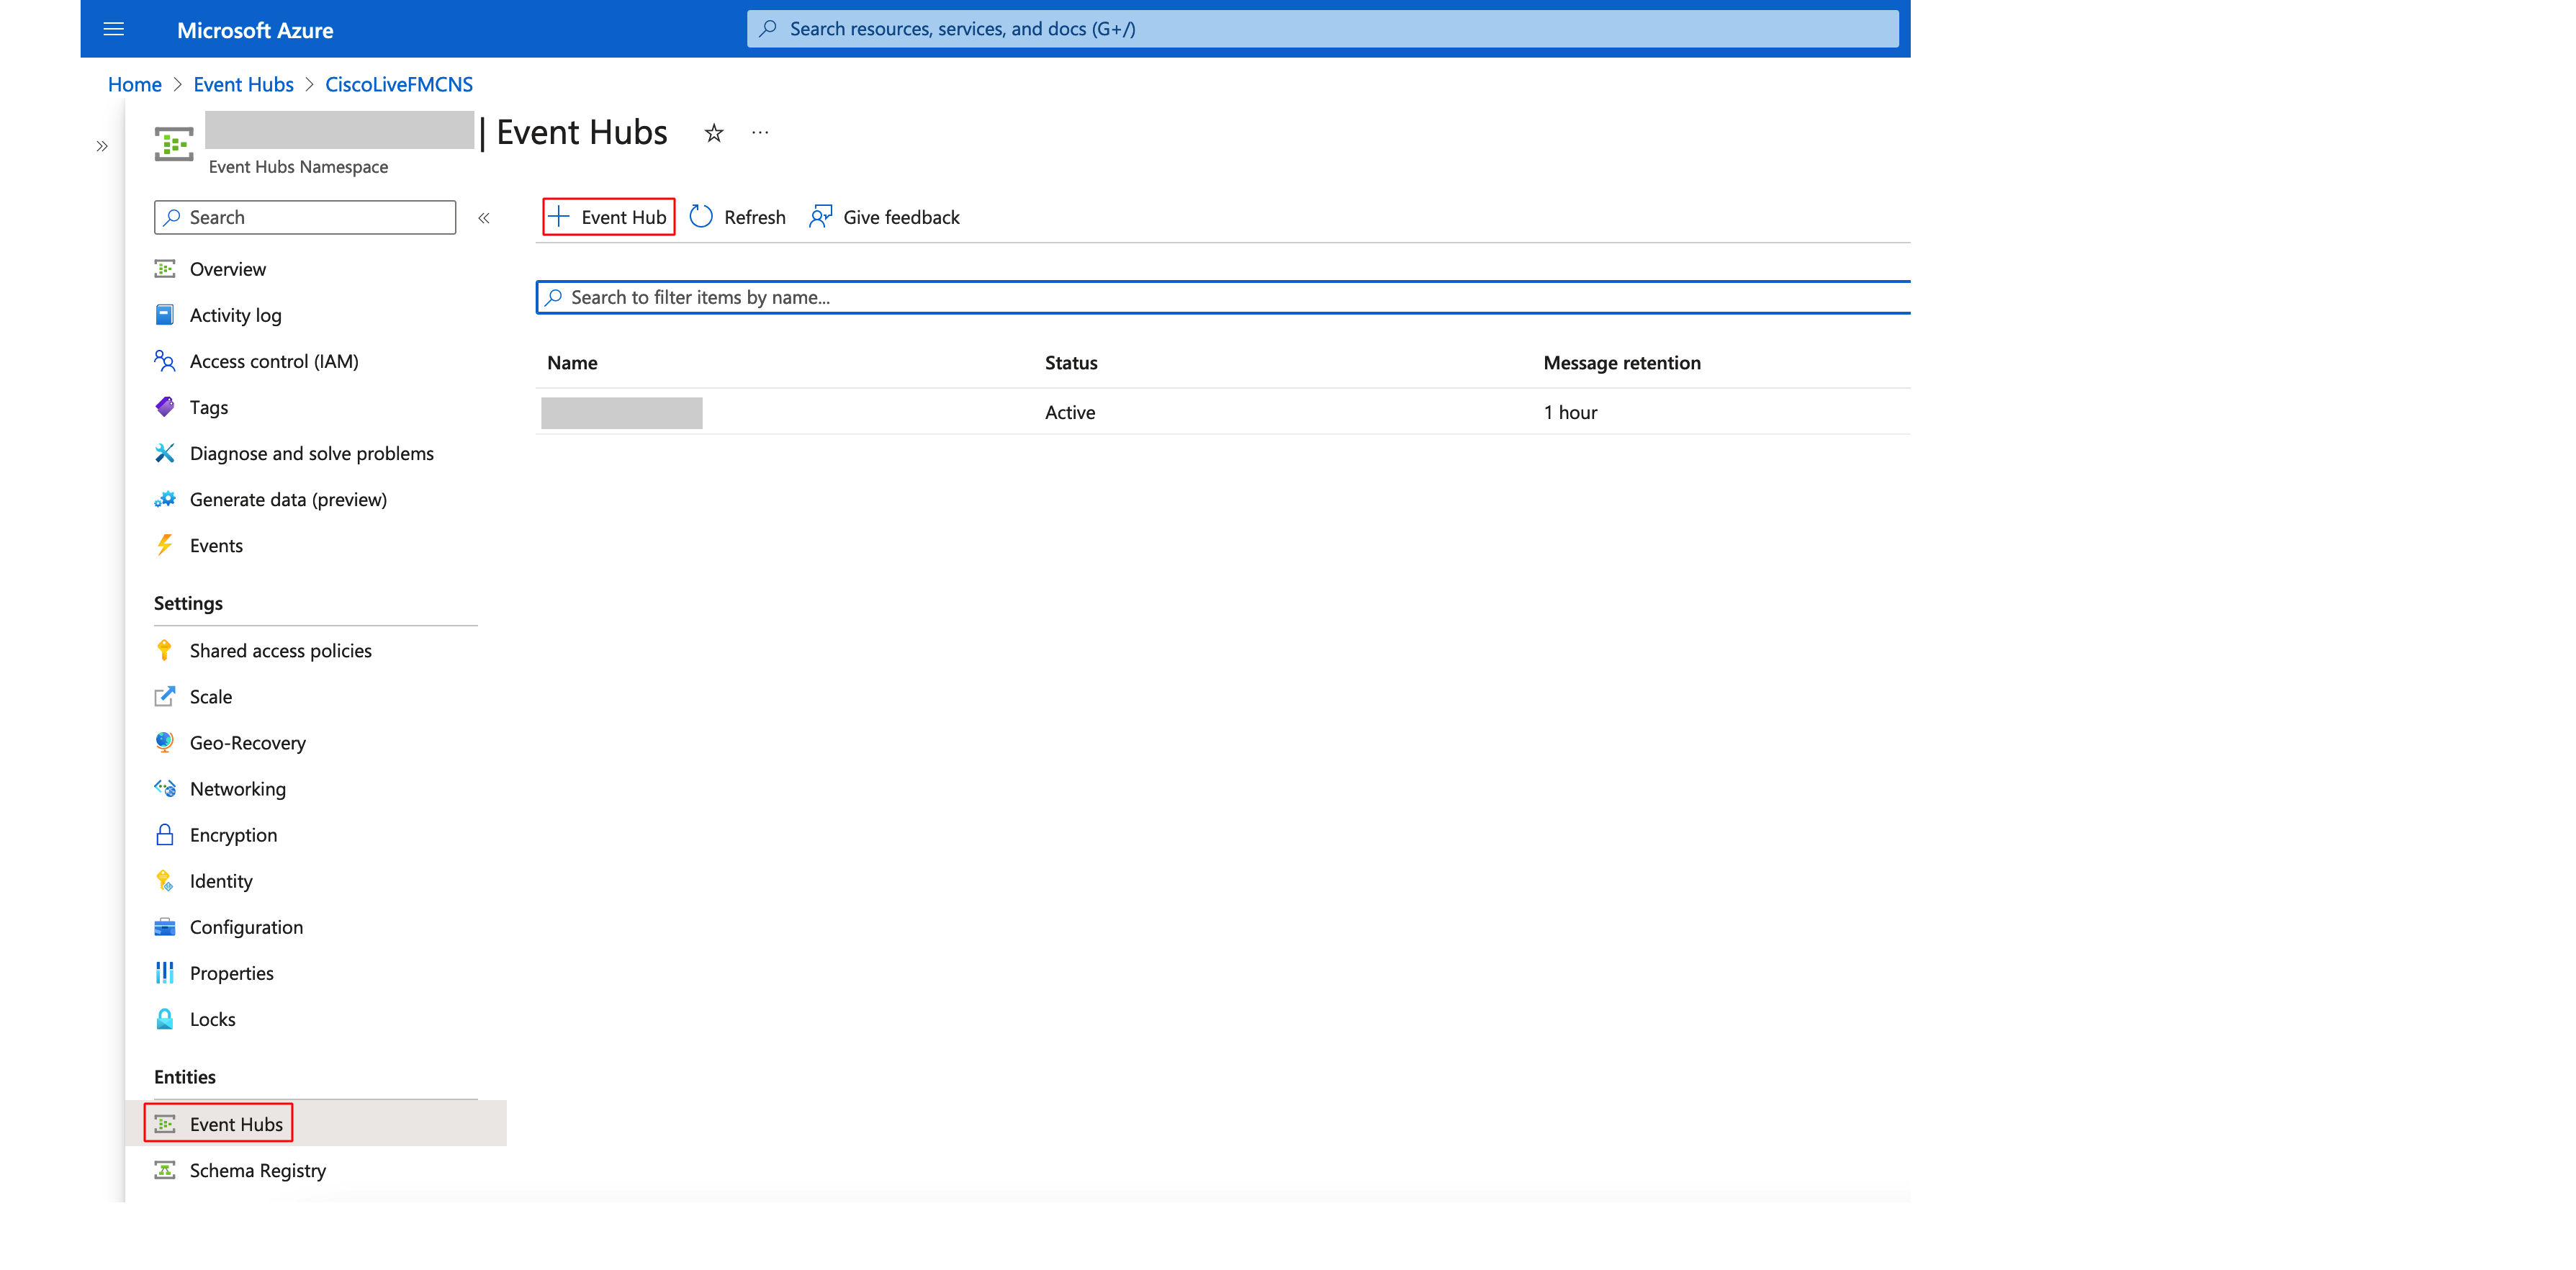
Step 15: Copy the name of the newly created Event Hub. This will be used later for configuration on the FMC.
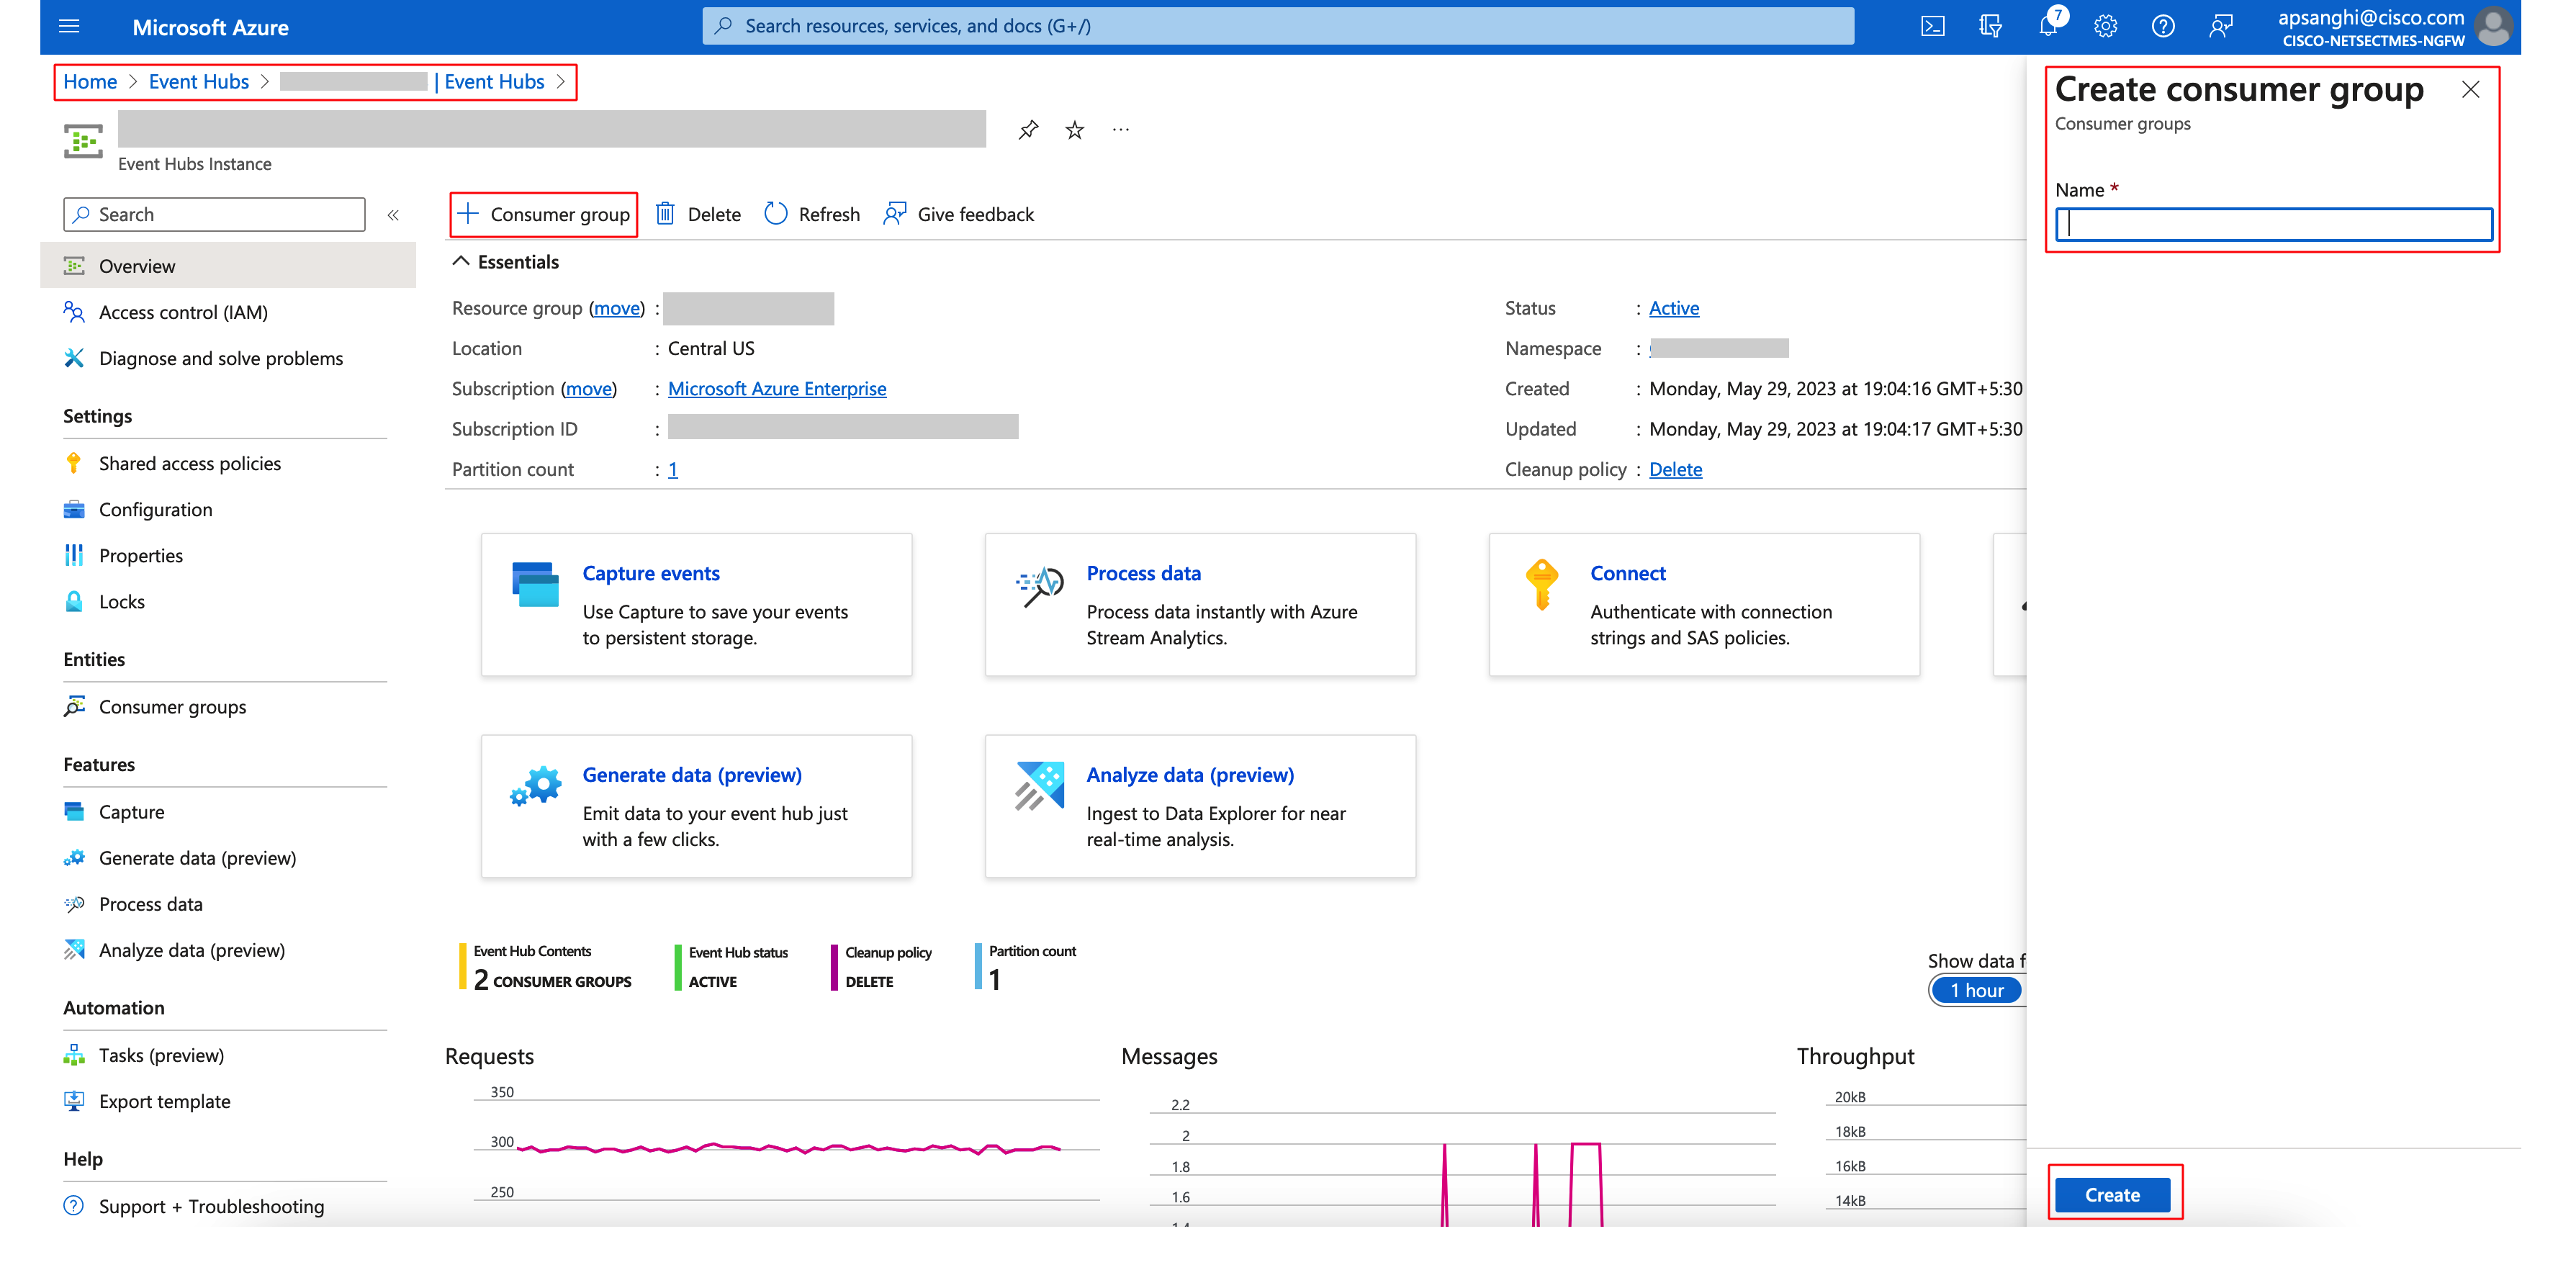
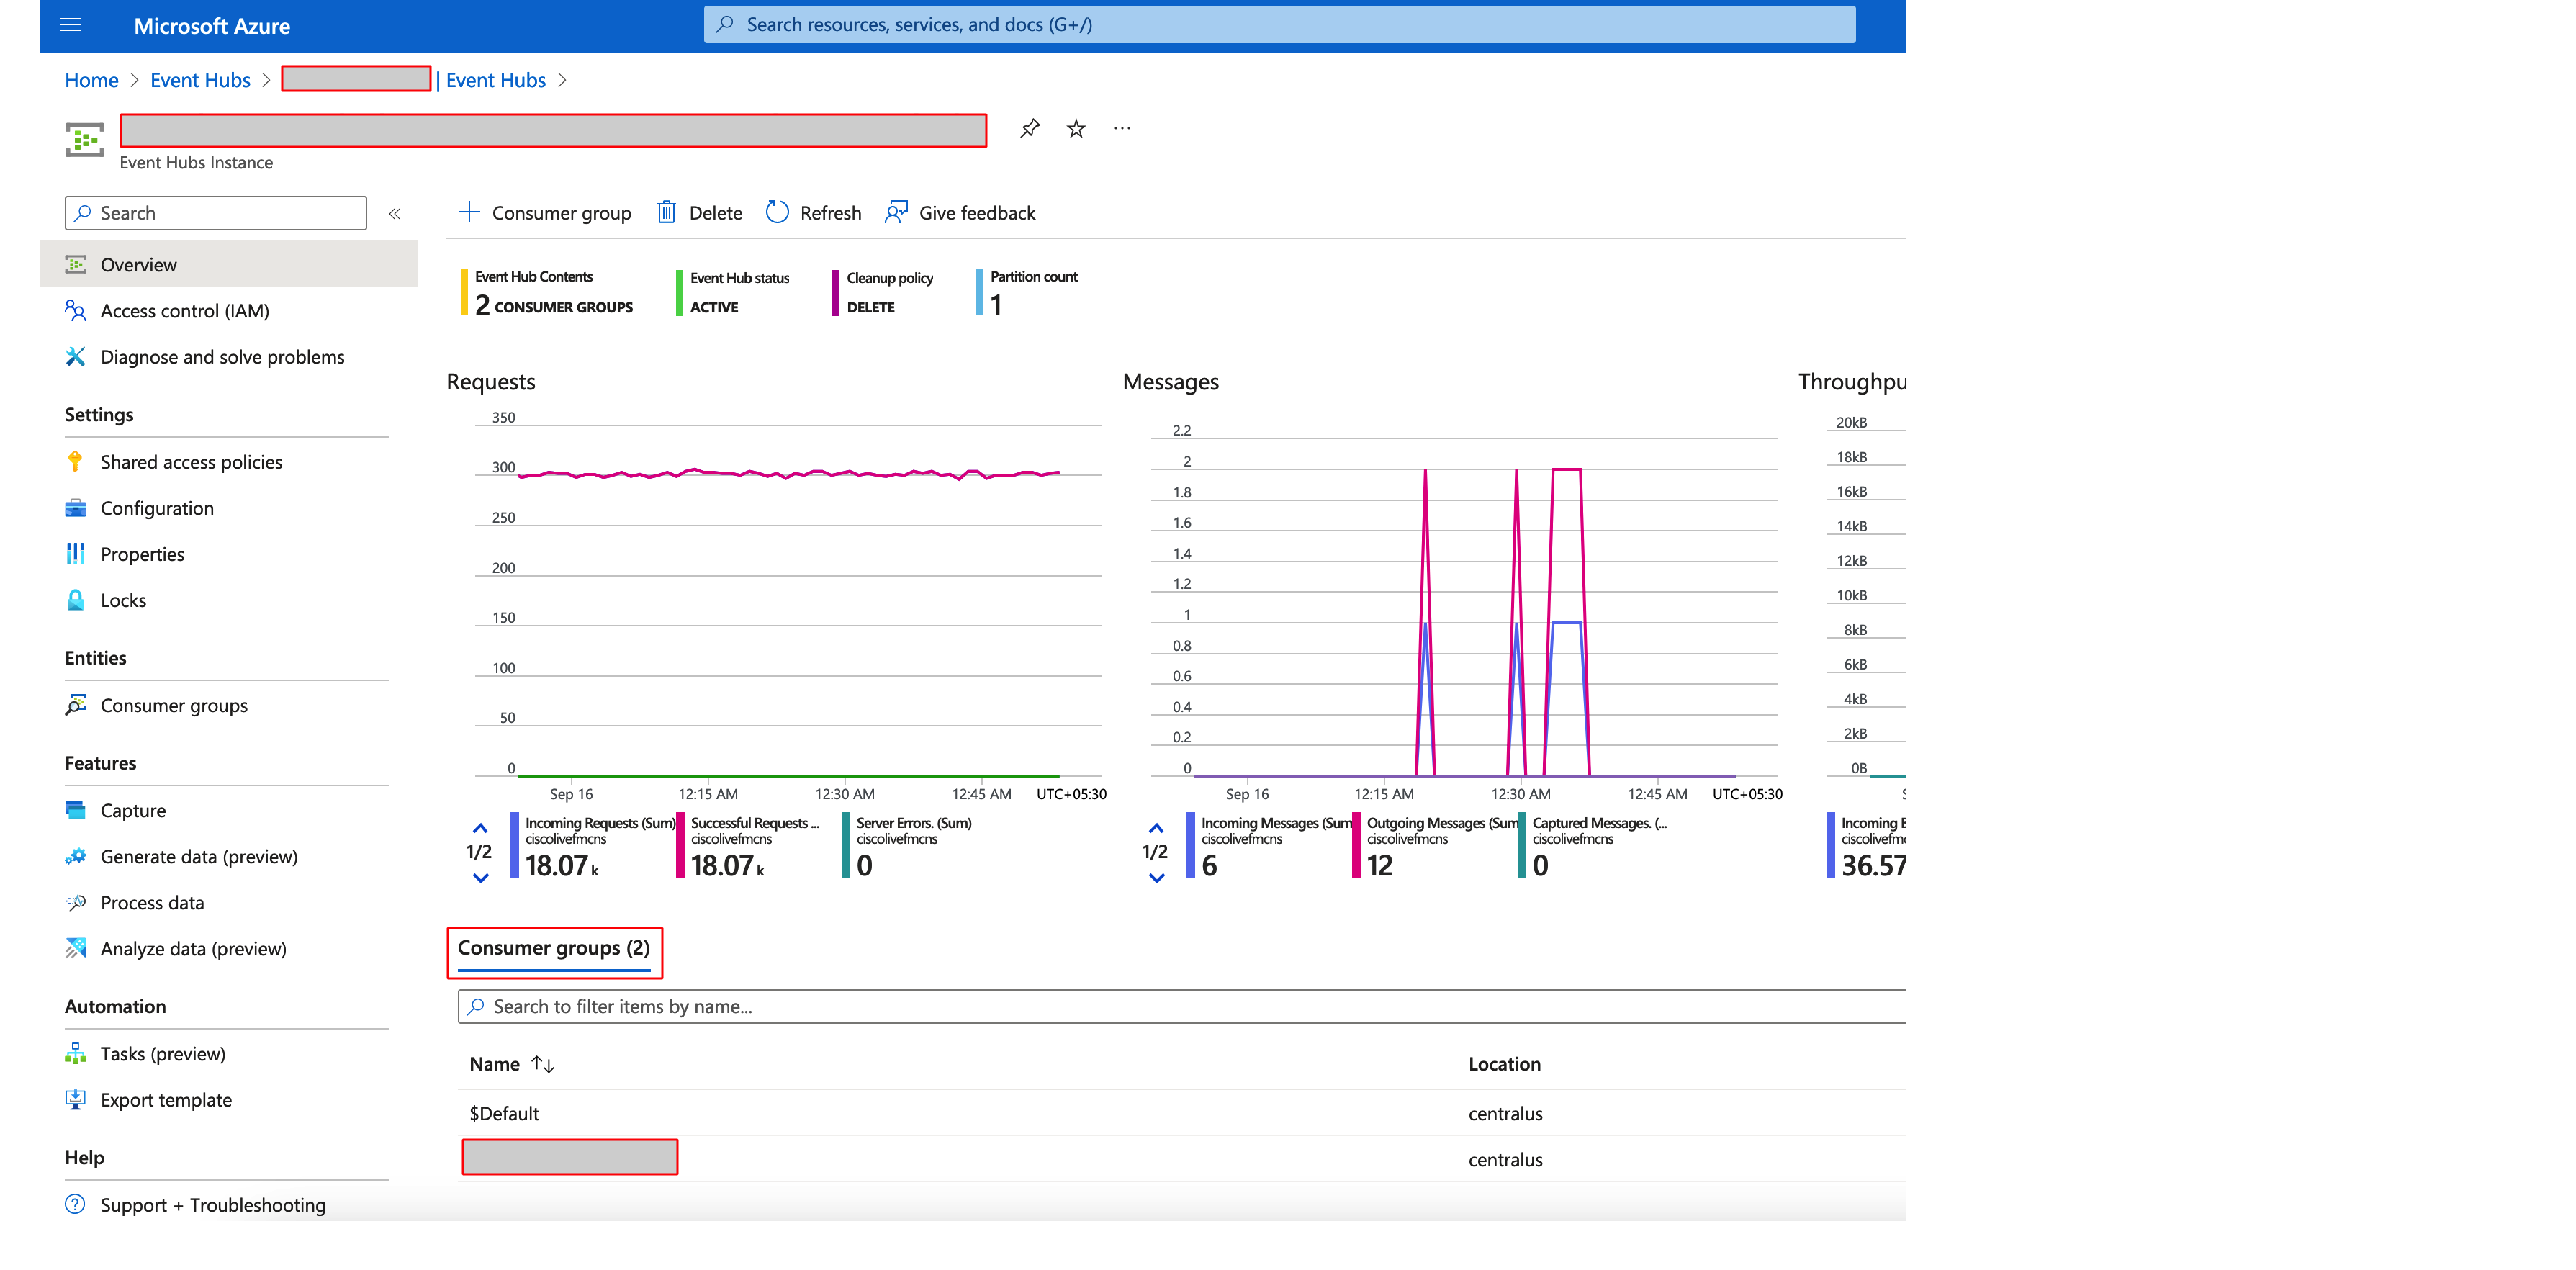
Step 16: Create a Consumer Group inside the new Event Hub. Select the Event Hub and Click on + Consumer Group and provide a name. Copy the name of the newly created consumer group. This will be used later for configuration on the FMC.
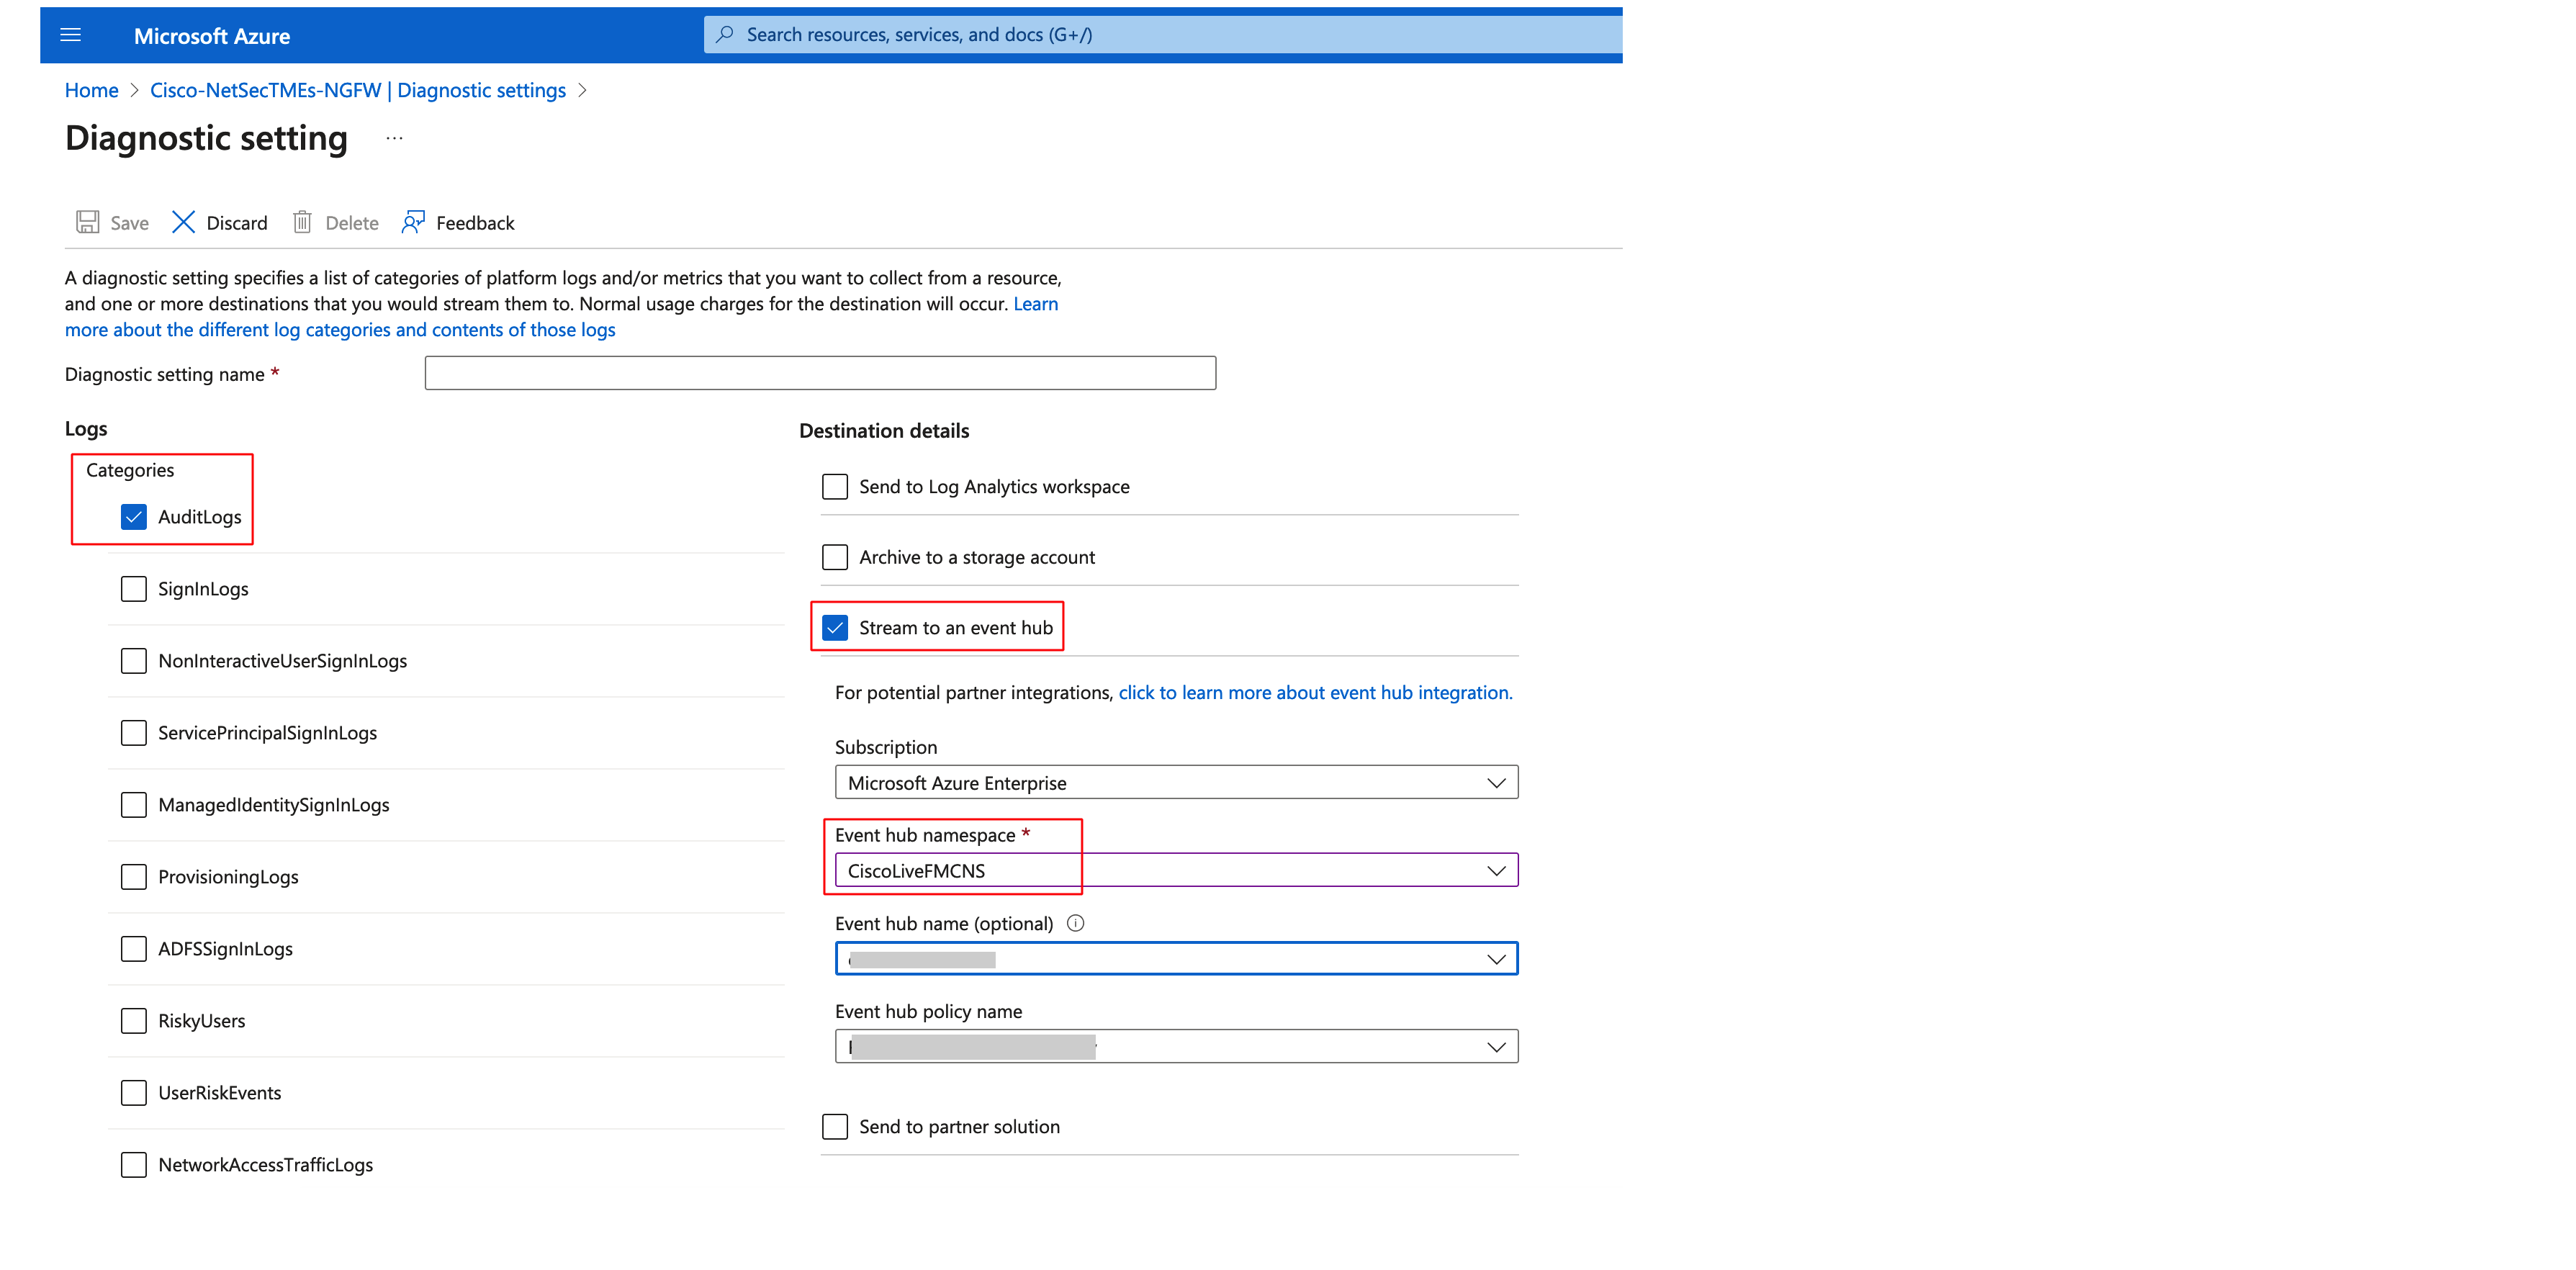
Step 17: Stream Azure AD audit logs to the Event Hub, so that FMC can receive changes to the group membership. Navigate to Azure AD > Diagnostic Setting and click on + Add diagnostic setting.
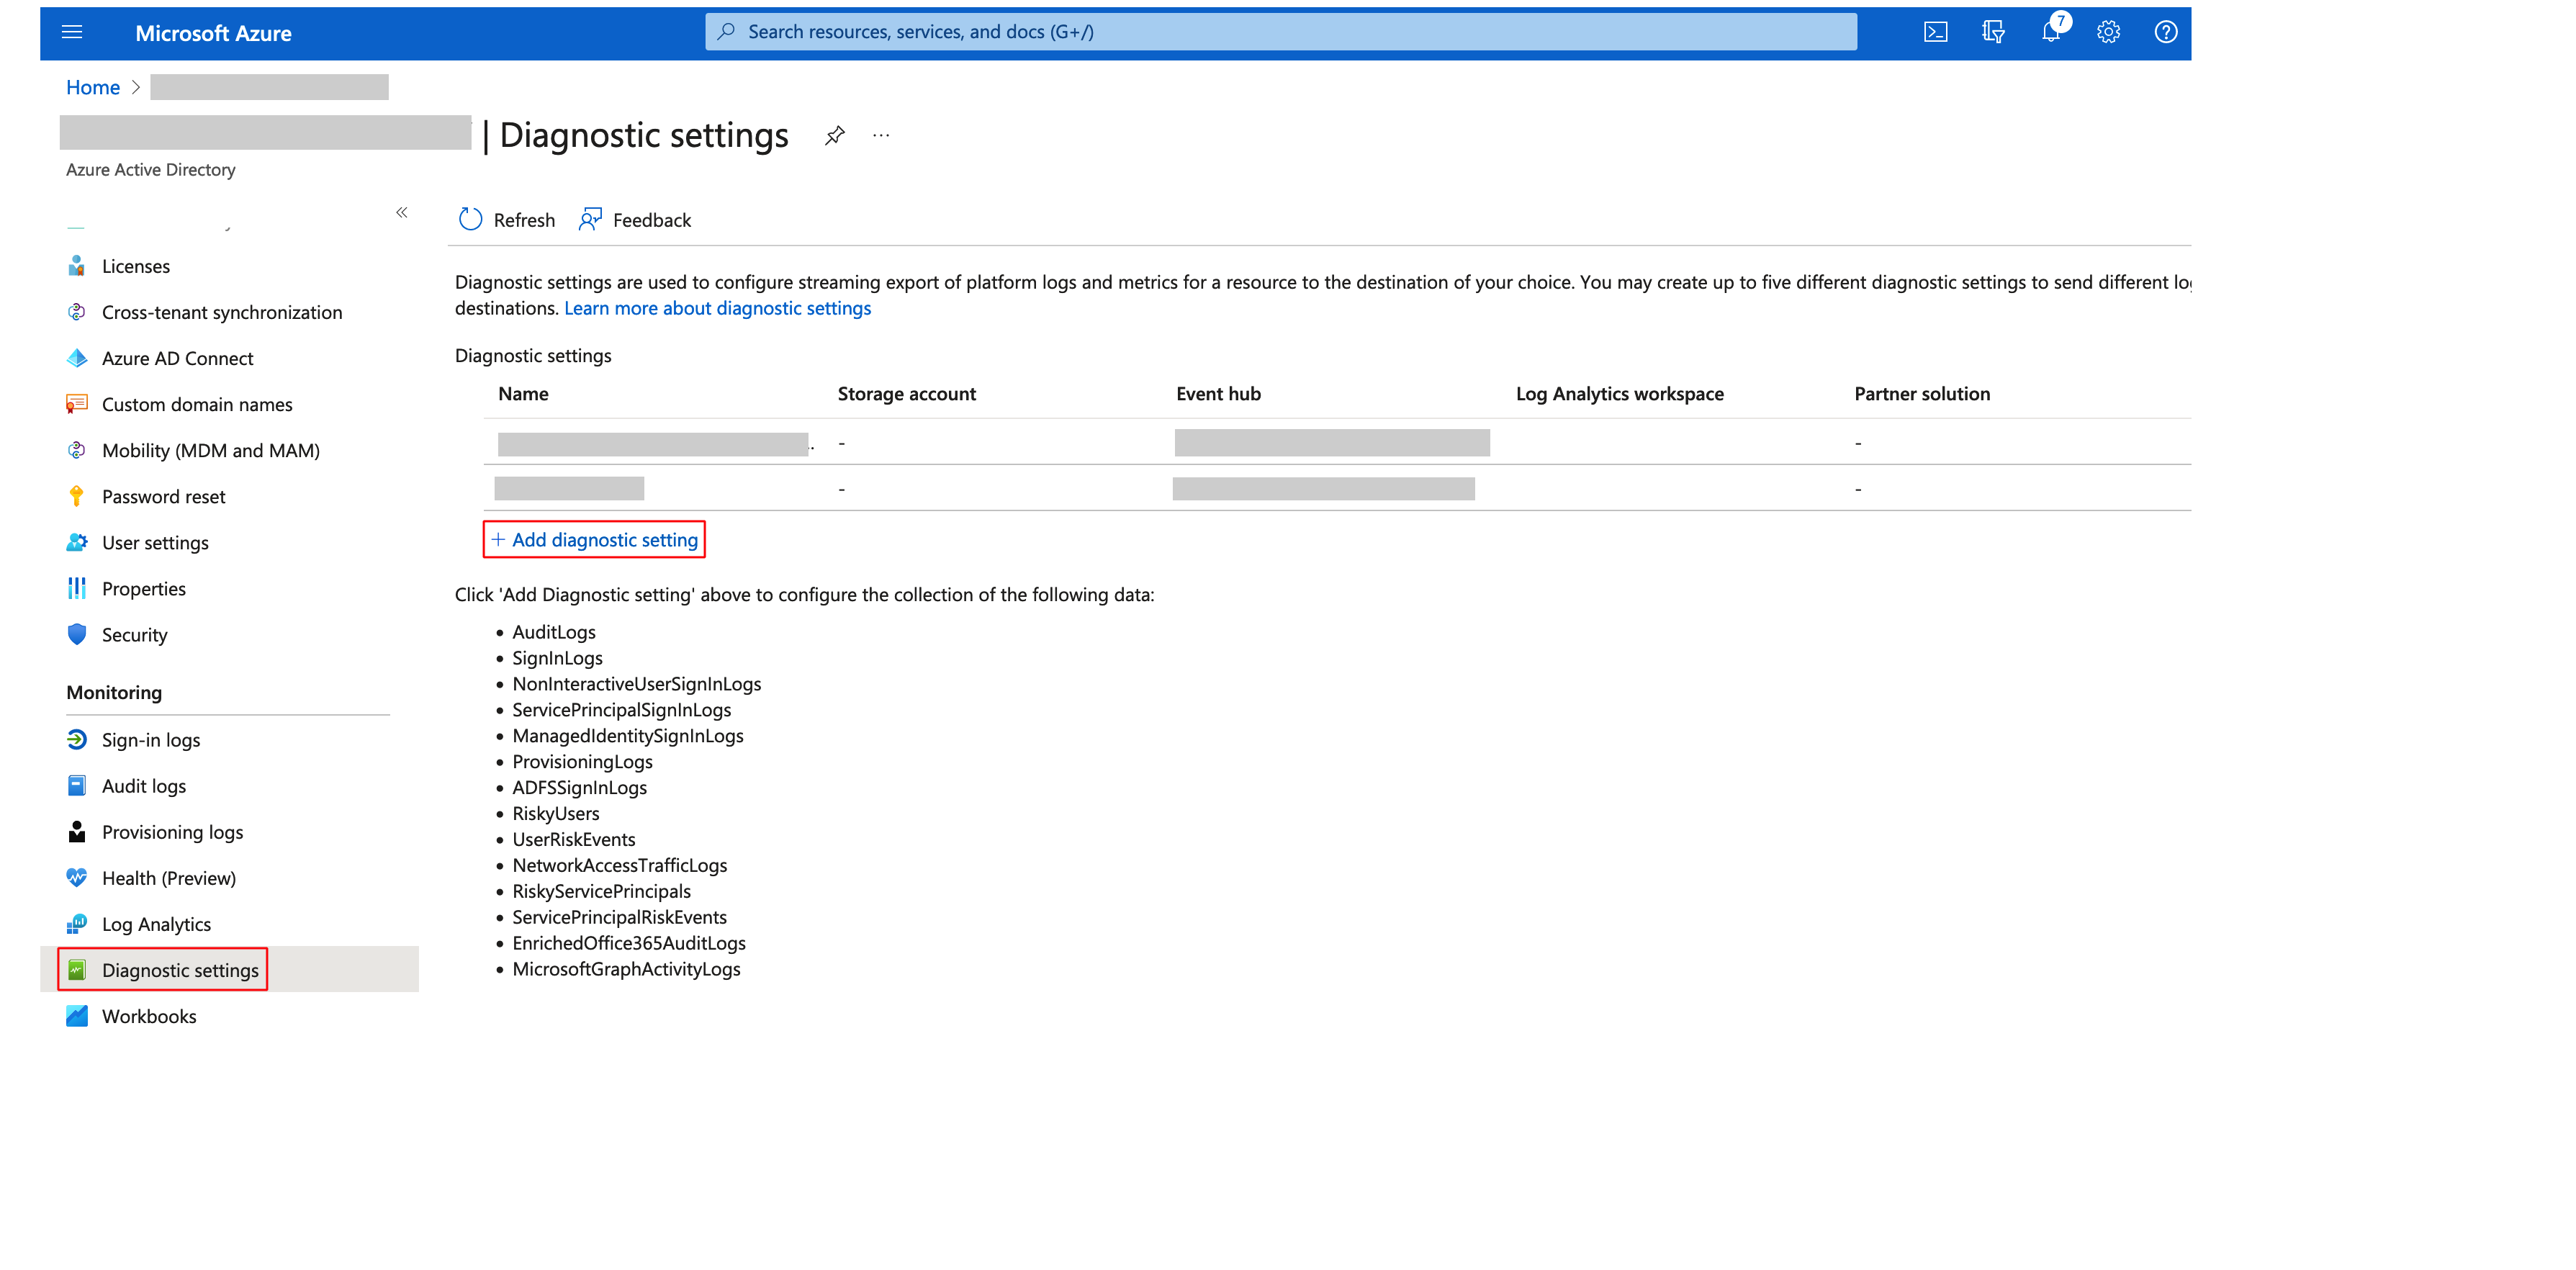
Step 18: Select the Log category as AuditLogs, the Destination details as Stream to an event hub and select the newly created Event hub.
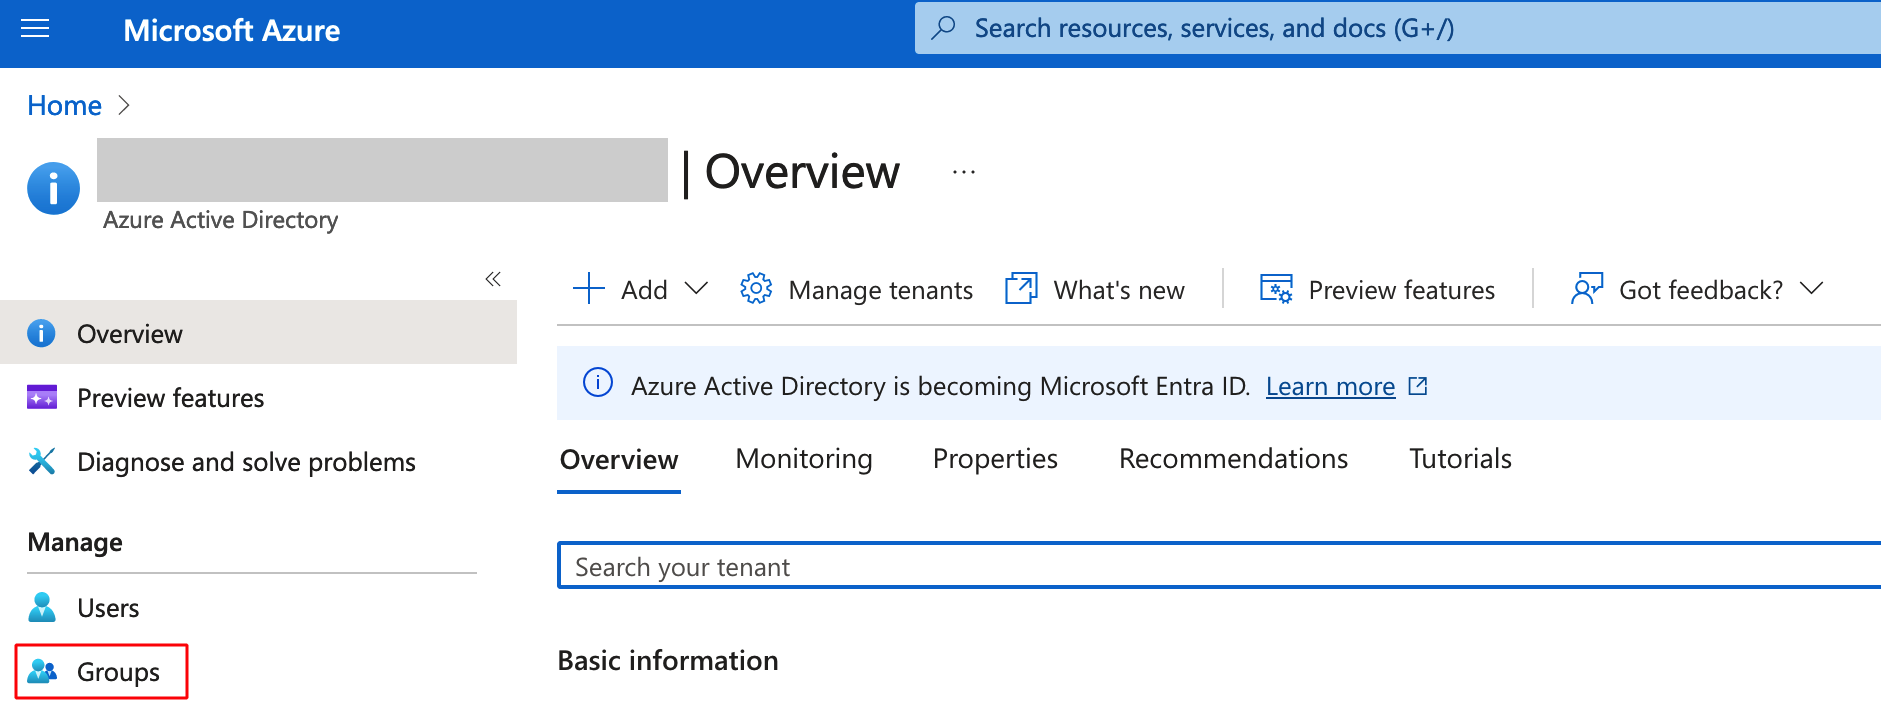
Step 19: Navigate to Home> Azure AD and then click on Groups in the left menu bar to add new user groups. These group names will be used in the Access Control Policies on the FMC.
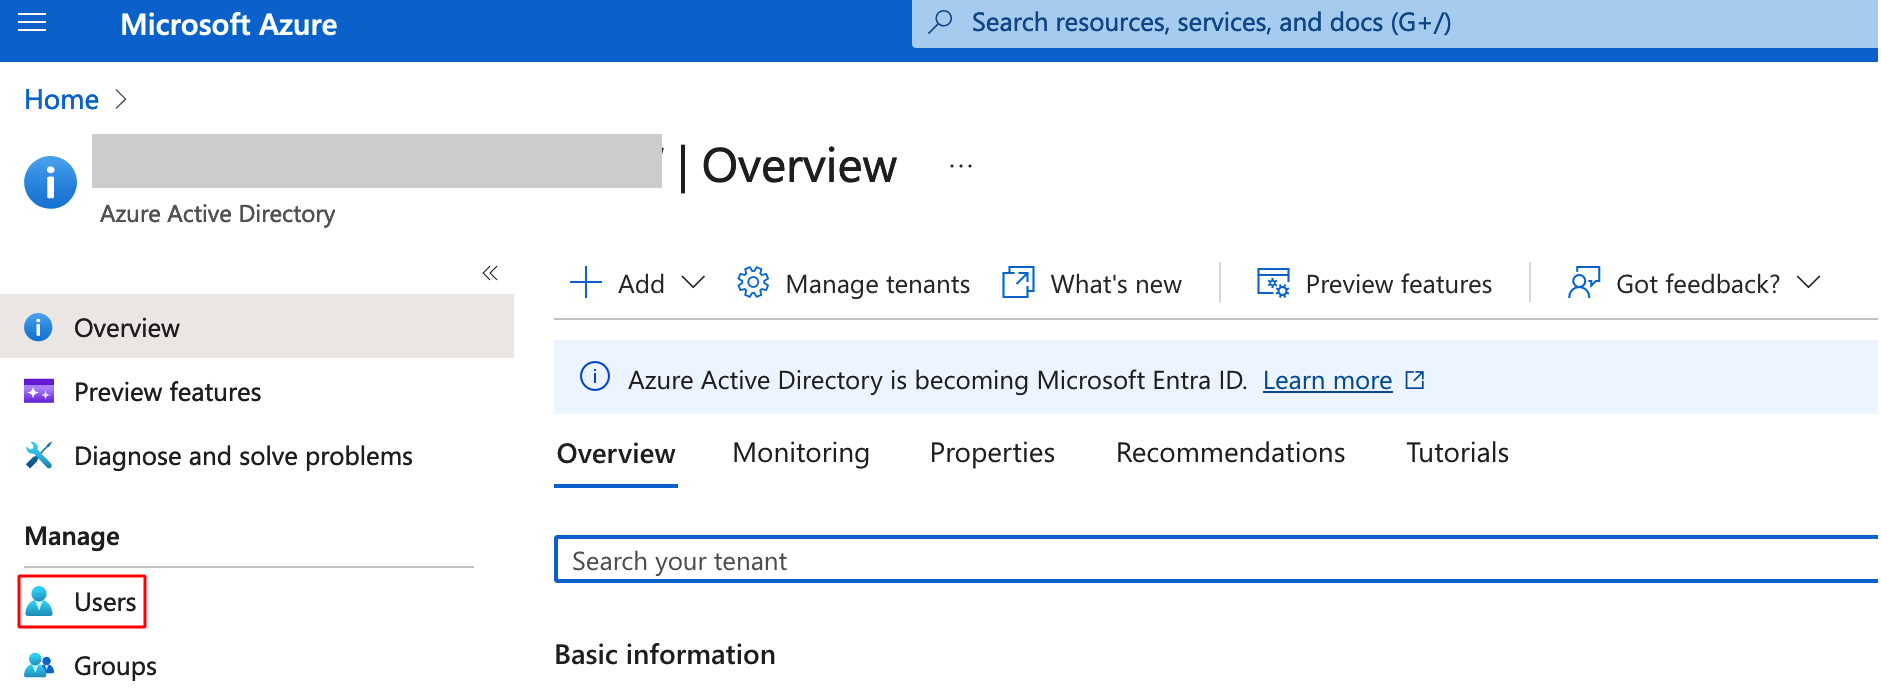
Step 20: Navigate to Home> Azure AD and then click on Users in the left menu bar to add new users, and assign them to the groups as needed.
Summary of Values Needed from Azure AD
- Client ID (Step 3)
- Tenant ID (Step 3)
- Client Secret (Step 5)
- Event Hubs Host Name (Step 11)
- Event Hub Connection String (Step 13)
- Event Hub Name (Step 15)
- Consumer Group Name (Step 16)
Configuring ISE
Step 1: Azure AD needs to be configured on ISE for (ROPC or EAP TLS) authentication against Azure AD users.
-
For ROPC, refer to the official ISE documentation for more information https://www.cisco.com/c/en/us/support/docs/security/identity-services-engine/216182-configure-ise-3-0-rest-id-with-azure-act.html
-
For EAP TLS, refer to the official ISE documentation for more information https://www.cisco.com/c/en/us/support/docs/security/identity-services-engine/218197-configure-ise-3-2-eap-tls-with-azure-act.html
Step 2: ISE and FMC need to be integrated using pxGrid for ISE to send user sessions to FMC
- Refer to the following document for information on how to configure ISE and FMC for pxGrid integration https://www.cisco.com/c/en/us/support/docs/security/identity-services-engine-24/214481-configure-ise-2-4-and-fmc-6-2-3-pxgrid-i.html
Step 3: Configure the other settings on ISE like identity source sequence, Authorization policies, Policy sets etc.
Configuring FMC
Configuring Azure AD Realm
Step 1: Navigate to Integration > Other Integrations > Realms > Add Realm and Select Azure AD

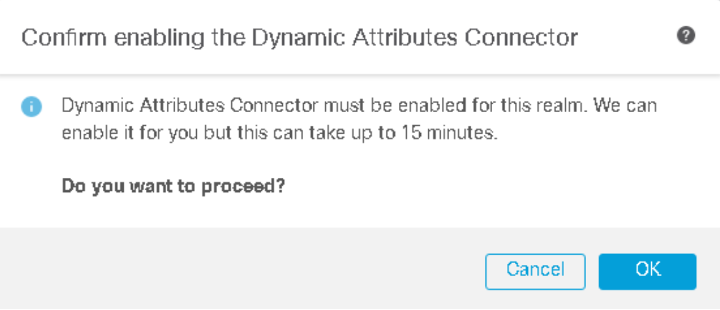
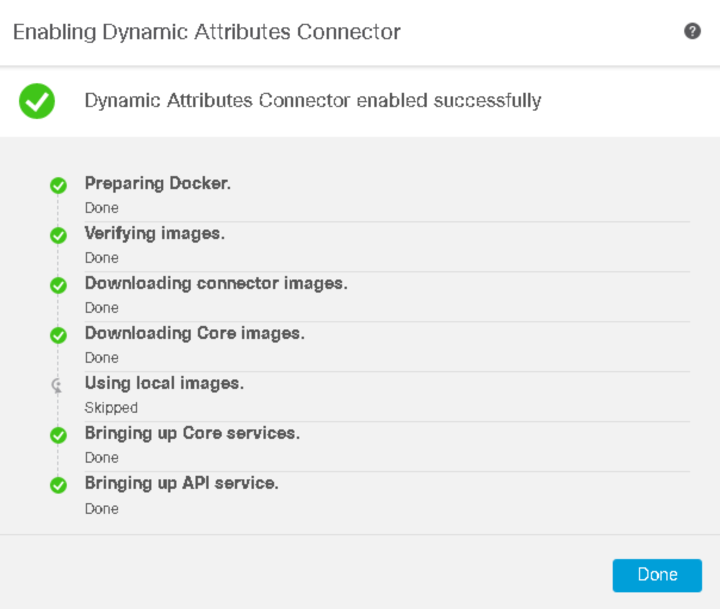
Note
When you configure the Azure AD realm for the first time, the Dynamic Attributes Connector is enabled. FMC leverages CSDAC docker infrastructure to process Azure AD Sessions from ISE.
Step 2: Enter the Azure client and hub information copied earlier while configuring the Azure AD and click on Test Connection to verify that the connection is successful.

Step 3: After saving the configuration, go to the User Session Timeout tab to change the timeout for the user sessions.
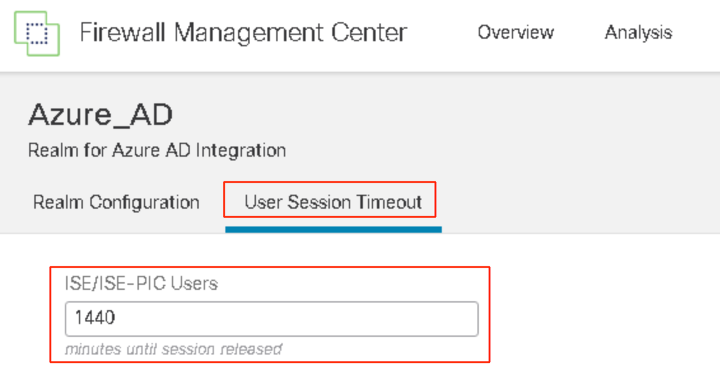
Note
1440 minutes is the default session timeout.
Configuring ISE as the identity source
Step 1: Navigate to Integration > Other Integrations > Identity Sources and Select Identity Services Engine.
Step 2: Provide the ISE details like IP addresses and certificates. Refer to the following document for information on how to configure ISE and FMC for pxGrid integration https://www.cisco.com/c/en/us/support/docs/security/identity-services-engine-24/214481-configure-ise-2-4-and-fmc-6-2-3-pxgrid-i.html
Configuring Access Control Policies
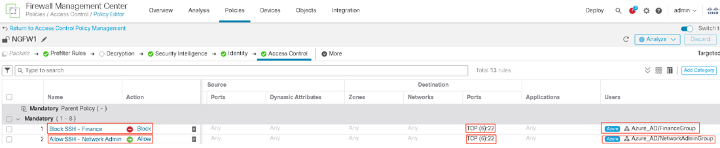
- Configure the access control rules to allow/block traffic as needed. In this example, we will block SSH access for users in the Finance Group and allow SSH access to users in the Network Admin Group.
Note
- Azure AD integration provides the users to group mappings information that can be used in Access Control Policies. FTD will not authenticate the users from Azure AD. For authenticating the users from Azure AD, FTD needs to use ISE as the Radius server and send the authentication request to ISE. ISE can then authenticate the users from Azure AD.
- There is no identity policy for Azure AD realm as Snort will look at all Azure identities for a given flow. The Legacy Active Directory and LDAP realms still require identity policy for policy enforcement.
- Azure AD users and groups are retrieved live from Azure AD for policy enforcement, so Internet connectivity to Azure is important.
Note
- Configure RAVPN and NAT policies as needed.
- This setup will also work for internal users connecting to the network using 802.1x and authenticating with ISE. ISE will send the username to IP address mapping to FMC using pxGrid, and FMC will retrieve the username to group mapping from Azure AD.
Verification
- We will first connect with a user in the network admin group using RAVPN. Then on the FMC go to Analysis > Active Sessions to see the user information. We will see the Realm as Azure_AD and the Discovery Application as Microsoft Azure.

- Next we will SSH to the router. On the FMC go to Analysis > Unified Events to check the connection event details. This connection will be allowed.

- Now we will connect with a user in the finance group using RAVPN. Then on the FMC go to Analysis > Active Sessions to see the user information. We will see the Realm as Azure_AD and the Discovery Application as Microsoft Azure.

- Next we will SSH to the router. On the FMC go to Analysis > Unified Events to check the connection event details. This connection will be blocked.

Limitations
- Azure AD integration is only supported for on-prem FMC in 7.4
- SSL, Qos, Correlation and Remediation policies for Azure AD users and groups is not supported in 7.4
- FTD should be using Snort 3 as the inspection engine.
- Azure Event Hub must be at least at the Standard tier, for FMC to get incremental user group updates.
- ISE should be on one of the following versions:
- 3.0p5+
- 3.1p2+
- 3.2+
Summary
With customers moving their active directory infrastructure to Azure AD, integration between FMC and Azure allows administrators to use the user or group information to control the traffic in their network, thus making their network more secure by restricting access as needed.
Updated almost 3 years ago