
HA and Cluster Upgrade Workflow
Cisco Secure Firewall HA and Cluster Upgrade Workflow
Introduction
Cisco Secure firewall introduces an improved upgrade workflow for clusters and high-availability devices. The upgrade wizard displays cluster and high availability units as groups, rather than as individual devices. You can specify the data unit upgrade order in a cluster, the control unit always gets upgraded last. This guide reviews the steps for upgrading an HA firewall pair using the new workflow.
The Secure Firewall Management Center (FMC) is at Release 7.2, and the devices are on Release 7.1 and will be upgraded to 7.1.0.1-28. However, the workflow and steps to upgrade any firewall device remain the same.
Configuration
Step 1: Login to Cisco Secure Firewall Management Center (FMC) and navigate to Devices > Device Management and click on the checkbox of HA pair. Click Select Action and click Upgrade Firepower Software
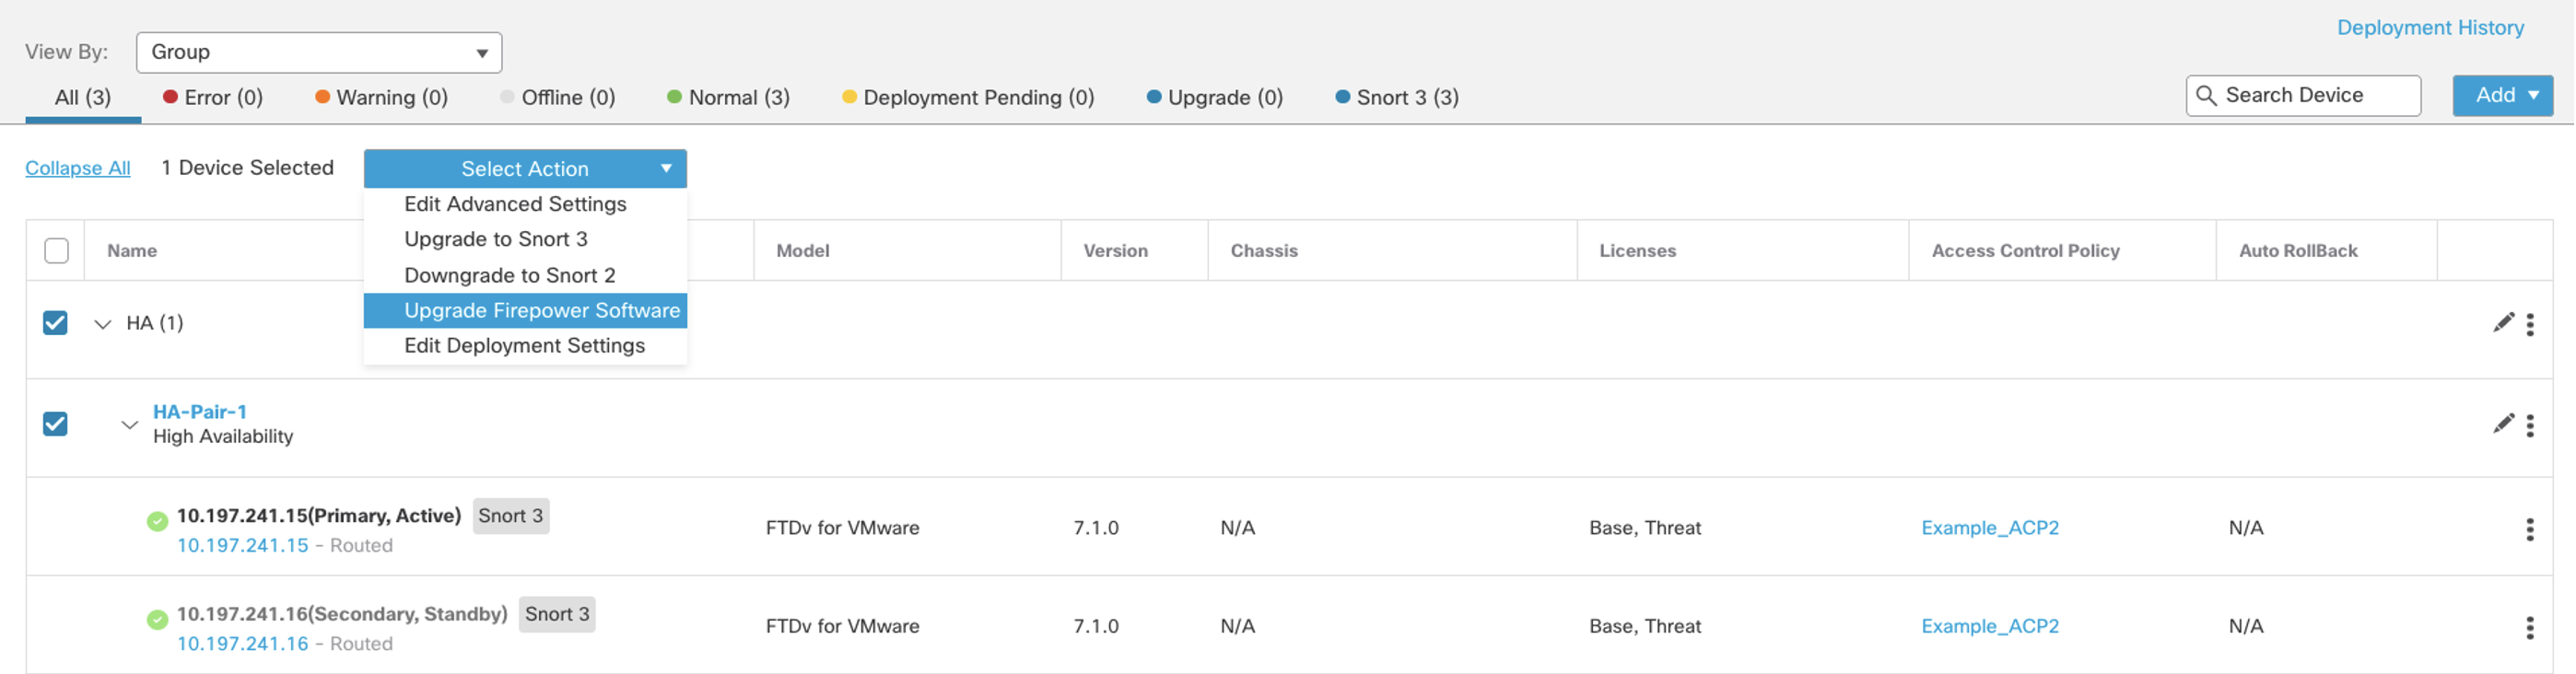
Figure 1: Device Management Page
️ Note
You may navigate by clicking Devices, and click Device Upgrade
Step 2: Click Select a version to select the desired version to upgrade.
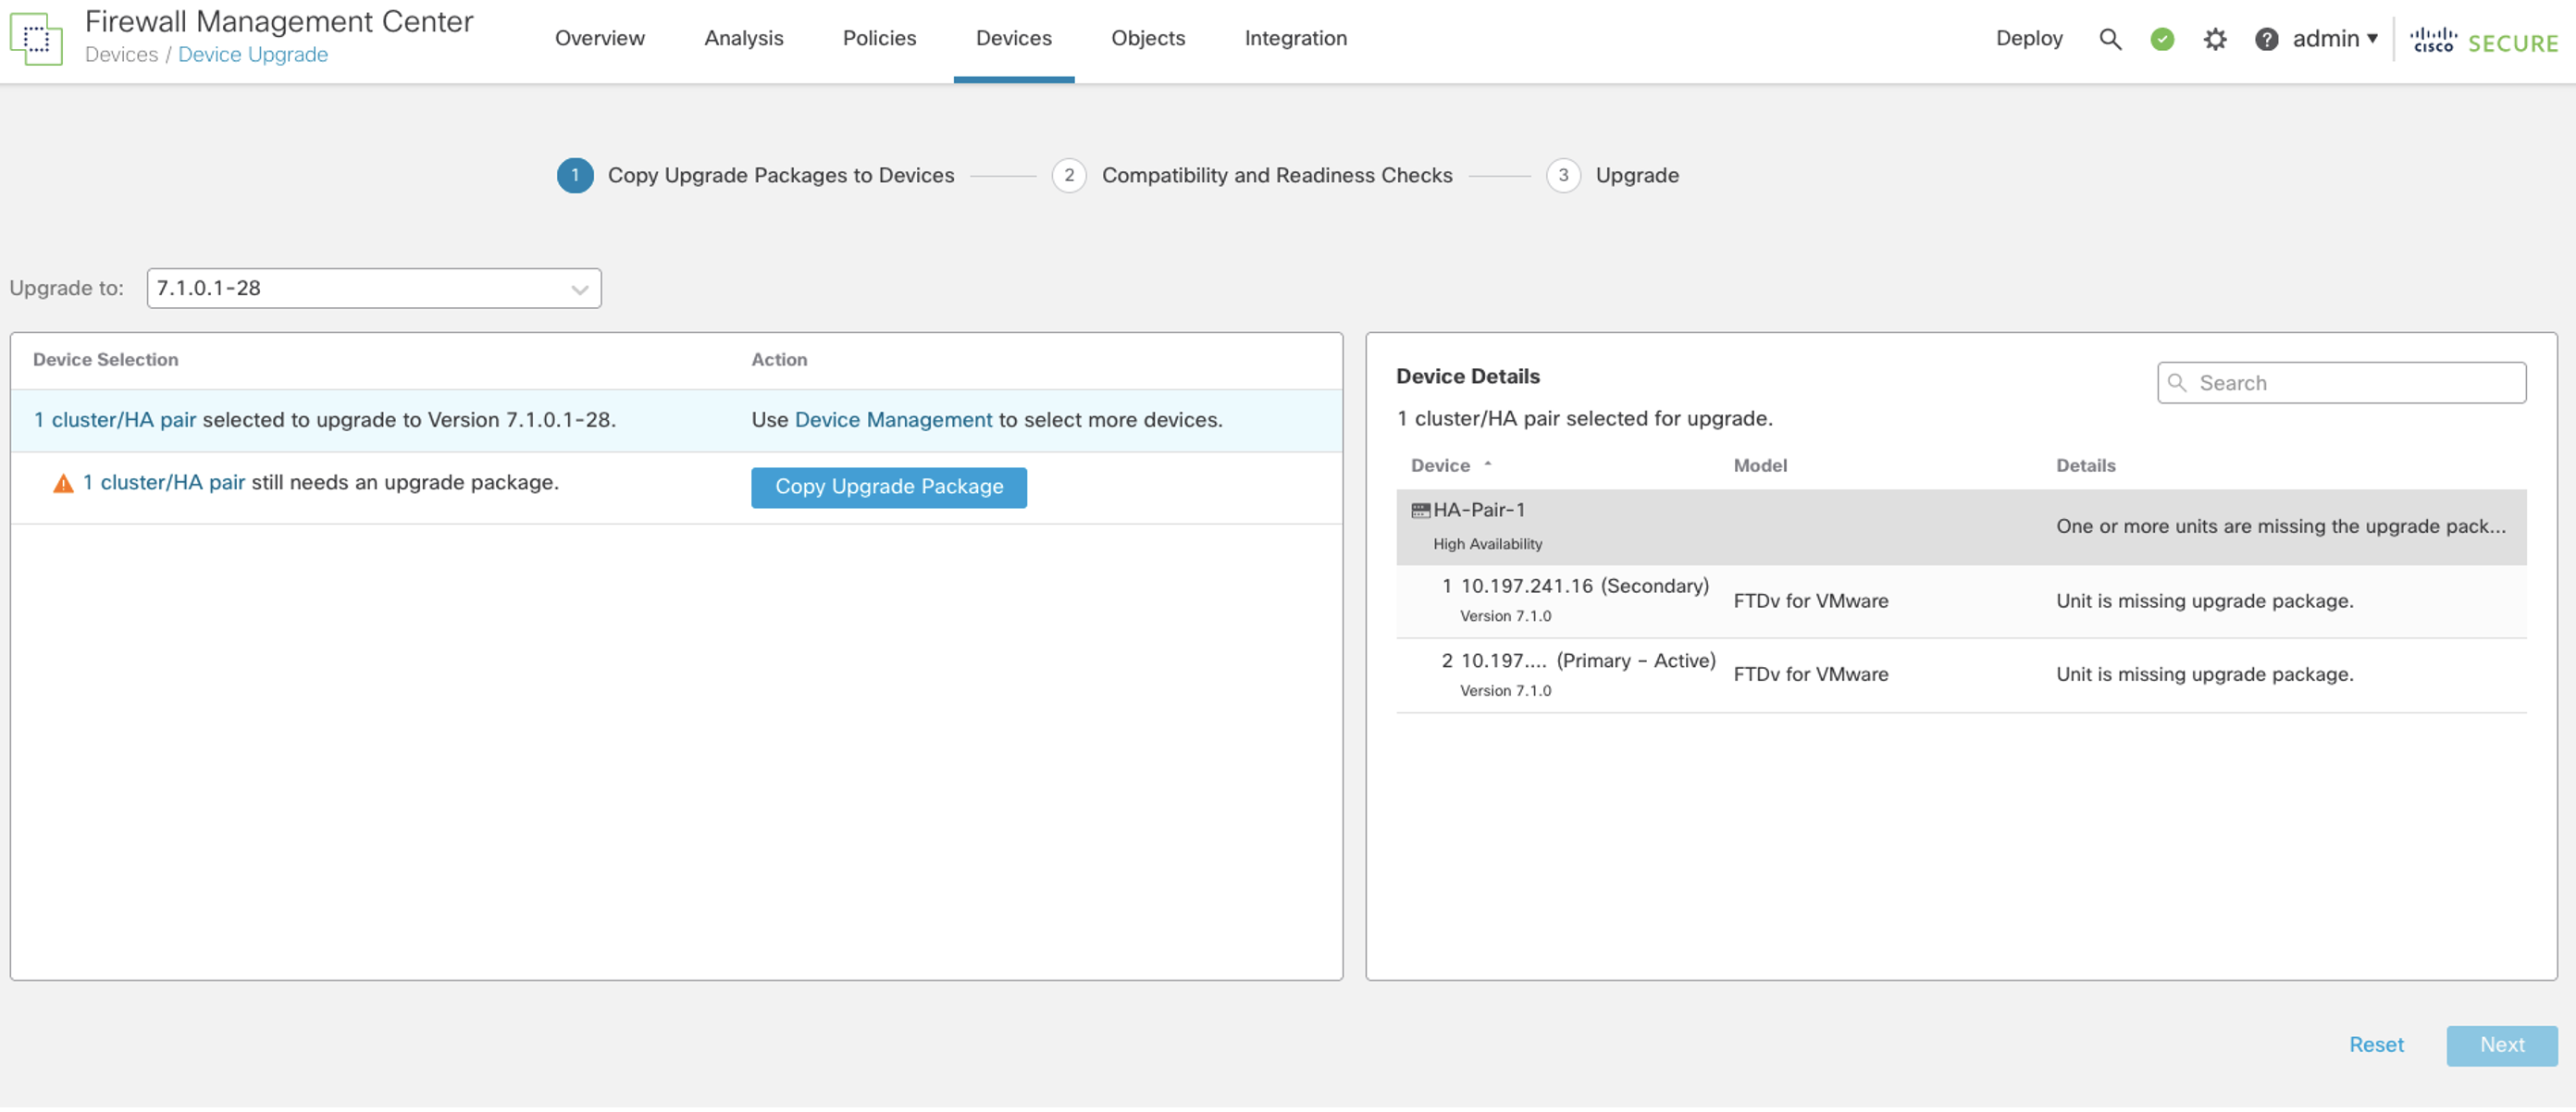
Figure 2: Copy Upgrade Packages to the device page
️ Note
If the upgrade package is not present you will need to upload the upgrade package by clicking System (gear icon on the upper right corner of FMC) and clicking Updates
Step 3: Click Copy Upgrade Package and click Continue
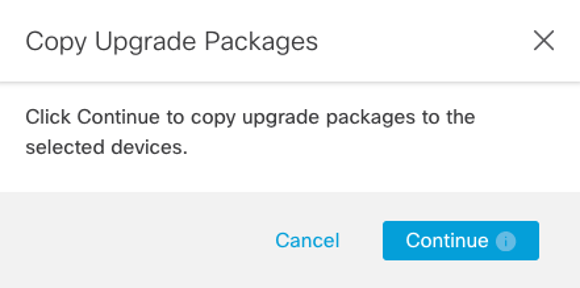
Figure 3: Copy Upgrade Packages
Step 4 (optional): You can monitor the file copy progress from Tasks
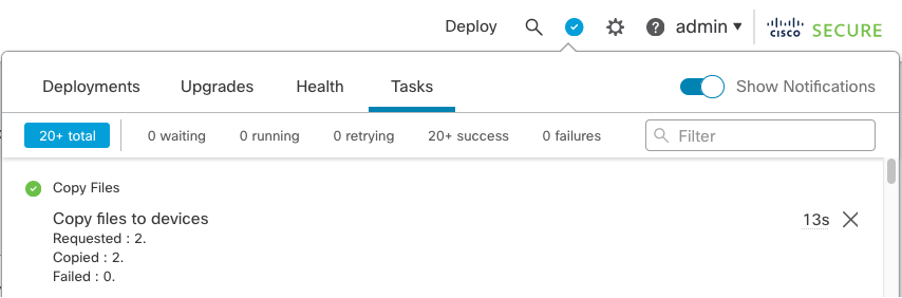
Figure 4: Monitoring upgrade copy progress
Step 5: Once the Warning sign changes to a Green tick, click Next
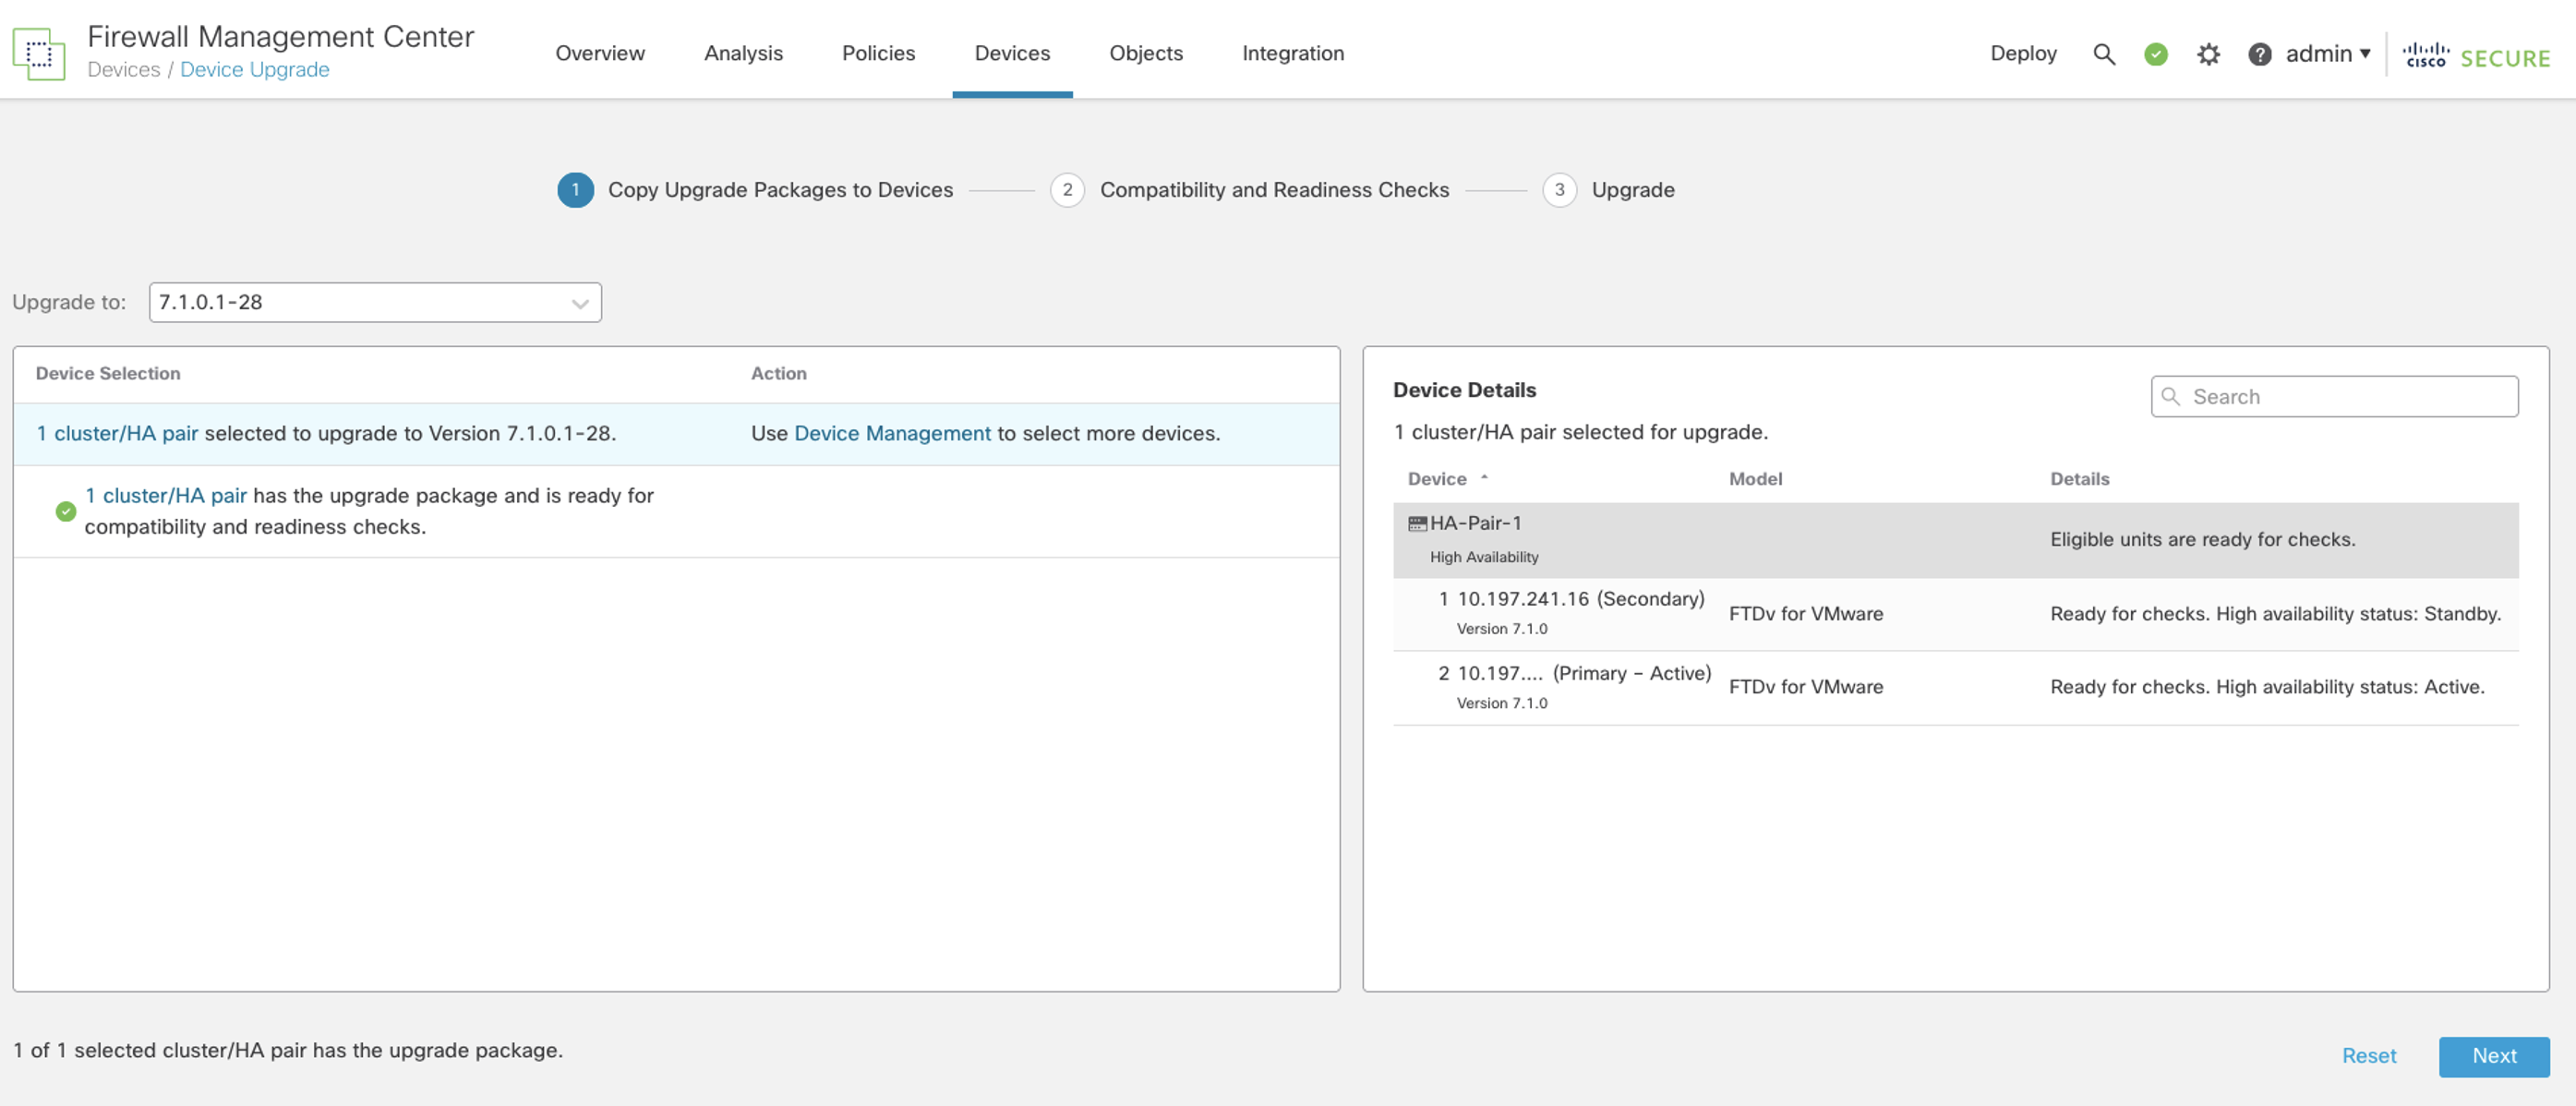
Figure 5: Update package uploaded successfully
Step 6: Click Run Readiness Check and click Continue
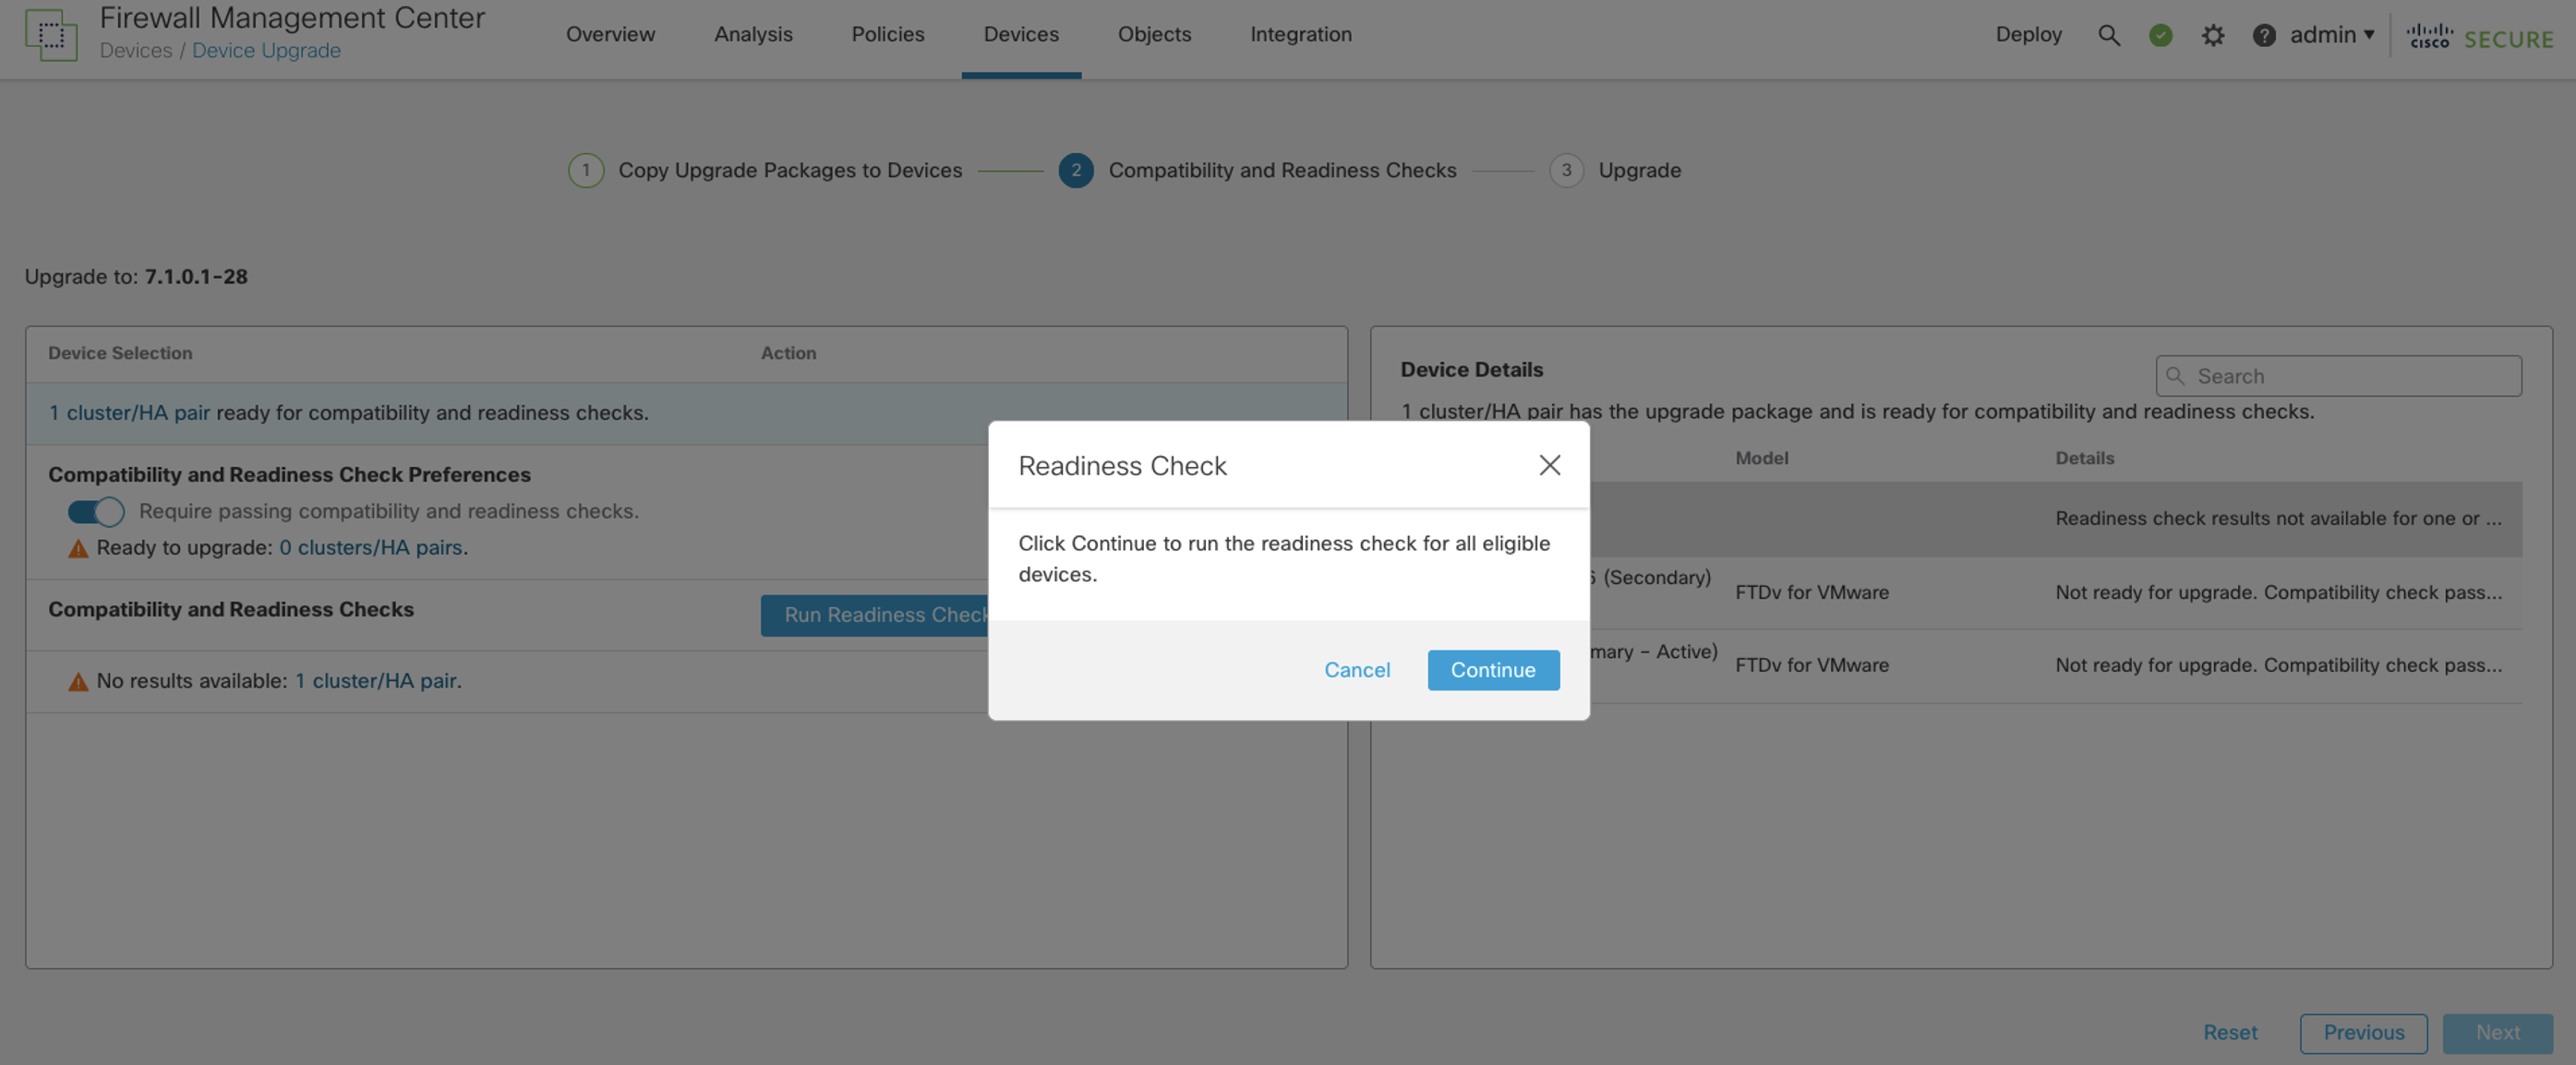
Figure 6: Run Readiness Check
Step 7 (optional): You can check the status of the Readiness Check by going to Tasks
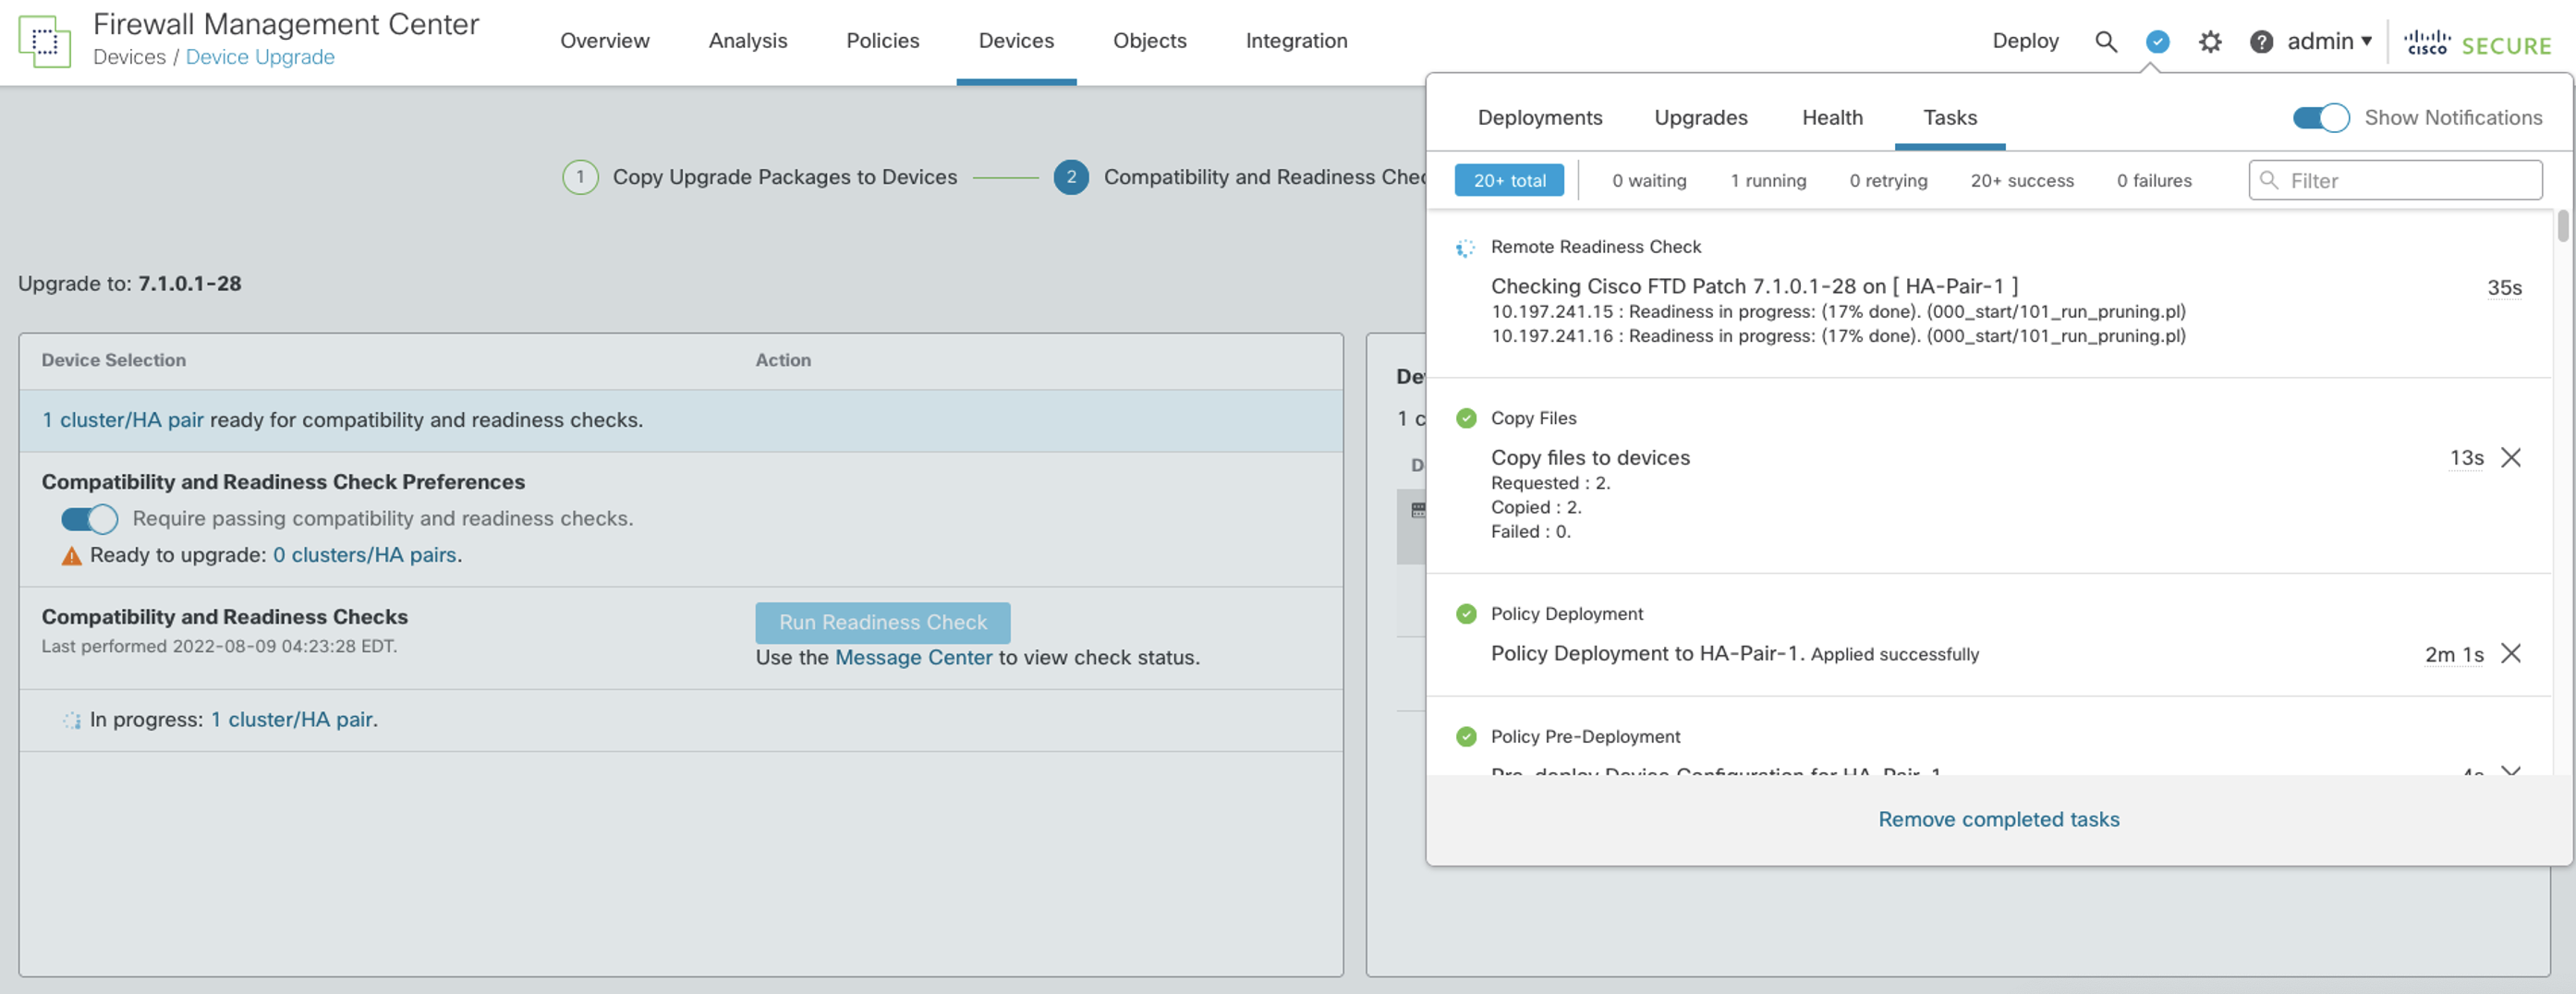
Figure 7: Monitoring Readiness Check via tasks
Step 8: Once the readiness check completes successfully. Select Next
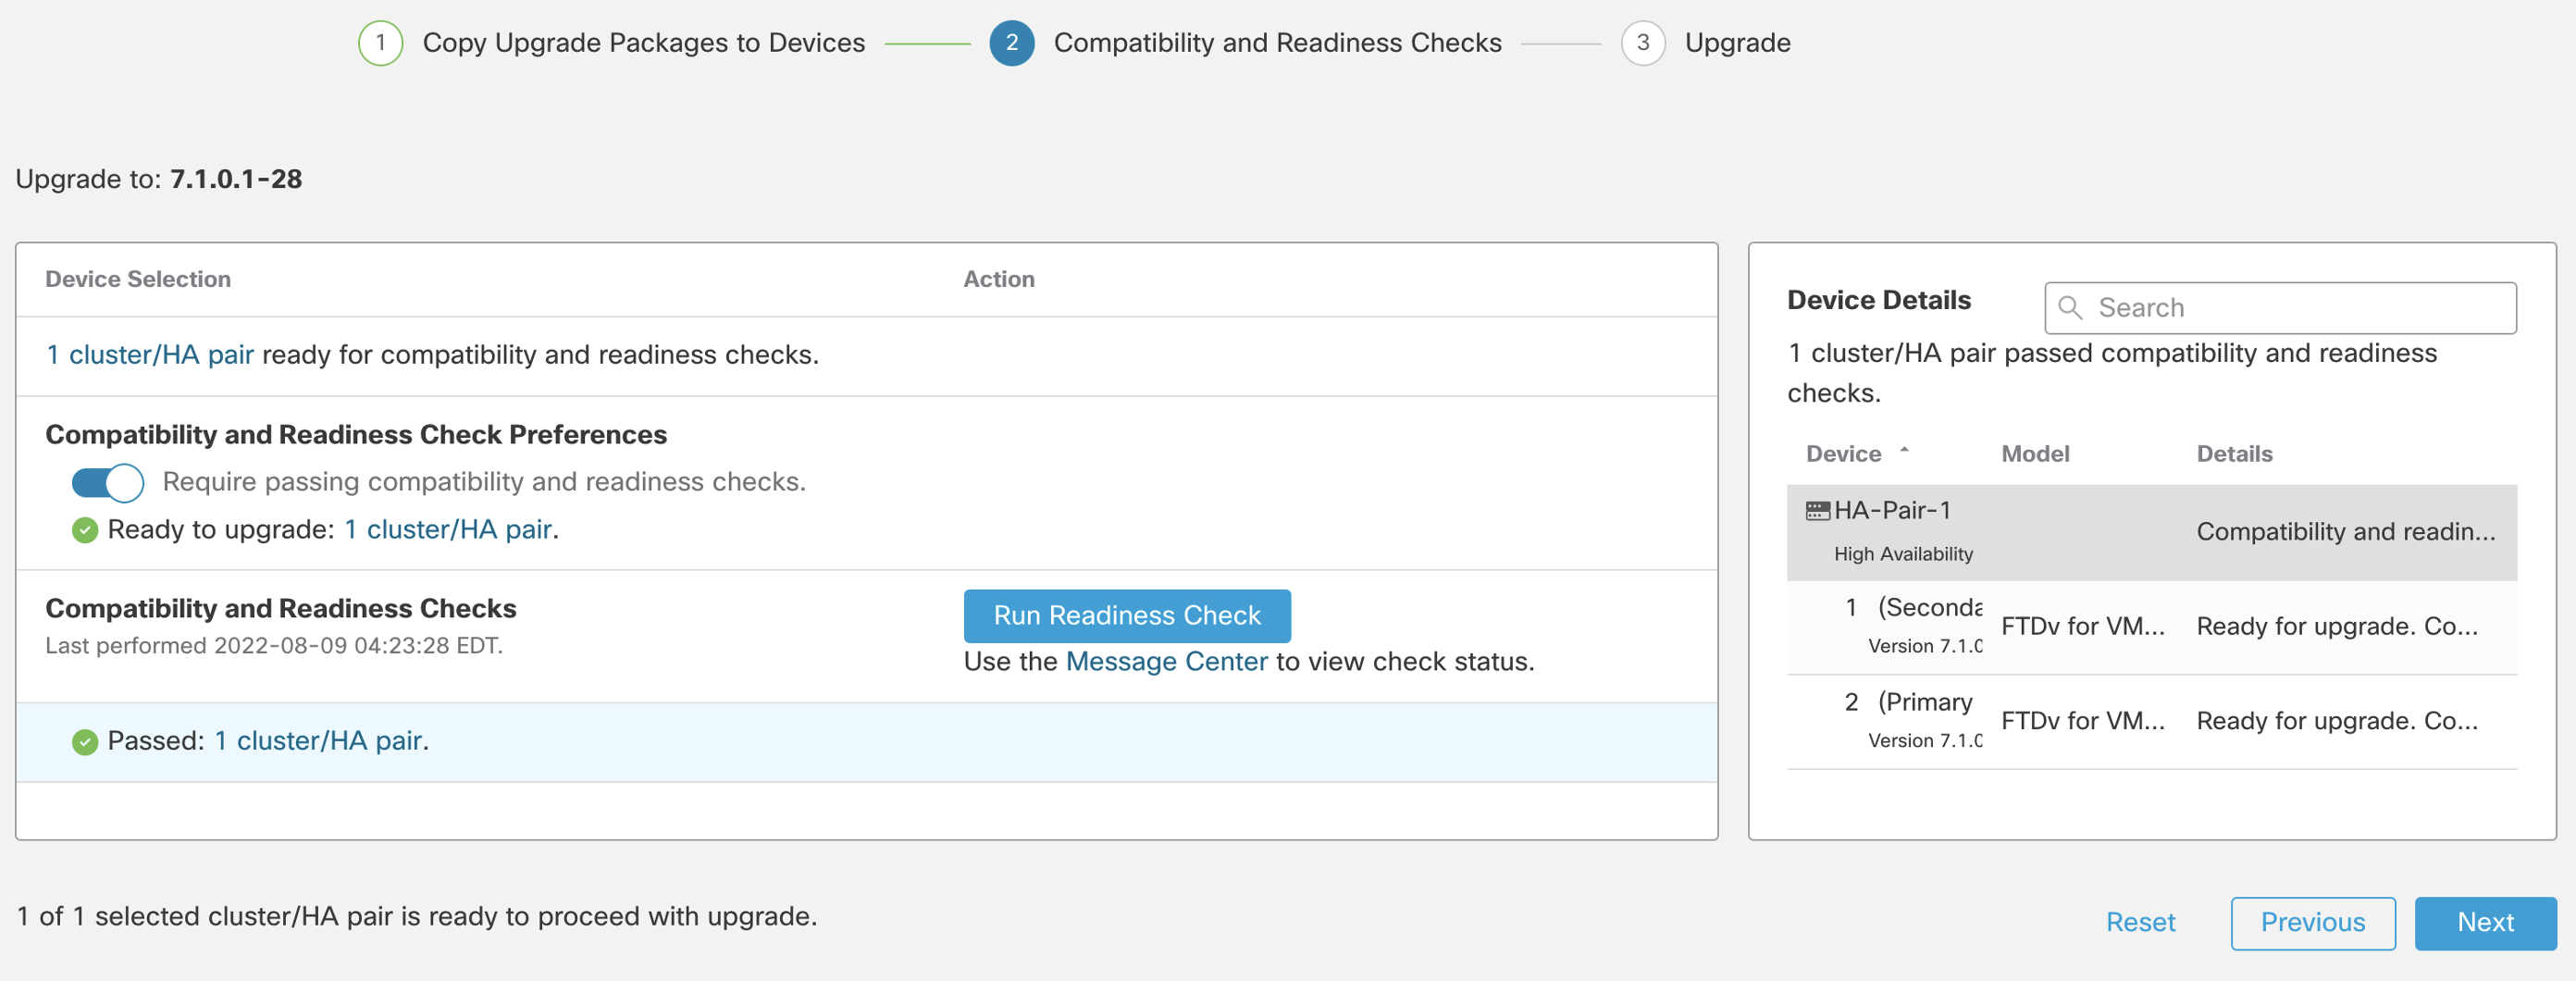
Figure 8: Readiness Check completed successfully
️ Note
In-case of HA secondary unit always upgrades first. For Cluster units order can be changed for data units, control unit always upgrades last.
Step 9: Click Start Upgrade and then click Upgrade
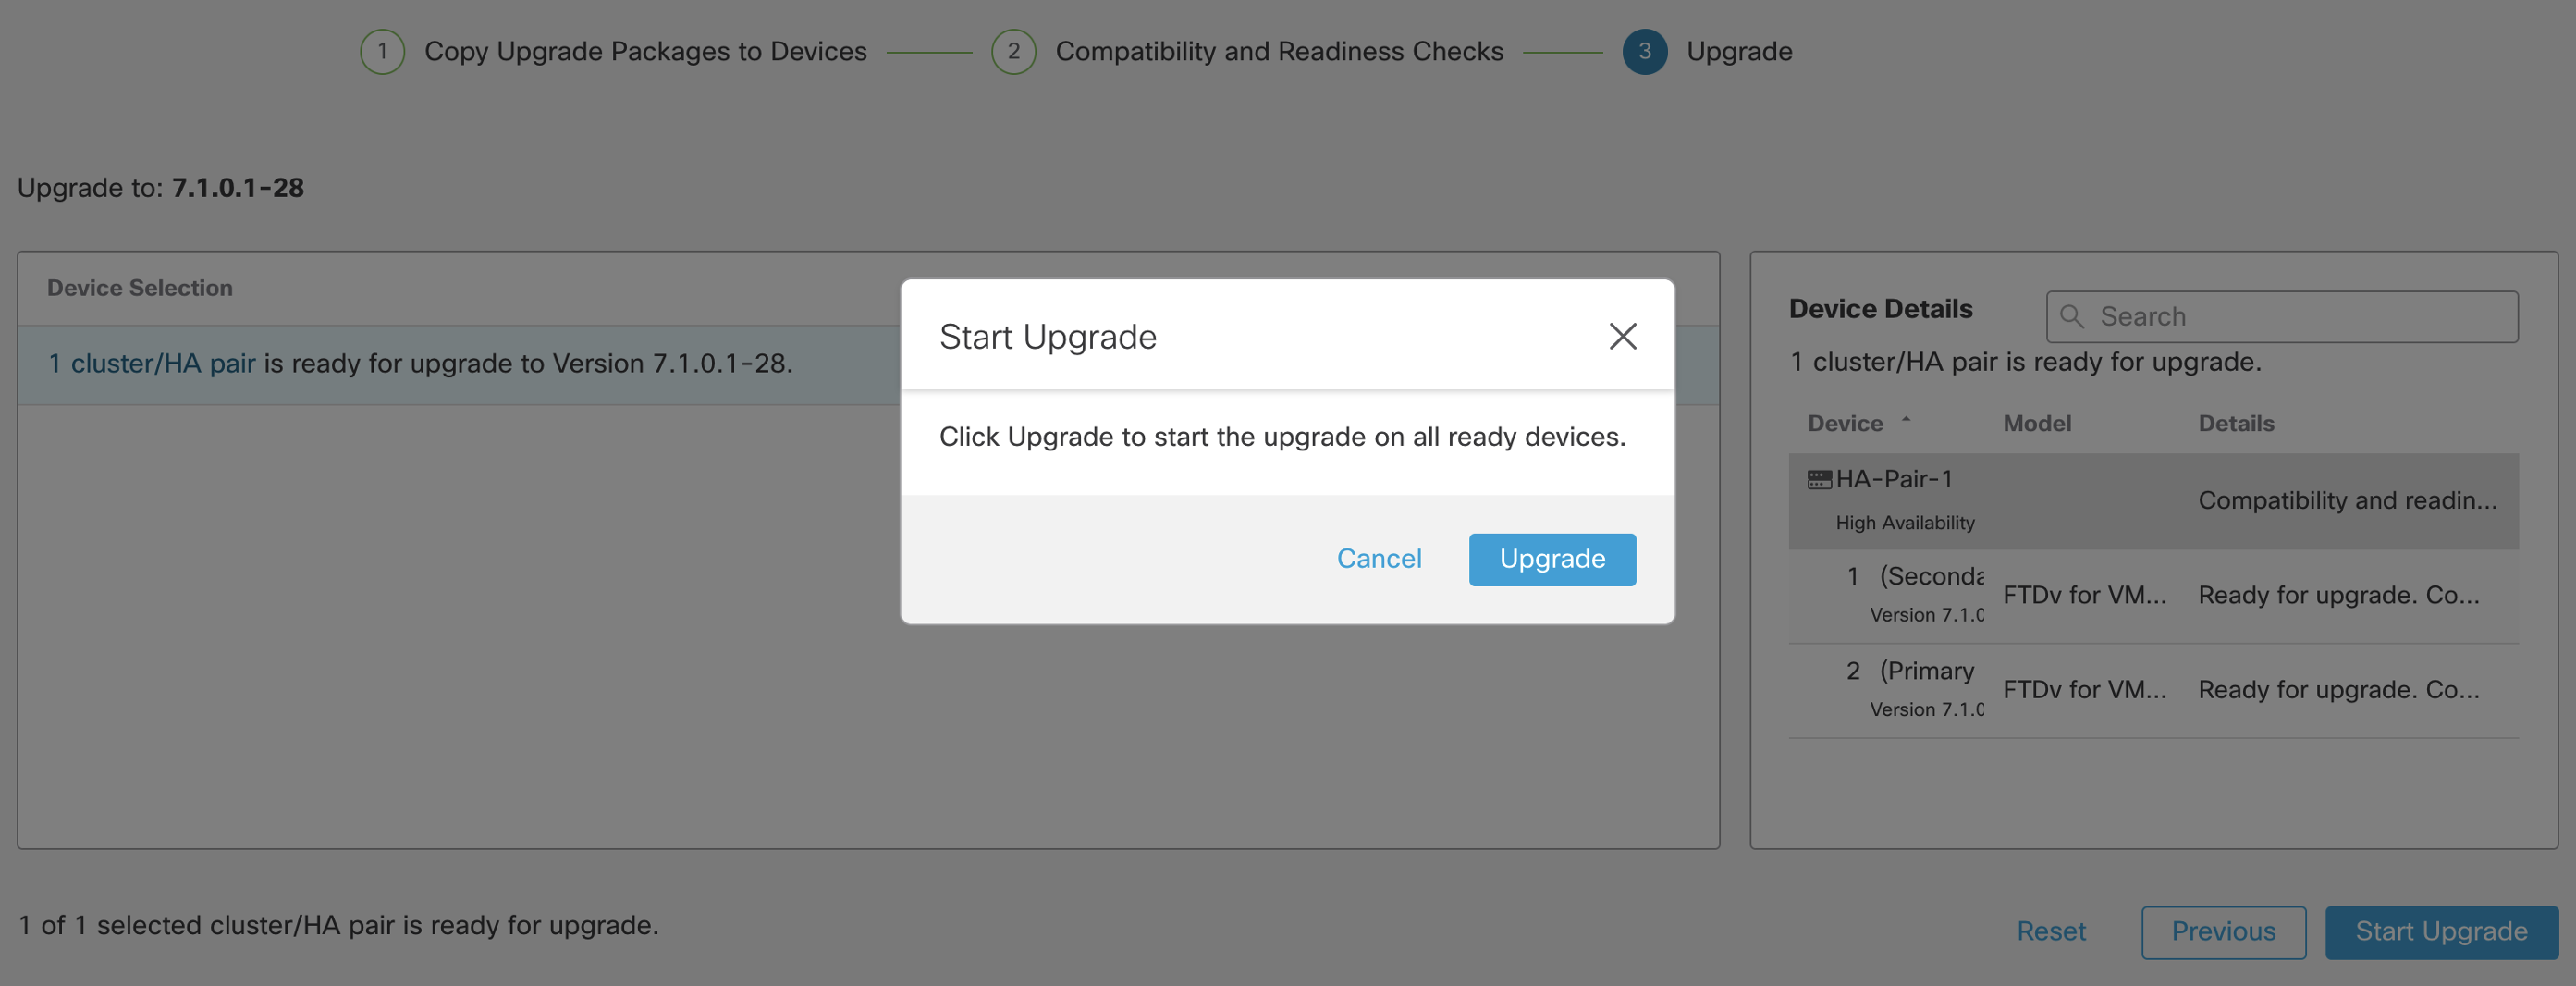
Figure 9: Starting the upgrade
Step 10: Click Finish to complete the wizard.
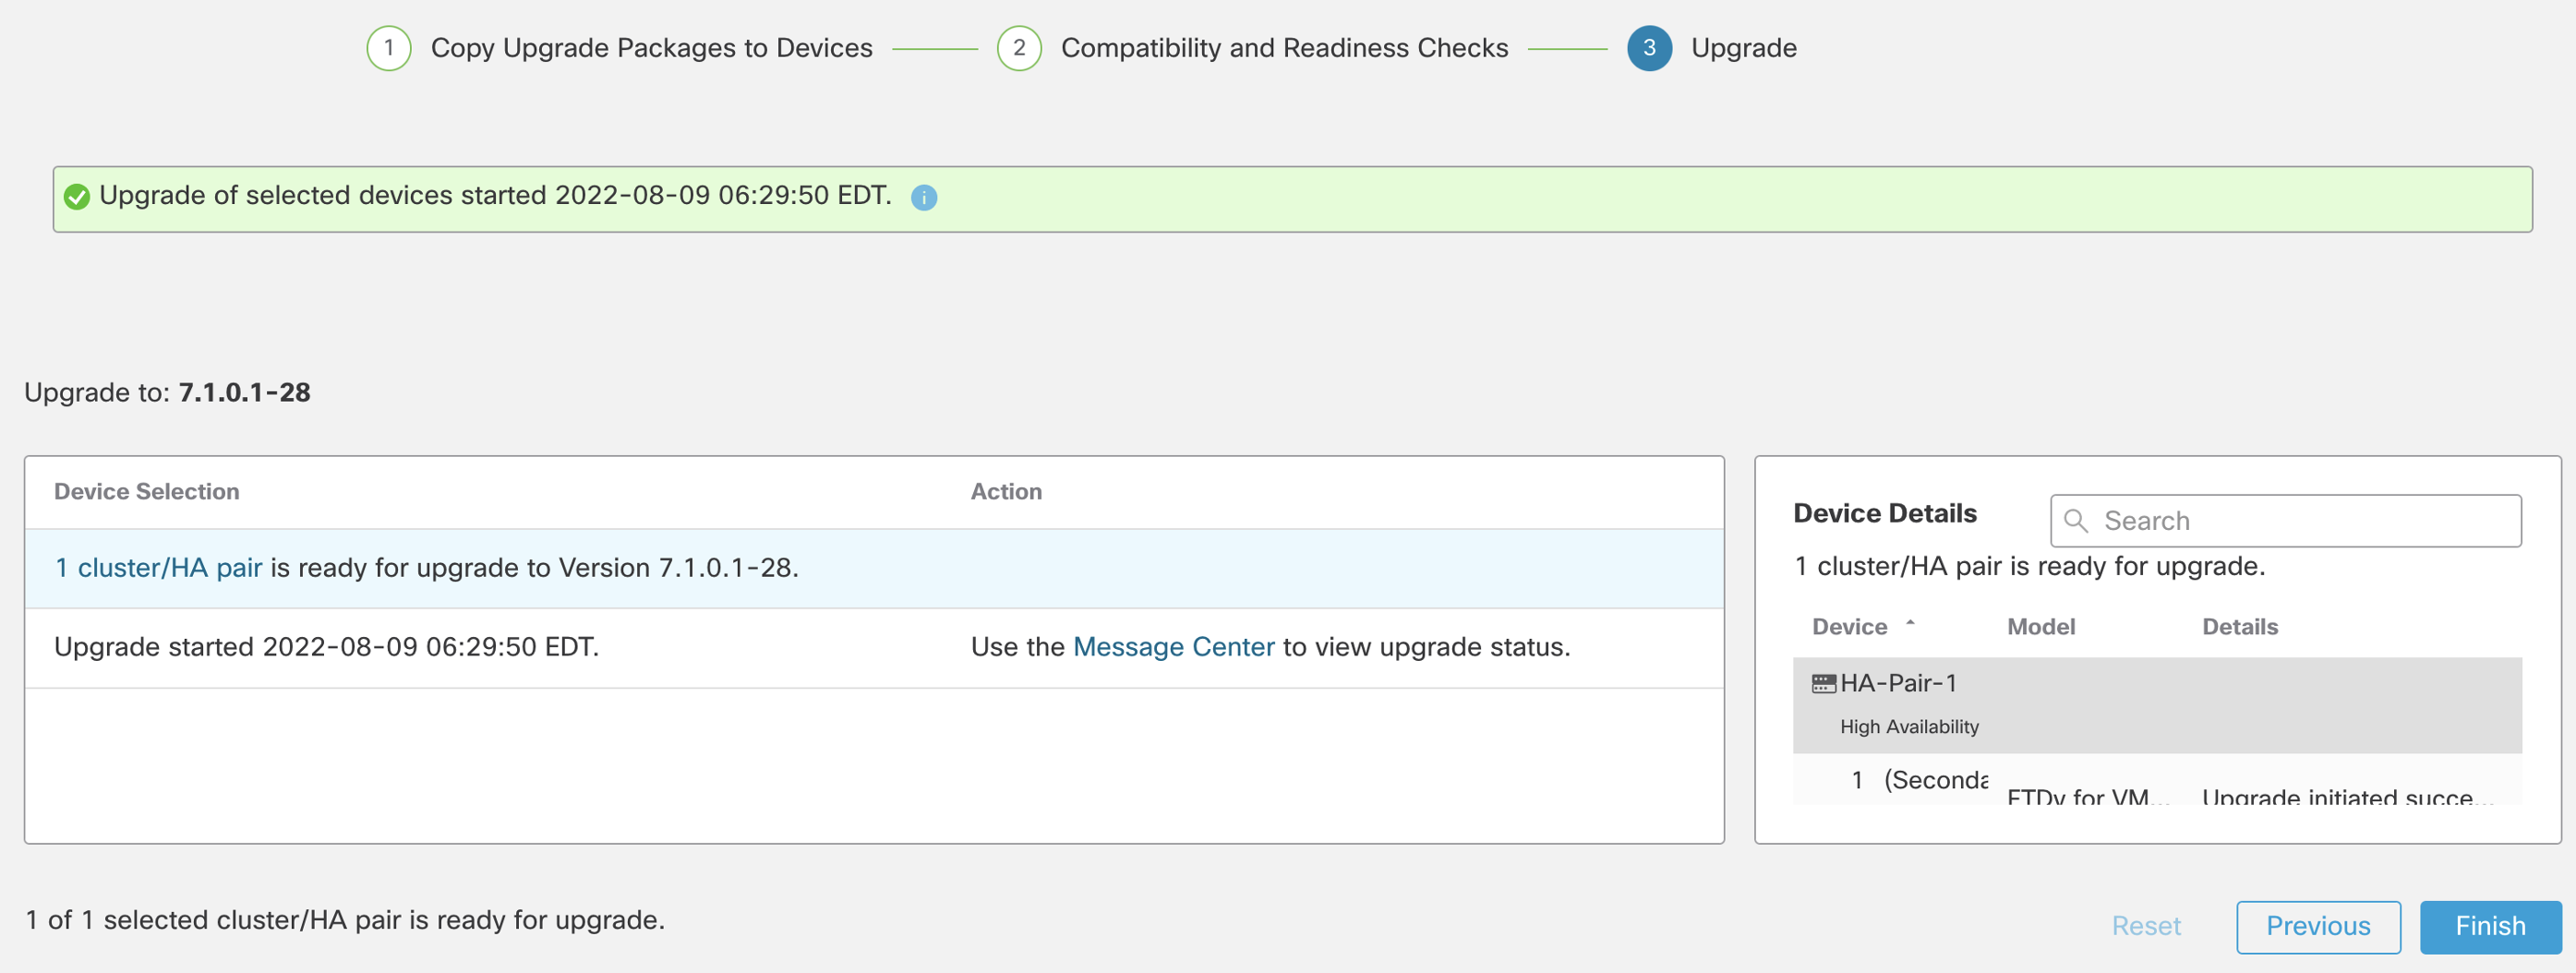
Figure 10: Upgrade wizard completed
Step 11 (optional): You can check the status of the upgrade by going to Tasks
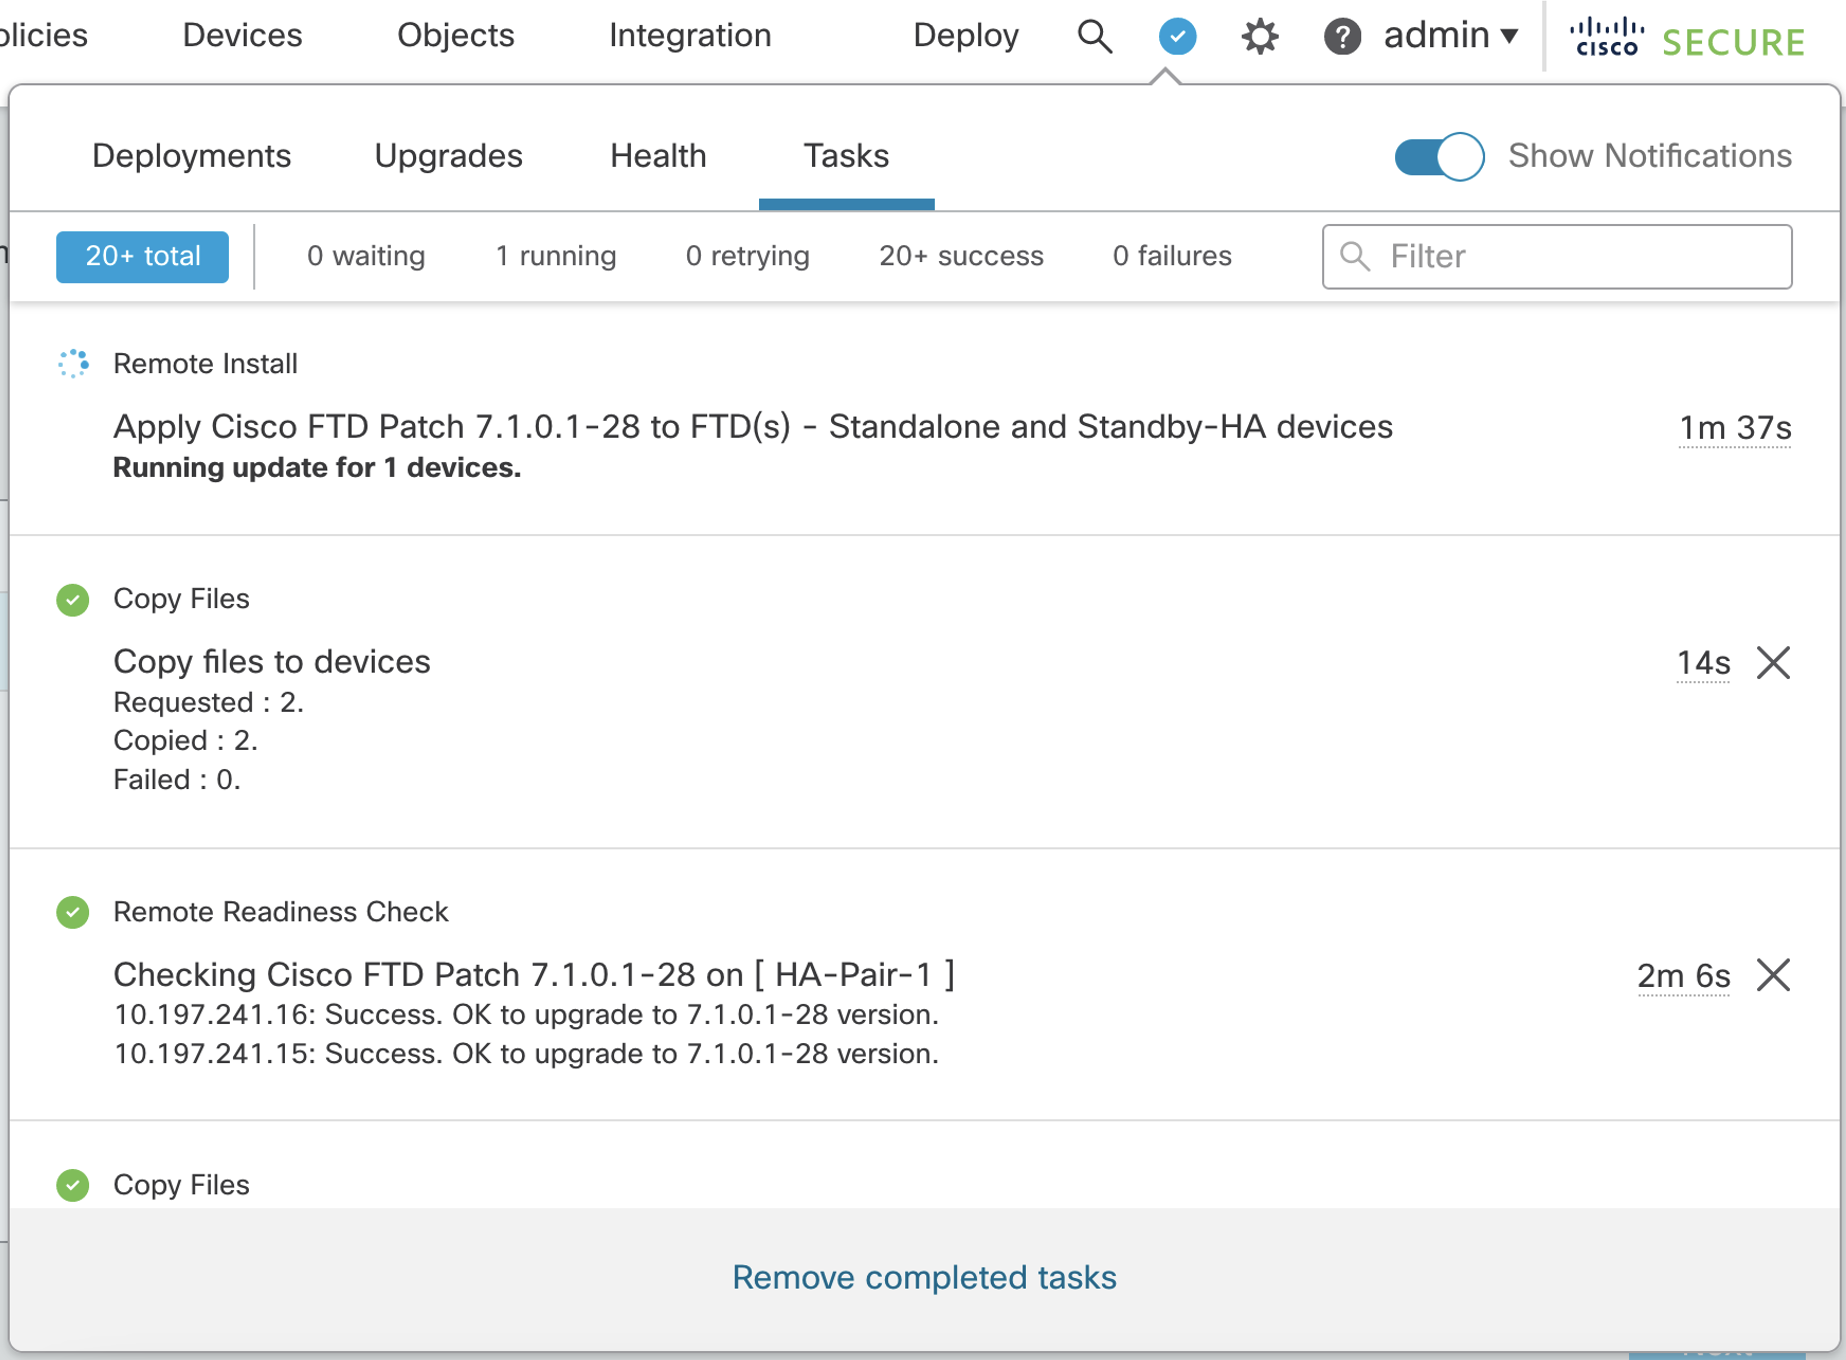
Figure 11: Monitoring Upgrade Status via Tasks
Verification
Step 1: Navigate to Devices and click Device Management. Both HA units should have a version as per the upgrade.
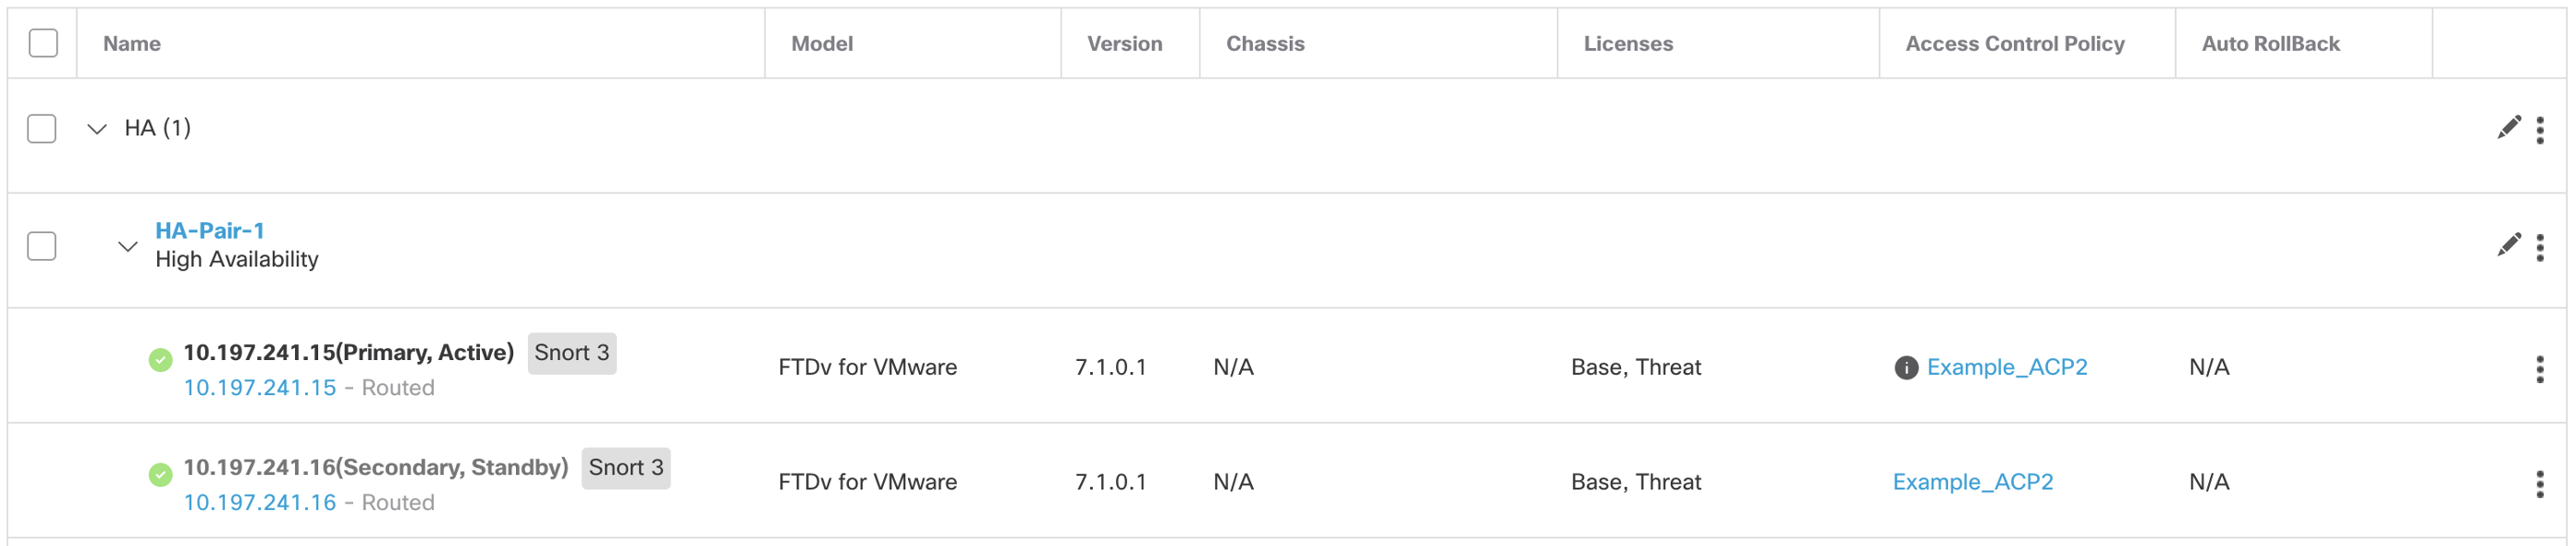
Figure 12: Device management page post upgrade.
Step 2: Login to both the devices via SSH to the management IP of the respective device and run the command show version to verify the version matches the FMC UI.
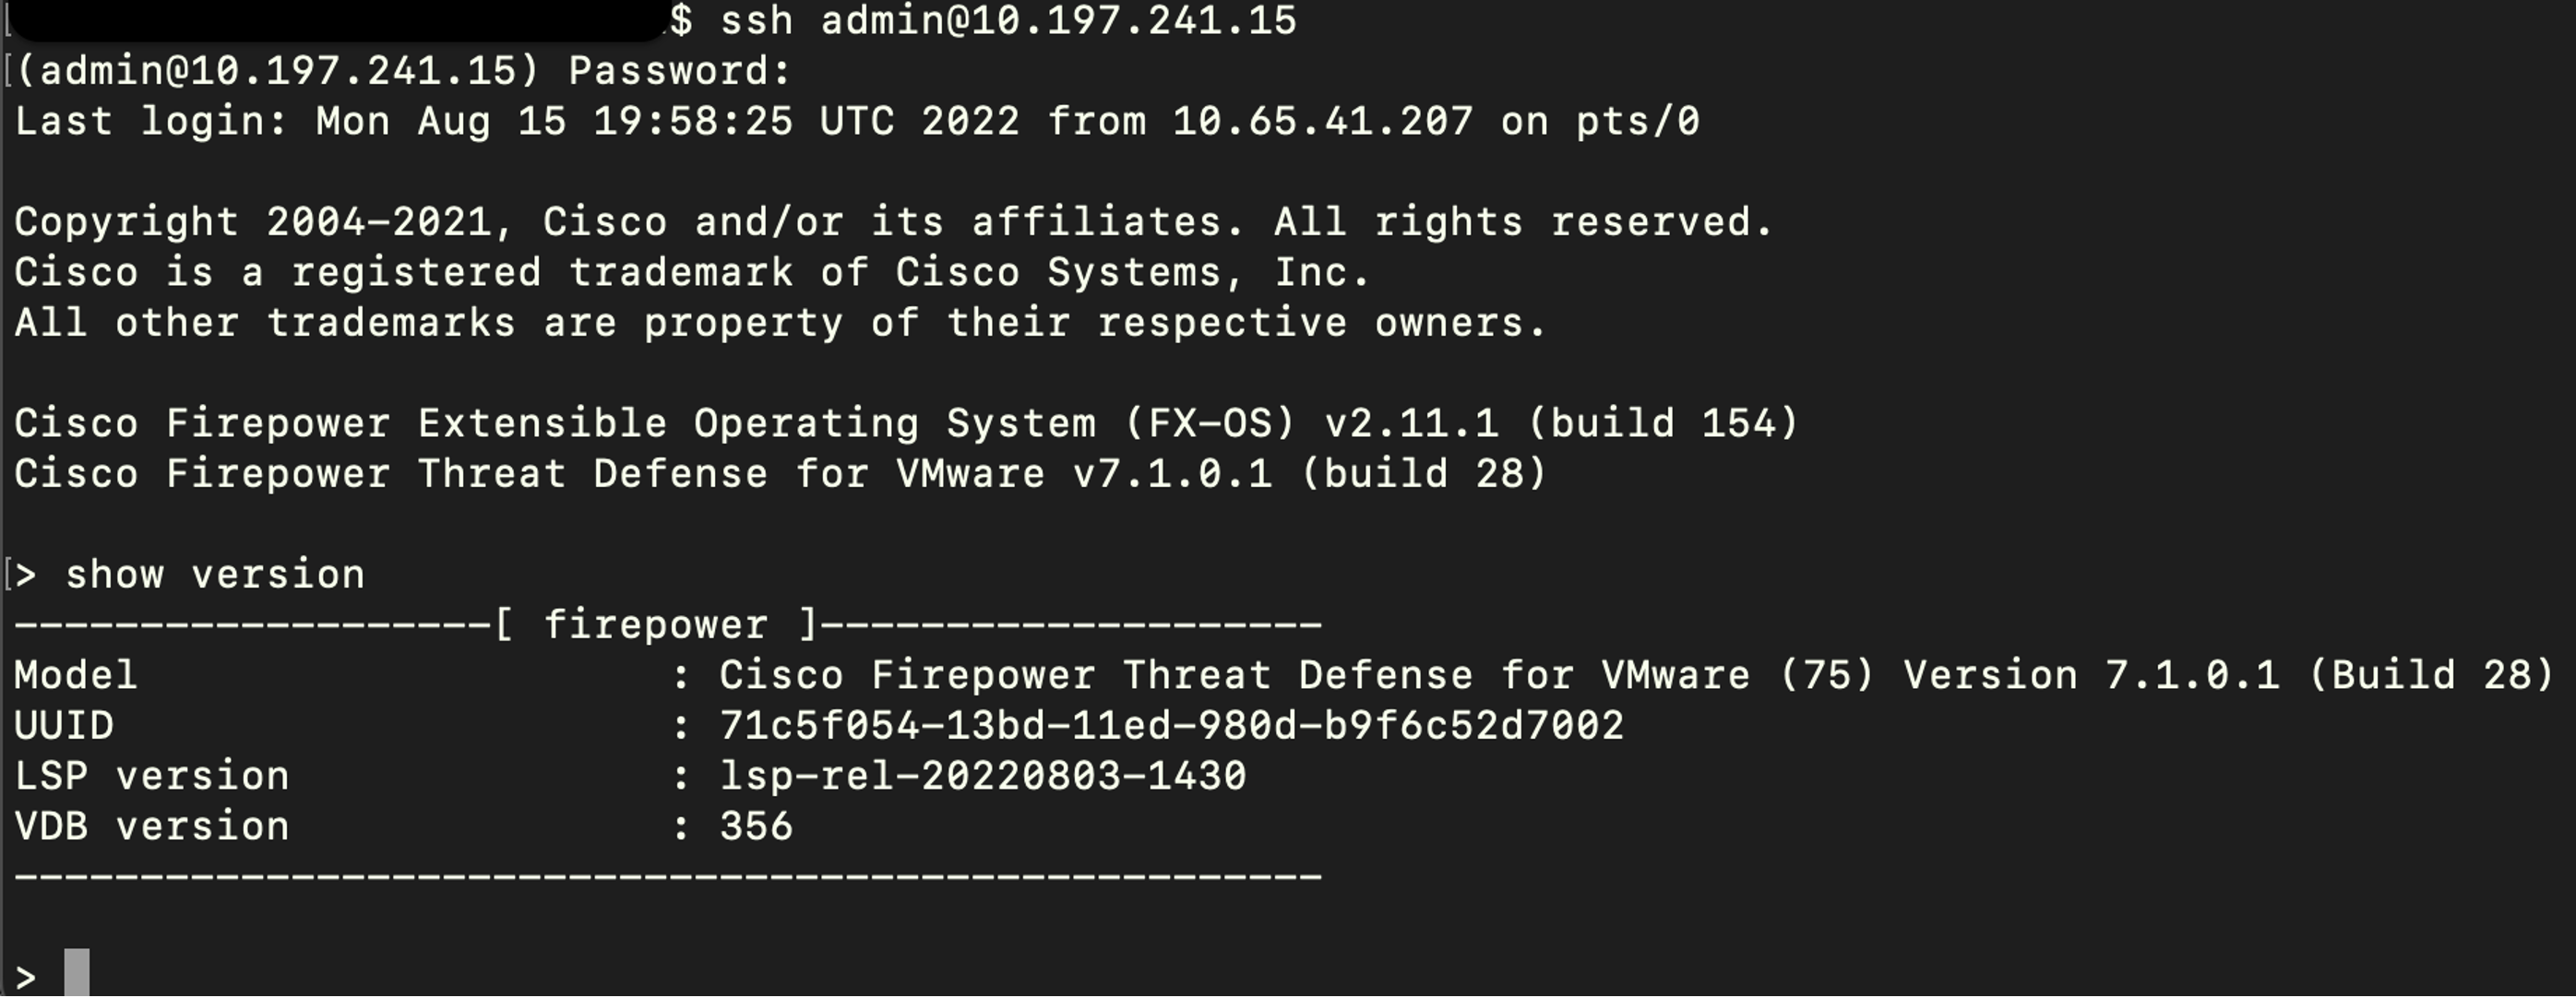
Figure 13: show version via CLI
Summary:
This document provided an overview of the Cisco Secure Firewall HA upgrade to help administrators use the new wizard to apply upgrades.
📚 Additional Resources
Updated over 3 years ago