VRF Aware Service - AAA RADIUS
Introduction
In FTD 7.4.1, FTD Services including Syslog, Netflow, SSH, and SNMP were made “VRF aware” and were supported on data interfaces. In FTD version 7.6, we have extended the VRF support to add AAA service.
Background
Administrators may want to SSH to the FTD on a data interface. If we are using an external authentication server, then, even if we SSH to a data interface, the authentication request is sent through the management interface. This requires that the authentication server must be reachable from the management interface, which may not be possible in all topologies. Starting in FTD version 7.6, administrators will have the option to specify the data interface which should be used to reach the external authentication server. This data interface can be in the global VRF or a user defined VRF. Route lookup will occur in VRF routing domain when this feature is enabled.
Note
This is a FTD only feature, as FMC management will continue using the dedicated management interface.
Platform Support and Requirements
This feature will be supported on all HW and virtual platforms. Minimum required version of the FMC and FTD is 7.6.
Configuration
Configure an External Authentication Server
- Go to System > Users
- Then select External Authentication and click on + Add External Authentication Object
- Select the required authentication method between LDAP or RADIUS
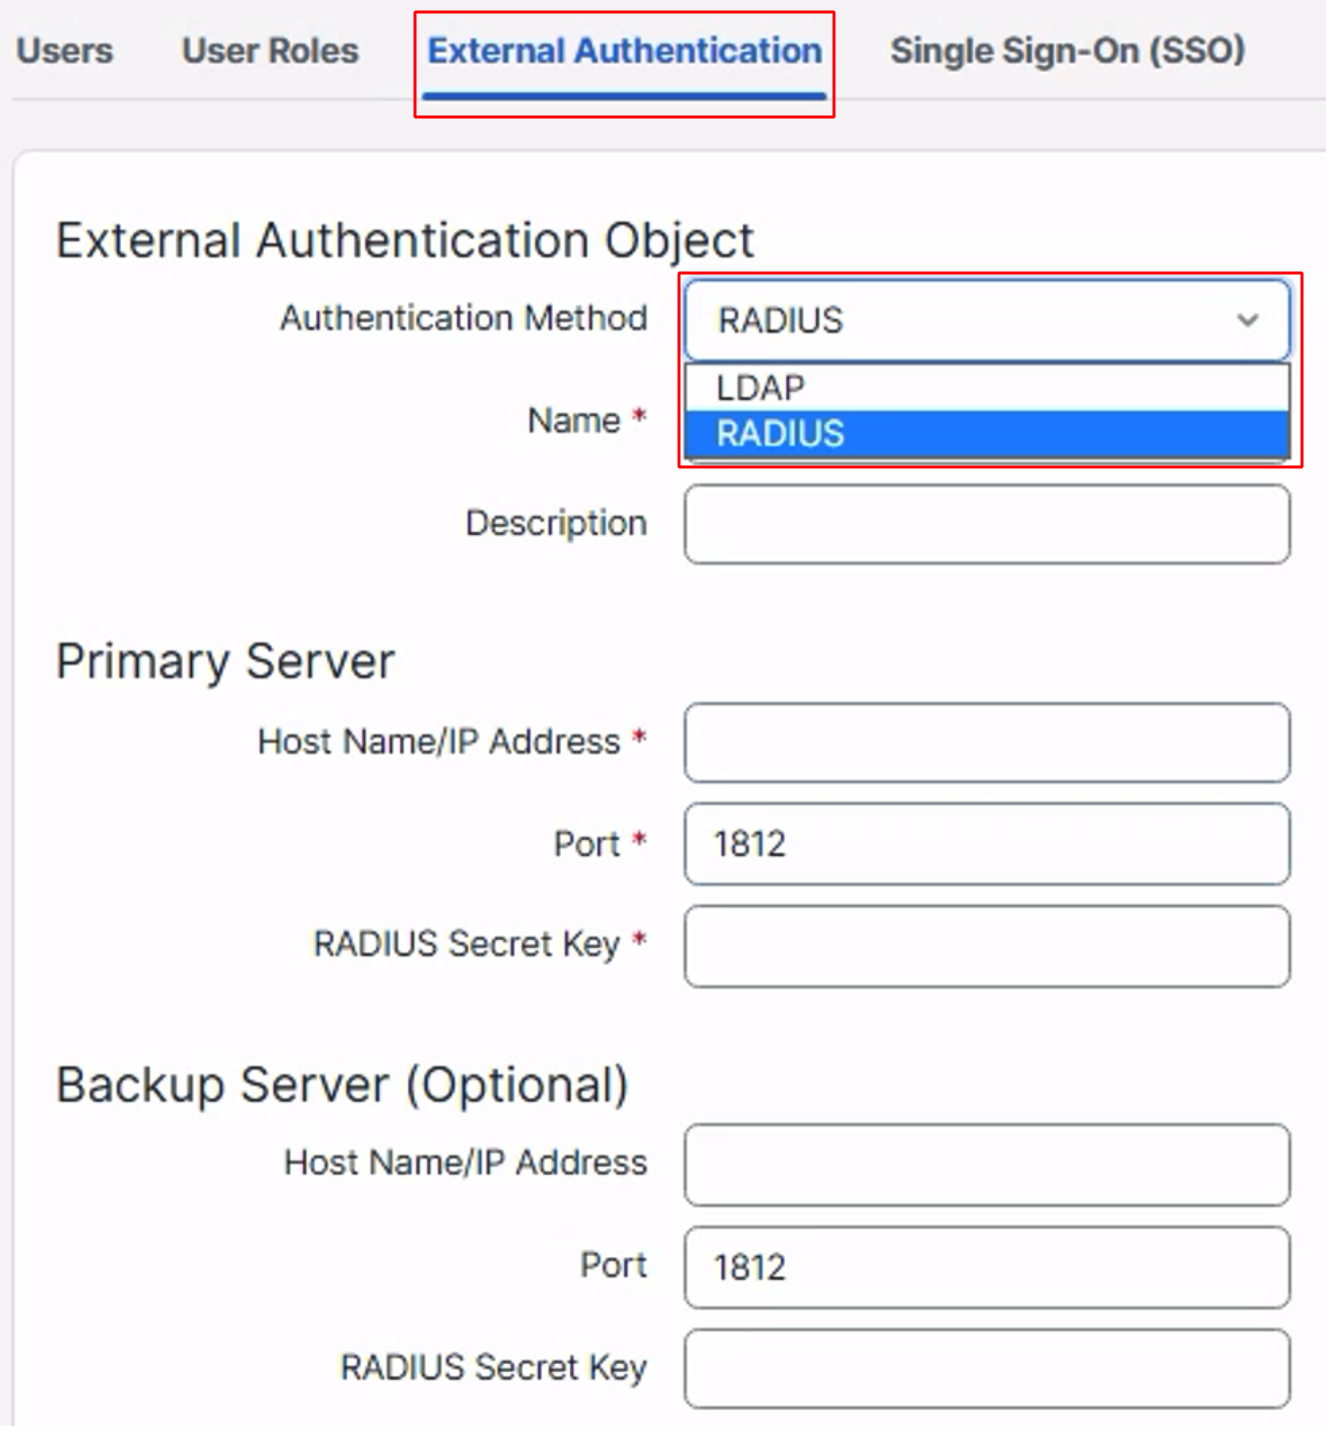
- Provide a Name for the authentication object
- Enter the Hostname/IP address for the authentication server
- Enter the Port number for communication
- If you are using Radius for authentication then enter the RADIUS secret key
- If you are using LDAP for authentication then enter the LDAP specific parameters:
- Base DN
- Username
- Password
- UI Access Attribute
- CLI Access Attribute
- All other settings can be left blank or filled as per specific requirements
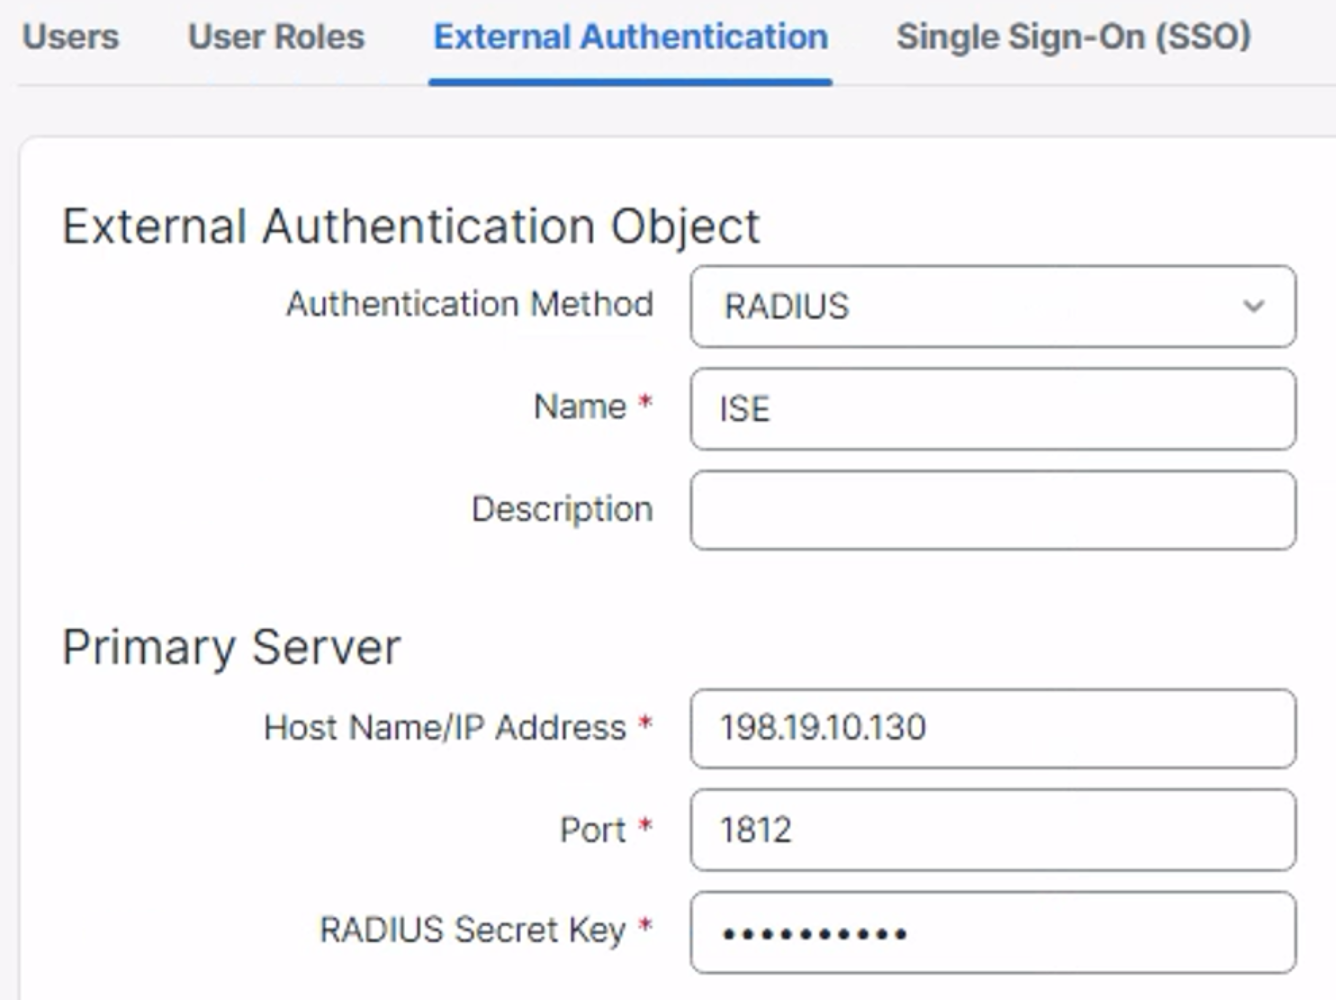
- Click on Save to save the new external authentication object
- Make sure the external authentication object is Enabled
- In the drop down next to Shell Authentication select the external authentication object
- Click on Save and Apply to save the changes

Configure a User Defined VRF (optional)
-
Go to Devices >> Device Management and edit the device settings
-
Go to the Routing tab
-
In the left panel click on Manage Virtual Routers, then click on + Add Virtual Router

Enter the name for the VRF.
-
Next, assign the interfaces that belong to this new VRF. Select the interface from the Available Interfaces list and click on Add to move the interface to the Selected Interfaces list.
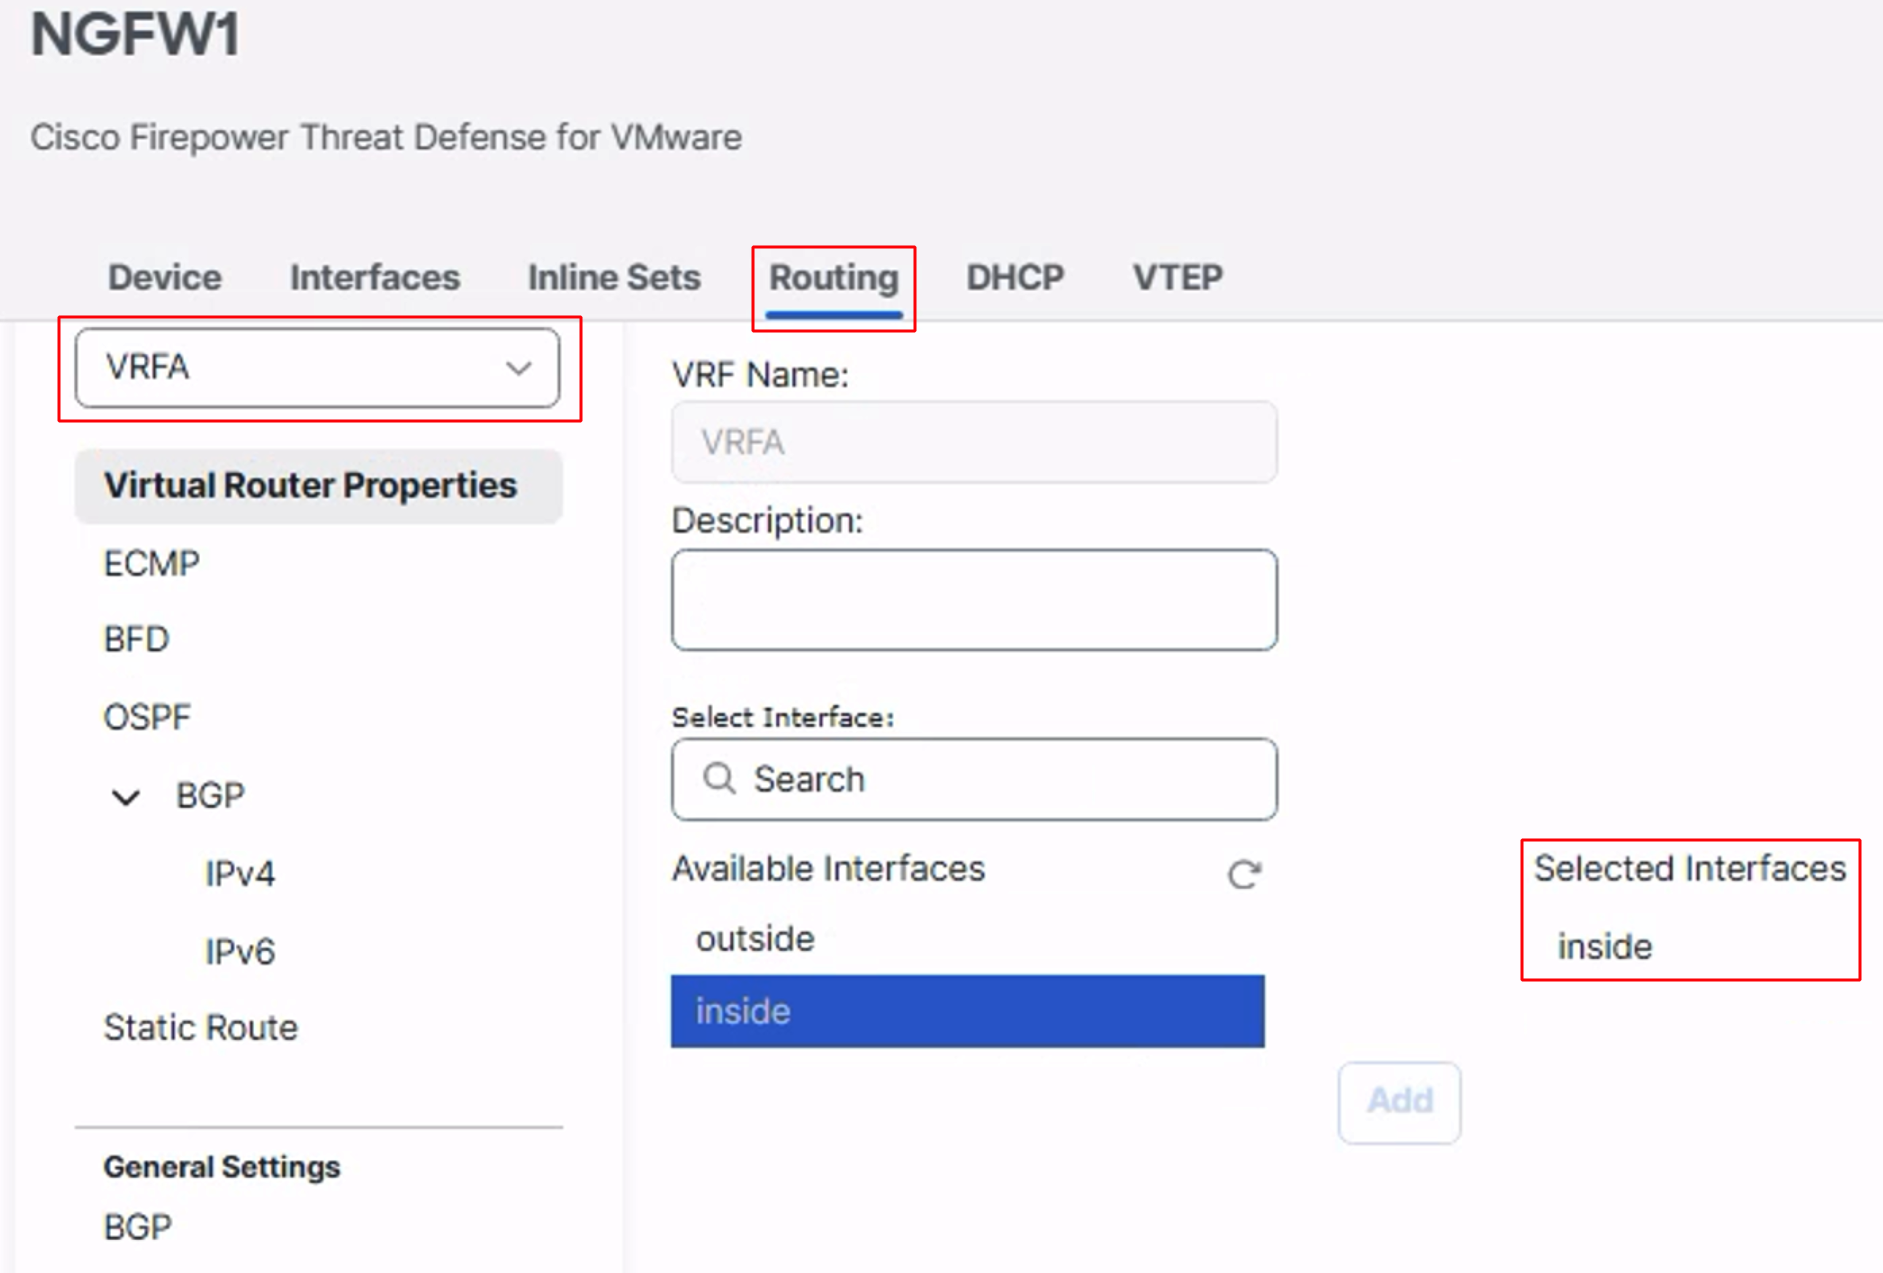
Click on Save to save the changes.
Note
Configuring a VRF is optional, as you can also use an interface in the global routing table to communicate with the authentication server.
Configure Platform Settings
-
Go to Devices >> Platform Settings and create/edit the platform setting
-
In the left pane, go to External Authentication
-
You will see the previously configured external authentication server. Make sure its status is Enabled

-
Click on the pencil icon to edit the authentication server. Select the interface from the available zones list and click Add to Primary Server
-
If you have configured a backup server then you can assign an interface to the backup server as well.
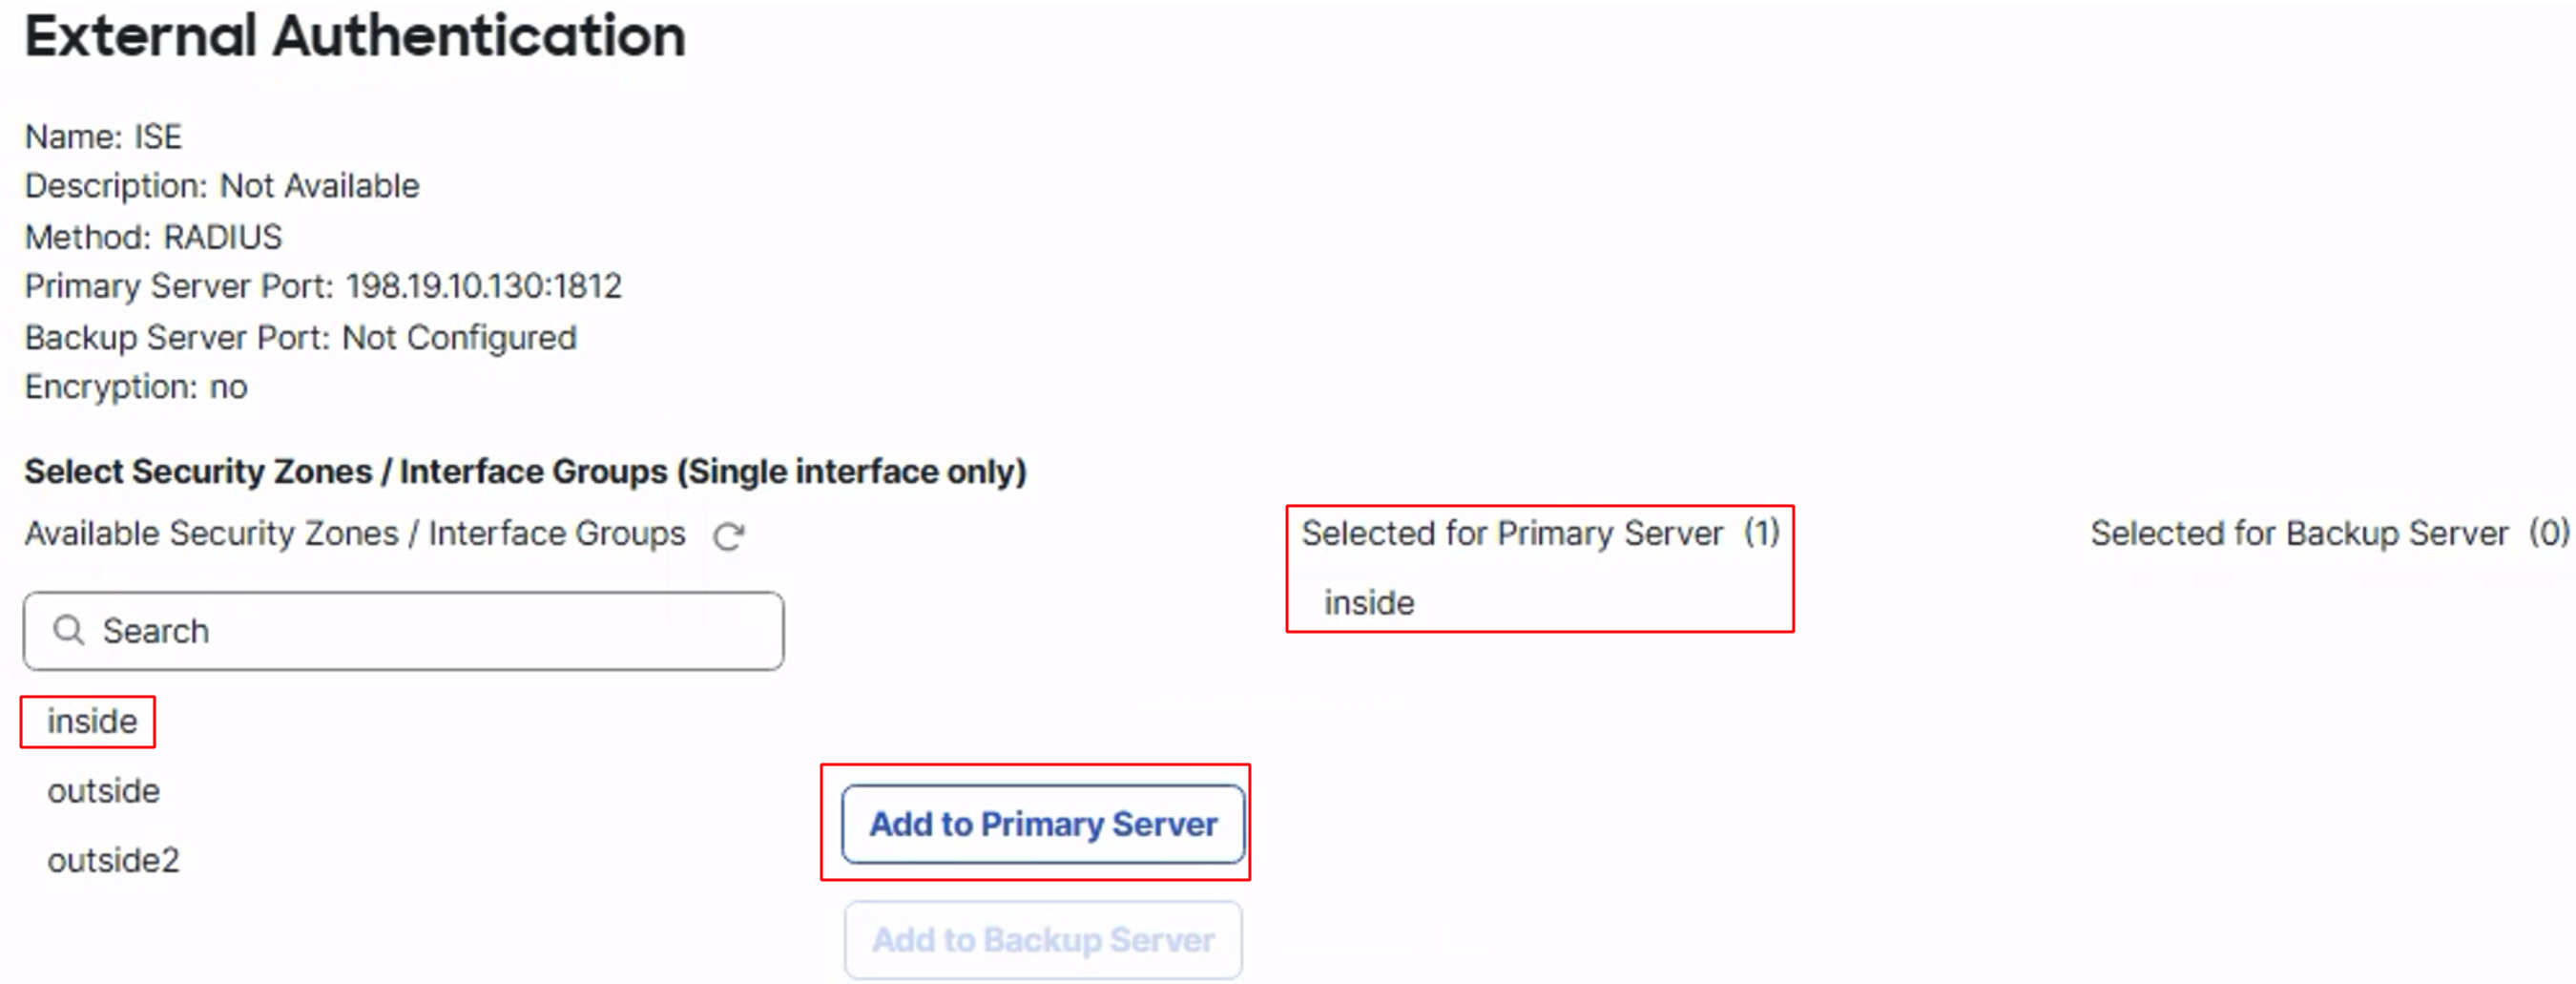
Click on OK to save the settings.
-
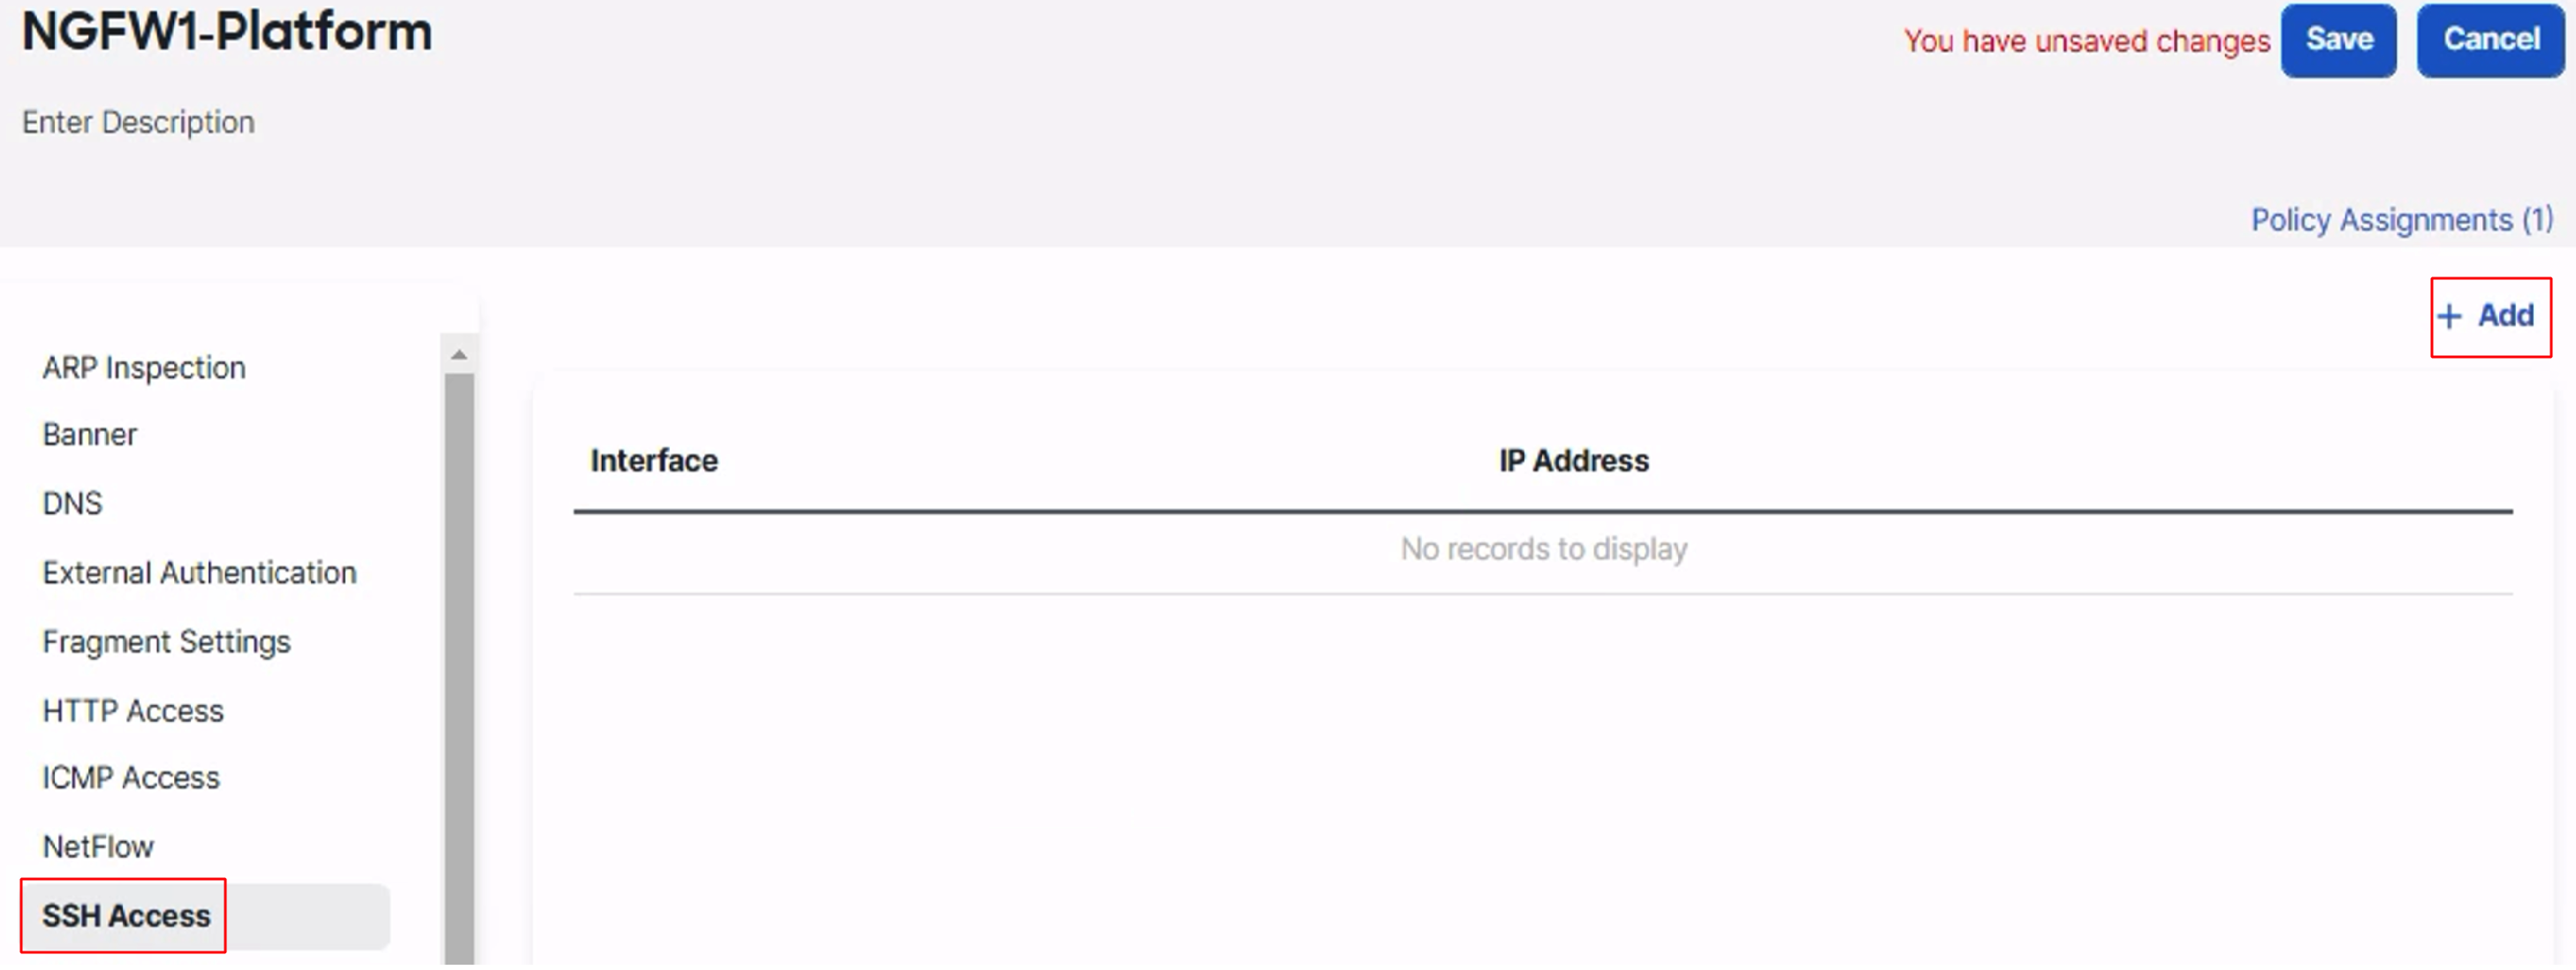
In the left pane go to SSH Access and click on +Add
-
Select the IP Address and the Available Zones. This will allow SSH access to these interfaces from the specified IP addresses only.
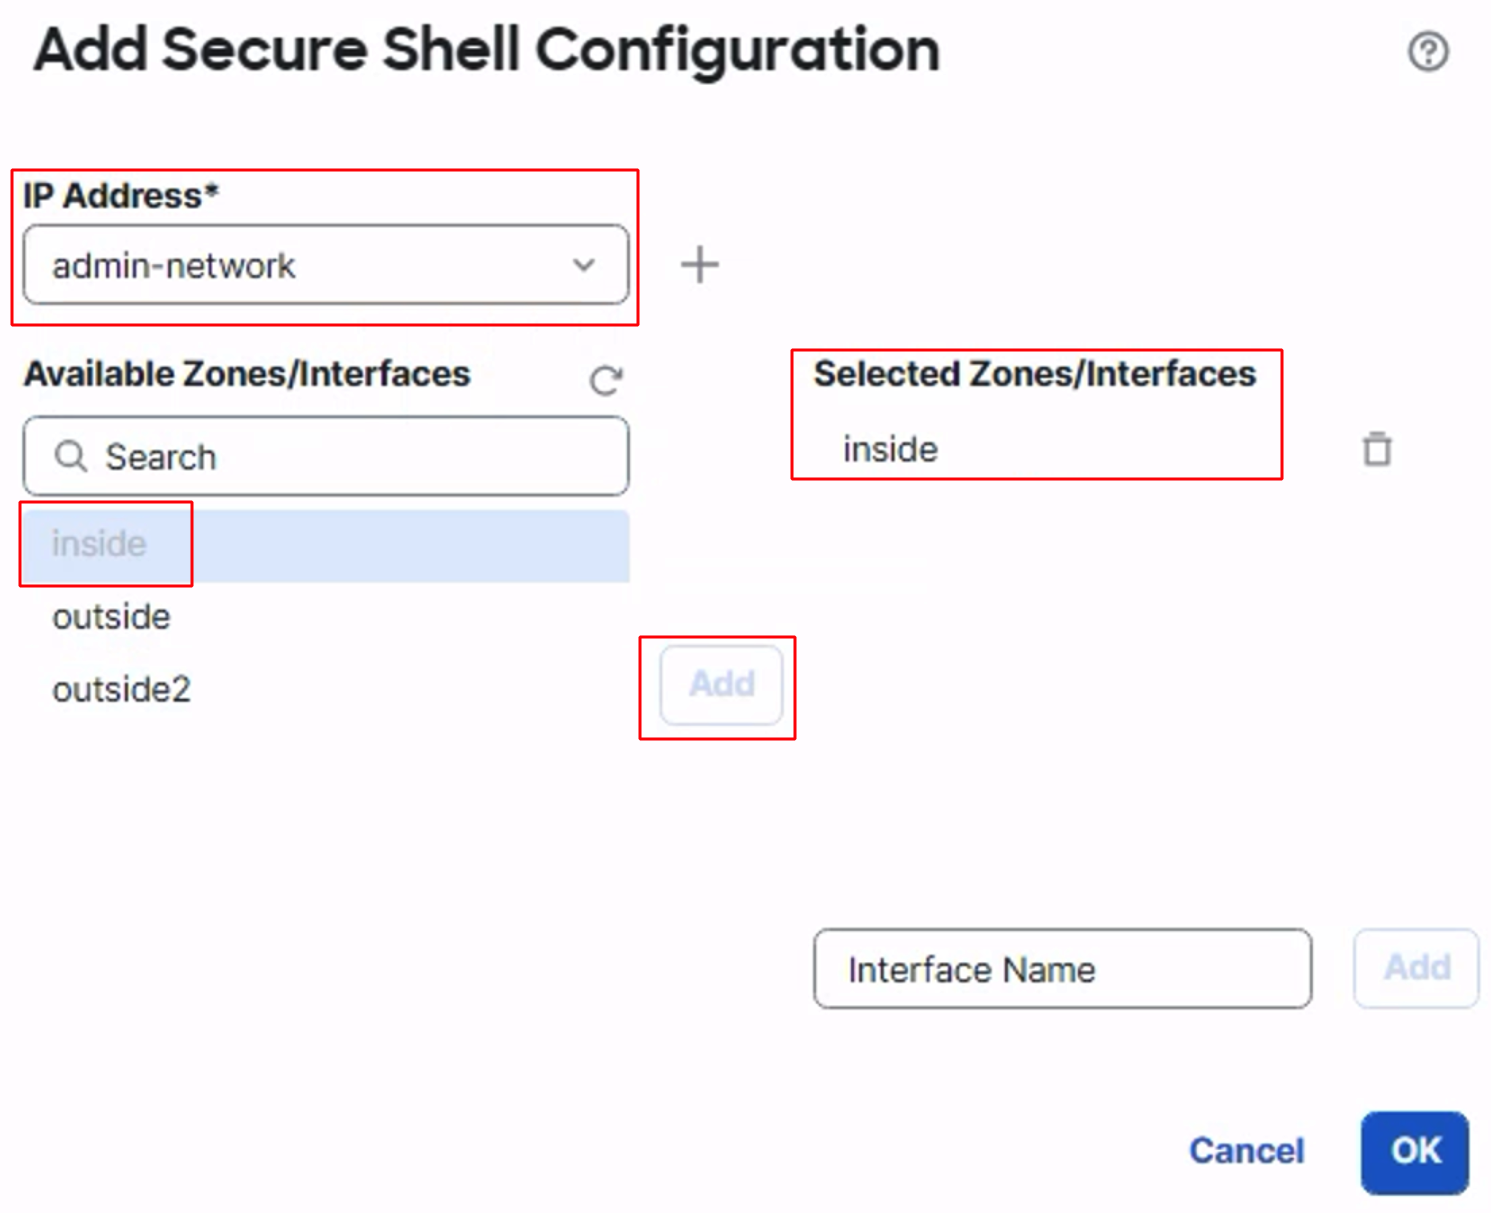
Click on OK to save the settings and then click on Save to save the changes.
-
Click Deploy > Deploy All to deploy the configuration to the device.
Note
The configuration of the Radius/LDAP server is not shown in this document.
Verification
To confirm that the LDAP/Radius authentication packets are going through the specified data interface, we can apply a capture on that interface and check the captures.
- Apply a capture on the inside interface to capture Radius packets
ngfw1# capture cap1 interface inside match udp any any eq 1812
- Initiate a SSH session from a test machine.
- Check the capture
ngfw1# show cap
capture cap1 type raw-data interface inside [Capturing - 436 bytes]
  match udp any any eq 1812

ngfw1# show cap cap1

2 packets captured

   1: 05:44:14.250994       198.19.10.1.58085 > 198.19.10.130.1812:  udp 89
   2: 05:44:14.322996       198.19.10.130.1812 > 198.19.10.1.58085:  udp 231
2 packets shown
- We can see that the Radius authentication message was sent from the inside interface with the source IP address of that interface.
Additional Resources
Updated 8 months ago
