Bulk Branch Onboarding using Templates
Introduction
Deploying multiple branch devices used to require administrators to configure each device individually. We resolved this issue by introducing Device Templates, which administrators can use to create a configuration template and apply that template to multiple devices. Another issue is that administrators have to onboard one device at a time and apply the template to each device individually. While applying the template reduces the effort to configure each device individually, administrators still have to spend considerable time onboarding one device at a time and applying the templates. To resolve this issue, we have introduced the feature of Bulk Branch Onboarding in Cisco Secure Firewall Release 7.6
NOTE
It would be good to familiarize yourself with following topic before you proceed:
- Device Templates: https://secure.cisco.com/secure-firewall/v7.6/docs/device-templates
How it works
With Bulk Branch Onboarding you can onboard up to 25 devices at a time using their Serial numbers. A sample CSV file will be available for download at the onboarding step, and will ask for the serial number and other relevant information depending upon the device template chosen to apply the configuration.
This feature is available with both on-prem Firewall Management Center (FMC) and cloud delivered FMC (cdFMC). For on-prem FMC, the FMC must be onboarded to Cisco Defense Orchestrator (CDO) using Cloud Onboarding. Check the following link for details on how to onboard the on-prem FMC to CDO:
https://secure.cisco.com/secure-firewall/v7.6/docs/cisco-security-cloud-integration
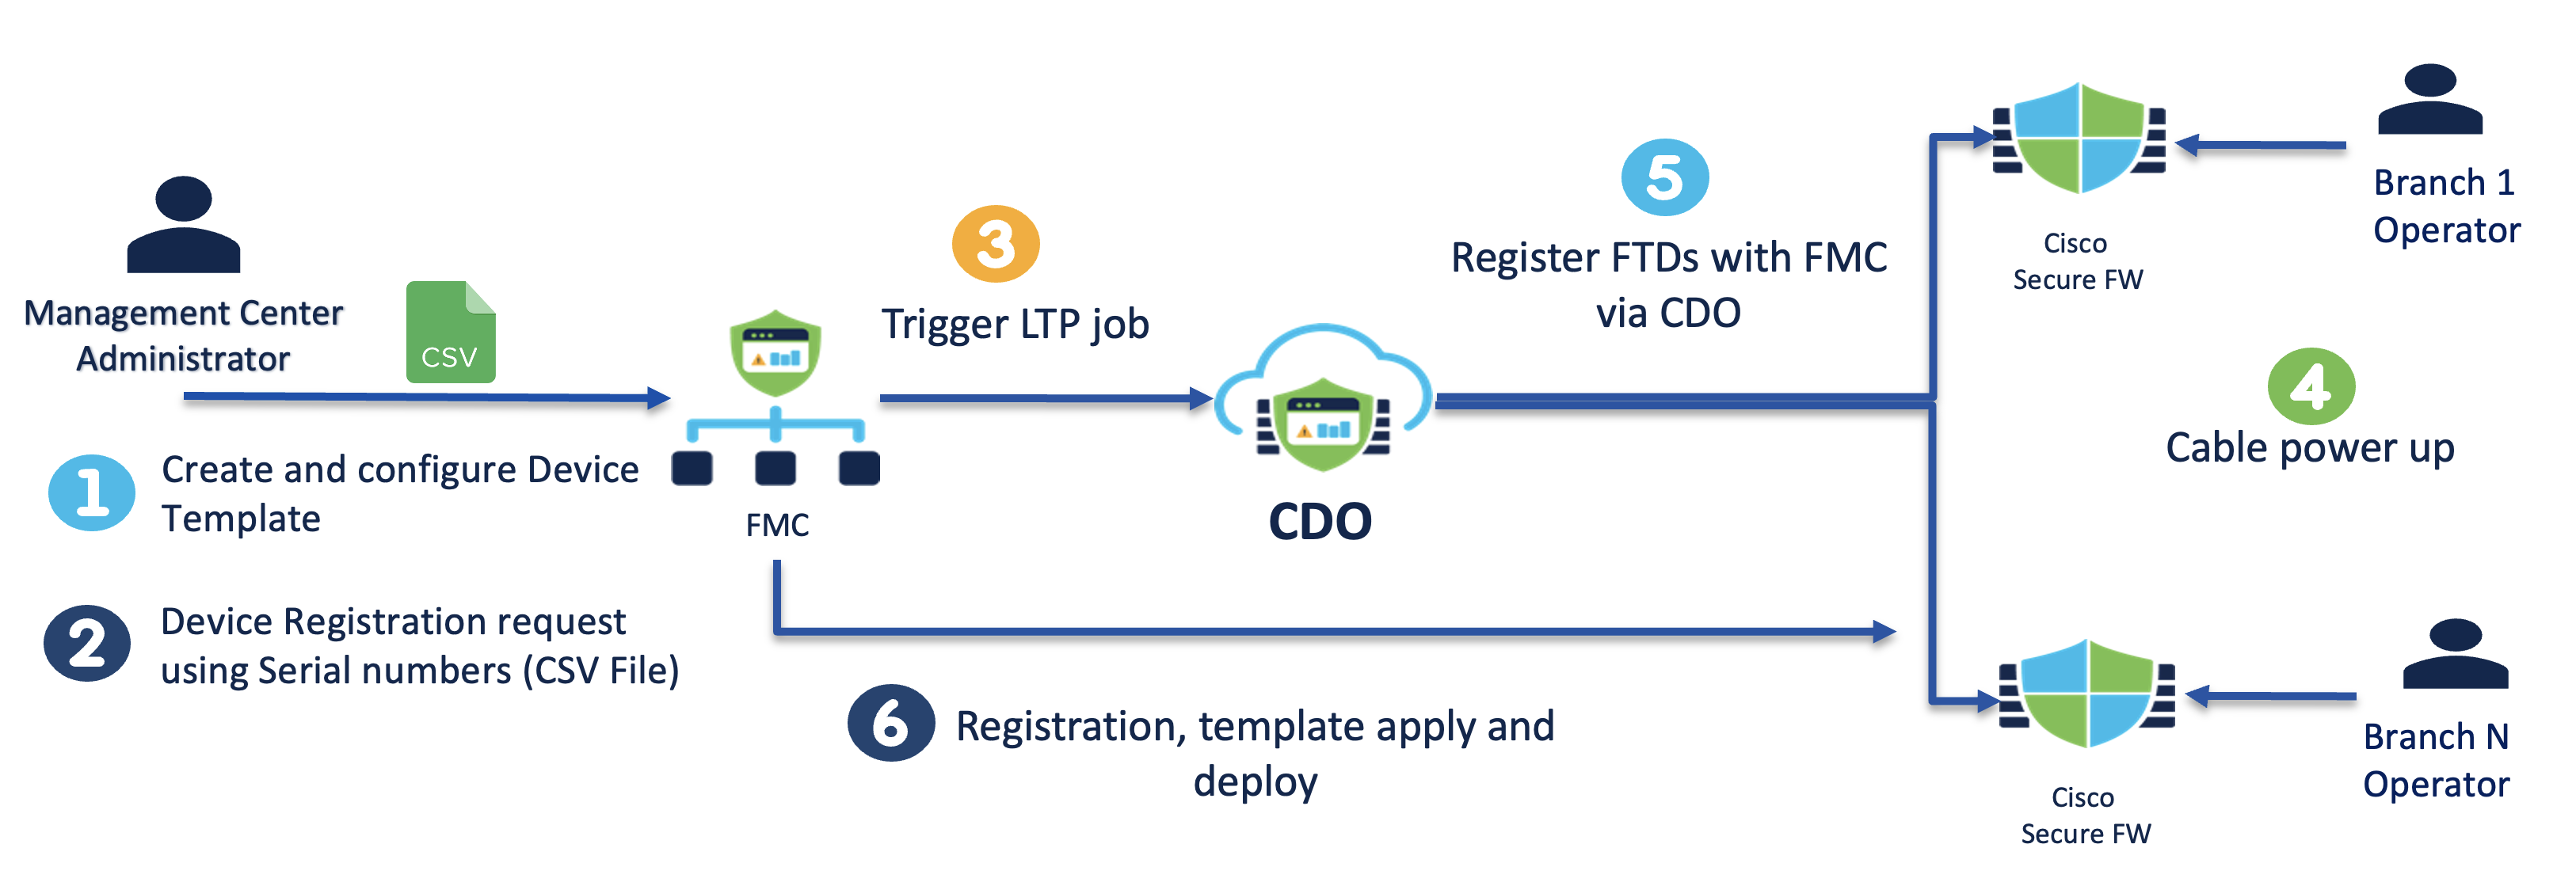
Workflow
- Create and configure a device template on the FMC
- Complete the device onboarding steps using the CSV file which has the serial numbers of the devices
- Completing the onboarding steps will trigger the Zero Touch Provisioning job on the CDO
- Power on and cable the branch devices
- The devices will automatically try to register
- All Devices are registered and the configuration from the template is applied in one go
 # Prerequisites
- Cisco Security Cloud Integration must be successfully enabled for on-prem FMC
- On-prem FMC must be at version 7.6
- FTD should belong to FPR 1000, 2100 or 3100 series
- FTD should be at version 7.4.1 or above
- Device must be in factory shipped state
- First data interface or the management interface must have internet connectivity to communicate with CDO
Configuration
The configuration steps below assume the following steps are already completed:
- The FMC is already onboarded with your CDO tenant using the Cisco Security Cloud integration.
- A Device template is already configured on the FMC.
Bulk Zero Touch Provision Registration
-
Go to Device > Device Management and click on Add
-
Select Device (Wizard)

-
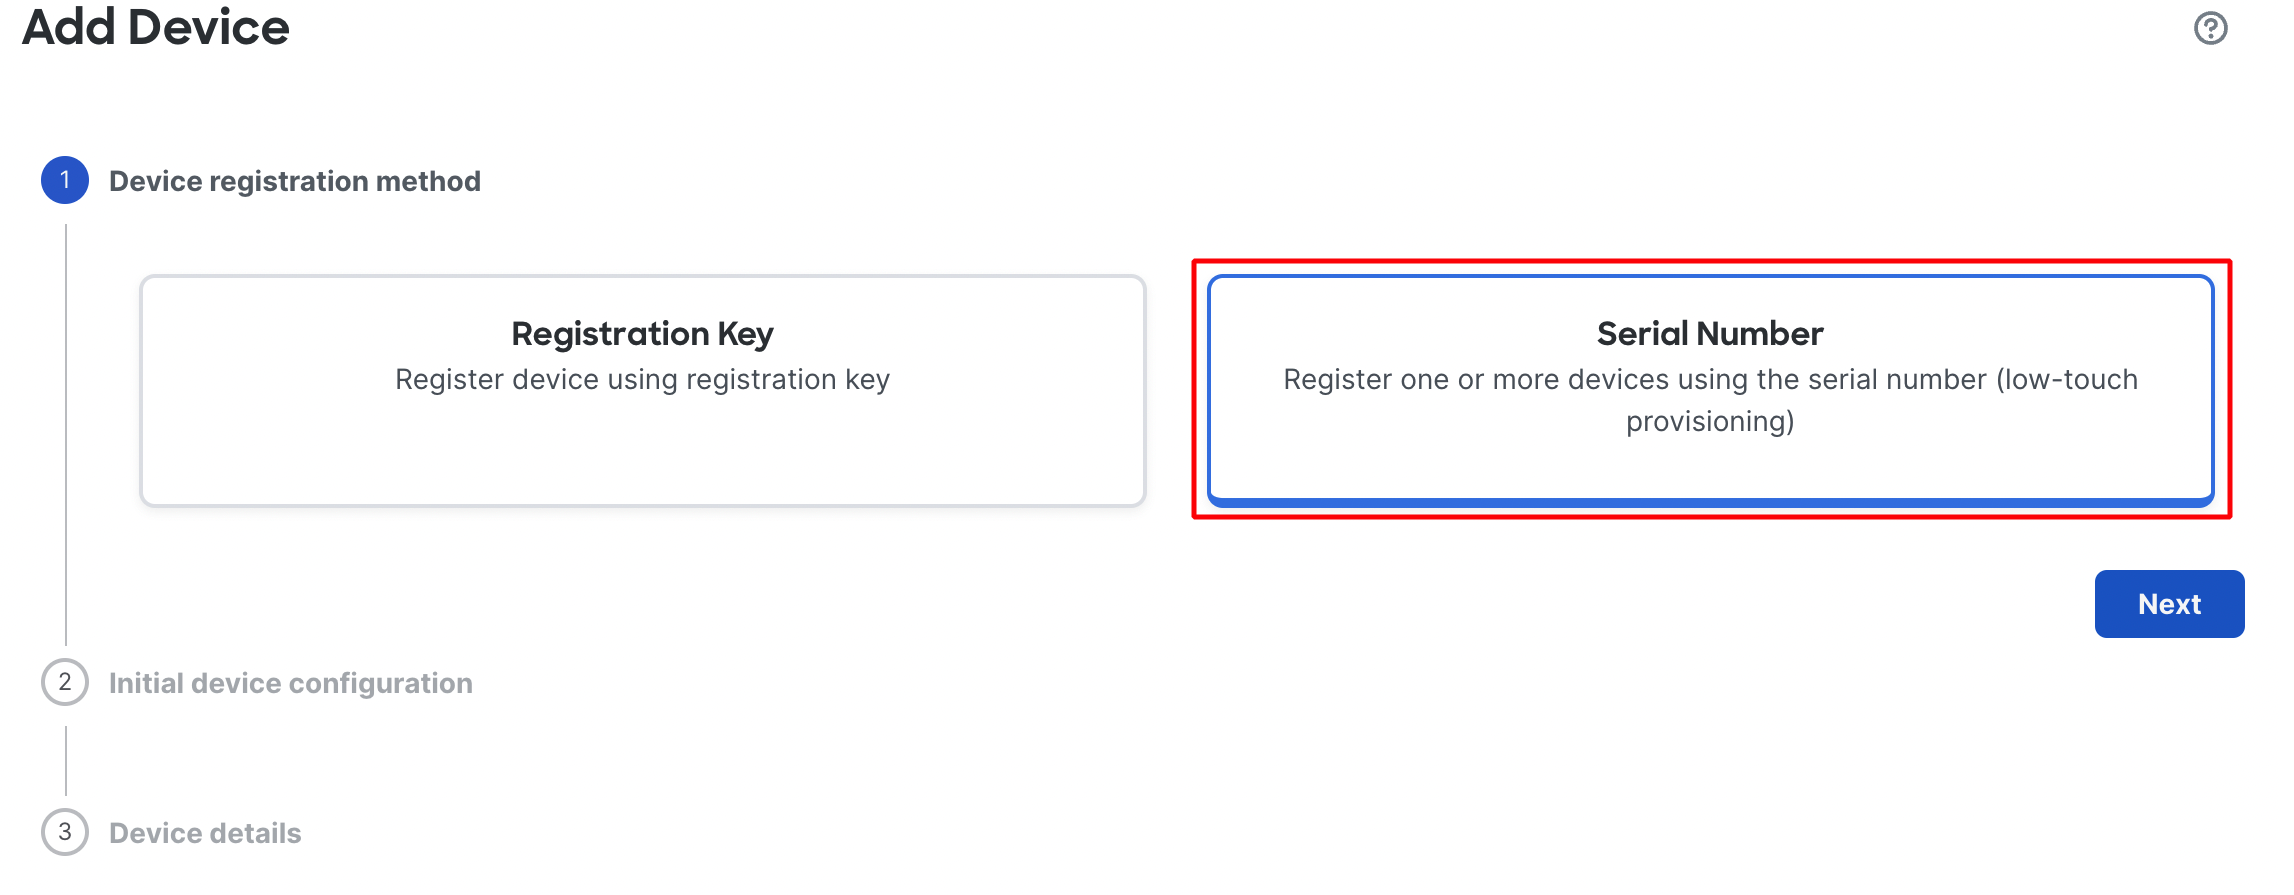
In the pop up box select Use Serial Number
-
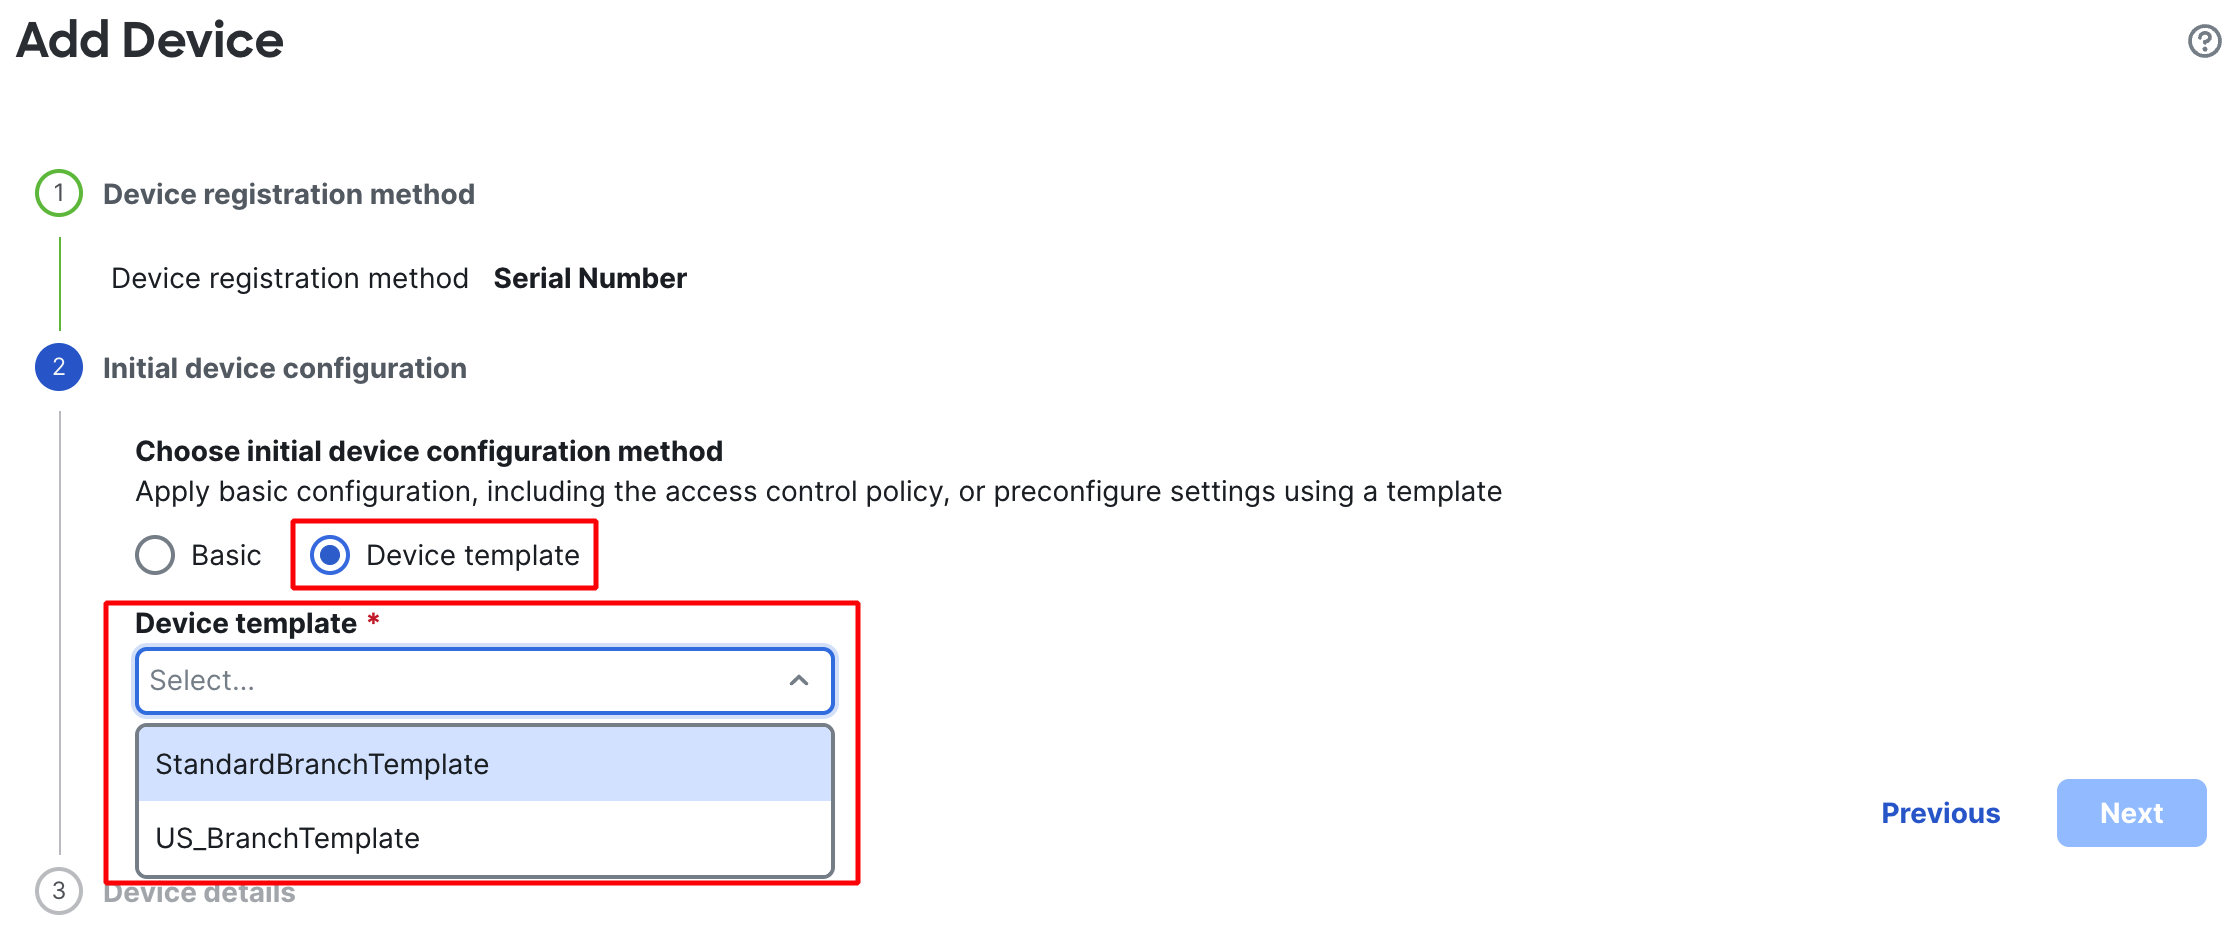
In the next step, select Device Template, select the template from the drop down, and click on Next
-
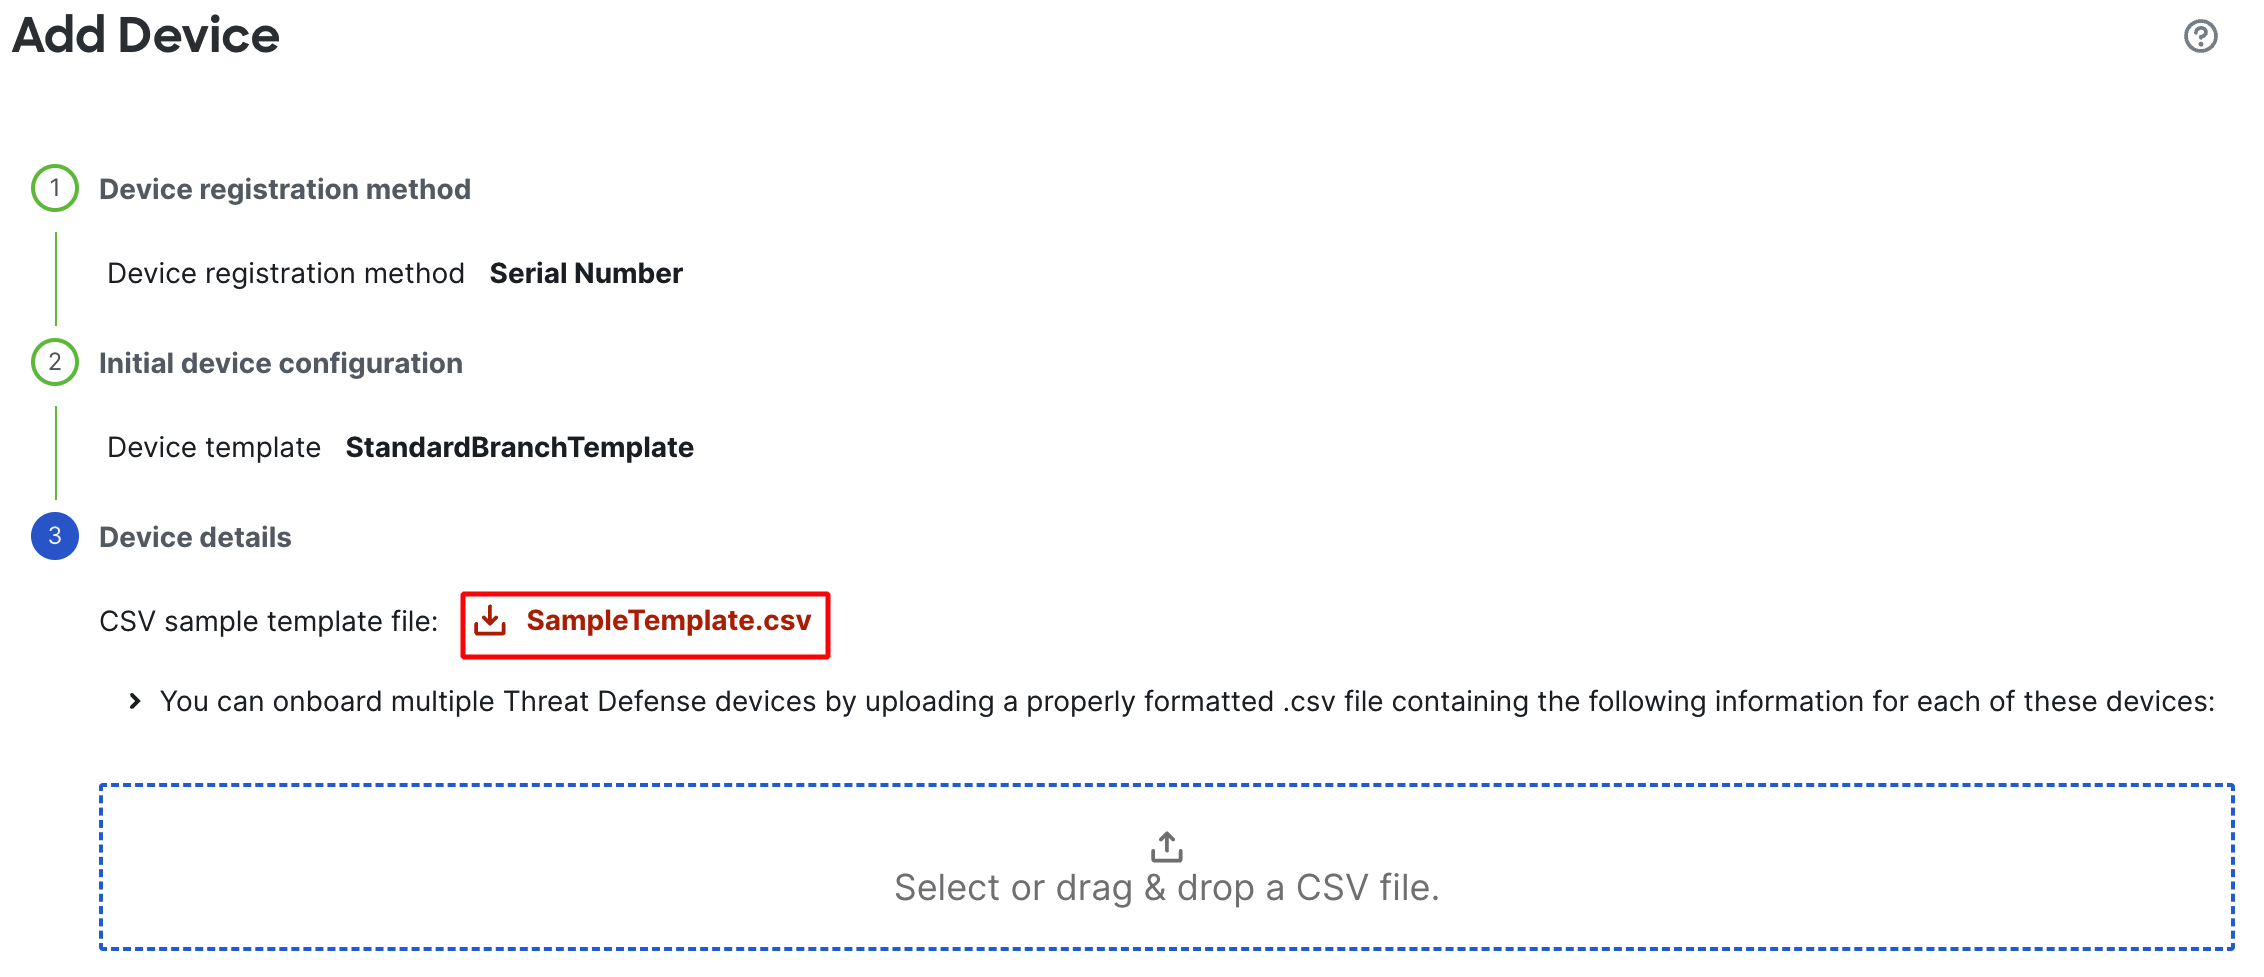
In the next step, click on the SampleTemplate.csv hyperlink to download the CSV template
-
Open the CSV file and fill in the required information and save the file
-
Back in FMC upload the filled in CSV file
-
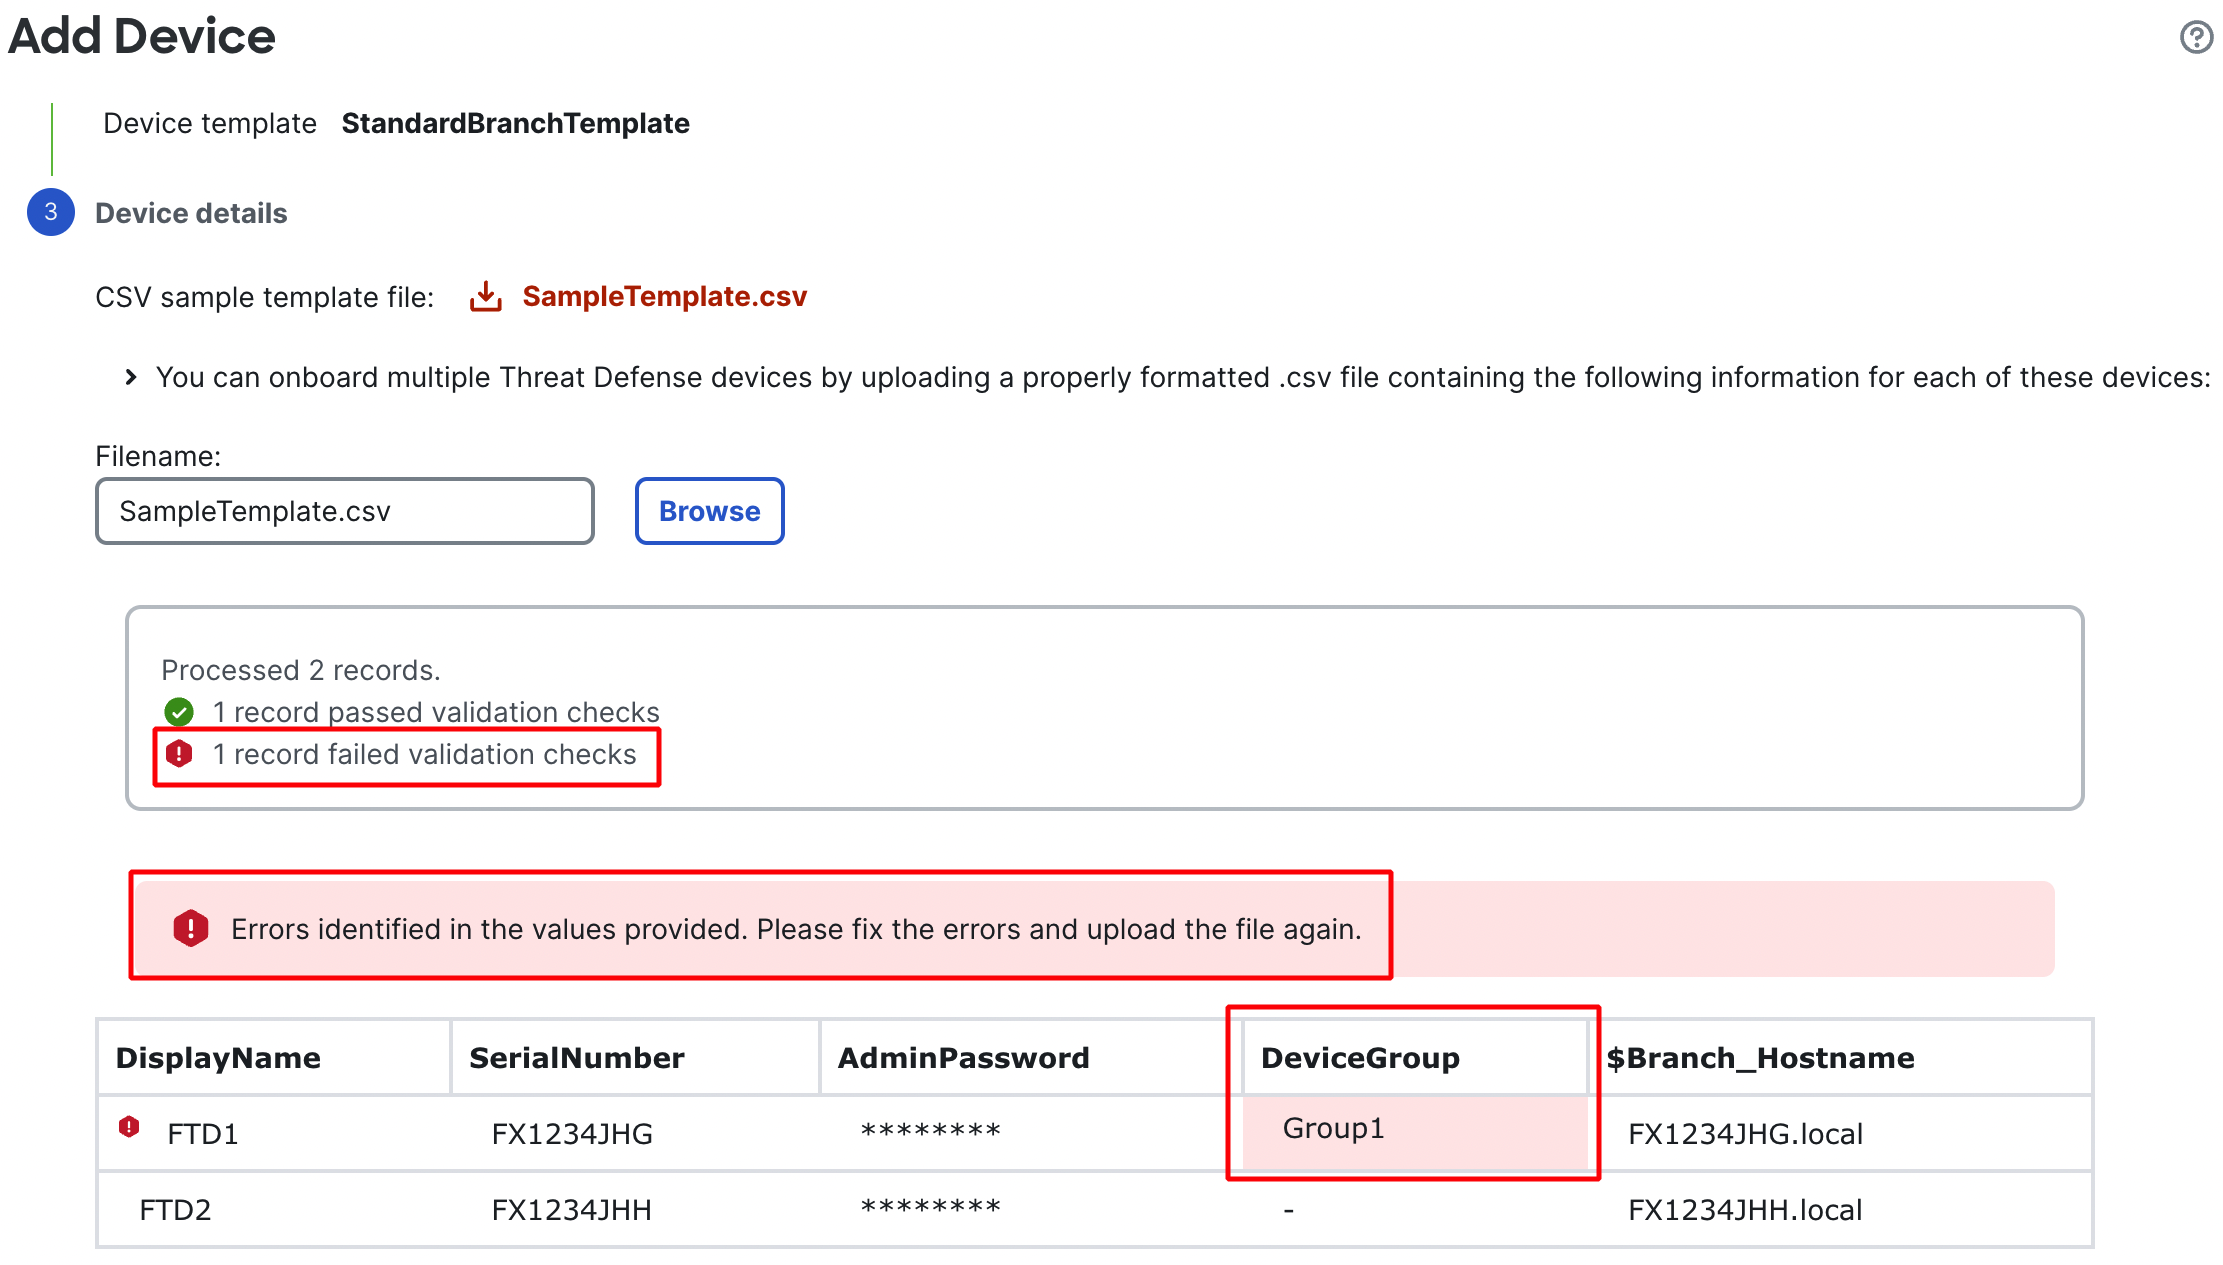
FMC will parse the file and show details about valid and invalid entries
- FMC will show a table highlighting any incorrect entries
-
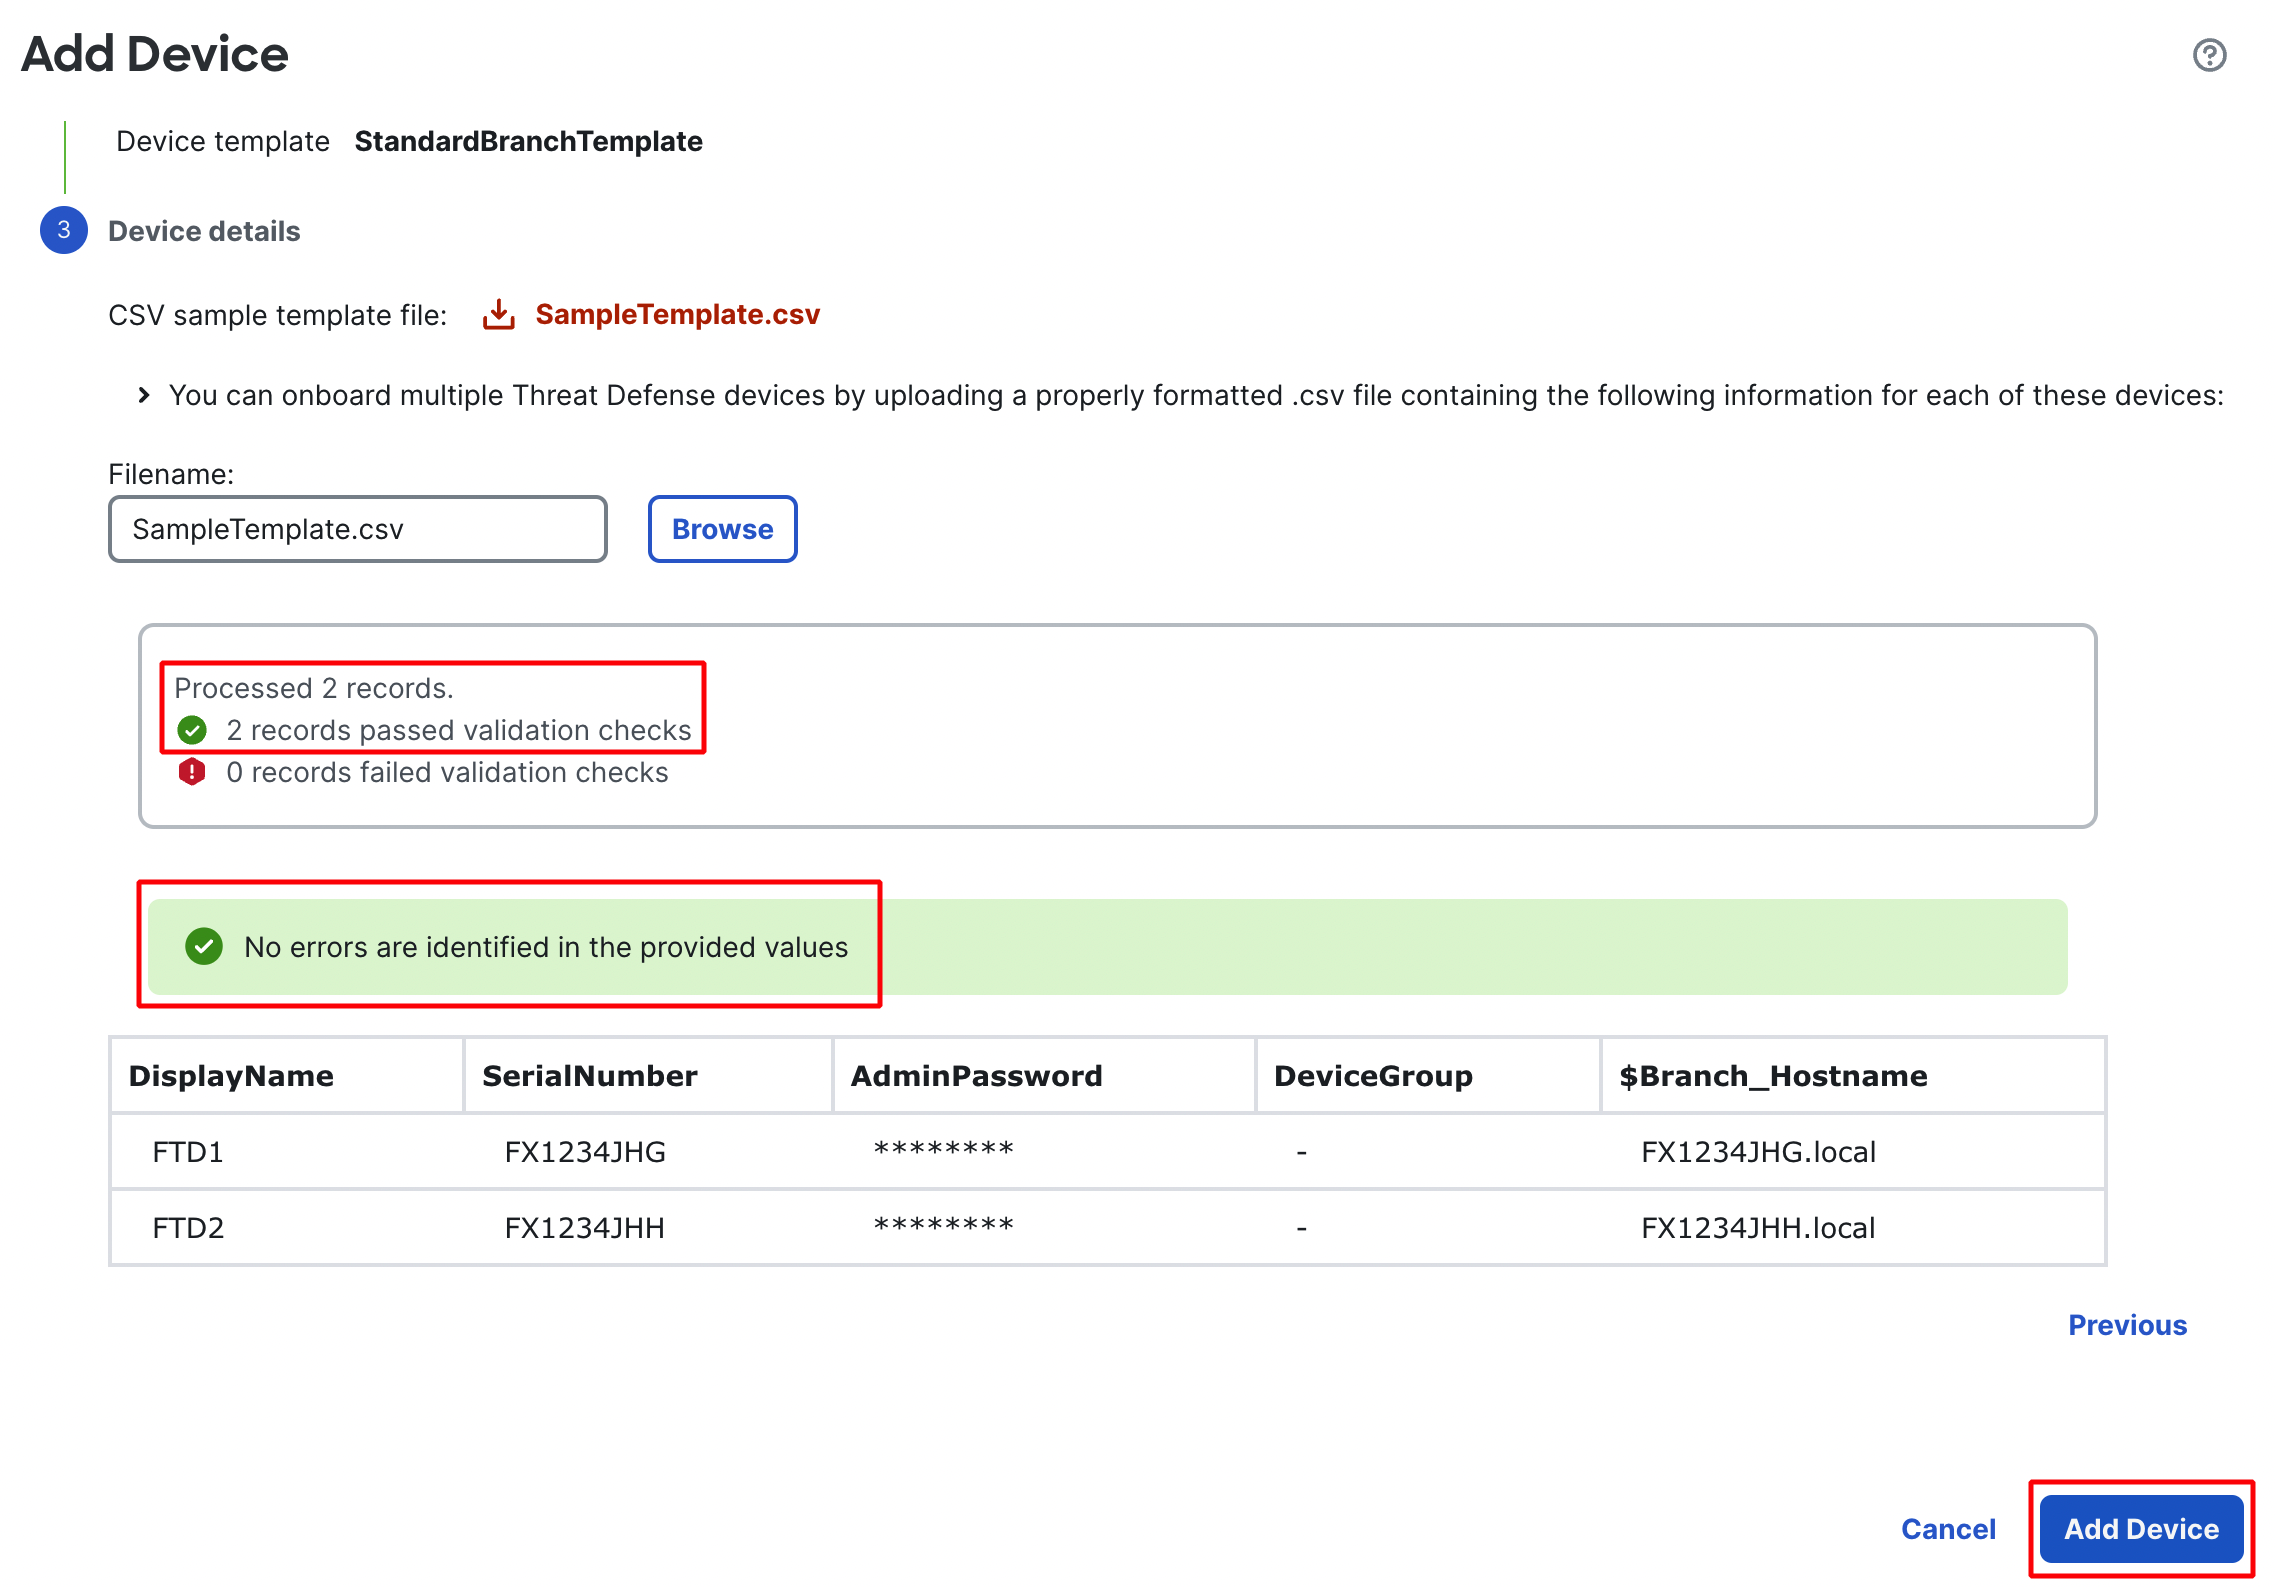
Once a CSV file with all correct entries is uploaded the Add Device button will become available. Click on it to start the claim and registration process.
Registration Stages
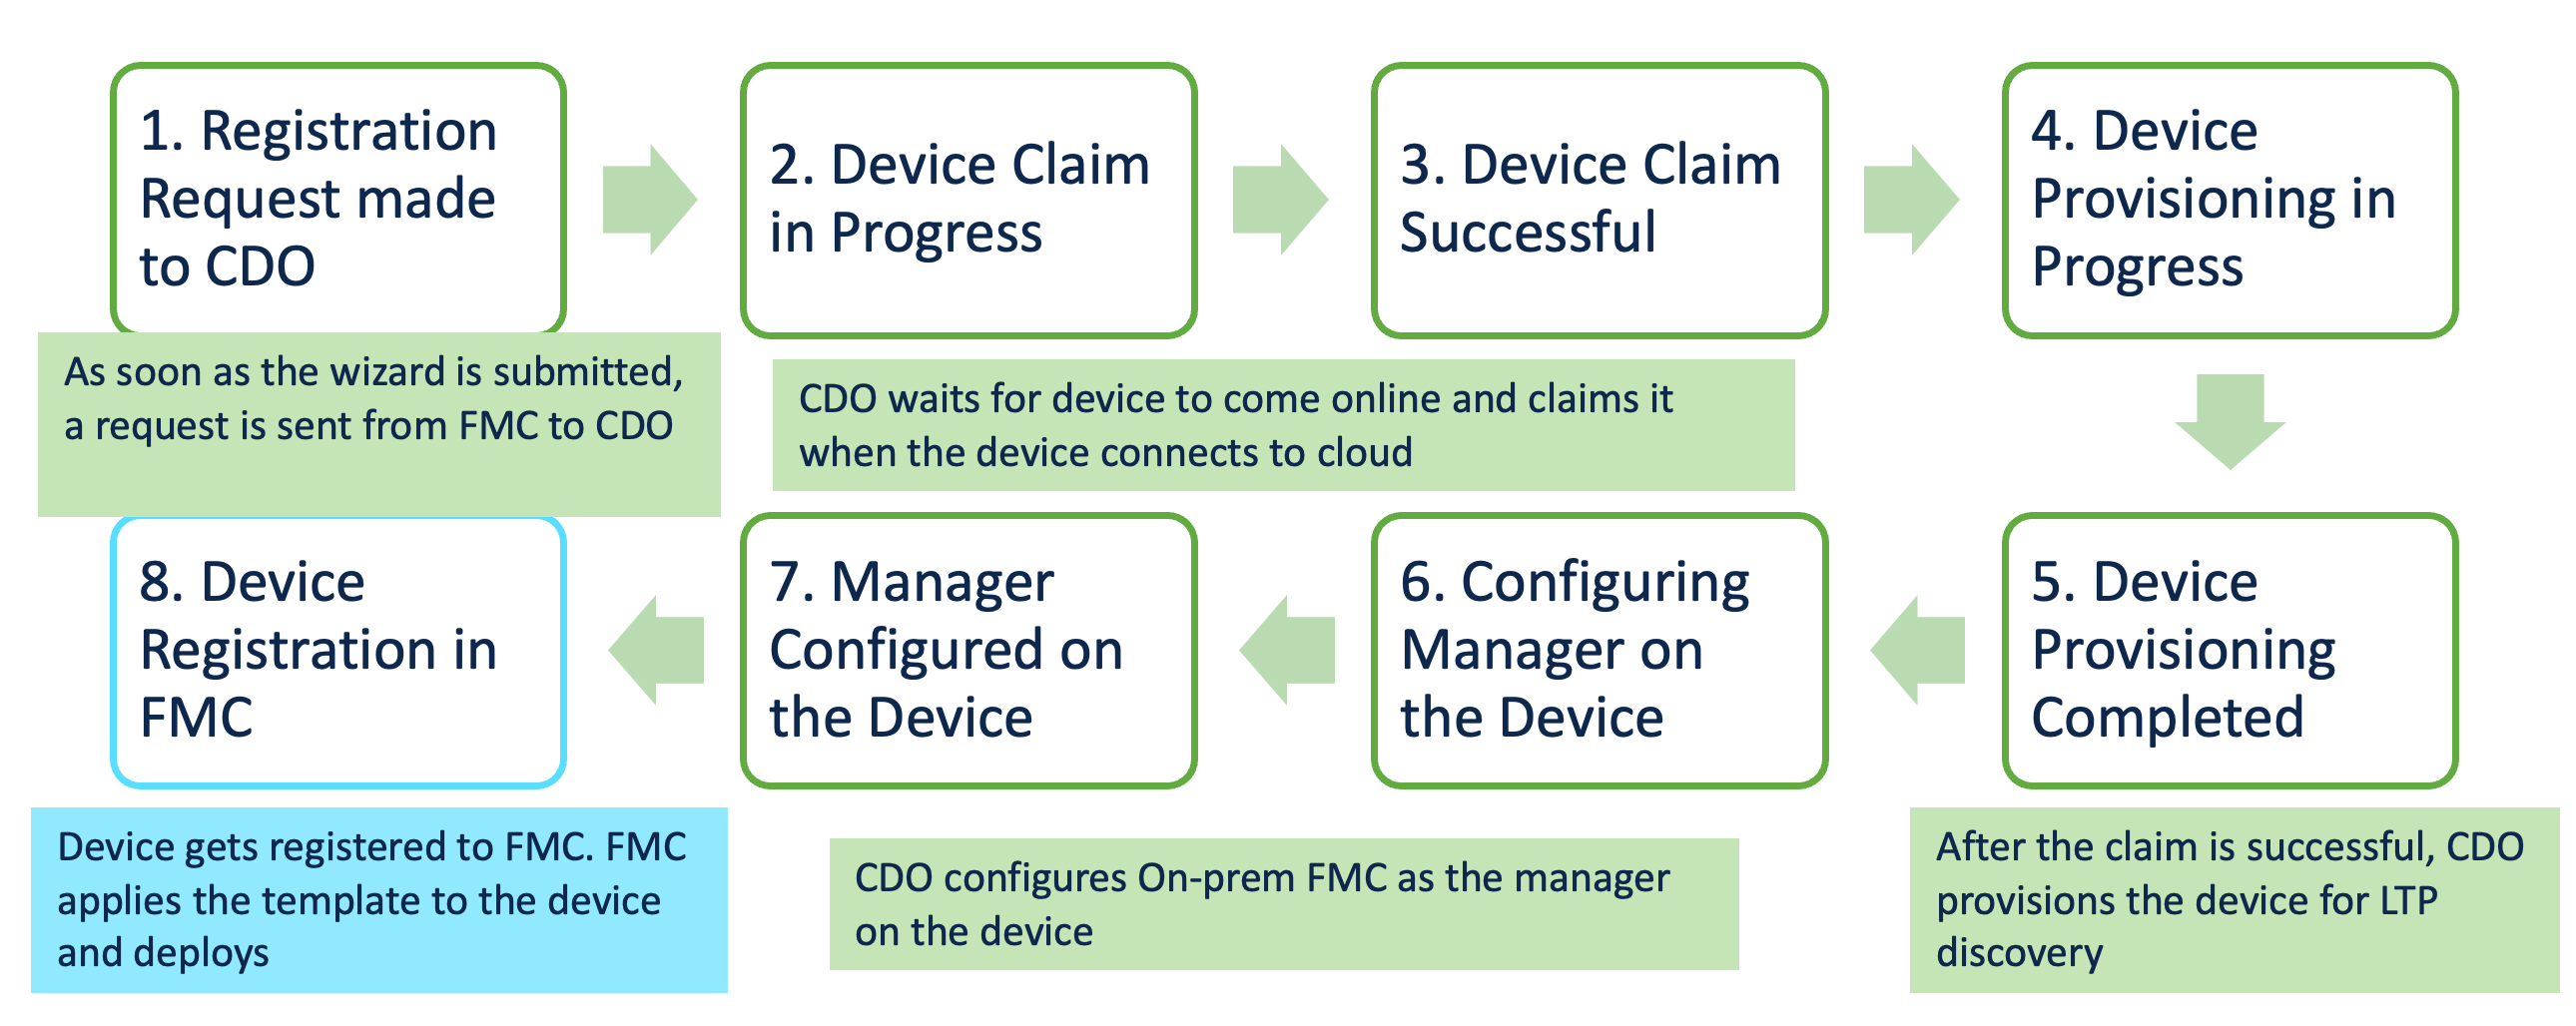
After clicking on the Add Device button, the FMC/FTD go through the following stages:
-
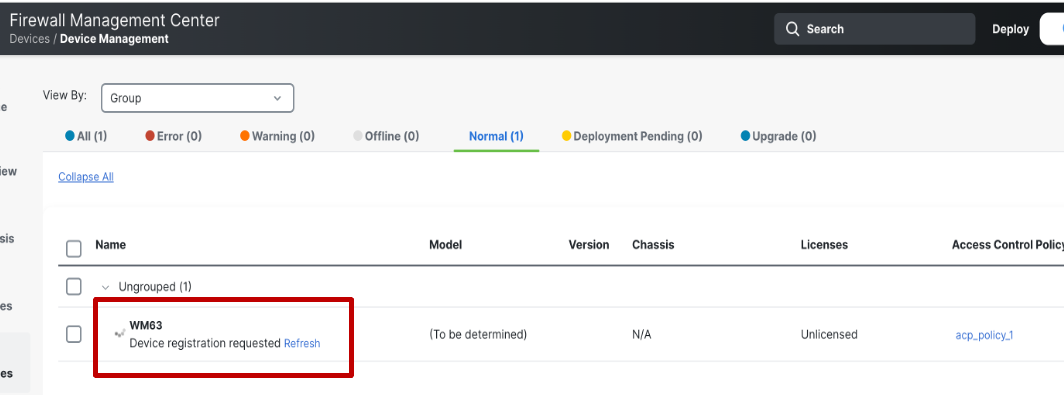
Once the registration wizard is completed, a registration request is submitted to CDO from FMC. The devices will start appearing in the FMC device listing page with status Device registration requested.
-
When CDO initiates the FTD device claim, the status of the device is shown as Claiming. At this point, the system is waiting for the FTD device to come online and connect to the cloud. CDO checks the claim status of the device frequently for the first two hours. If the FTD device does not come online or does not connect to the cloud within the first two hours, then CDO checks the claim status in a scheduled manner.
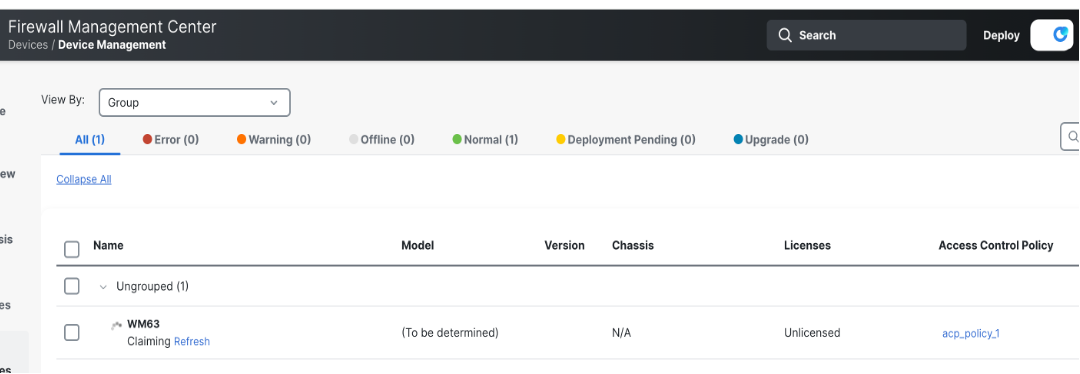
-
If the status shows Claim Pending then that means the device has not been plugged in yet or it has been plugged in after the last claim check. In other words, the device did not come online within the first two hours of triggering the job. The last claim check time can be seen next to the status. Refresh button can be clicked to trigger a claim check in this case.
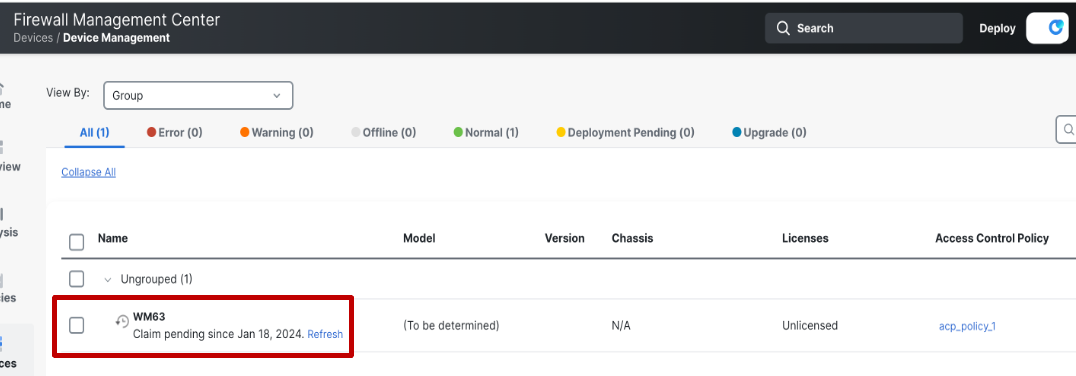
-
CDO will claim the device, once the device is plugged in and it connects to CDO successfully. Once the device is claimed its status will be changed to Device claimed successfully.
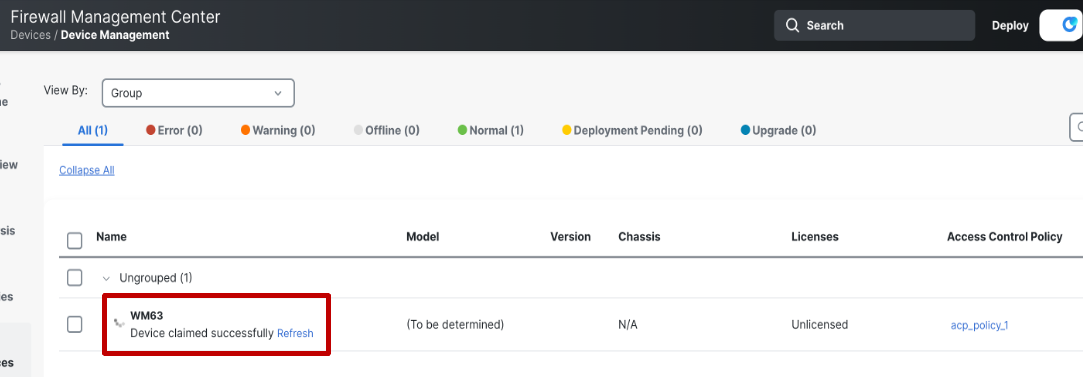
-
CDO will then initiate the device provisioning and the status will change to Initial Provisioning is in progress.
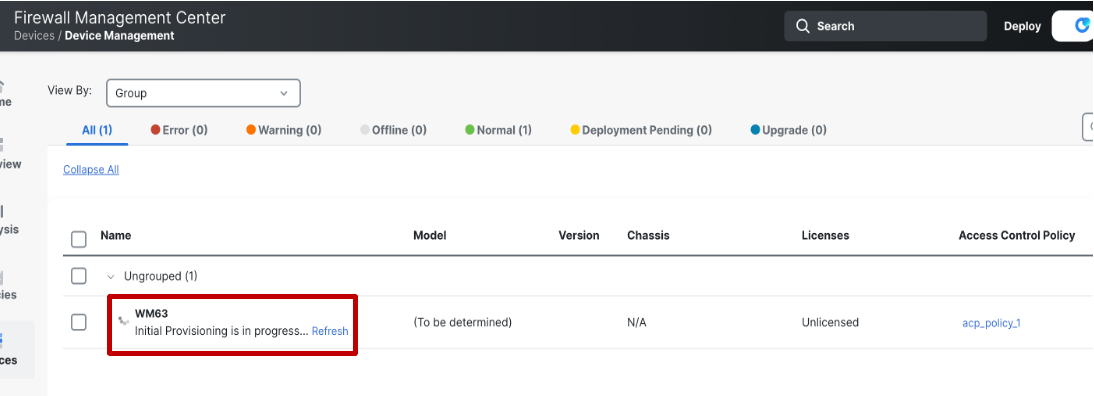
-
Once the provisioning is complete the status will change to Initial Provisioning is Completed.
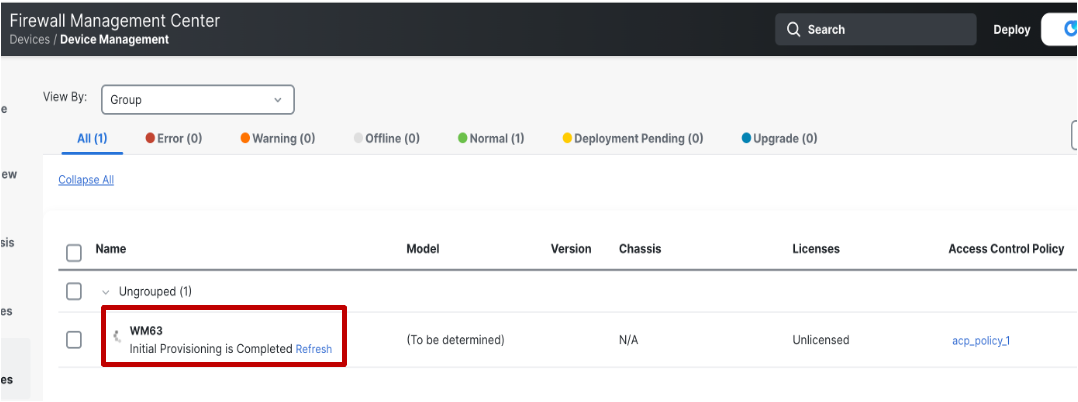
-
After the initial provisioning is successfully completed, the next step will be to configure the on-prem FMC as the manager of the FTD device. During this phase, the status of the device will be shown as Configuring manager on the device.
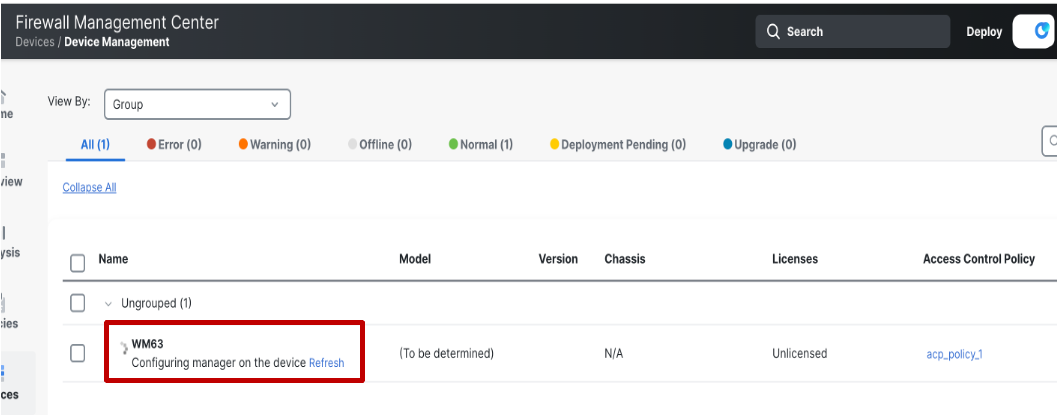
-
When the process is complete, the status of the device is shown as Manager is configured on the device.
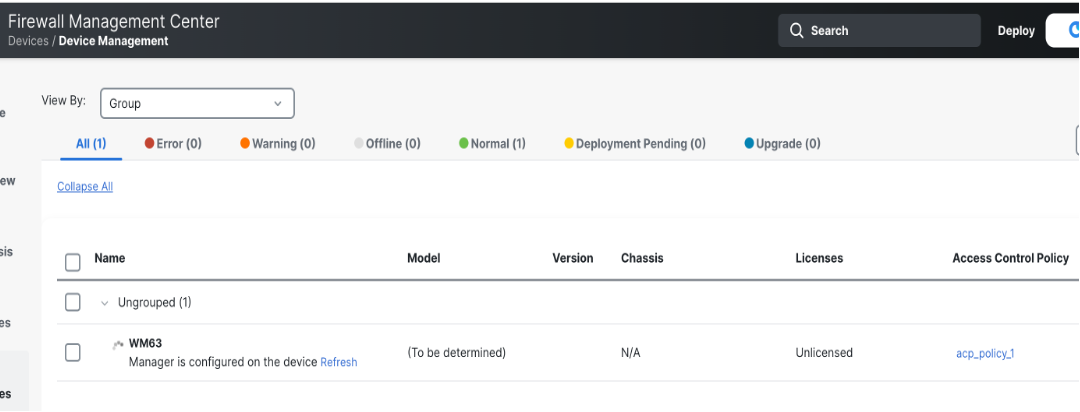
-
After the manager is configured on the device, CDO submits the device registration request to the FMC. When FMC receives the device registration request from the CDO, the device registration task starts executing on the FMC. The status of the device is shown as Device registration started.
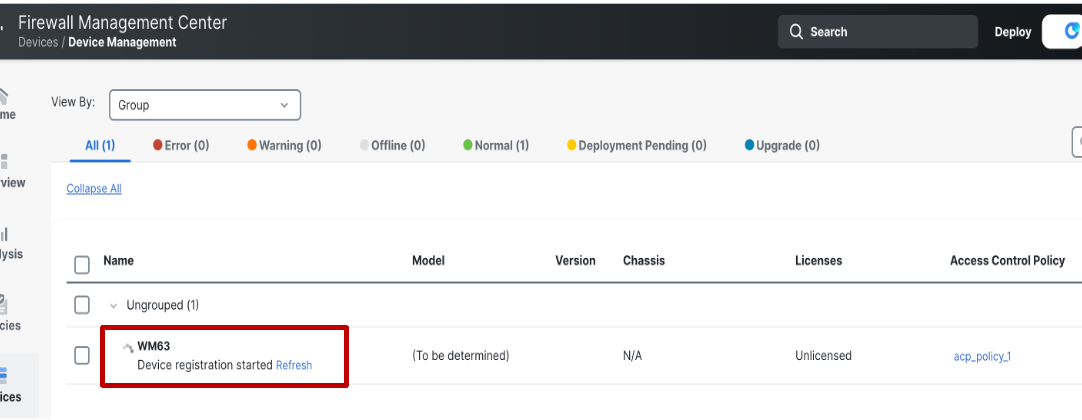
-
When device registration is completed on the FMC, the device hostname is displayed in the format: <Serial_number>.local.
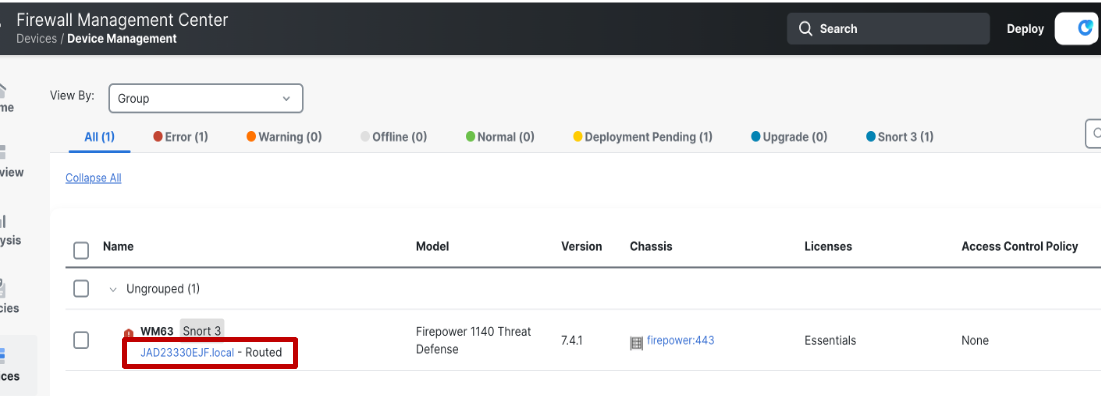
-
In the Device tab (in device edit page), the onboarding method will be shown as Serial Number.
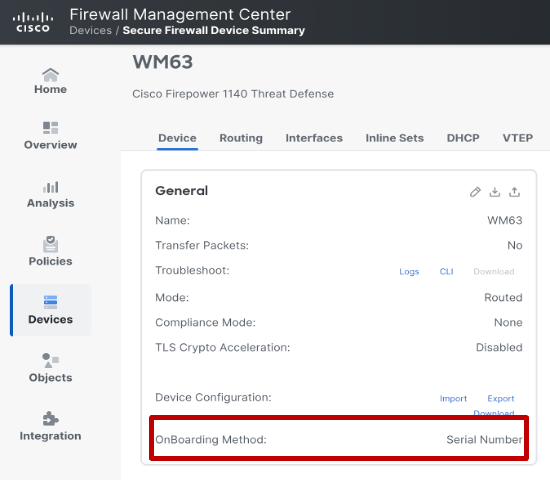
Provisioning Errors
-
Provision Error Due to Missing Admin Password
-
When the default admin password has not been changed on the device and the user has not provided a new admin password at the time of registration, the FTD device provisioning will fail.
-
In this case, the status of the device is shown as Provision Error with Enter Password link which is visible when hovering over the error icon.

-
Click on Enter Password to set a new admin password.
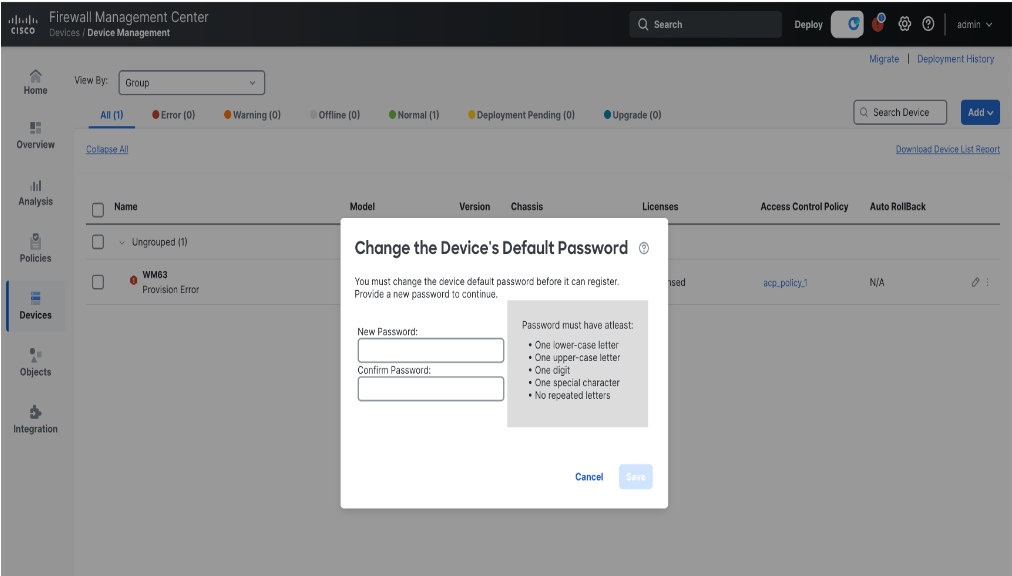
-
Click on Save to save the password and retry the registration.
-
-
Provision Error Due to Admin Password Already Set
-
When the default admin password has already been changed in the device and the user has also provided an admin password during provisioning, the device provisioning will fail.

-
Onboarding is re-triggered, ignoring the user-provided password if the Confirm and Proceed link is clicked.
-
-
General Provision Error
-
When device provisioning failed in CDO for any other generic error, the status of the device is shown as Provision Error with a Retry link.

-
Onboarding is re-triggered in CDO when this link is clicked.
-
Additional Resources
To learn more about SD-WAN Wizard, please refer to the following link:
Updated 7 months ago
