Scenario 6 - Platform Settings
Now that our device is registered. Let's create a platform settings policy. This policy defines some of the configurations specific to a device. These include:
- SSH banner
- NetFlow
- Syslog servers
- Time Zone
- Performance Profile
We will configure some of the common settings in our policy.
Lab Tasks
These are the tasks in this scenario. If you are familiar with the Secure Firewall you may do these on your own, or for step-by-step instructions see below.
- Task 1 - Create a new Platform Settings policy named Standard Platform and add NGFW1 to the policy
- Task 2 - Edit the policy to enable sending syslog events from the NGFW1 management interface to the Splunk server we defined earlier on the default syslog UDP port. Set the logging filter on the "alert" severity.
- Task 3 - Review Performance Profile options
- Task 4 - Deploy policy changes to NGFW1
Task 1 - Create Platform Policy
-
From the FMC2 web UI navigate to Devices > Platform Settings.
-
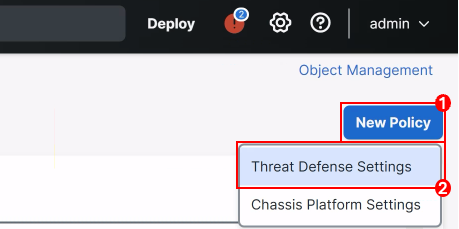
Click the New Policy button and select Threat Defense Settings.
-
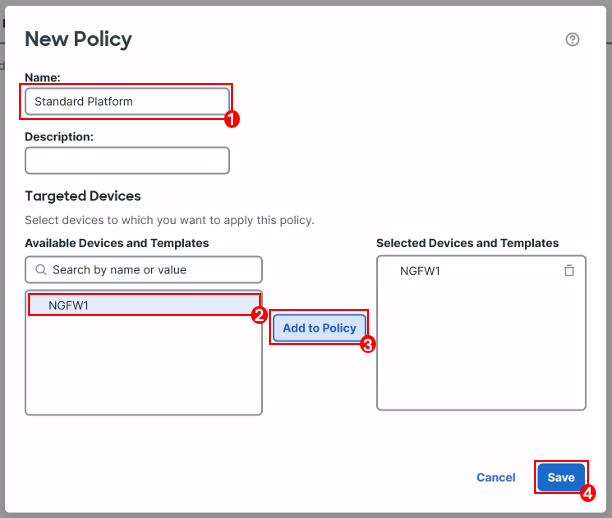
Name your policy Standard Platform.
-
Add the NGFW1 device to the policy.
-
Click Save to create the policy.
-
Task 2 - Edit Platform Policy
We will configure our devices to send to our Splunk syslog server.
-
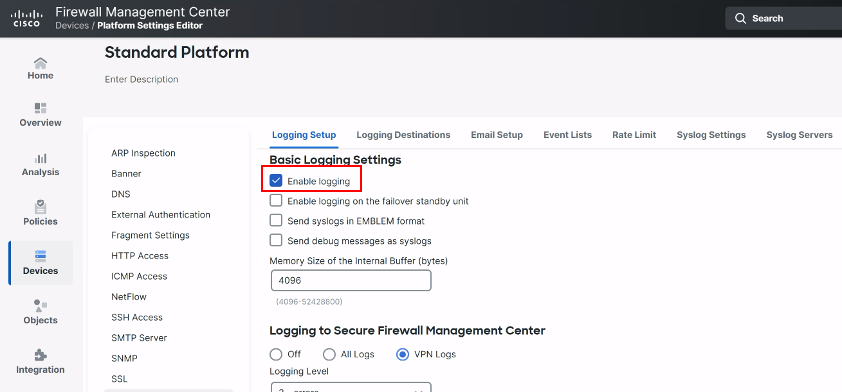
To setup syslog we need to configure some basic logging settings, define our syslog server(s) and then configure logging destinations. On the left panel, click Syslog.
-
Under the Logging Setup tab click the checkbox for Enable Logging.
-
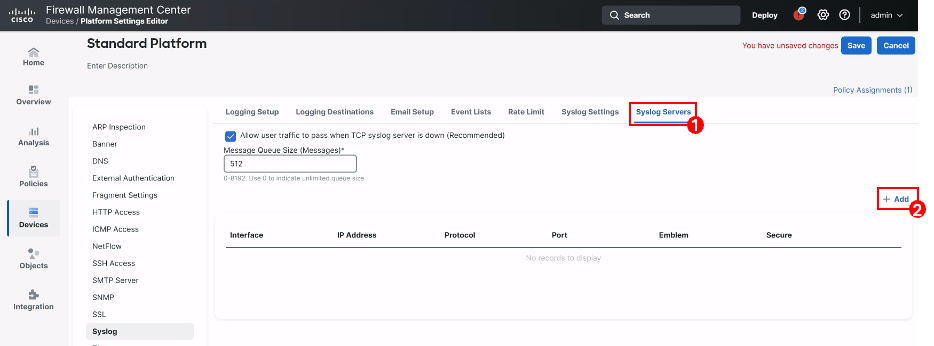
Click the Syslog Servers tab then click + Add.
-
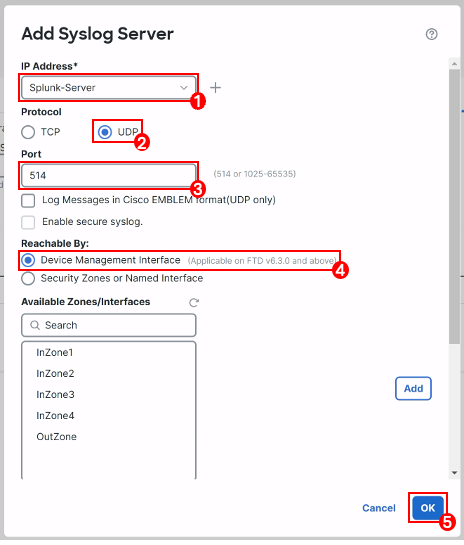
In the Add Syslog Server dialog:
-
IP Address: Splunk-Server
-
Protocol: UDP
-
Port: 514
-
Reachable By: Device Management Interface
-
Click OK to save the server settings.
-
-
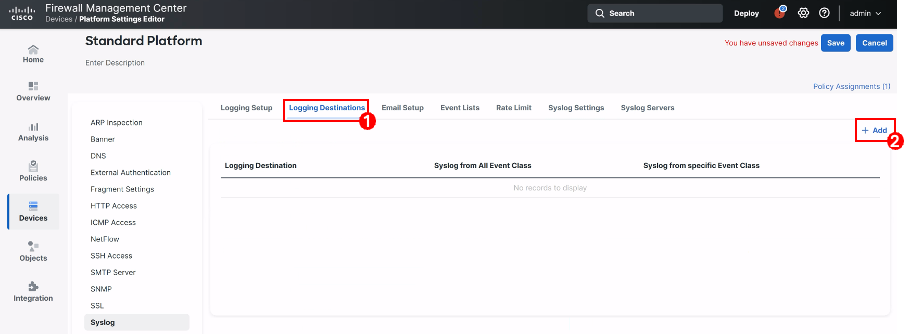
Click the Logging Destinations tab then click + Add.
-
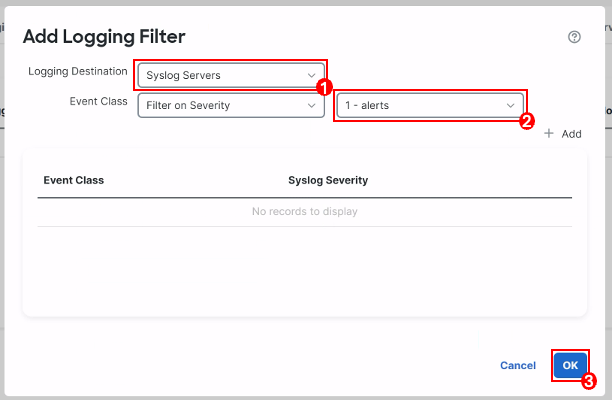
In the Add Logging Filter dialog enter the following:
-
Logging Destination: Syslog Servers
-
Event Class: Filter on Severity 1 - alerts
-
Click OK to save the filter.
-
Task 3 - View Performance Profiles
-
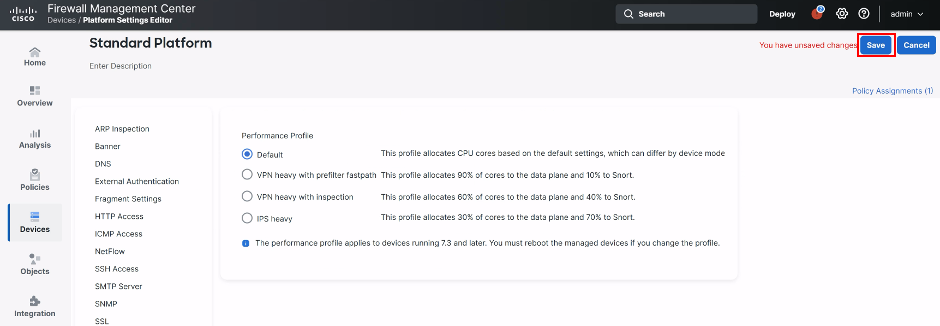
Click on Performance Profile in the left panel.
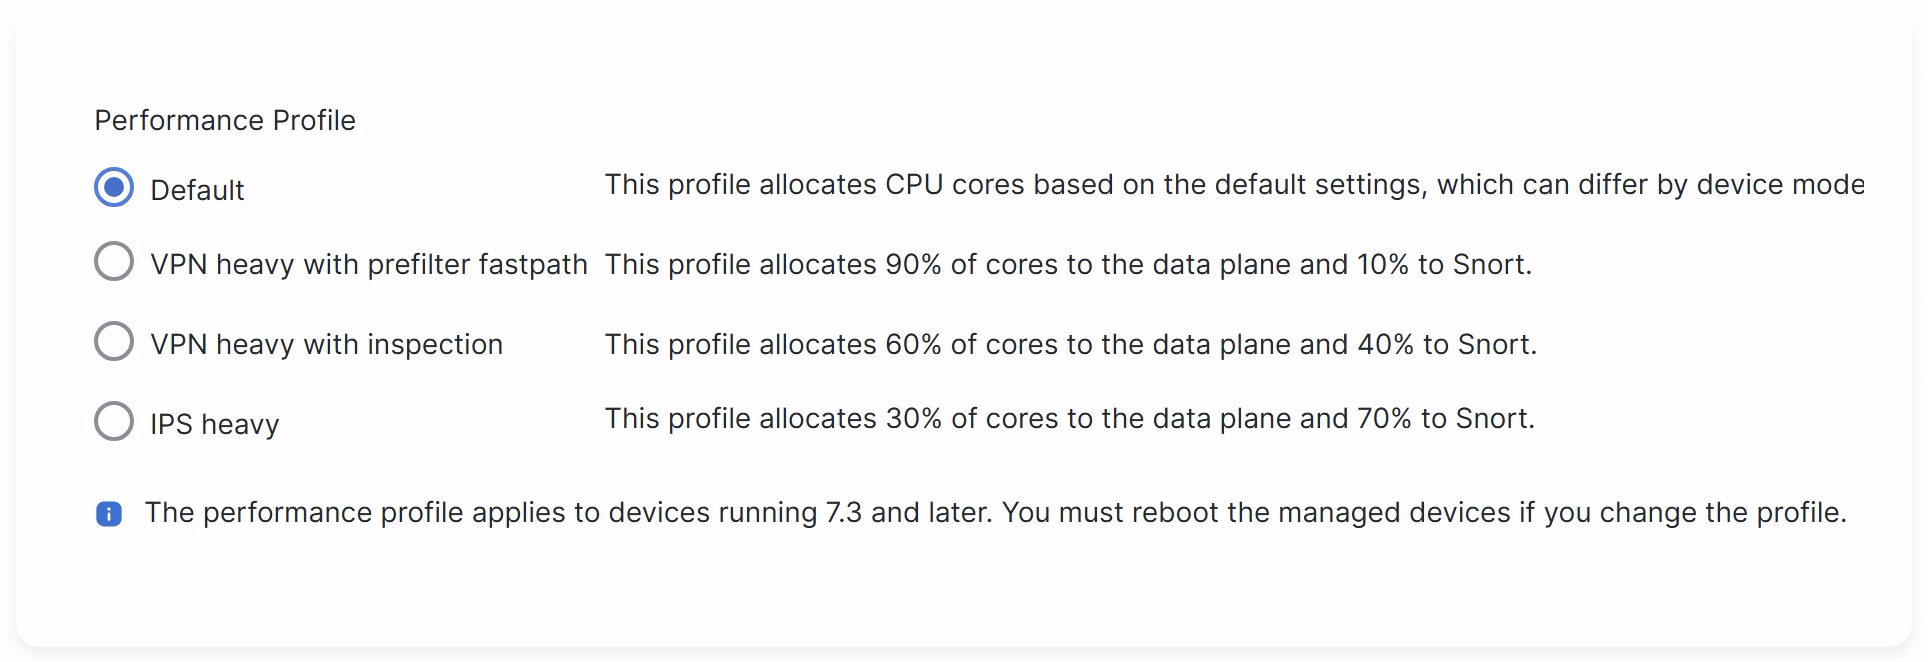
Notice that we can customize the CPU allocation within our device depending on how it is deployed. This is less impactful for a small device like our dCloud FTDv but could be more significant for larger hardware platforms.
Since our device will perform both firewall and IPS functions we will leave it at the default allocation.
-
Click Save to save your platform policy.
Task 4 - Deploy Changes
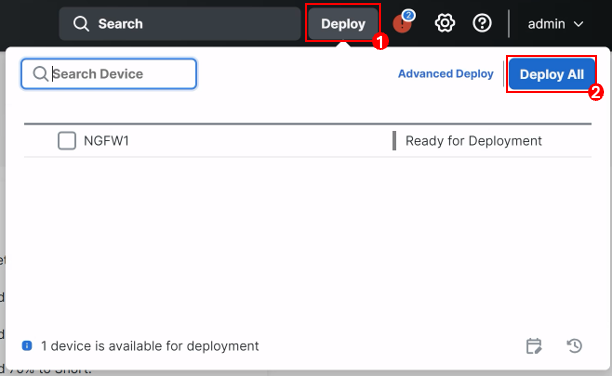
- Click Deploy in the top menu then click the Deploy All button.
-
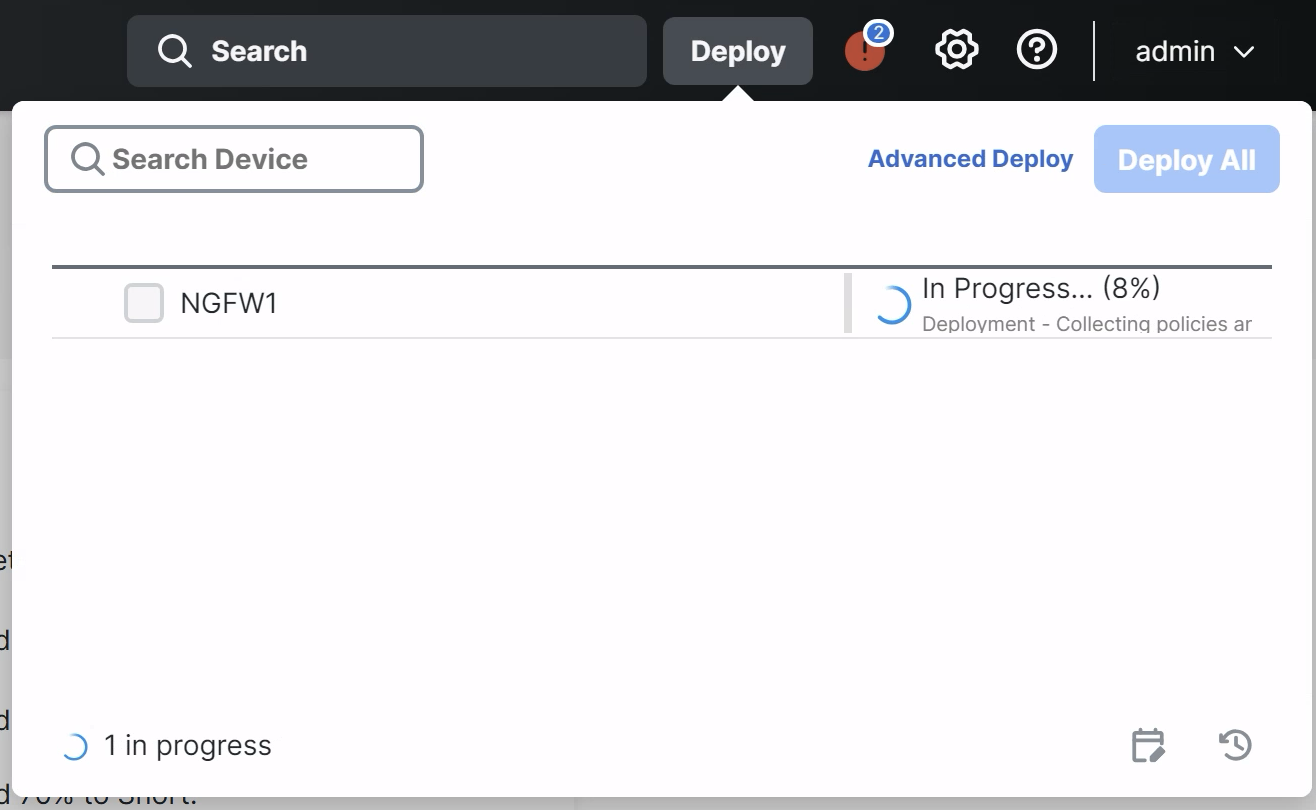
You can monitor deployment progress here or in the message center.
Tell us how we are doing
We are doing our best to ensure the scenarios in this lab guides are useful, clear and work as expected.
Please share your thoughts to help us improve or fix any problems you may run into..
Click here to provide your feedback or report an issue with this guide
Updated about 1 year ago

