Scenario 11 - Intrusion Policy
A key component of the system is deep packet inspection. This is performed by Snort and is configured via the Intrusion policy. In this section we will create Intrusion and Network Analysis policies to be used in our deployment. Both of these policies configure the Snort detection engine. The Intrusion policy is focused on the Snort rule set while the Network Analysis policy is used to configure advanced options.
Lab Tasks
These are the tasks in this scenario. If you are familiar with the Secure Firewall you may do these on your own, or for step-by-step instructions see below.
- Task 1 - Create a prevention mode Intrusion policy based on the Balanced rule set.
- Task 2 - Change the Browser -> Firefox rule group to use Security Level 3.
- Task 3 - Disable SID:52431 in the policy
- Task 4 - Run Cisco Recommended Rules based on Security Level 3, do not disable any rules.
- Task 5 - Create a new Network Analysis policy based on the Balanced policy.
Task 1 - Create Intrusion Policy
-
From the FMC2 UI navigate to Policies -> Intrusion and click the Create Policy button.
In the initial create policy dialog we will set the Name, the Inspection Mode and the Base Policy.
Name: Balanced Intrusion
Inspection Mode: Prevention
Base Policy: Balanced Security and Connectivity
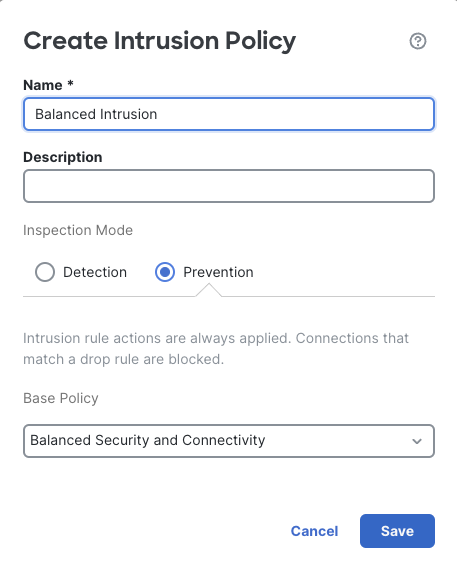
Create Policy Dialog
Click Save
-
The new policy using the Balanced Security and Connectivity rule set is an excellent starting point for most organizations. The system has created two policies, one for Snort 2 and one for Snort 3. These policies are independent and any changes made to one will not impact the other. Because we have only Snort 3 deployed we will only be working with this version of the policy.
Initially, the policy is a copy of the system provided rule set. However, as traffic is inspected there may be a need to adjust the rule set based on specific organization needs or false positive detections. In our case, we would like to adjust the rules for our corporate standard browser by increasing the protection level.
Click the Snort 3 Version link to edit the Snort 3 policy.
The About Intrusion Policies dialog gives helpful information on how Intrusion policy layers and groups work. Take some time to click through the various tabs and familiarize yourself with the various components.
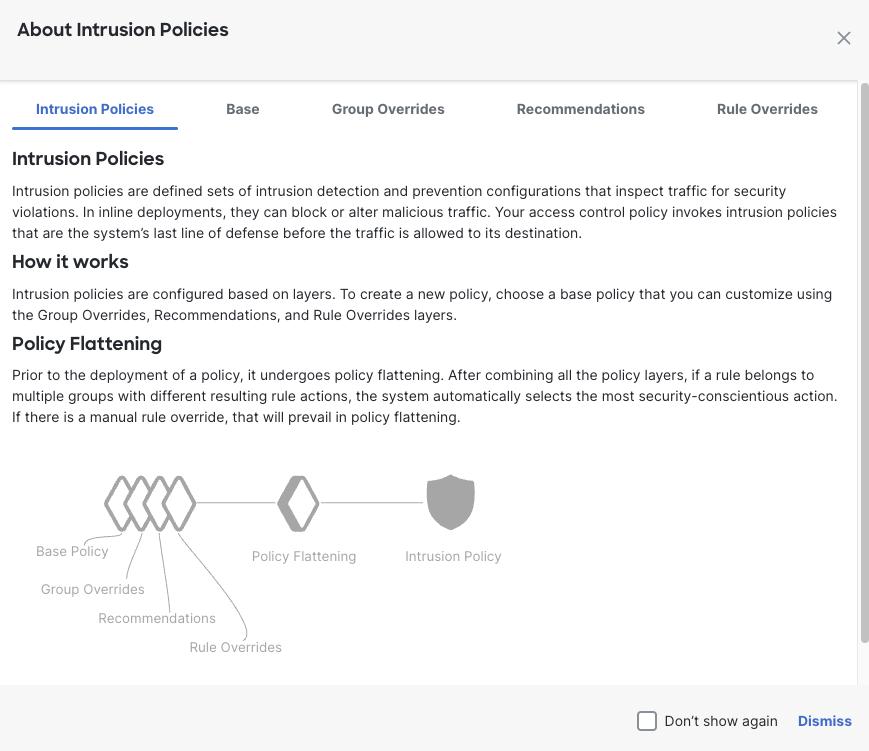
About Intrusion Policies
The initial view is the Summary tab. Here you can see the various layers:
- Base
- Group Overrides
- Recommendations
- Rule Overrides
The currently selected Summary tab is a summary of the rule states based on the layers.
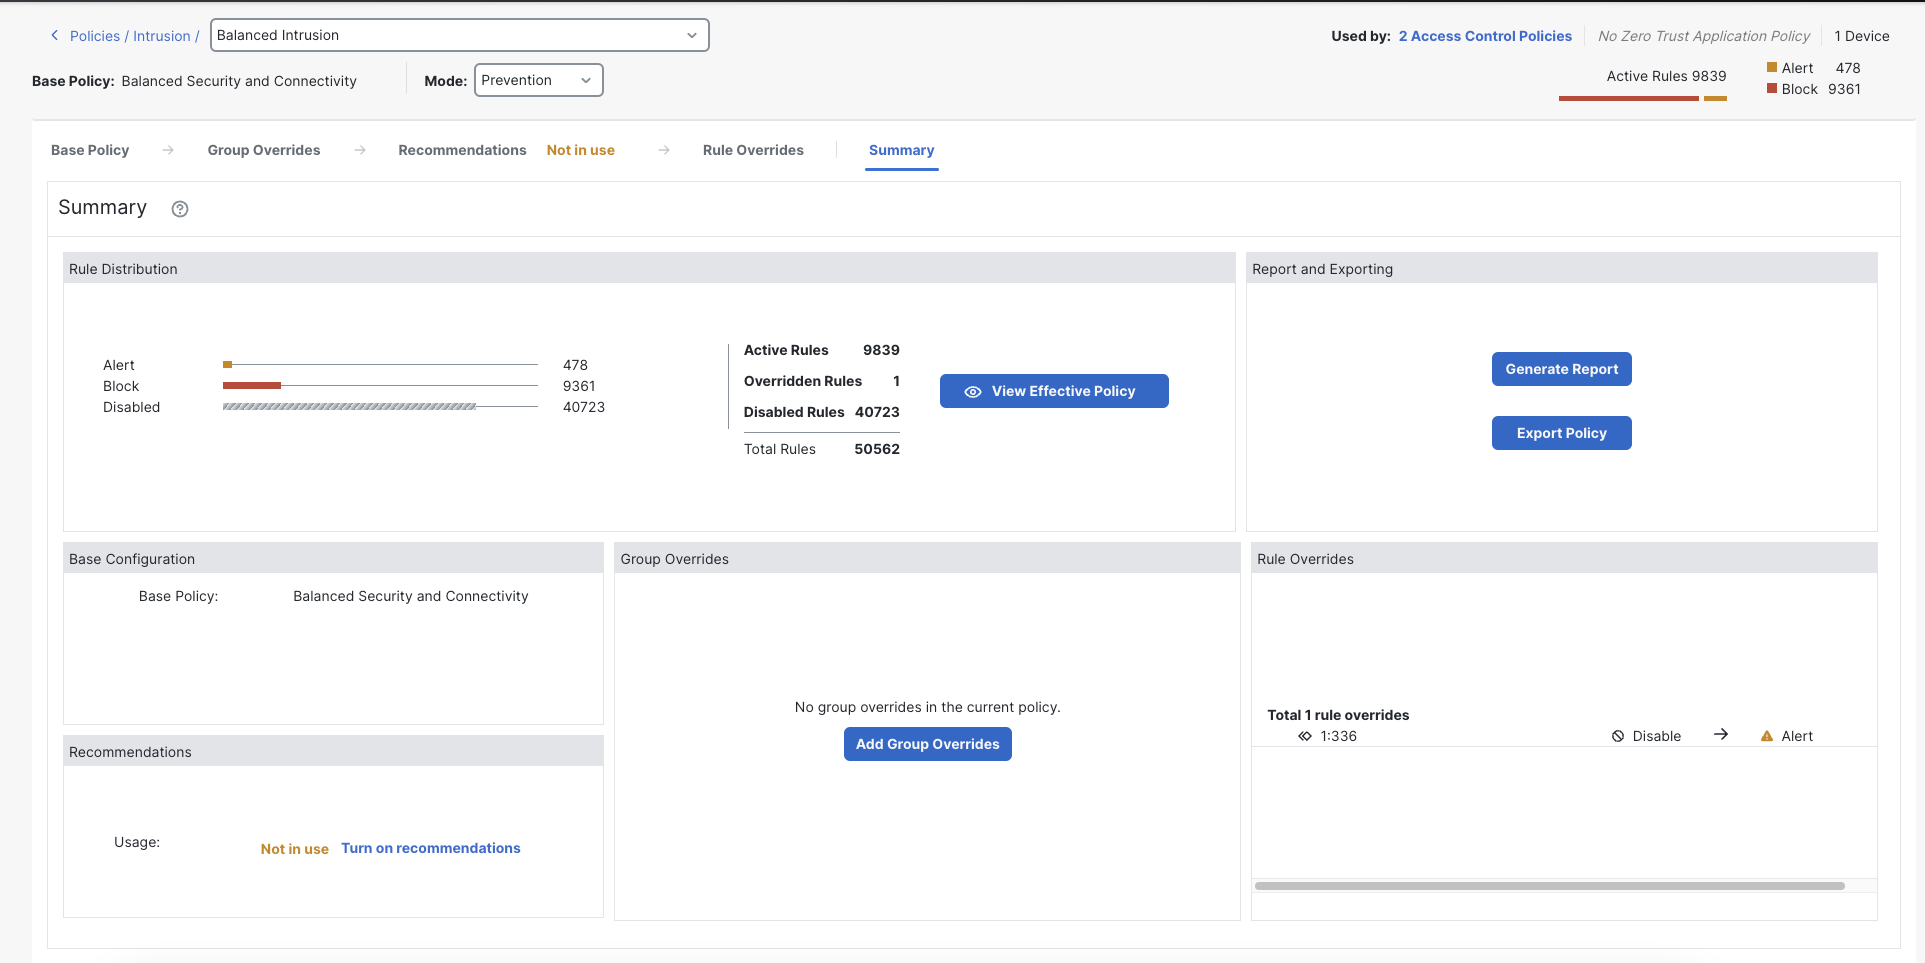
Intrusion Policy Summary
Clicking a layer allows you to view or edit the layer settings.

Policy Layers
Task 2 - Modify Rule Group Security Level
-
Now we will increase the protection level for our corporate browser.
Click the Group Overrides layer.
Expand Rule Categories
Expand the Browser category
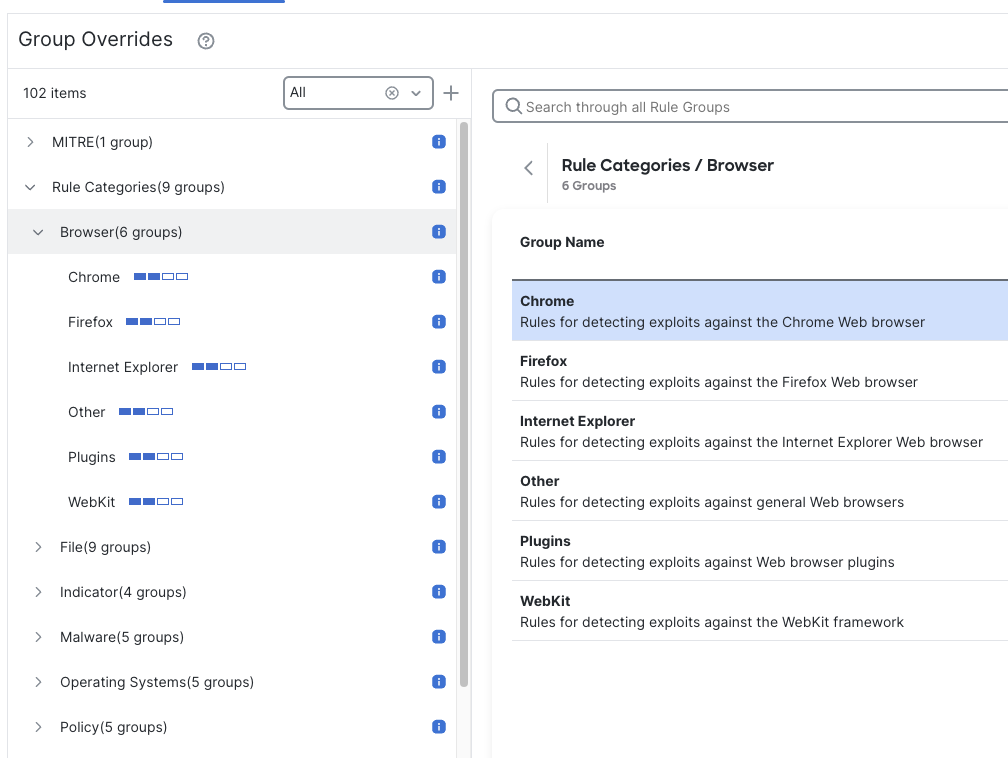
Browser Category
Within the Browser category there are 6 groups corresponding to various web browser types.
Notice that the blue Security Level icon to the right of each group indicates each group is using Security Level 2. This corresponds to the Balanced Security and Connectivity rule set and is the Security Level inherited for all groups in this policy.
Click the Firefox group, then to the right click the pencil icon to edit the Security Level.
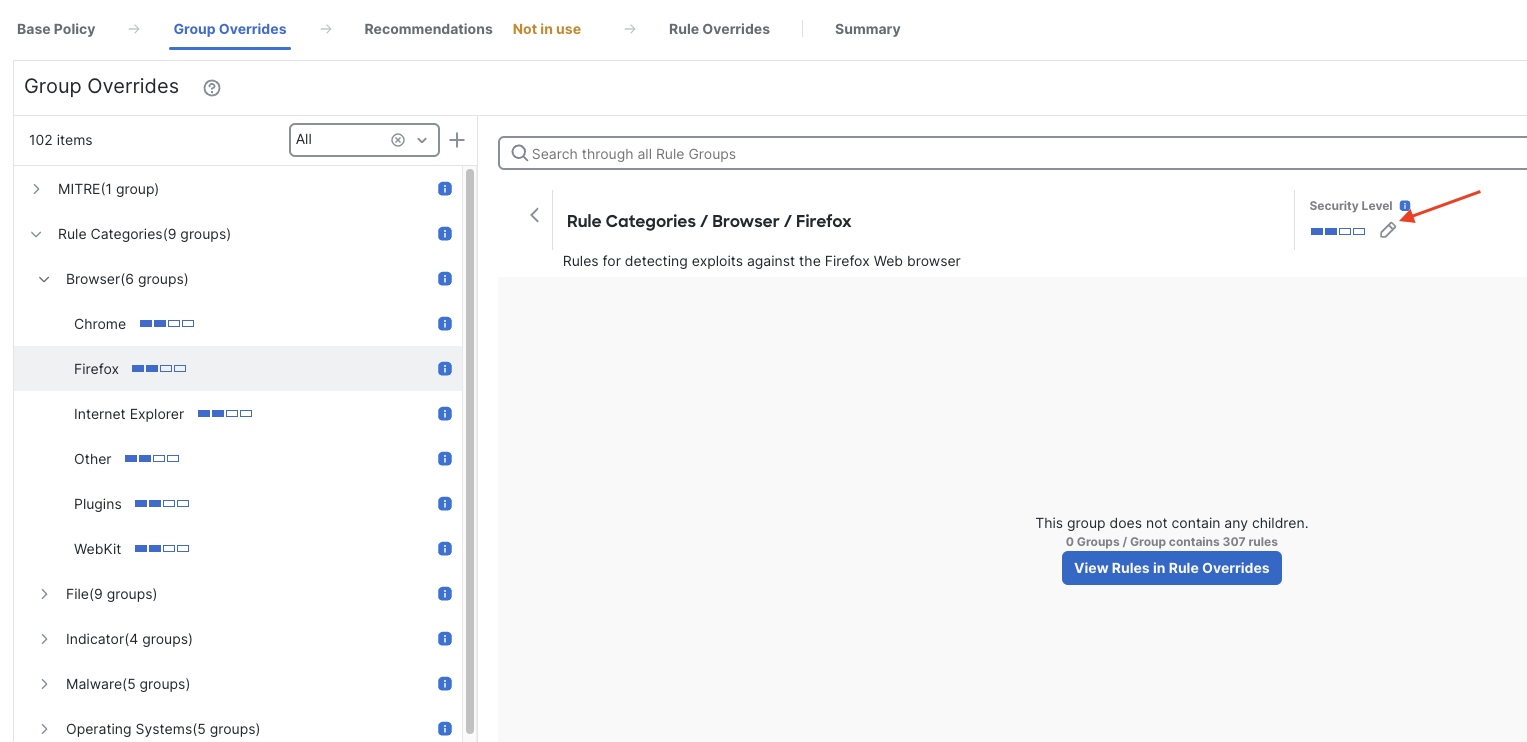
In the Edit Security Level dialog we can change the security level and thereby change the rule set that the Firefox rule group uses.
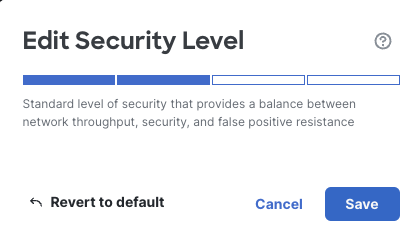
Firefox Group Security Level
Note the number of Alert and Block rules currently enabled in the policy (look in the upper right corner)

Active Alert/Block Rules
Note:
The number of Rules may be different from the screenshot as new rules are continuously added on a weekly basis.
Click the next security level segment to change the Firefox group to Security Level 3. Note the description changed to indicate this is a higher level of security.
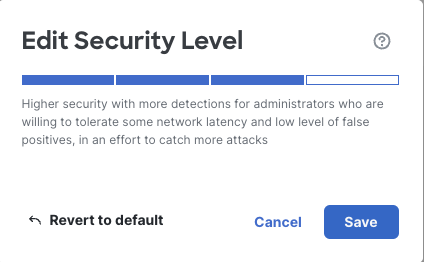
Firefox Security Level 3
Click Save
Note the number of active rules has now changed.

Updated Rule States
Notice that the Firefox group now has a customized Security Level and an icon indicates the group has been Overridden.
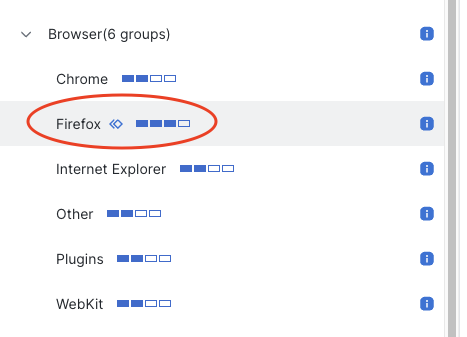
Firefox Group Override
The Firefox rule group now has additional rules enabled based on the Security Level 3 (Security Over Connectivity) rule set. As new rule updates are applied this group will continue to use the most up-to-date rules based on this new Security Level.
Task 3 - Disable Snort 3 Rule
-
While the above procedure is preferred when making adjustments to your intrusion rule set, we can also override the rule state of specific rules. A common reason for this is to disable rules that are causing false positive alerts.
Click on the Summary tab, you may see a rule list, if you see the summary page then click on the View Effective Policy button.
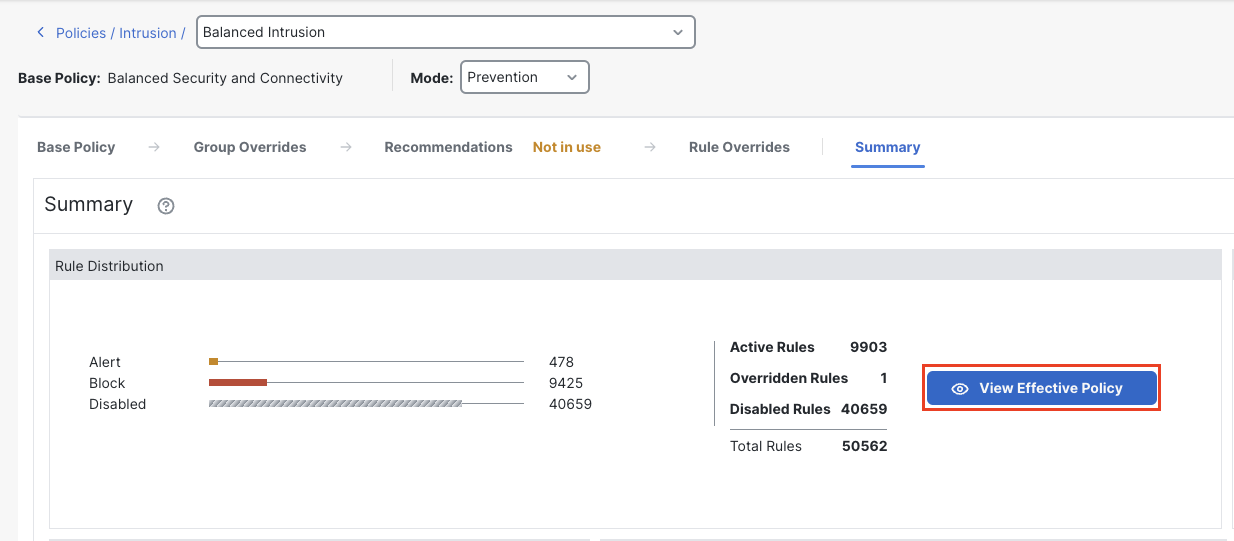
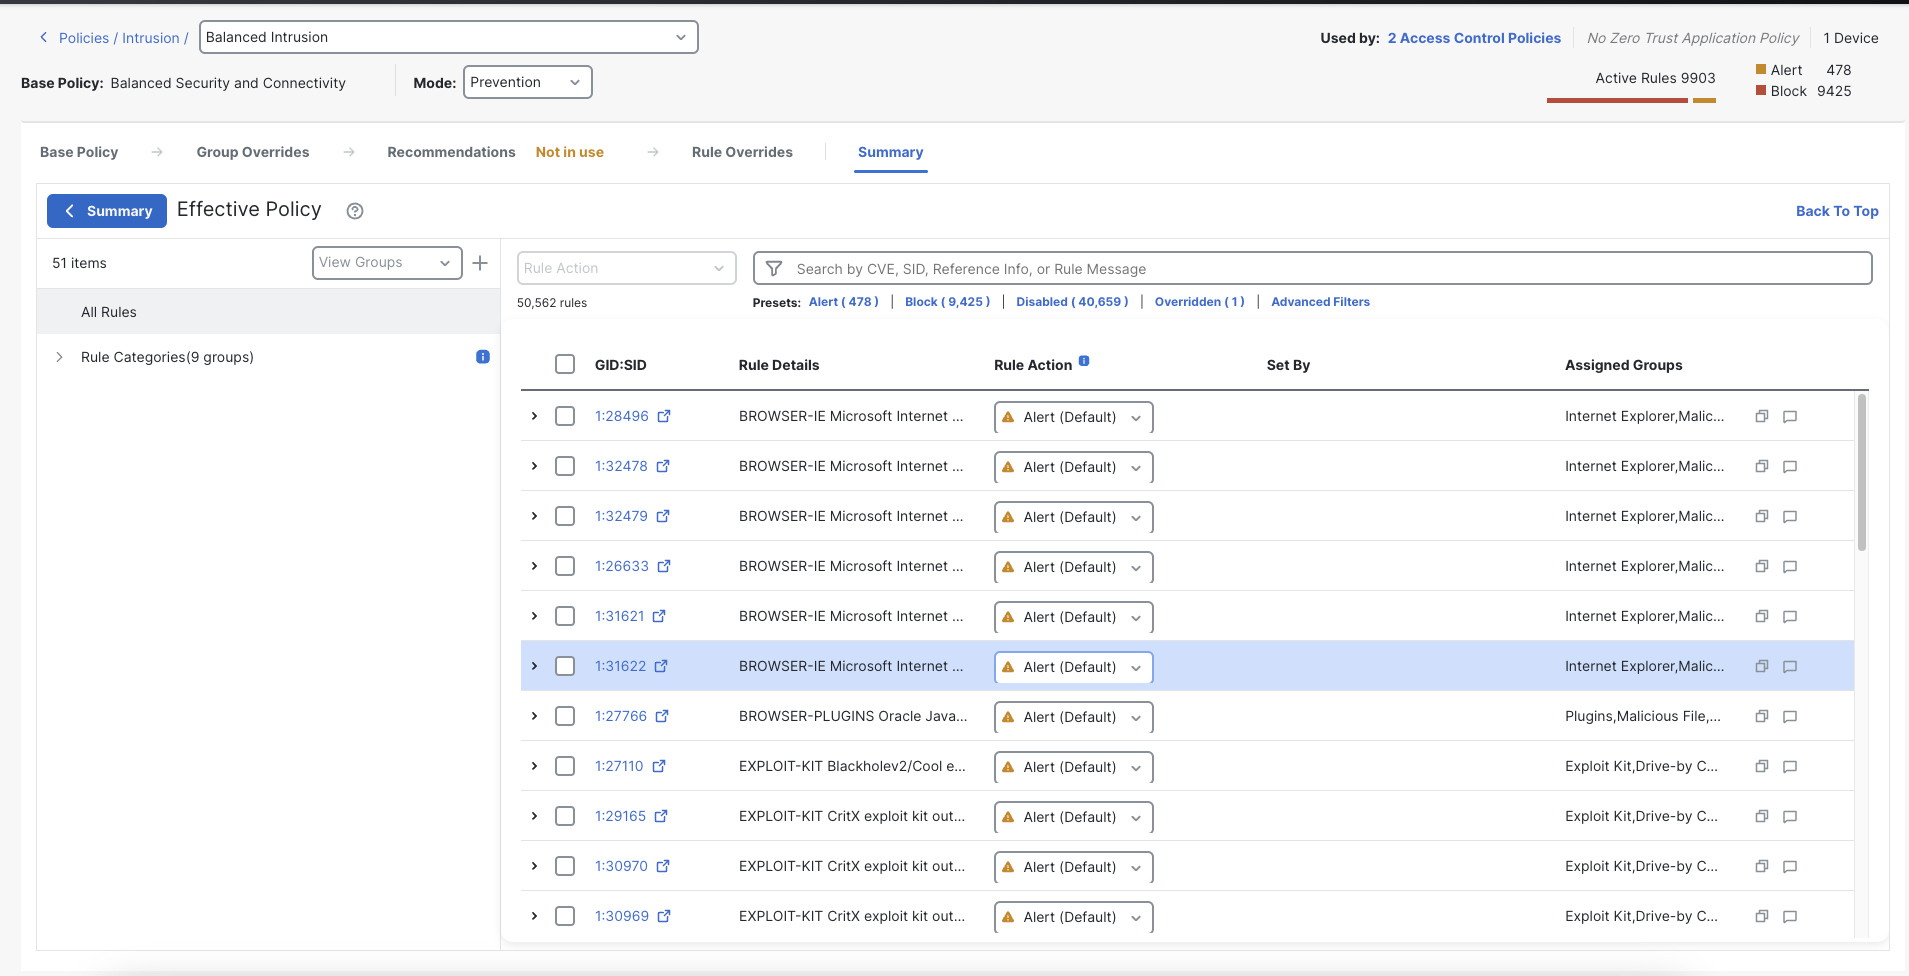
View Effective Policy
This page shows you the effective policy as a result of the layers. Each higher layer can override a rule state set in a lower layer. The order of priority from high to low is:
- Rule Overrides
- Recommendations
- Group Overrides
- Base Policy
We will override a specific rule. This action will take effect at the Rule Overrides layer. This means regardless of how the rule state is set at the Base Policy, Group Overrides or Recommendations layers, whatever we set at the Rule Overrides layer will prevail.
From the Summary page we can scroll through the rule set. However, because of the large size this is not a practical way to find a rule. The Search bar at the top of the list provides several ways to locate rules. This can be done by the Generator ID, Snort ID as well as a free form search of the entire rule. Users can also search for rules written for specific Common Vulnerabilities and Exposures (CVE) identification numbers.
Clicking Advanced Filters gives more options including searching for rules from a specific Lightweight Security Package (LSP) release. Users can also search for just the new or updated rules in a given LSP.
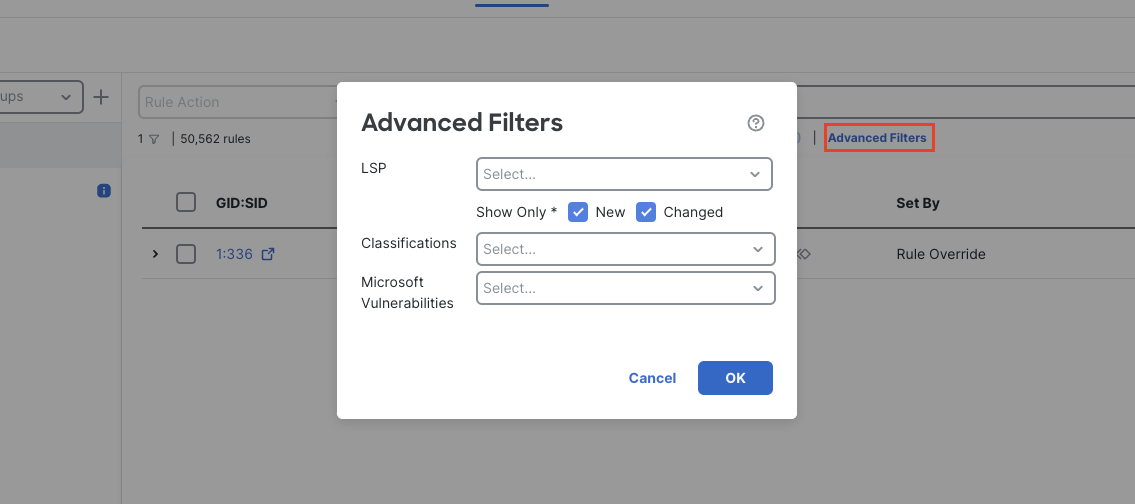
Advanced Filters
In our case we know the specific rule ID also known as the Security Identifier or SID.
Click the search field end enter 52431 then press enter.
Note that several rules were returned as the system searched all the rule data for the search term. The rule we wanted is at the top of the list. We could have been more specific by typing SID:52431 in the search. This would have returned just the single rule.

Specific SID Search
Expand the rule by clicking the > symbol to the left. You can see the rule content and what it is searching for.

Snort 3 Rule
We need to disable this rule as it is generating false positive alerts. Click the drop down under the Rule Action column and select Disable. This change is written to the policy immediately.
To document this change click the comment icon to the right of the rule.

Rule Comment Icon
Type in a comment, click on Add Comment and click Save
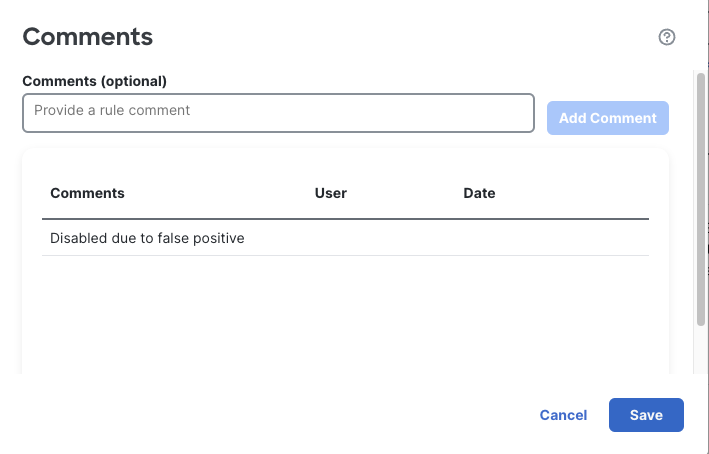
Rule Comment
Note the comment icon now changes to blue to indicate a comment is present.
Blue Comment Icon
Task 4 - Cisco Recommended Rules
-
The system can help automate the policy tuning process by making recommendations on rules to enable or disable. This feature is called Cisco Recommended Rules and it is based on information in the FMC host database.
We will configure the system to enable additional rules based on the vulnerabilities possibly present in the environment.
Click on the Recommendations layer. Note that it currently states that these Recommendations are Not in use.
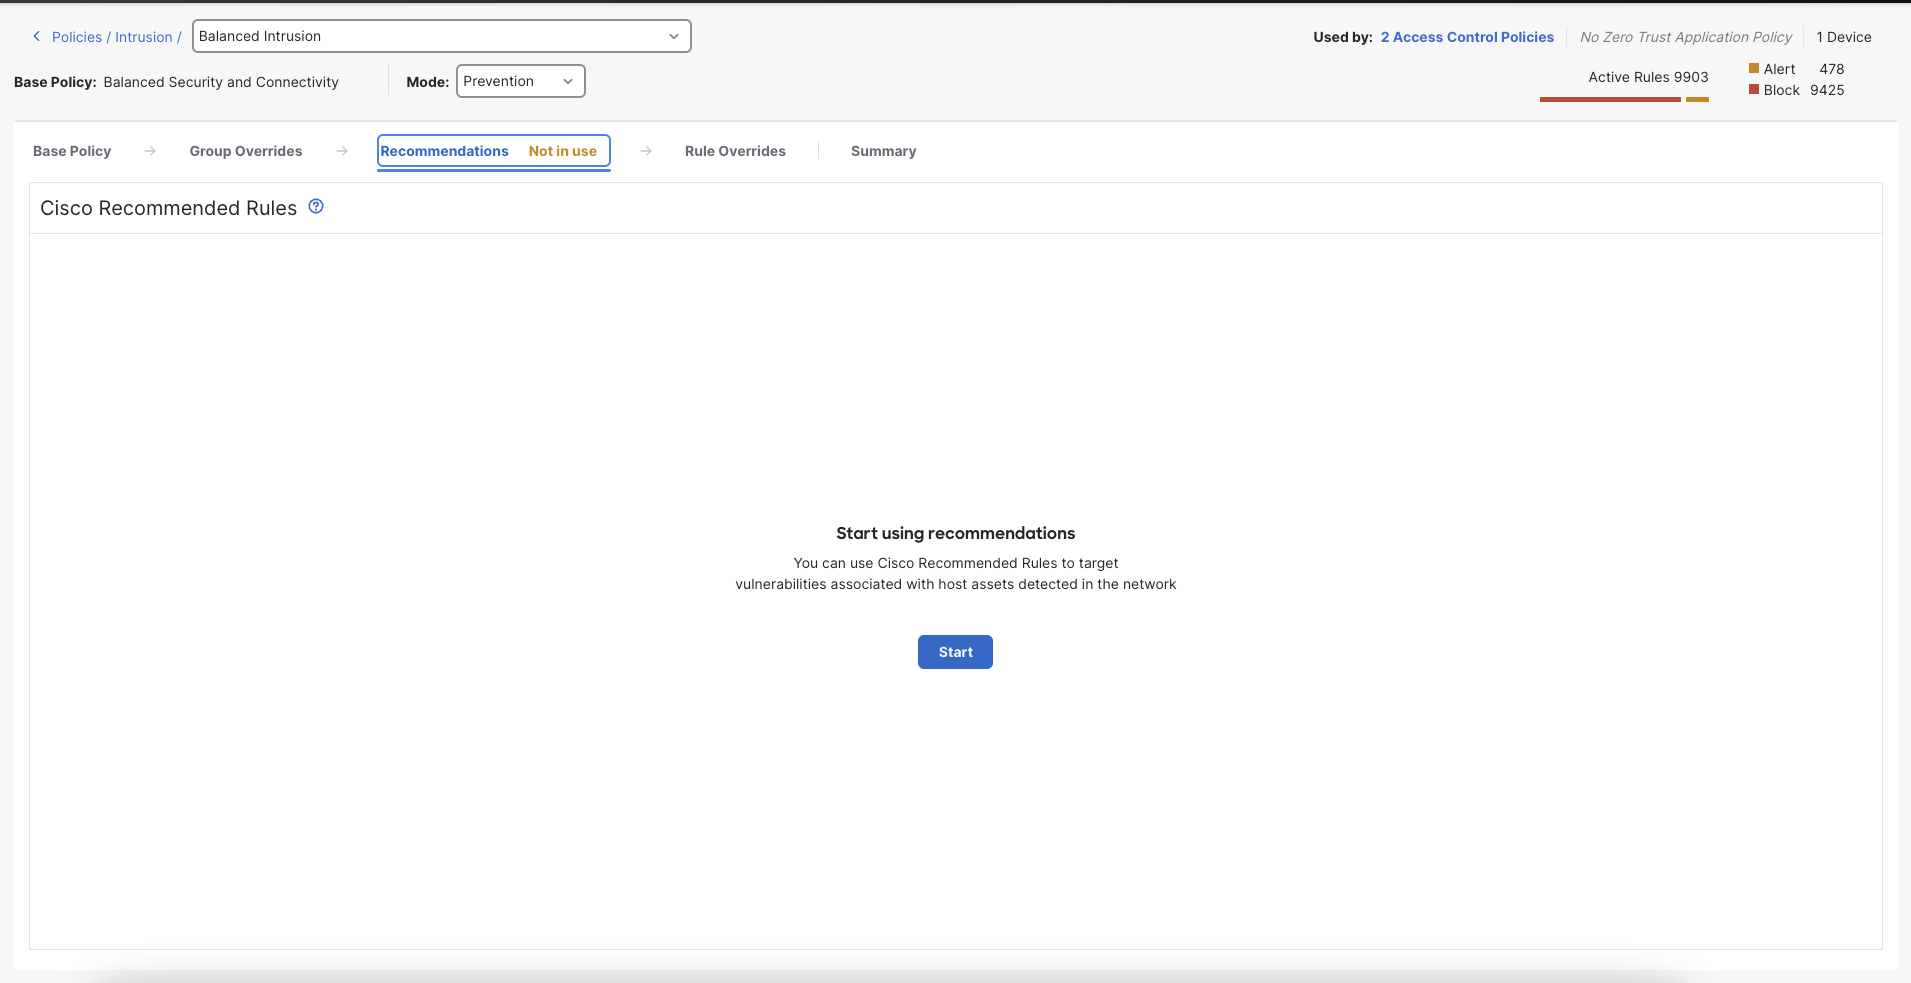
Recommendations Not in use
Click the Start button to configure Recommendations
This next dialog is the Cisco Recommended Rules configuration. Here you select a number of options:
- Security Level - this determines the rule set that will be used to recommend changes to your policy. It corresponds to the various Base Policy rule sets. Recommendations will only select from the enabled rules in the selected Security Level. This means if your Base Policy is Security Level 2 (Balanced), selecting Security Level 2 here will never enable additional rules. The only way to enable additional rules is to select a Security Level higher than that of the Base Policy.
- Accept Recommendations to Disable Rules - the system can enable rules based on vulnerabilities in the host database. It can also disable rules based on the absense of vulnerabilities. Checking this box enables the system to automatically disable rules written for vulnerabilities that were not detected on the network.
- Protected Networks - this is the network range that will be used to filter the hosts available in the host database. If you only want to base Recommendations on a subset of the hosts in the database, use a network object here to restrict the hosts.
Click the bar by Security Level 3. Since we are using a larger rule set for Recommendations and have not checked the Disable Rules box this will result in additional active rules.
Again, note the Active Rules count in your policy in the upper right corner.
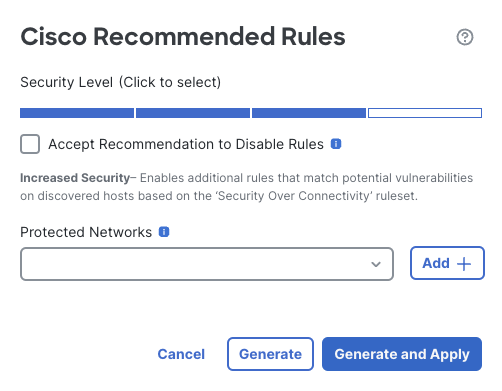
Security Level 3 Recommendations
Click Generate and Apply
This will generate Recommendations and apply the changes to your policy.
Note:
It is recommended to apply the recommendations in a lab environment first to understand the impact on your traffic.
Note the increased count of Active Rules in the policy.
Your policy layers now indicate that Recommendations is active.
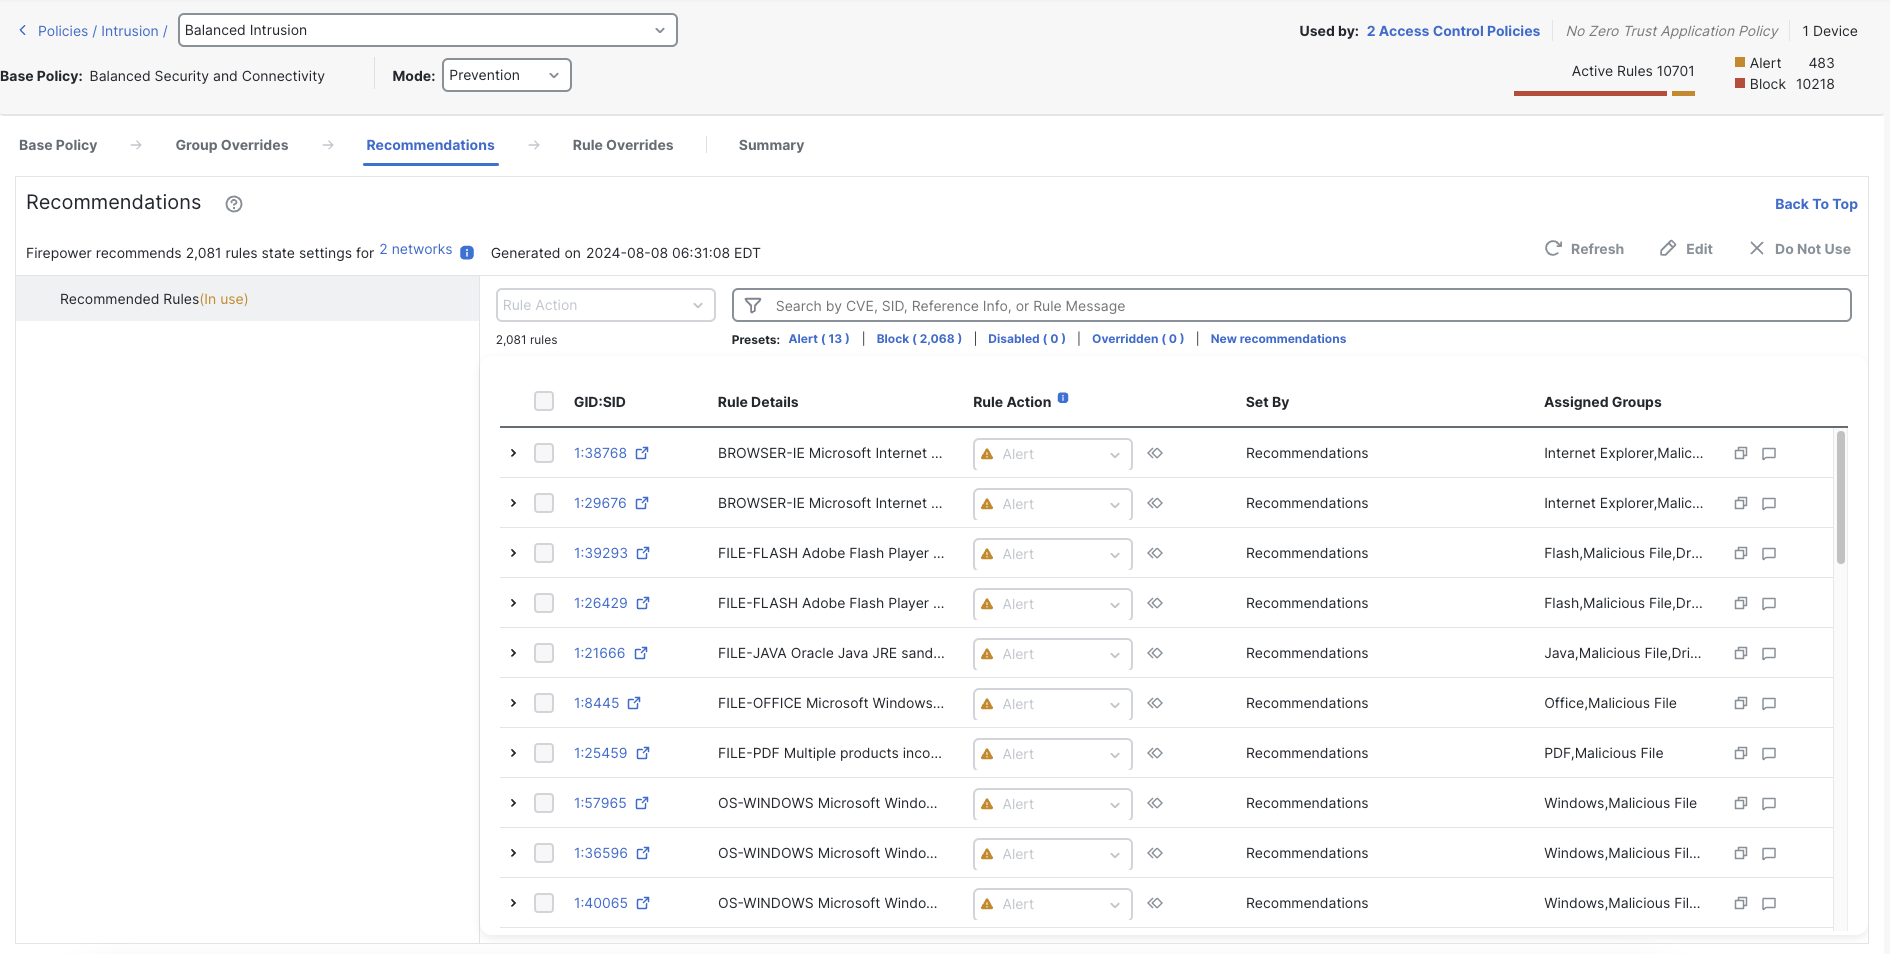
Policy with Enabled Recommendations
Task 5 - Network Analysis Policy
-
Return to the Intrusion policies list by clicking < Policies / Intrusion in the upper left of your screen. Notice there is no need to save the policy as all changes are written immediately.
Click Network Analysis Policies
Click Create Policy
Name your policy dCloud Balanced NAP and the Base Policy as Balanced Security and Connectivity
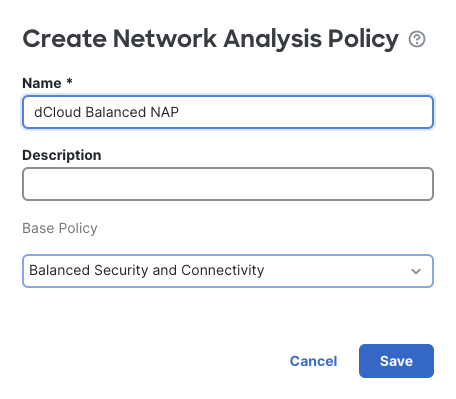
Click Save to create the policy.
As with the Intrusion policy, there are Snort 2 and Snort 3 versions.
Click the Snort 3 Version link. Note the Warning dialog. Network Analysis policy customization should only be performed by advanced users or with advice of Cisco TAC.
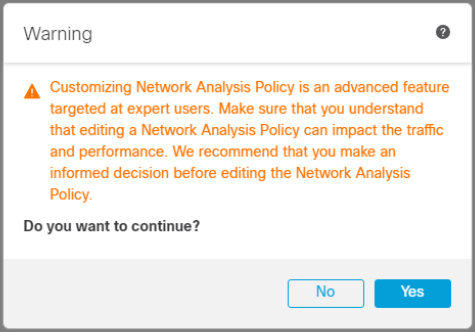
NAP Warning
Click Yes to proceed.
The various Inspector configurations are listed here. The data is shown in json format.
Using the various items on the Action button on the right users can view, download or upload Network Analysis configurations.
Feel free to view the various Inspector configurations. We will not be making any modifications at this time
Tell us how we are doing
We are doing our best to ensure the scenarios in this lab guides are useful, clear and work as expected.
Please share your thoughts to help us improve or fix any problems you may run into..
Click here to provide your feedback or report an issue with this guide
Updated about 1 year ago

