Scenario 5 - Device Registration
We are finally ready to register our device to the FMC! If this were a new device you would have to start by configuring the IP address for the management interface. In this scenario we have a device that is already managed by another FMC and we will repurpose it for our use here.
Lab Tasks
These are the tasks in this scenario. If you are familiar with the Secure Firewall you may do these on your own, or for step-by-step instructions see below.
- Task 1 - Deregister NGFW1 from fmc.dcloud.local, destroy the interface configuration, configure routed mode, and prepare NGFW1 for registration to fmc2.dcloud.local
- Task 2 - Register NGFW1 with fmc2.dcloud.local, name it NGFW1, enable all but the Carrier license, assign the NGFW1 Access Control policy to the device.
Task 1 - Deregister NGFW1 and Prepare the Device
Note
You have been working up to this point with FMC2. You will now connect to FMC1 and de-register a device and then move it to FMC2 for the remainder of this lab.
-
From the Chrome browser, click the shortcut for FMC which will direct you to https://fmc.dcloud.local. The credentials should be saved in the browser but if not, login as admin/C1sco12345.
-
Navigate to Devices > Device Management
-
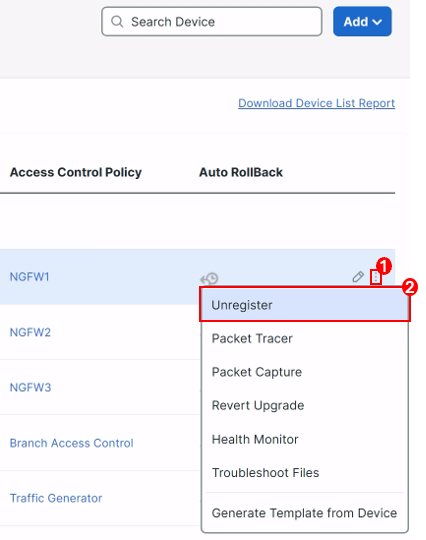
Locate the NGFW1 device and click the three dot icon to the far right, then select Unregister from the pop-up menu.
-
Click Yes to confirm the deletion.
-
-
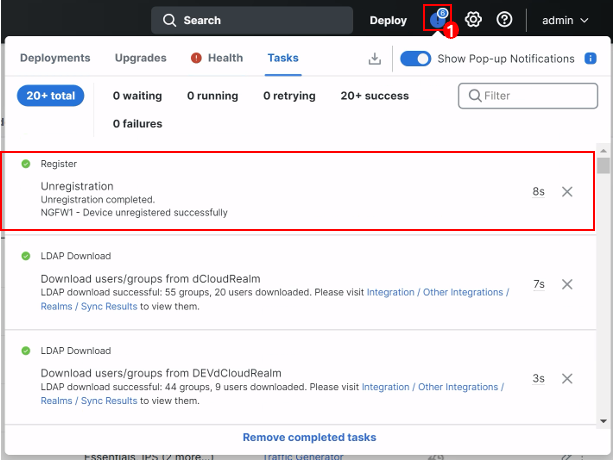
Navigate to the Message Center, and click Tasks to check the list to confirm that the device is successfully unregistered.
-
At this point it is recommended you close the fmc.dcloud.local tab in your browser. You will not need to connect to this FMC again for this lab.
-
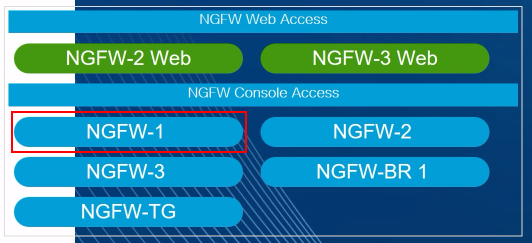
From the Quick Launch connect to the console of the NGFW1 device.
- At the CLI prompt type configure firewall transparent and press Enter.
- This command destroys the interface configurations on the device. Otherwise, when we register this device to the new FMC it will retain most of its original interface settings.
- Type y to confirm and press Enter
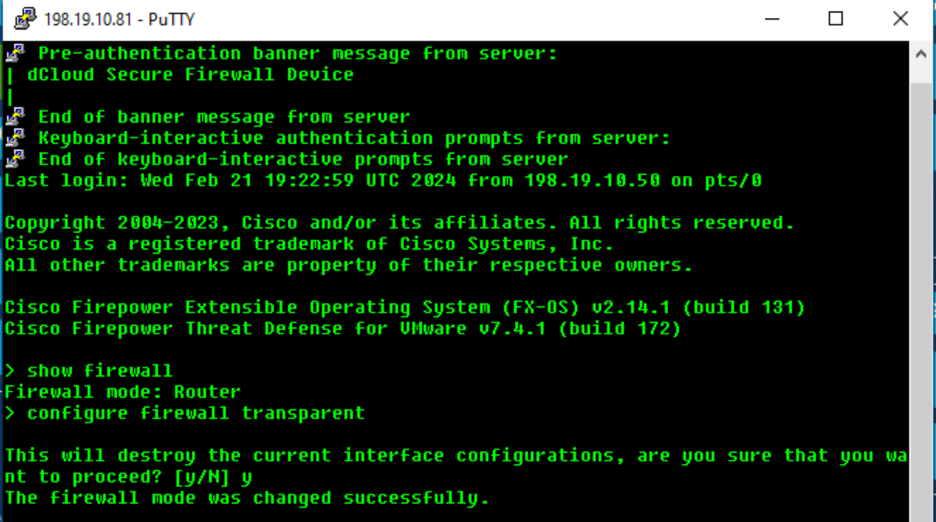
Destroy Device Interface Config
- At the CLI prompt type configure firewall routed and press Enter.
- You will again receive a prompt about the interfaces, it's important to put the device back into routed mode for our deployment.
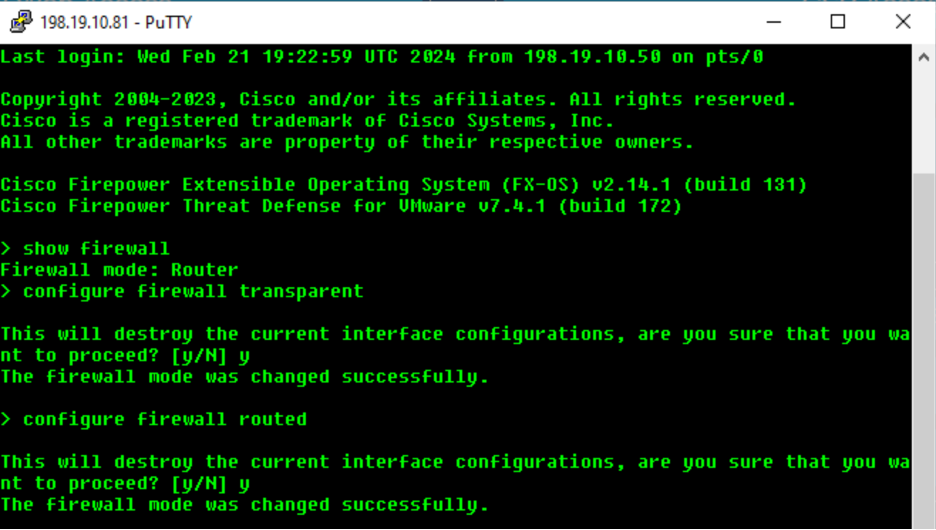
Place Device in Routed Mode
- Next, we will prepare the device to be managed by FMC2.
- Type configure manager add fmc2.dcloud.local cisco123 and press Enter.

Prepare Device for FMC Registration
- Type exit to close the console session.
Task 2 - Register NGFW1 to FMC2
Now that our device is prepared we can register it to FMC2.
-
Return to the FMC2 web UI and navigate to Devices > Device Management.
-
Click the Add button on the right and select Device.
-
Enter the following into the Add Device dialog:
-
Host: ngfw1.dcloud.local
-
Display Name: NGFW1
-
Registration Key: cisco123
-
Group: None
-
Access Control Policy: NGFW1
-
Performance Tier: FTDv - Variable
-
Check the Malware Defense, IPS, and URL boxes.
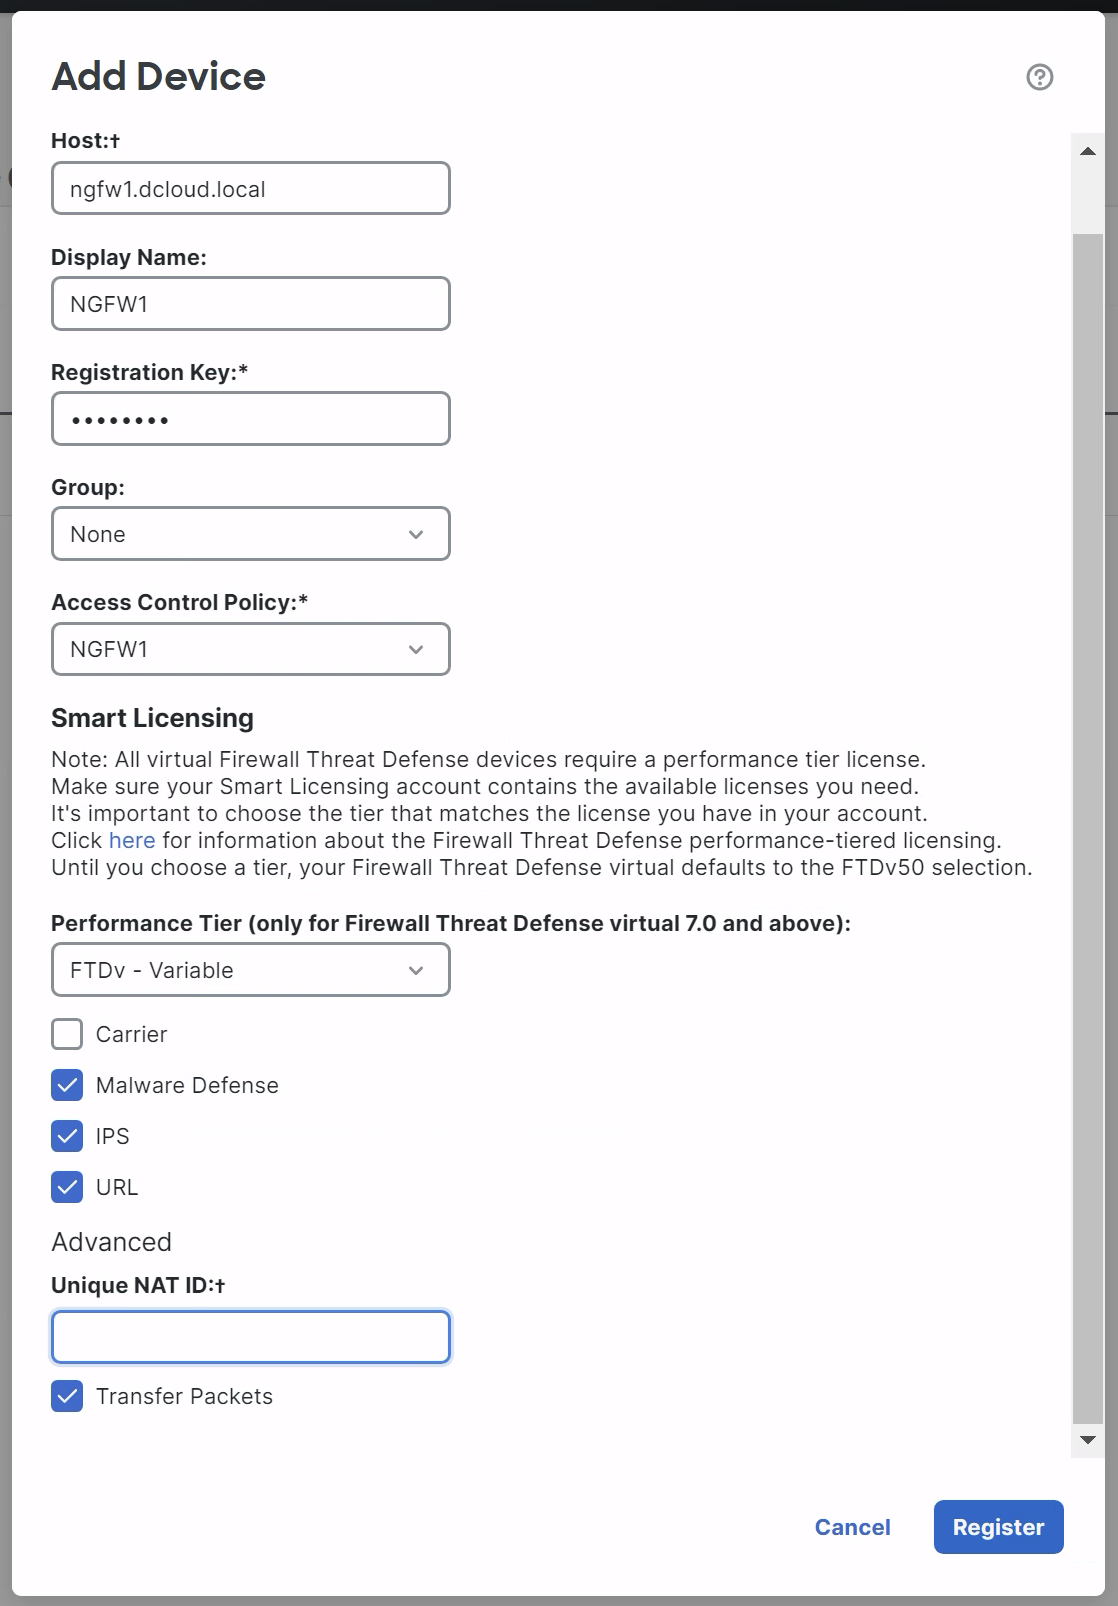
-
Note
Ensure the Unique NAT ID is blank as shown above. Sometimes the browser may try and fill in this field automatically. Any data here will cause device registration to fail.
- Click Register
- You should see the device registration status update.
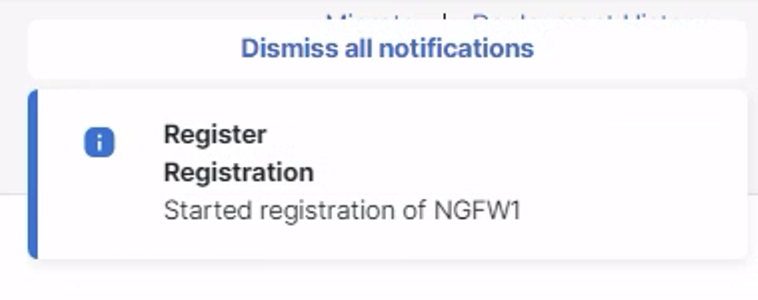
Registration Update Message
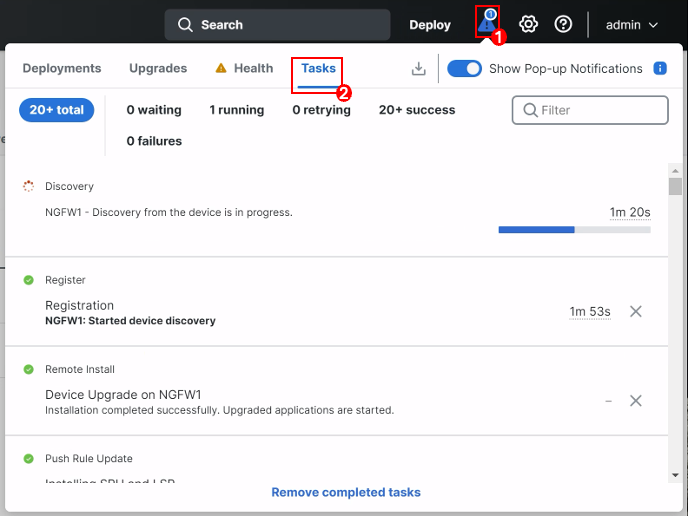
After a few minutes the NGFW1 device should appear in the device list. It will take several minutes for the process to complete. You can follow the progress by clicking on the message center icon in the top menu bar.
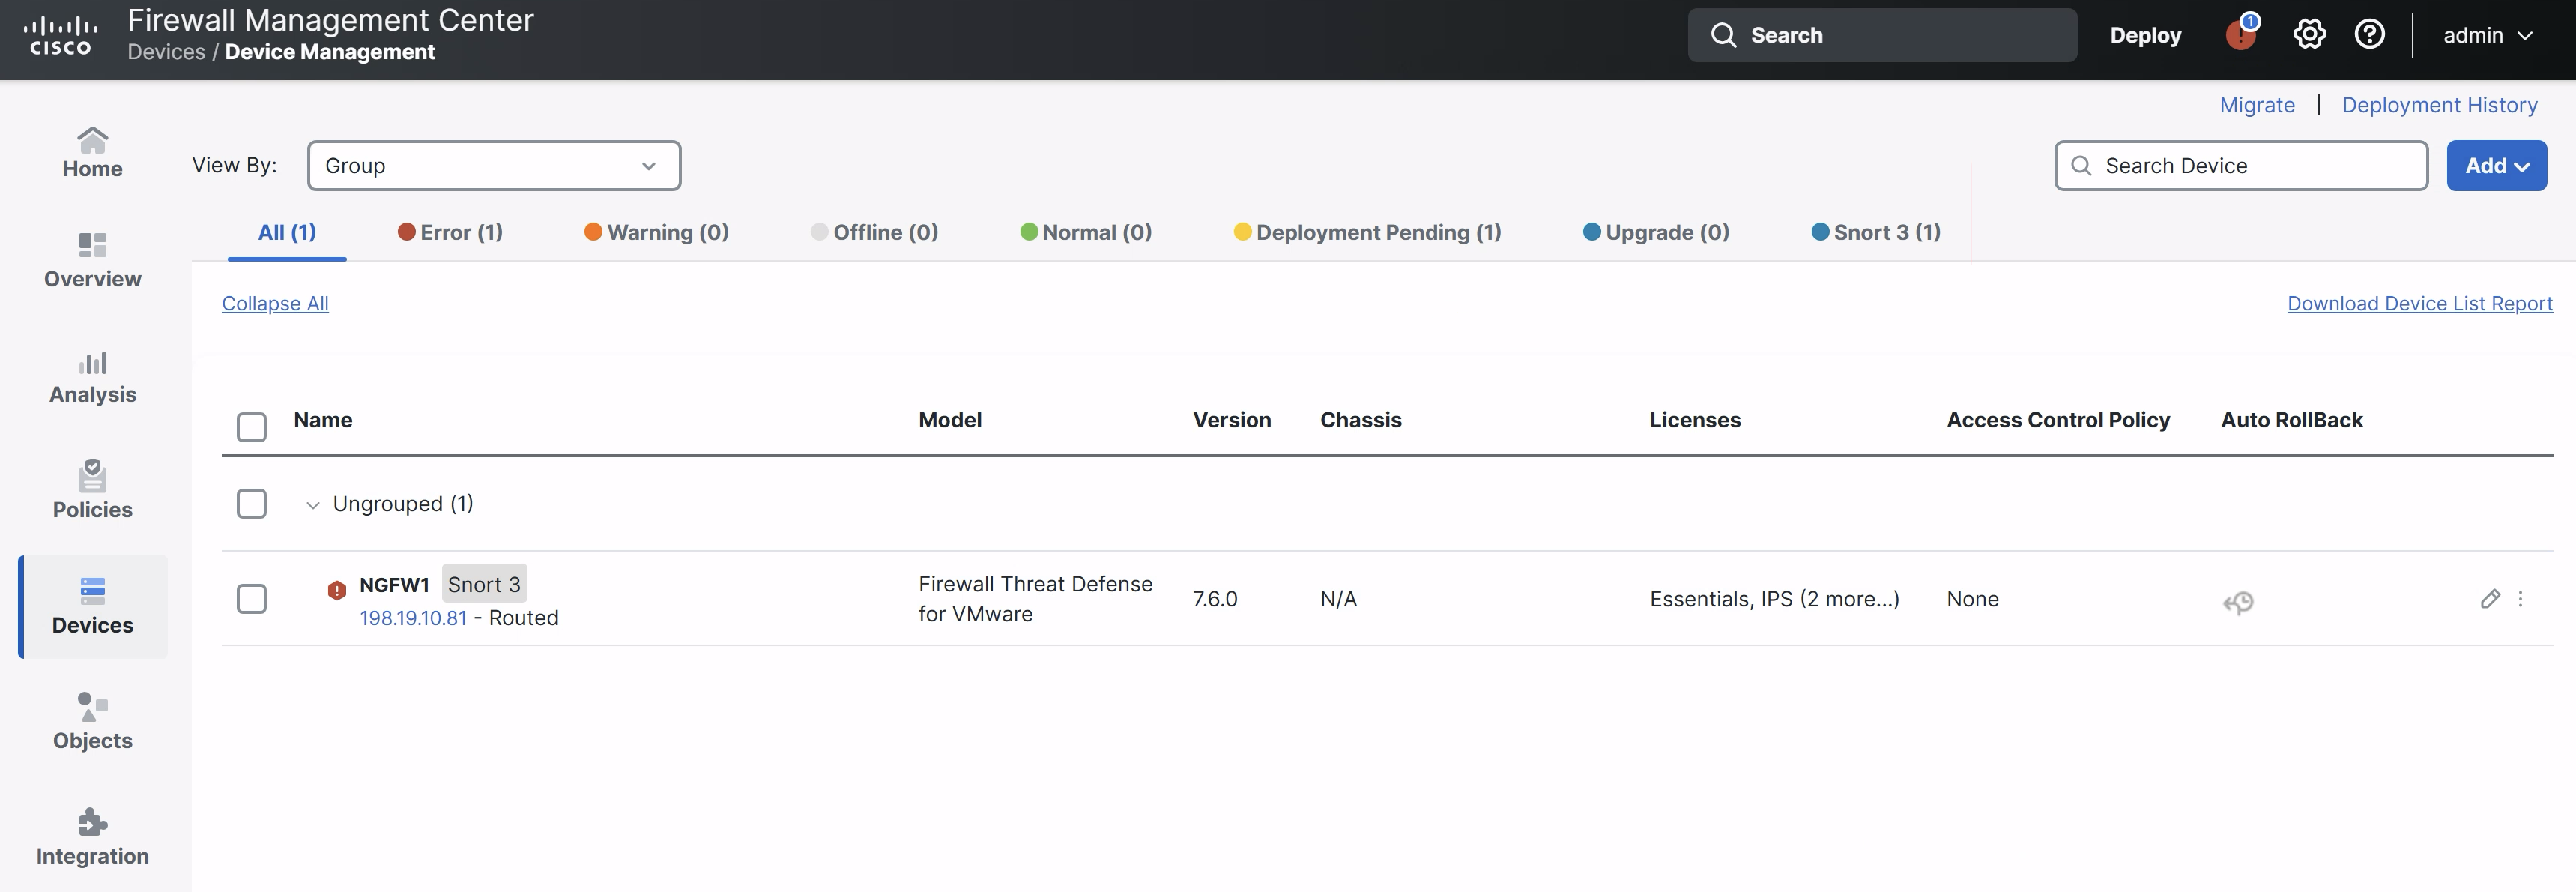
When registration is finished the NGFW1 device should show in the device listing.
Note
You may see errors relating to the Cisco threat feed or cloud connectivity. You may ignore these errors as this is a lab environment.
Tell us how we are doing
We are doing our best to ensure the scenarios in this lab guides are useful, clear and work as expected.
Please share your thoughts to help us improve or fix any problems you may run into..
Click here to provide your feedback or report an issue with this guide
Updated about 1 year ago

