
Threat Assessment using Caldera
Introduction
Caldera is an adversary emulation platform designed to easily run autonomous breach-and-attack simulation exercises. It can also be used to run manual red-team engagements or automated incident response. Caldera is built on the MITRE ATT&CK framework and is an active research project at MITRE.
This guide showcases the threat efficacy of the Cisco Firewall based on the analysis of the traffic generated by Caldera. The firewall is subjected to a series of common, high-severity attack scenarios, post which, a report is generated detailing the effectiveness of the firewall in stopping these attacks along with recommendations for bridging the gaps seen.
Insights into SnortML
The standard Intrusion Prevention rules present in next gen firewalls are written based on known and fixed patterns. While these rules are effective at catching known attacks against known vulnerabilities, they may not be able to detect new and unknown attacks that deviate from prior attack patterns. This leaves systems vulnerable to novel attacks and new exploits against zero day vulnerabilities.
SnortML is a machine learning-based exploit detection engine for the Snort Intrusion Prevention System, introduced in release 7.6. With its new Machine Learning capabilities, attacks never seen before can be detected and blocked in real-time. Coverage can now be written for entire vulnerability classes, providing coverage even for new and unknown vulnerabilities. For the first release of the feature, coverage is provided to detect and block SQL injection attacks. The underlying model, built and trained by Cisco Talos, receives updates via the existing Lightweight Security Package (LSP) update system. These updates include enhancements to existing SQL injection detection, and will deliver support for new exploit types over time.
Lab Tasks
These are the tasks in the scenario below. If you are familiar with the Cisco Firewall and Caldera you may do these on your own, or for step-by-step instructions see below.
- Task 1 - Configure Allow All rule for NGFW1
- Task 2 - Initiate traffic from the Caldera client
- Task 3 - Configure policies for NGFW1
- DNS policy
- Malware & File policy
- Access Control policy
- Task 4 - Re-run the Caldera Assessment
- Task 5 - View the Events on FMC Unified Event Viewer
Lab Connectivity Diagram
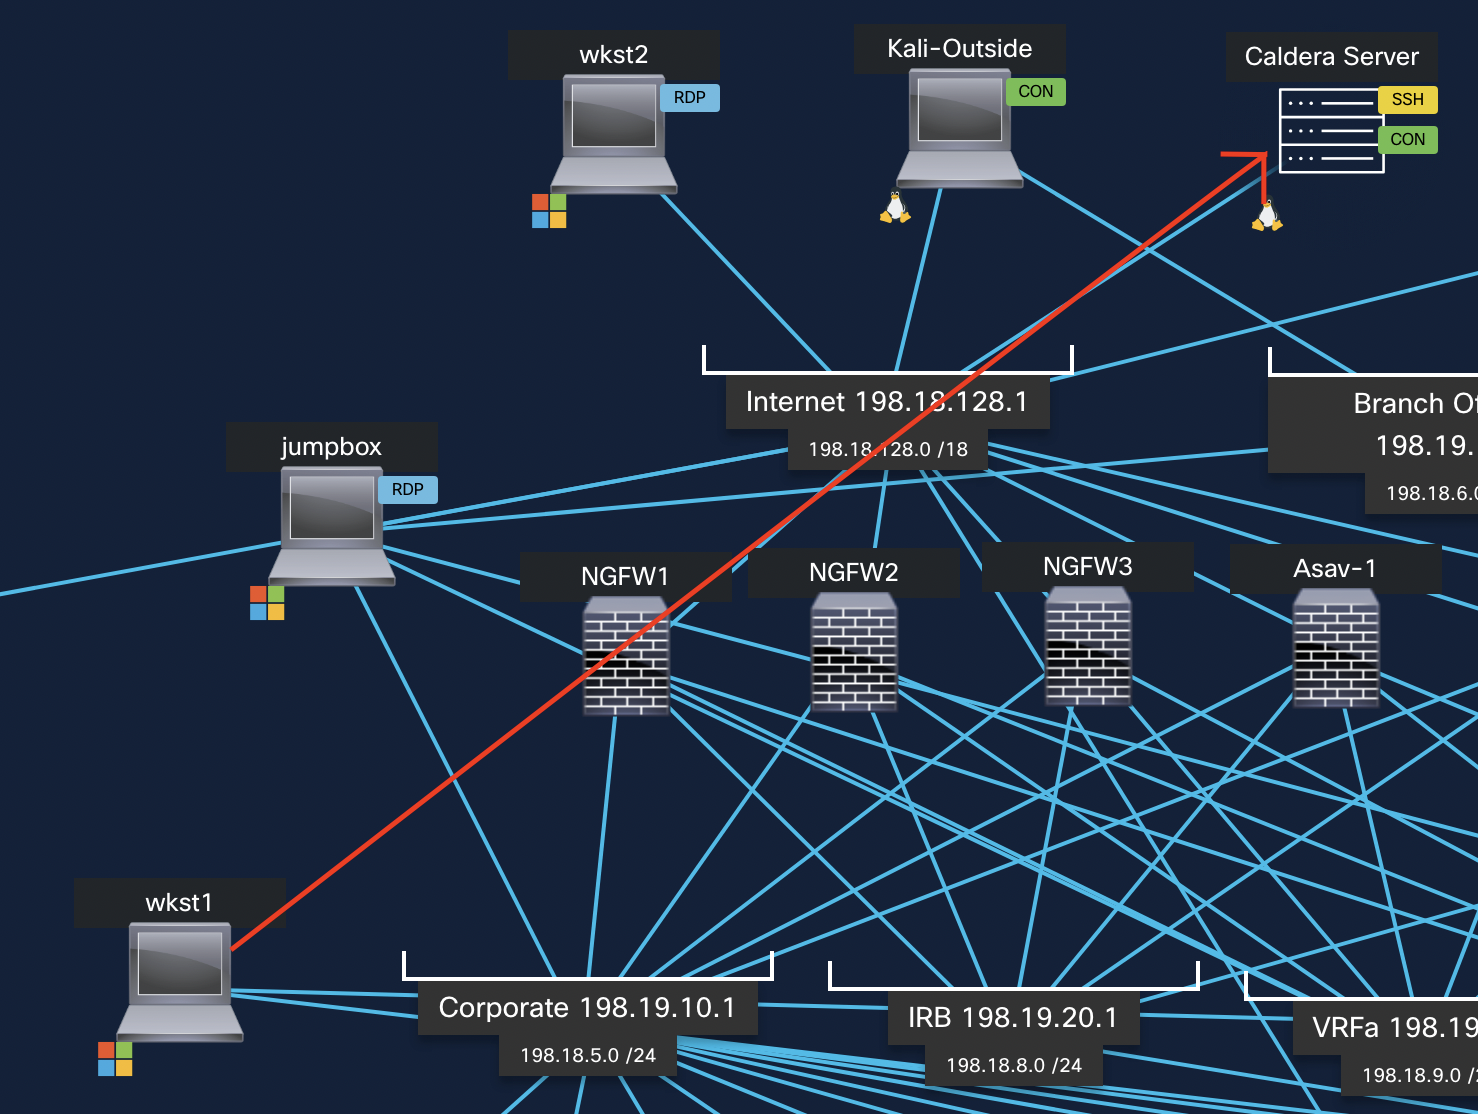
The Caldera test traffic is generated from Wkst1 which is connected to the Inside interface of NGFW1 towards the Caldera Server which is connected to the outside interface of NGFW1. The flow of traffic is as shown below. The traffic hitting the inside interface is routed out via the outside interface of NGFW1.
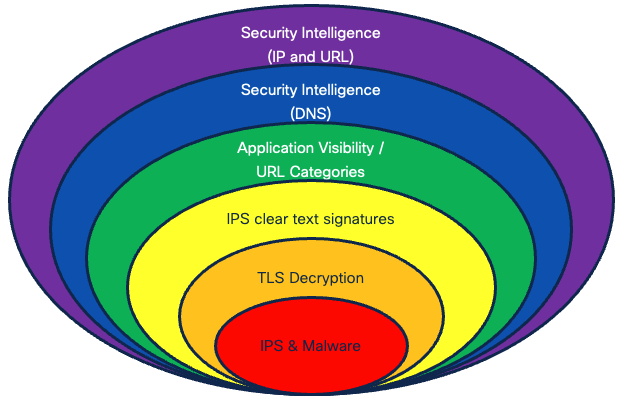
As the famous quote by H.E. Luccock goes, "No one can whistle a symphony. It takes an orchestra to play it", to get the most out of the protection rendered by the firewall, we need to utilize all of its security features. No single security feature of a firewall or IPS can protect your network against constantly emerging security threats. Cisco Secure Firewall provides a security barrier consisting of mutually complementary layers of protection. Cisco Secure Firewall is not just a box you install in your network – it is a security enabler for Cisco Talos – one of the largest commercial threat intelligence teams in the world.
Task 1 - Configure Allow All rule for NGFW1
An Allow All rule is to be configured for NGFW1 to run an initial Caldera test and see how all the test cases become exploitable through the firewall with no security-related configuration.
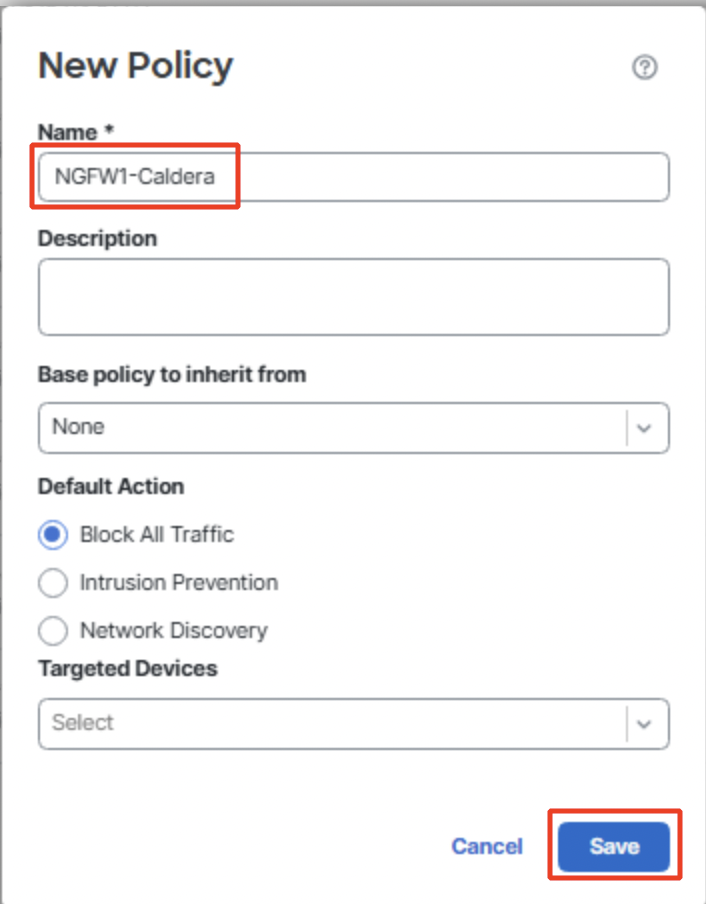
- Navigate to Policies > Access Control. Click on New Policy.
- Type in the Name as 'NGFW1-Caldera' and click on Save.
Click on Add Rule and type in the Name as 'Allow All'.
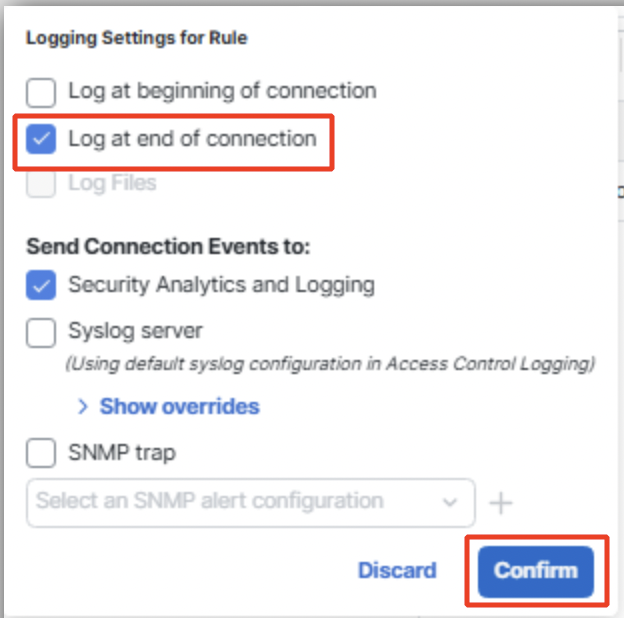
Click on Logging and select Log at end of connection and click on Confirm.
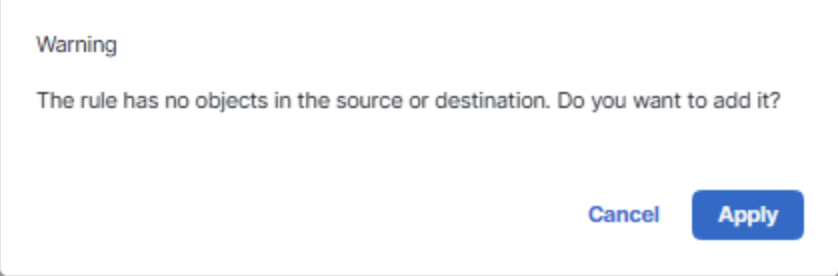
Click on Add. Ignore the below warning and click on Apply.
NOTE
The Allow All rule is configured for testing purpose. It is highly recommended NOT to use such conditions in production environment.
- Click on Security Intelligence. Click on the edit icon of the DNS policy added.

Delete the rule 'Block Bad DNS' by clicking on the Delete icon. Click on Save.

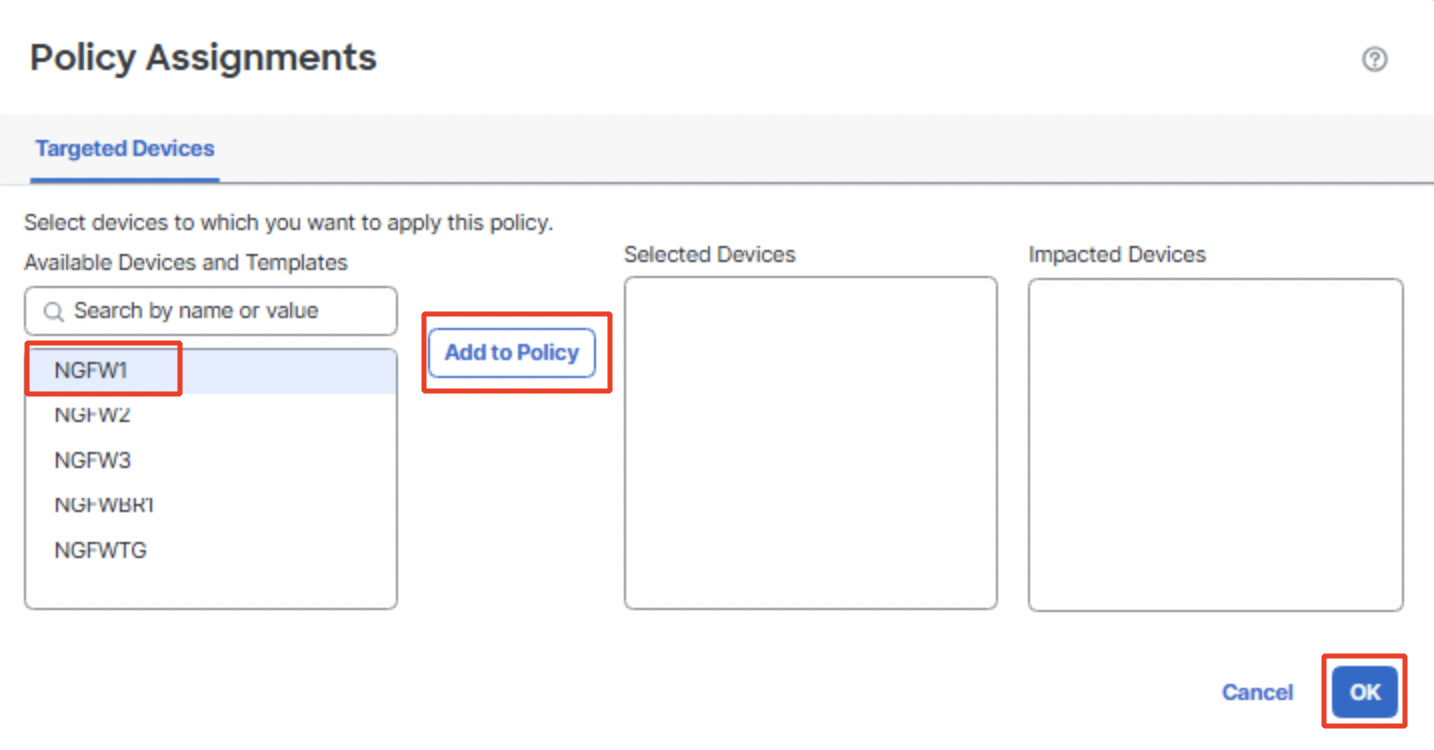
- Back on the Access Control policy page, click on 0 device against Targeted.

Click on NGFW1 > Add to Policy > OK.
Click on Save.
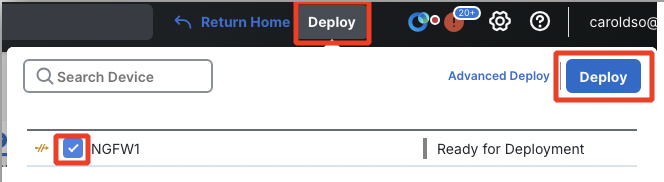
- Deploy the Access Control policy configured to NGFW1 by clicking on Deploy. Select NGFW1 and click Deploy. Wait for the deployment to complete.
Task 2 - Initiate traffic from the Caldera client
WARNING
For Caldera assessment to work WKST1 needs to be able to communicate with Caldera server, for which NGFW1 should be properly configured. The script is executed automatically upon logon to WKST1. In case you logged on to WKST1 before NGFW1 was configured, then please follow these steps:
Please verify that WKST1 can communicate with the Caldera server by opening command prompt and initiating a ping to 198.18.133.49. If the pings are successful then please proceed to step 3.
If the pings fail, then please verify NGFW1 configuration to make sure it is configured correctly.
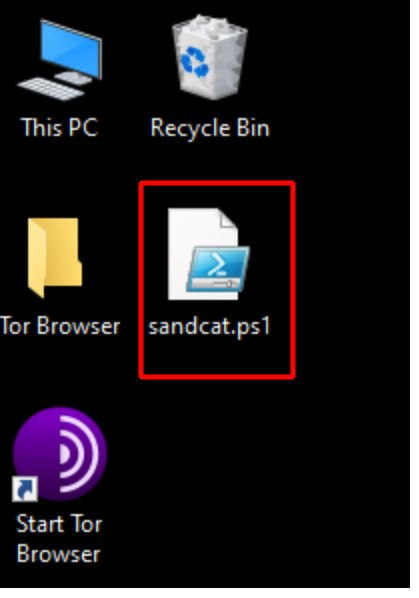
Once the pings to Caldera server are successful, locate file "sandcat.ps1" file on the desktop of WKST1
Right click on the file and click on "Run with PowerShell"
Wait for 2 minutes for the script to execute. The PowerShell window should close automatically once the script is executed.

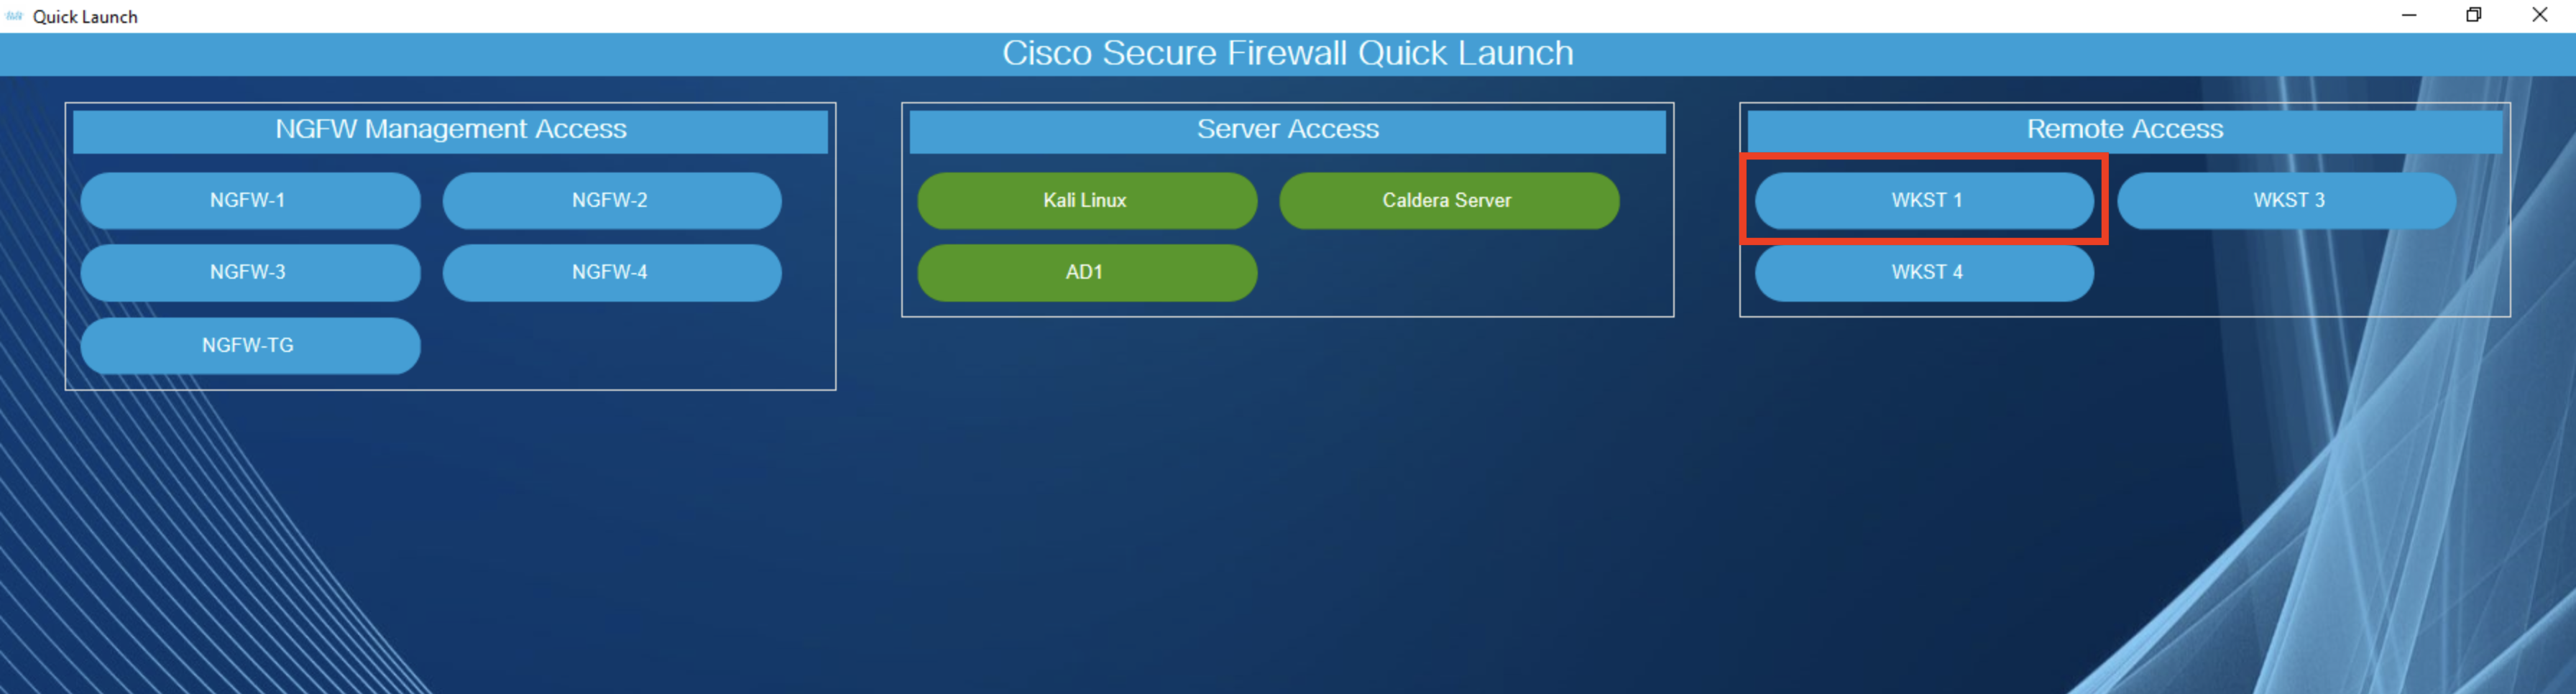
Connect to the Wkst1 via RDP from the Jumpbox. Enter the password C1sco12345 if prompted.
NOTE
A script is scheduled to run upon RDP to wkst1. When you RDP to wkst1, you will notice a command prompt window open. Wait for the window to close before proceeding further.
Switch back to the Jumpbox, open Chrome browser and select the bookmarked site Caldera Assessment as shown below.

Enter your First Name, Last Name and Email. These fields are required for the report that gets generated post the Caldera assessment.
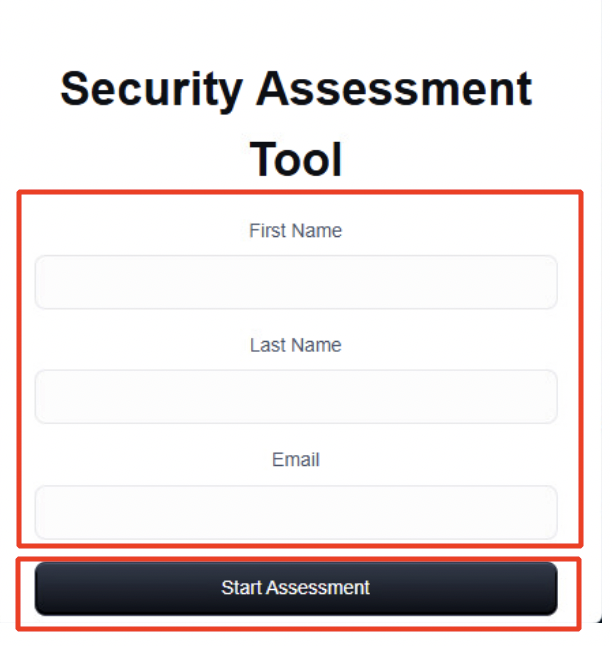
Once you click on Start Assessment, the Caldera traffic generation starts from the client i.e. Wkst1 towards the Caldera Server.
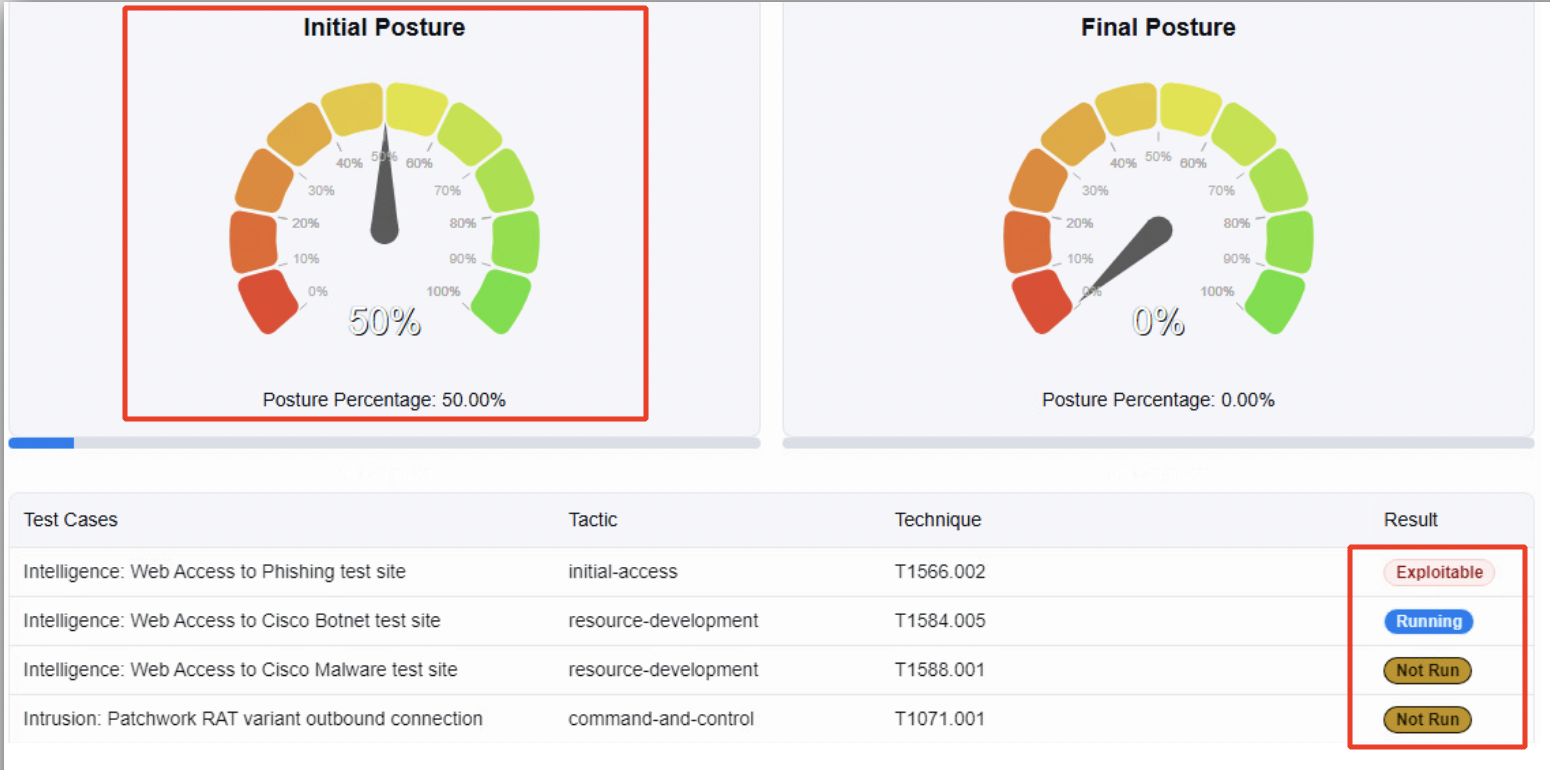
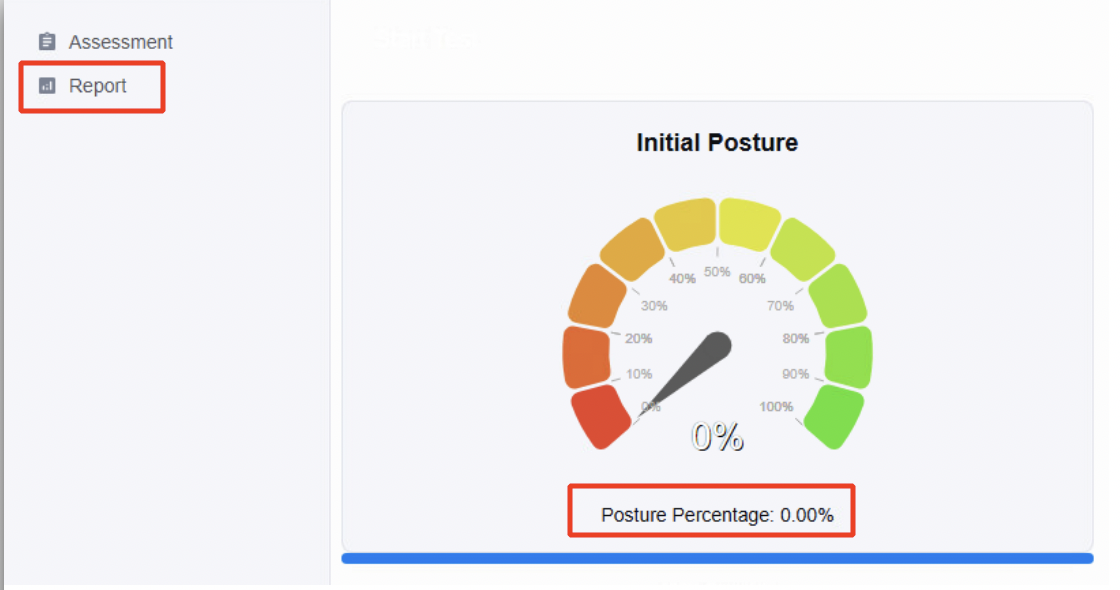
The Initial Posture graph shows the live posture percentage as the Test Cases listed below it, start running one after the other. The Result column on the right shows the state of each of the Test Case.
NOTE
This may take about 15 minutes to complete.
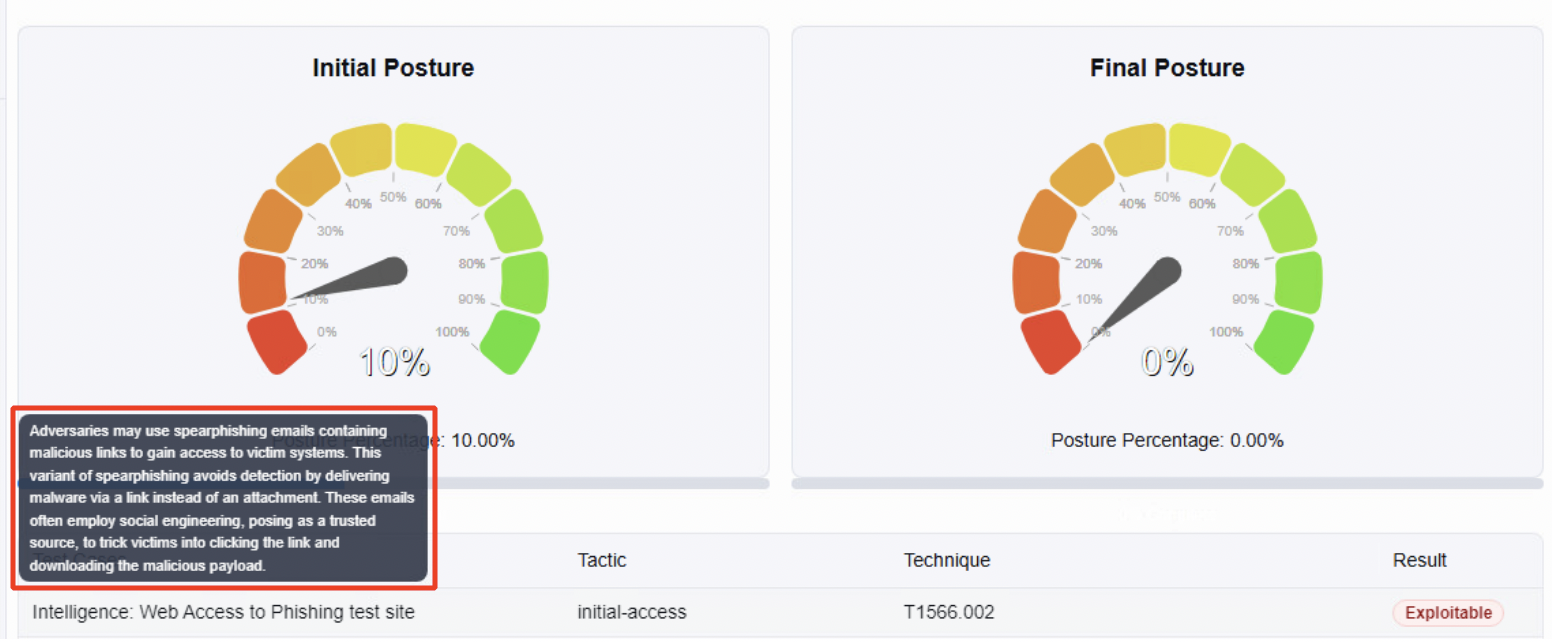
To see the details about each test case, you can hover your mouse over it as shown below.
NOTE
Caldera might show a Reset button, please DO NOT click it.
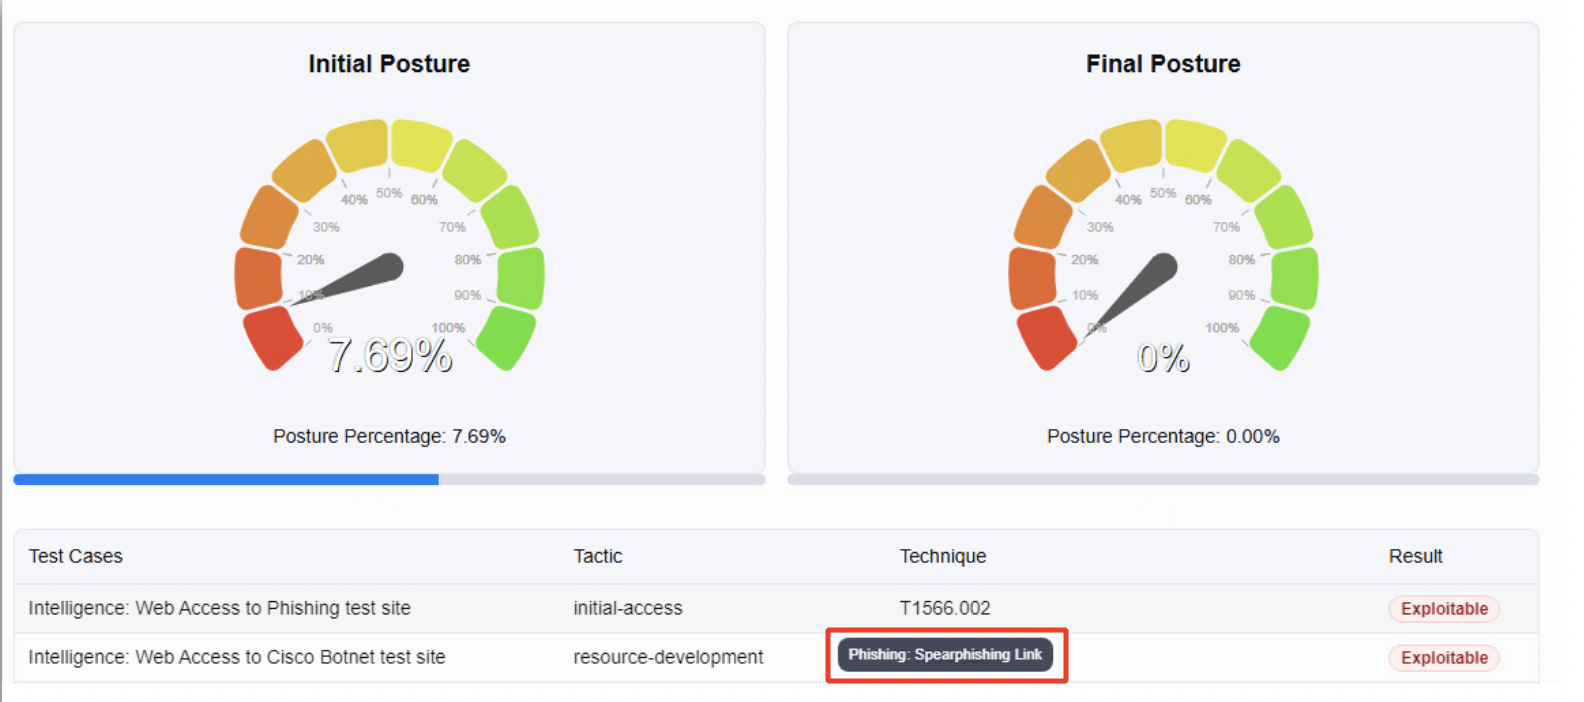
Hover your mouse over the Technique to get the MITRE TTP.
Once all the Test cases complete execution i.e., you do not see any Test case in the state Not Run but either as Exploitable or Succeed, you can click on Report to see the details of the assessment completed. Note that the Initial Posture shows the Posture Percentage as 0.00% which means that all the Test cases have been deemed as exploitable and that NGFW1 is not blocking any of the test case.
Scroll down the report for further details. The report will show the testing methodology and the scenarios comprising the test, displaying the result against each test along with the associated Mitre Tactic and Technique ID. This will be followed by the recommendations and mitigations to be imbibed, to improve the security posture of the firewall.
You can also view the events on the FMC by navigating to Analysis > Unified Events.
Task 3 - Configure policies for NGFW1
The mitigations provided in the report would indicate that the firewall needs to block certain files, block malware, URLs, etc. So let us proceed with these mitigations by configuring the required policies as follows.
I. DNS POLICY
DNS-based Security Intelligence allows you to block traffic based on the domain name requested by a client, using a Security Intelligence Block list. Cisco provides domain name intelligence you can use to filter your traffic; you can also configure custom lists and feeds of domain names tailored to your deployment.
Warning
For the DNS-based Security Intelligence policies to be effective, ensure your clients use clear-text DNS resolution through the firewall. DNS packets between the clients and the DNS server must pass the firewall to be inspected.
- Navigate to Policies > DNS and click Add DNS Policy > DNS Policy.
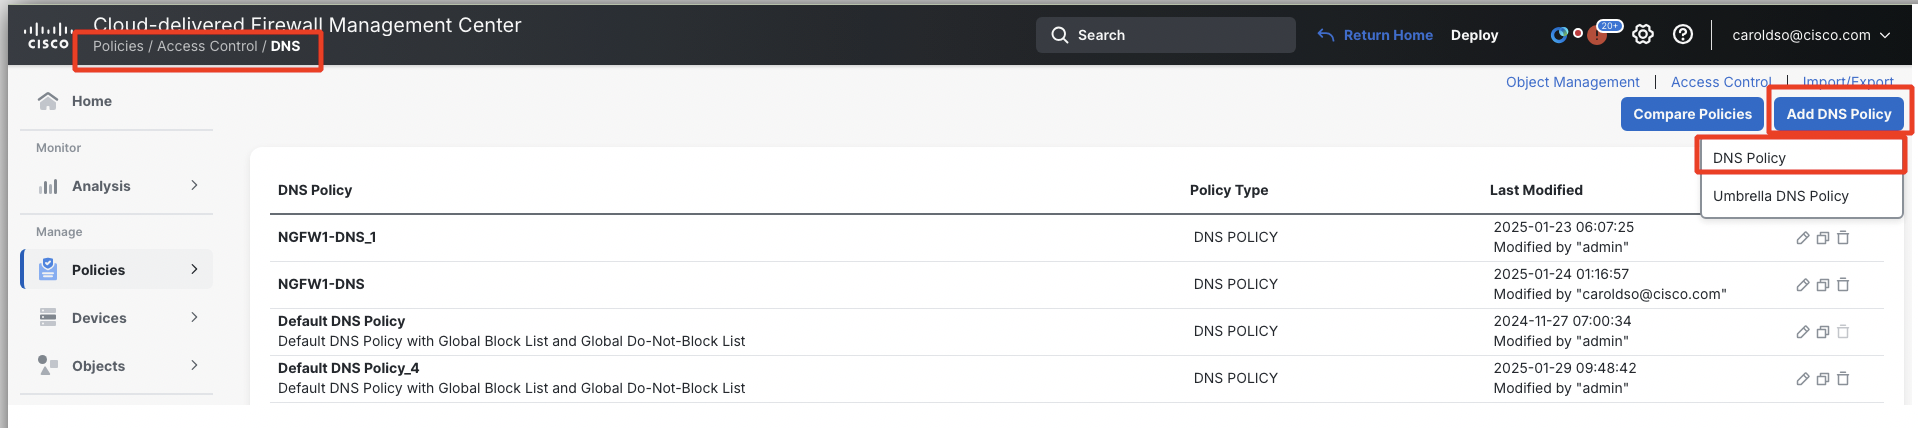
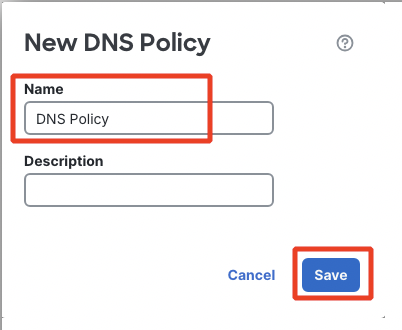
Specify the name DNS Policy and click Save.
- Add a new rule by clicking Add DNS Rule.
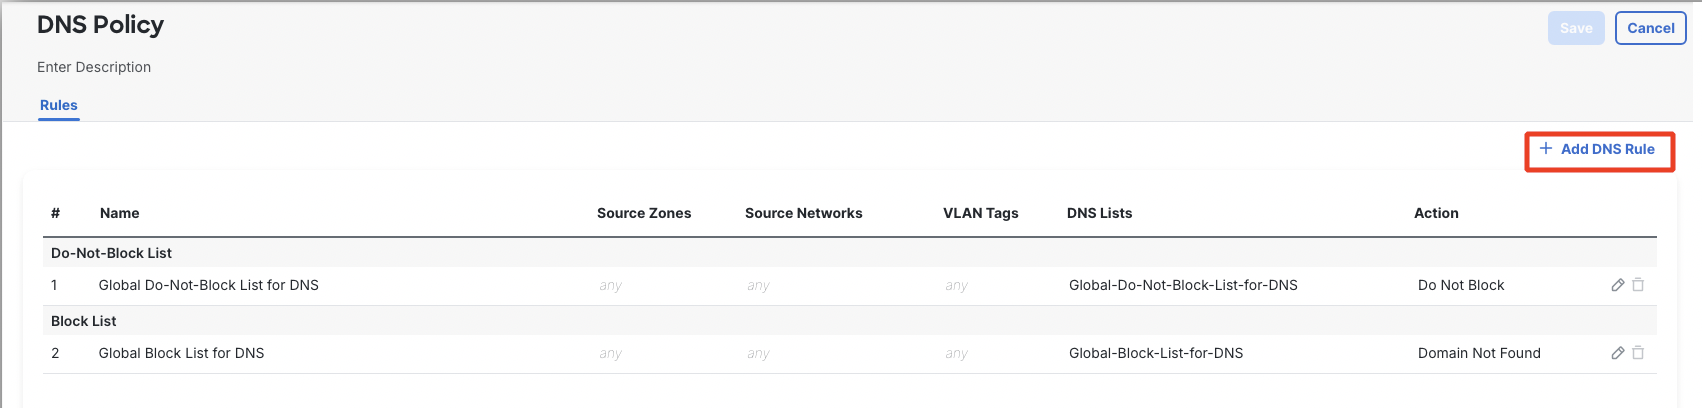
Configure the rule as per screenshot below:
- Name: Block Malicious DNS
- Action: Domain not Found
- DNS: Select ALL elements available in the DNS Lists and Feeds lists (from DNS Attackers to DNS Tor_exit_node). Click on Add to Rule.
Note
Please do not add 'Global-Block-List-for-DNS' and 'Global-Do-Not-Block-List-for-DNS' to Selected Items.
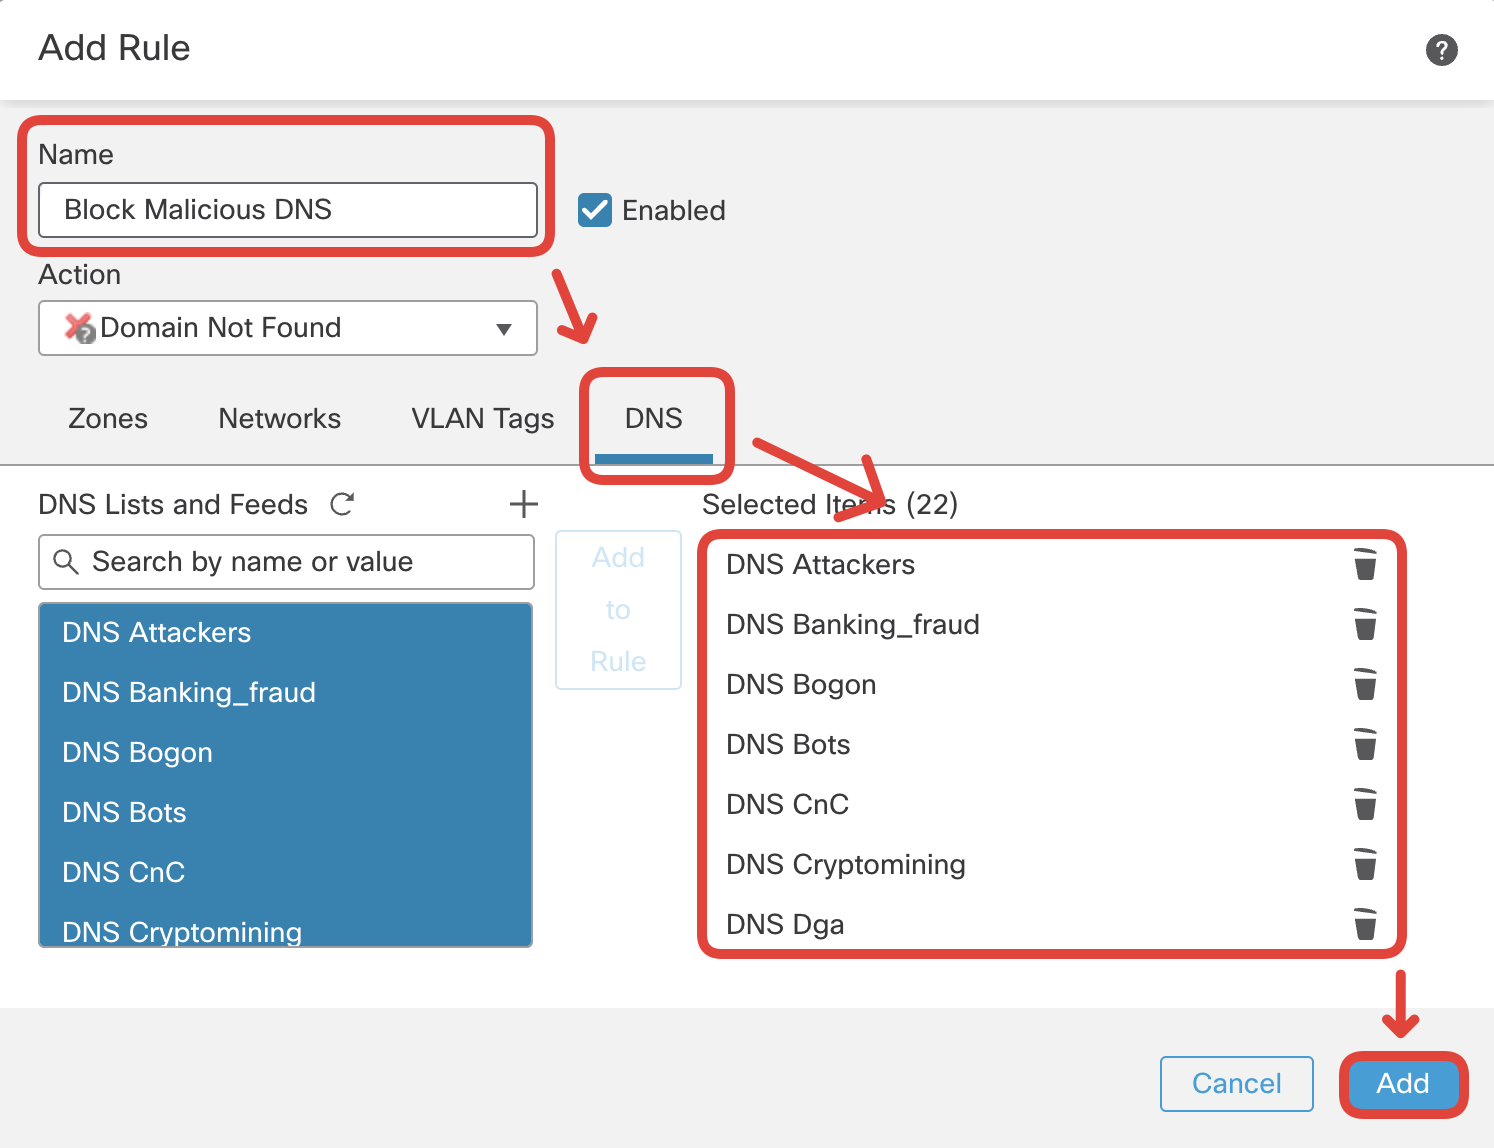
Click Add.
-
Ensure the new rule is properly configured and click Save.

Note
The other available actions for a DNS rule are - 'Do Not Block', 'Monitor', 'Drop', and 'Sinkhole'.
II. FILE POLICY
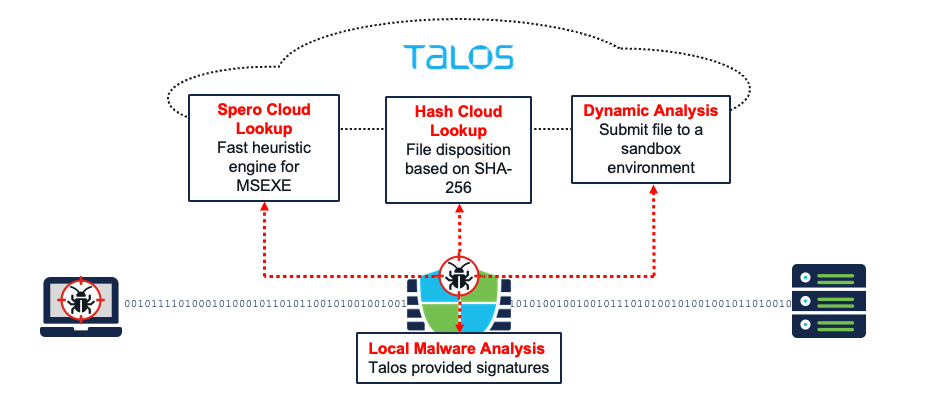
A file policy is a set of configurations that the system uses to perform malware protection and file control, as part of your overall access control configuration. This association ensures that before the system passes a file in traffic that matches an access control rule’s conditions, it first inspects the file. Cisco Secure Firewall supports a few types of file analysis to provide the best protection:
- Spero Analysis - Spero analysis examines structural characteristics such as metadata and header information in executable files. After generating a Spero signature based on this information, if the file is an eligible executable file, the device submits it to the Spero heuristic engine in the AMP cloud
- Local Malware Analysis - Local malware analysis allows a managed device to locally inspect executables, PDFs, office documents, and other types of files for the most common types of malware, using a detection rule set provided by the Talos Intelligence Group.
- Hash Cloud Lookup - Querying the TALOS cloud for the file's disposition based on its SHA-256 hash value.
- Dynamic Analysis - submit files for dynamic analysis using Secure Malware Analytics (formerly Threat Grid), Cisco’s file analysis and threat intelligence platform. Secure Malware Analytics runs the file in a sandbox environment, analyzes the file's behavior to determine whether the file is malicious, and returns a threat score that indicates the likelihood that a file contains malware.
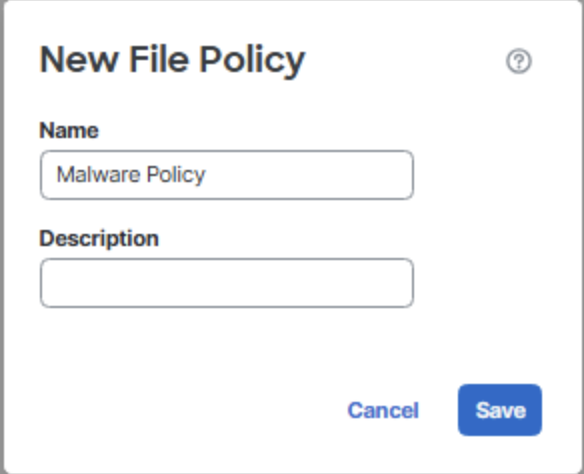
- Create a new file policy. Navigate to Policies > Malware & File and click New File Policy.

- Set the name to Malware Policy and click Save.
- First, you add a rule that disallows sending certain file types through the firewall.
Note
The firewall uses the concept of File Magic to detect a file type. File Magic is a Hex word in the beginning of every file that is unique for their type and respective version. Below are a few examples of magic numbers for common file types:
Portable Network Graphics (PNG): 89 50 4E 47 0D 0A 1A 0A
MS Outlook Personal Storage Table (PST): 21 42 44 4E
PDF Document (version 1.0): 25 50 44 46 2D 31 2E 30
PDF Document (version 1.7): 25 50 44 46 2D 31 2E 37
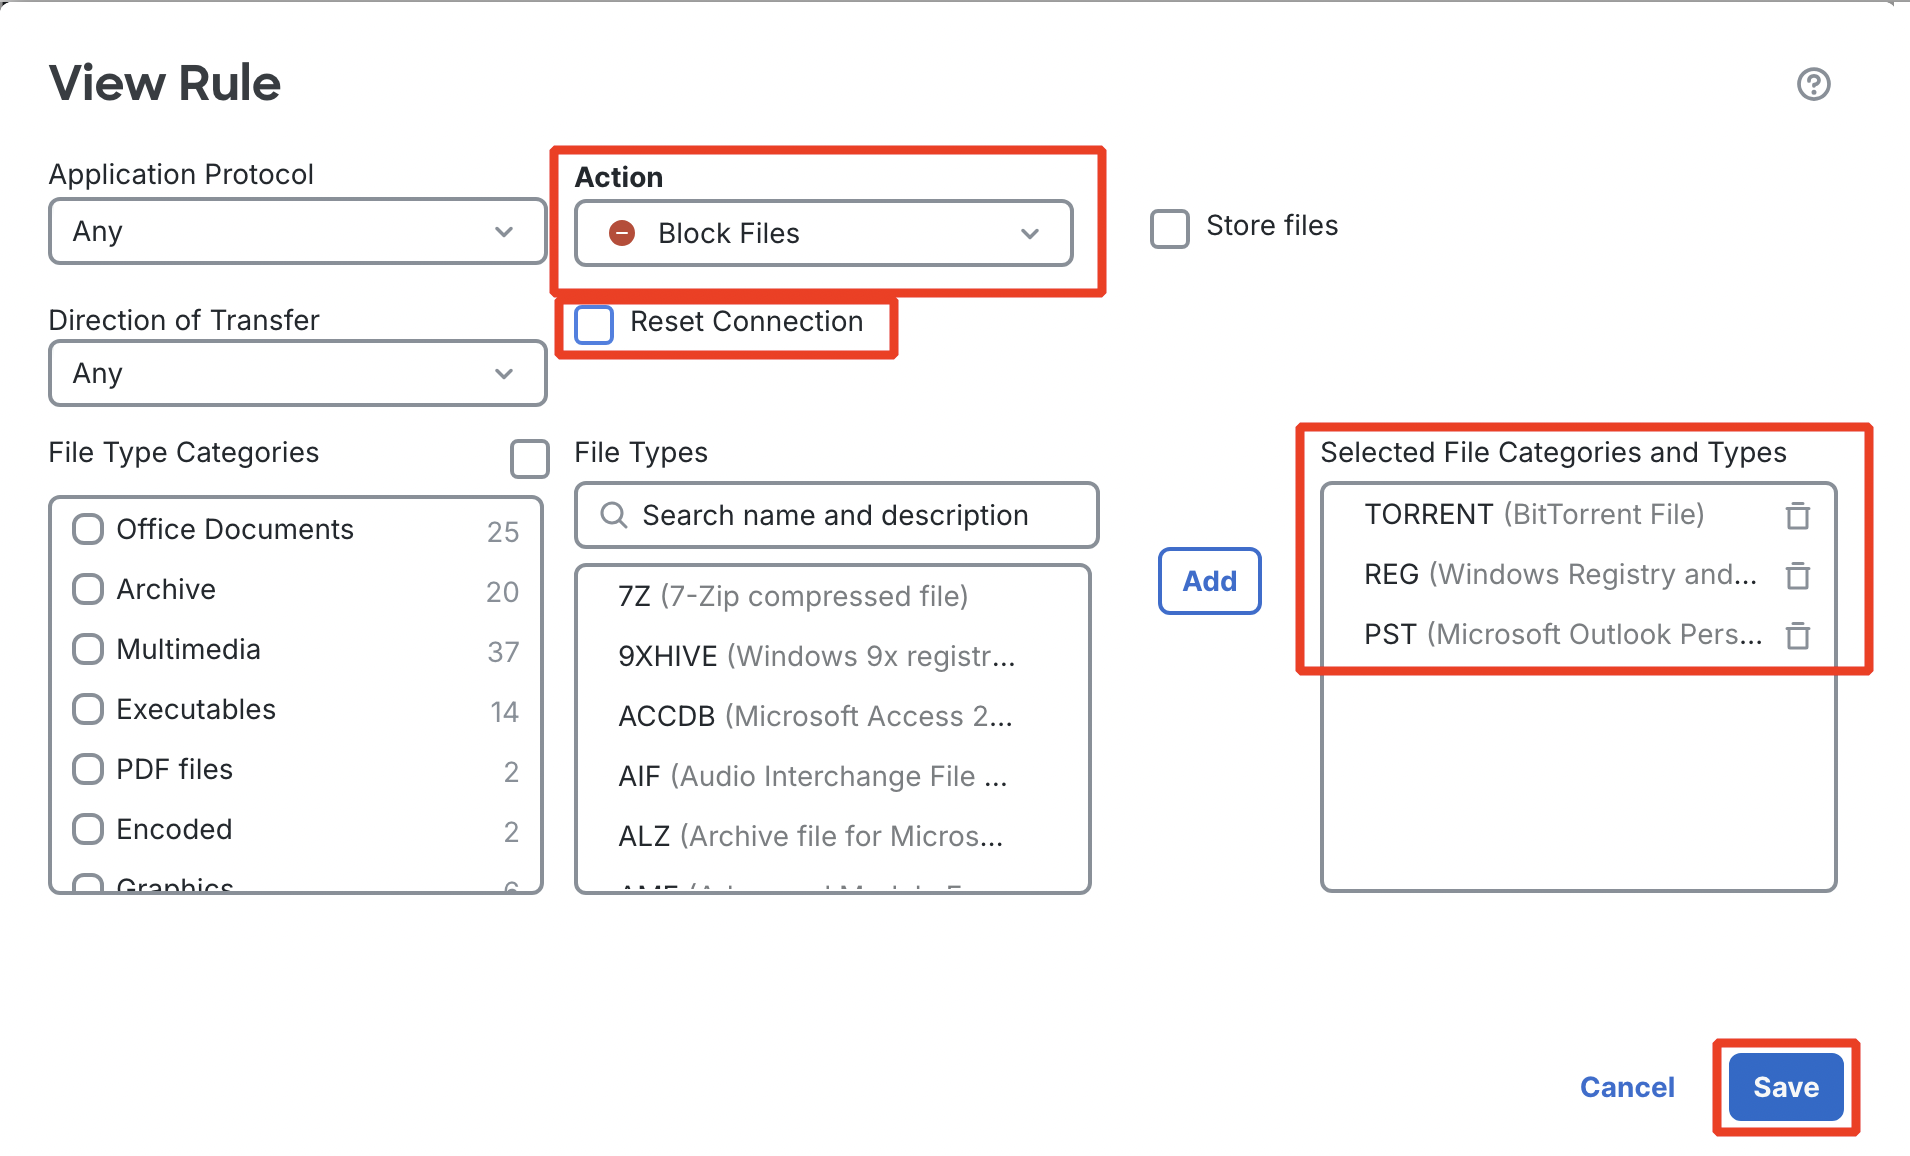
Click Add rule.

Set the action to Block Files and select three file types:
- REG (Windows Registry)
- TORRENT (BitTorrent File)
- PST (Microsoft Outlook Personal Storage)
Disable the Reset Connection checkbox. Click Save.
- Add another rule to block malware found in any of all the available file categories and types as shown below:
- Click on + Add Rule.
- Action: Block Malware
- Options Selected:
- Spero Analysis for MSEXE
- Dynamic Analysis
- Local Malware Analysis
Disable the Reset Connection checkbox if it is enabled.
- File Type Categories: All file categories
Click on the checkbox against File Type Categories. Select All types in selected Categories under File Types and click on Add.
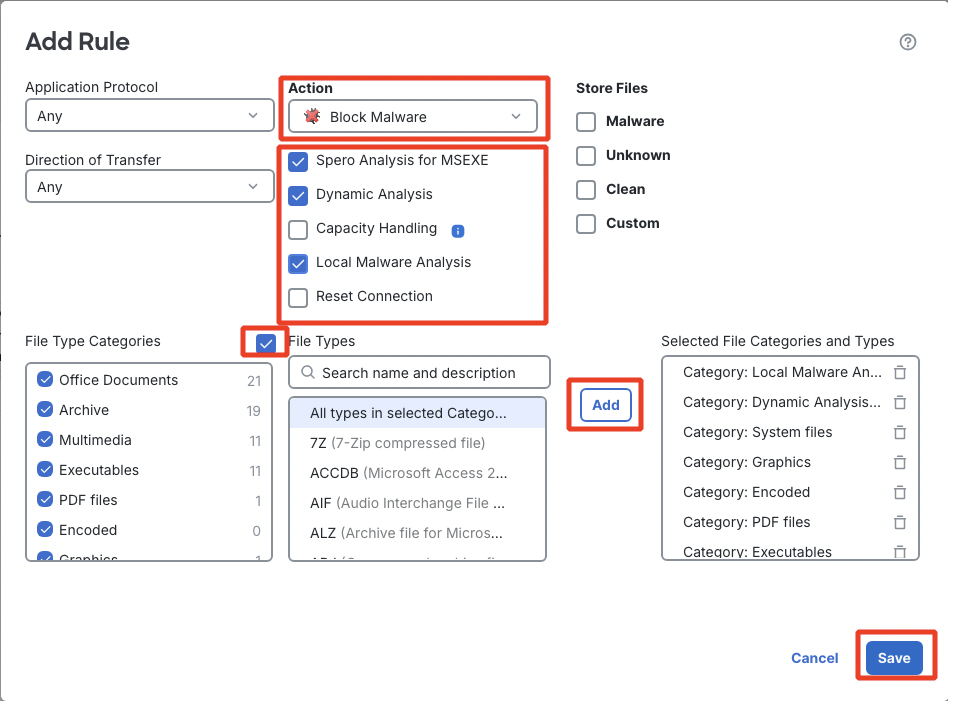
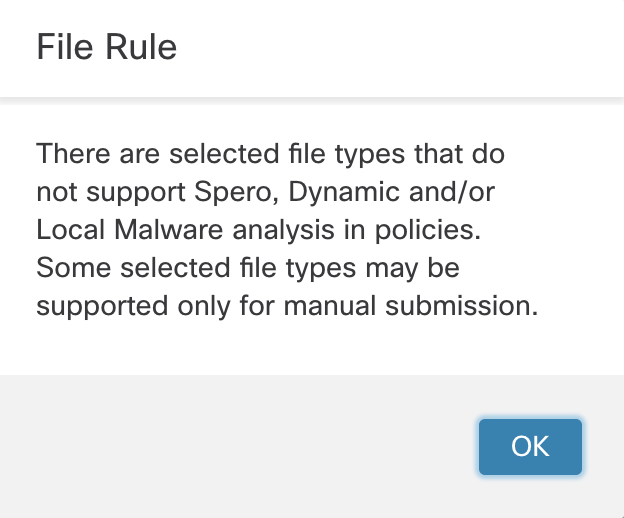
Click Save. You can ignore the warning that pops up afterward. Click OK.
- Click on the Advanced tab. Select Inspect Archives under Archive File Inspection. Ensure that the rest of the check-boxes are enabled as shown in the below screenshot.
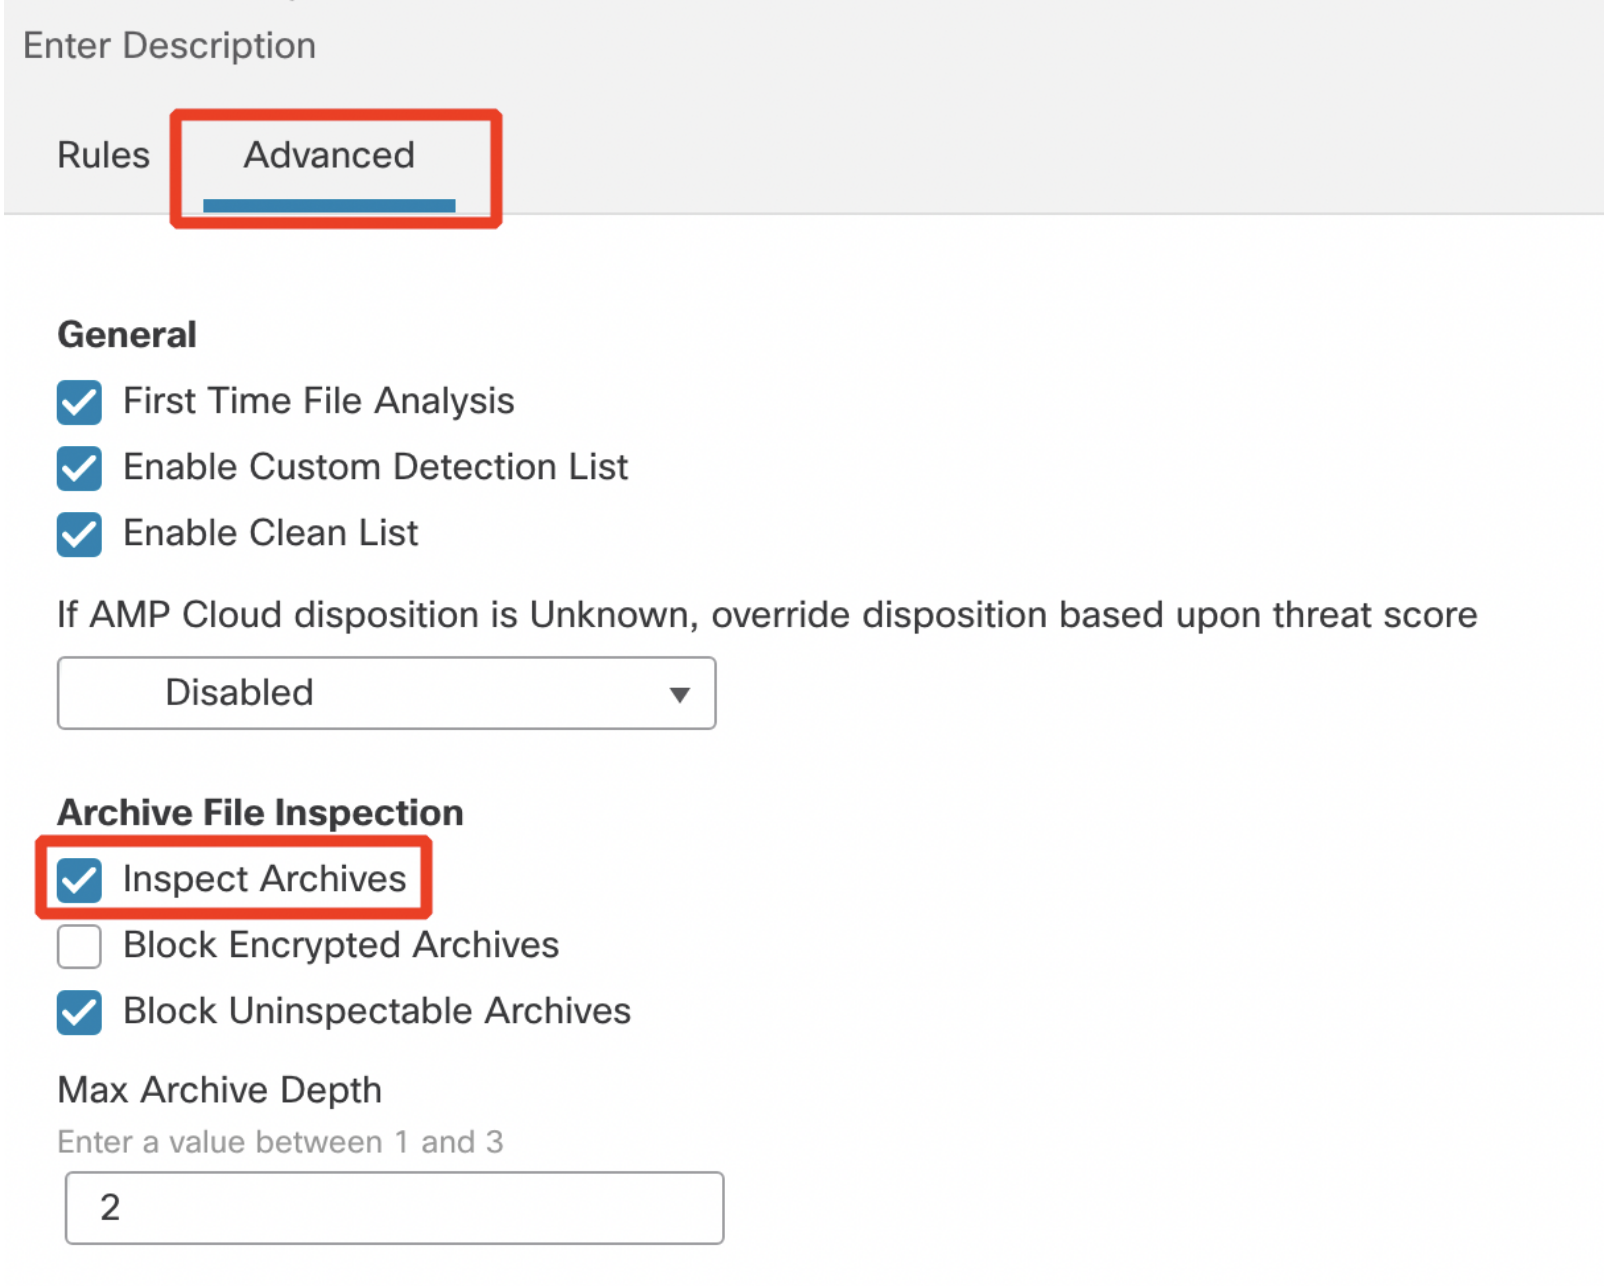
- Go back to the Rules tab. The final File Policy should have two rules as per the screenshot below.
Note
Notice, the file policies are unordered. If more than one rule applies to a file under inspection, the following rule apply: simple blocking takes precedence over malware inspection and blocking, which takes precedence over simple detection and logging.

Click Save.
III. Configure Intrusion Policy
Intrusion policy blocks or alters malicious traffic through the firewall by examining the decoded packets for attacks based on patterns. Intrusion policies are paired with variable sets, which comprises of variables like HOME_NET, EXTERNAL_NET, DNS_SERVERS etc. These named values can be defined to accurately reflect your network environment.
The system-delivered policies have pre-set rule states and Network Analysis Policies
other configurations, based on the experience of Cisco Talos. The network analysis and intrusion policies have similarly named system-defined policies that complement and work with each other.
The system-defined policies in the order of least security to maximum security is as follows:
- No Rules Active
- Connectivity Over Security
- Balanced Security and Connectivity
- Security Over Connectivity
- Maximum Detection
If needed you can also create custom network analysis and intrusion policies to change the settings best suited to your network environment
- Navigate to Policies > Intrusion.
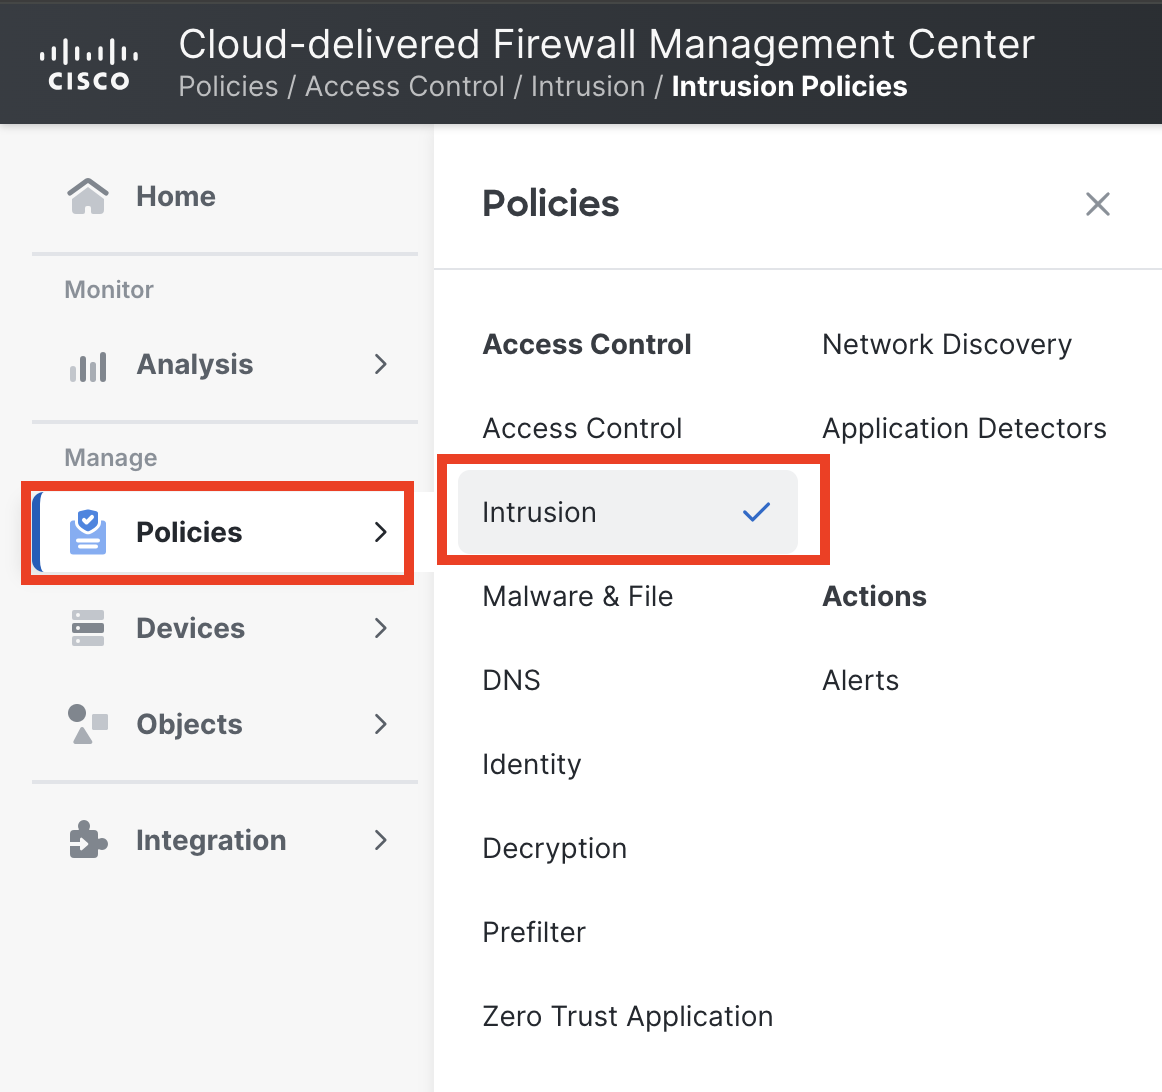
- Click on Create Policy.

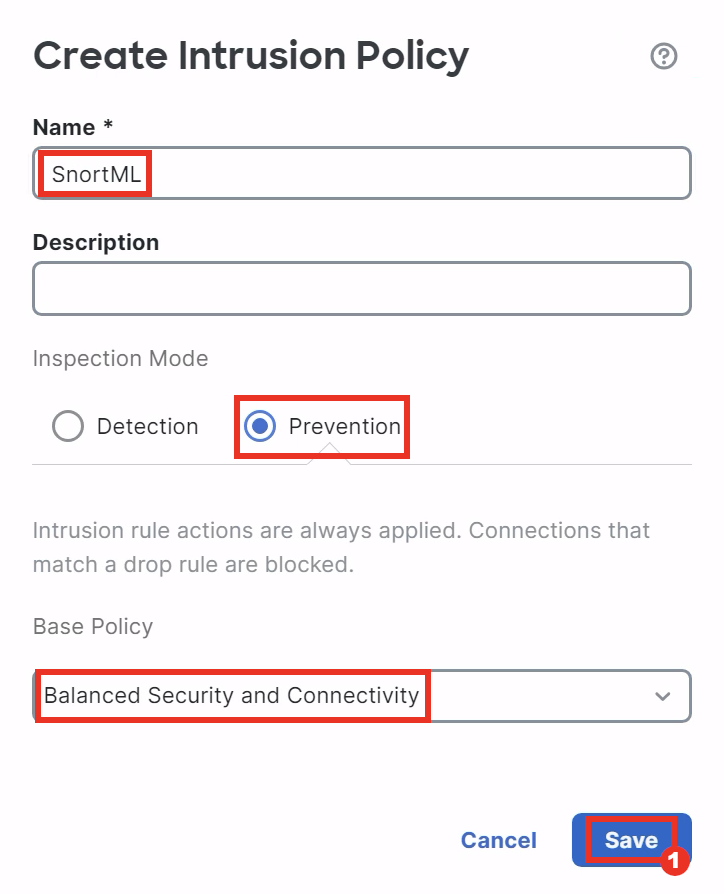
3.Configure the following details:
- Name: SnortML
- Inspection Mode: Prevention
- Base Policy: Balanced Security and Connectivity
- Click Save
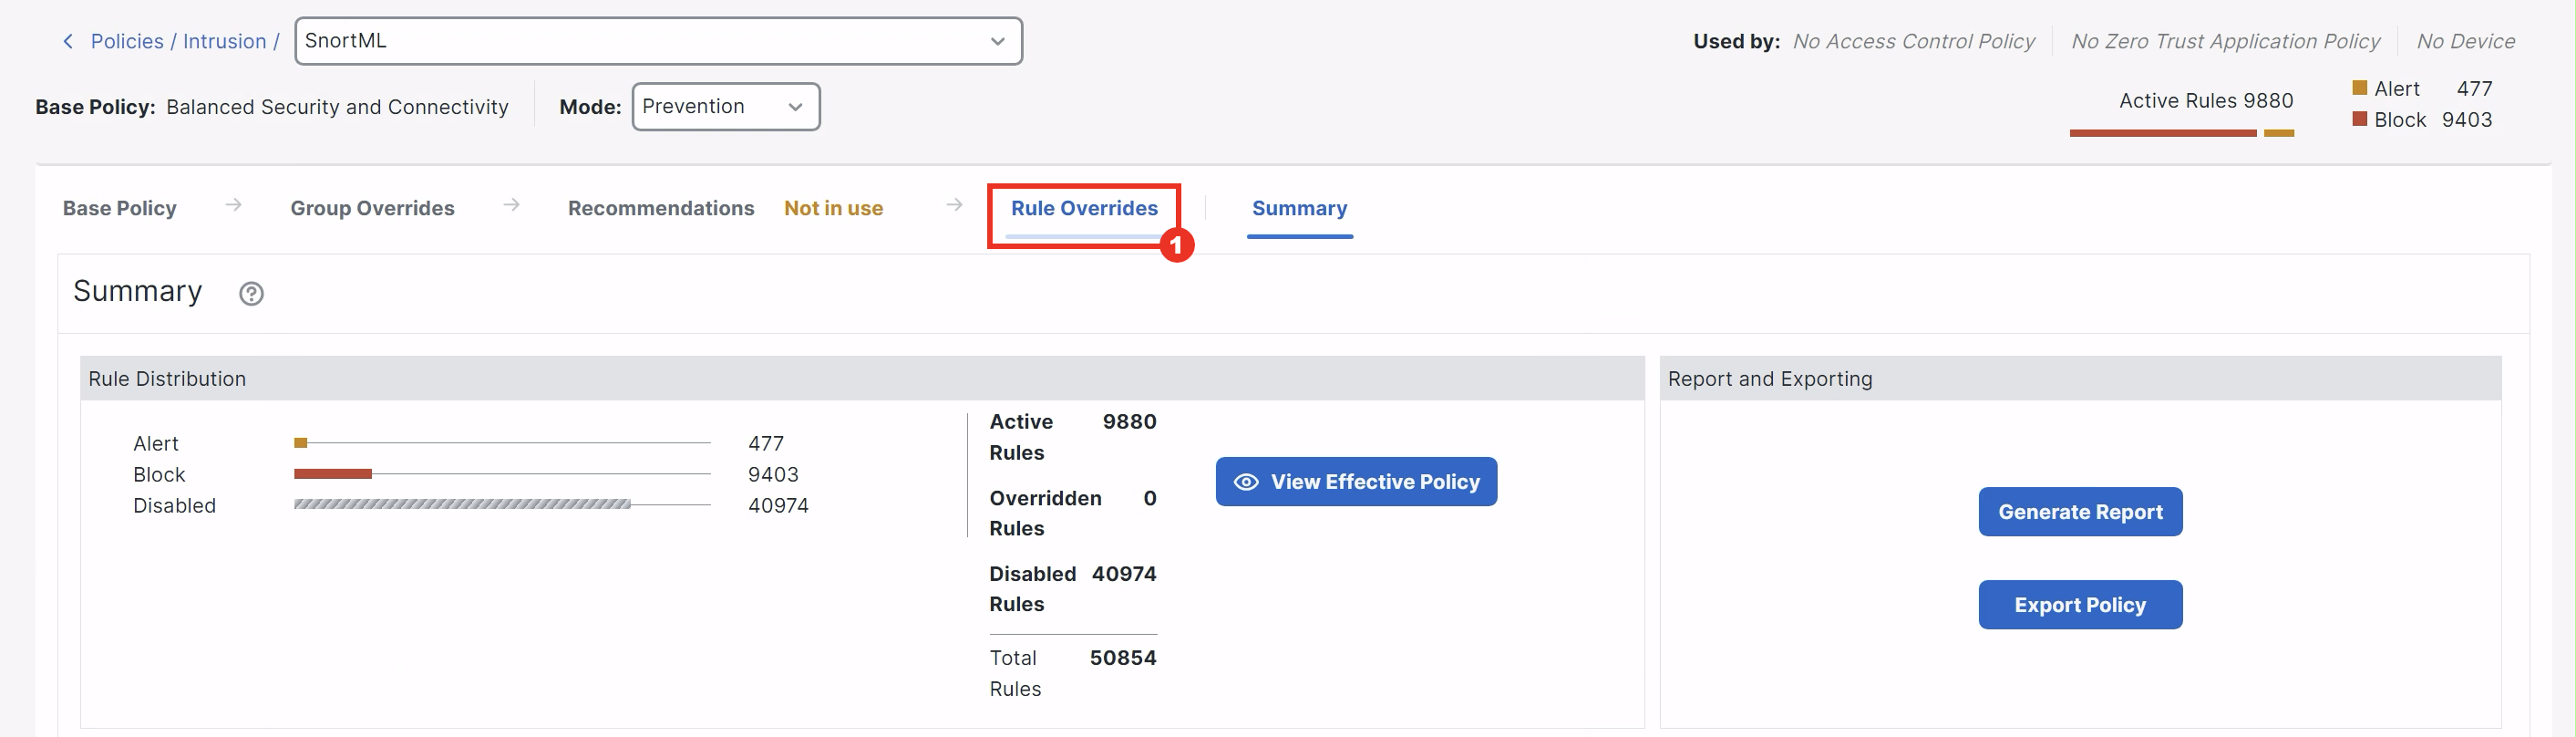
- In the Intrusion Policy listing, click Snort 3 Version for the SnortML policy to open up the configuration panes.

- You can read through the note About Intrusion Policies that pops up to understand the Snort 3 version of Intrusion policies. Once you are done reading click Dismiss. Then, click Rule Overrides.
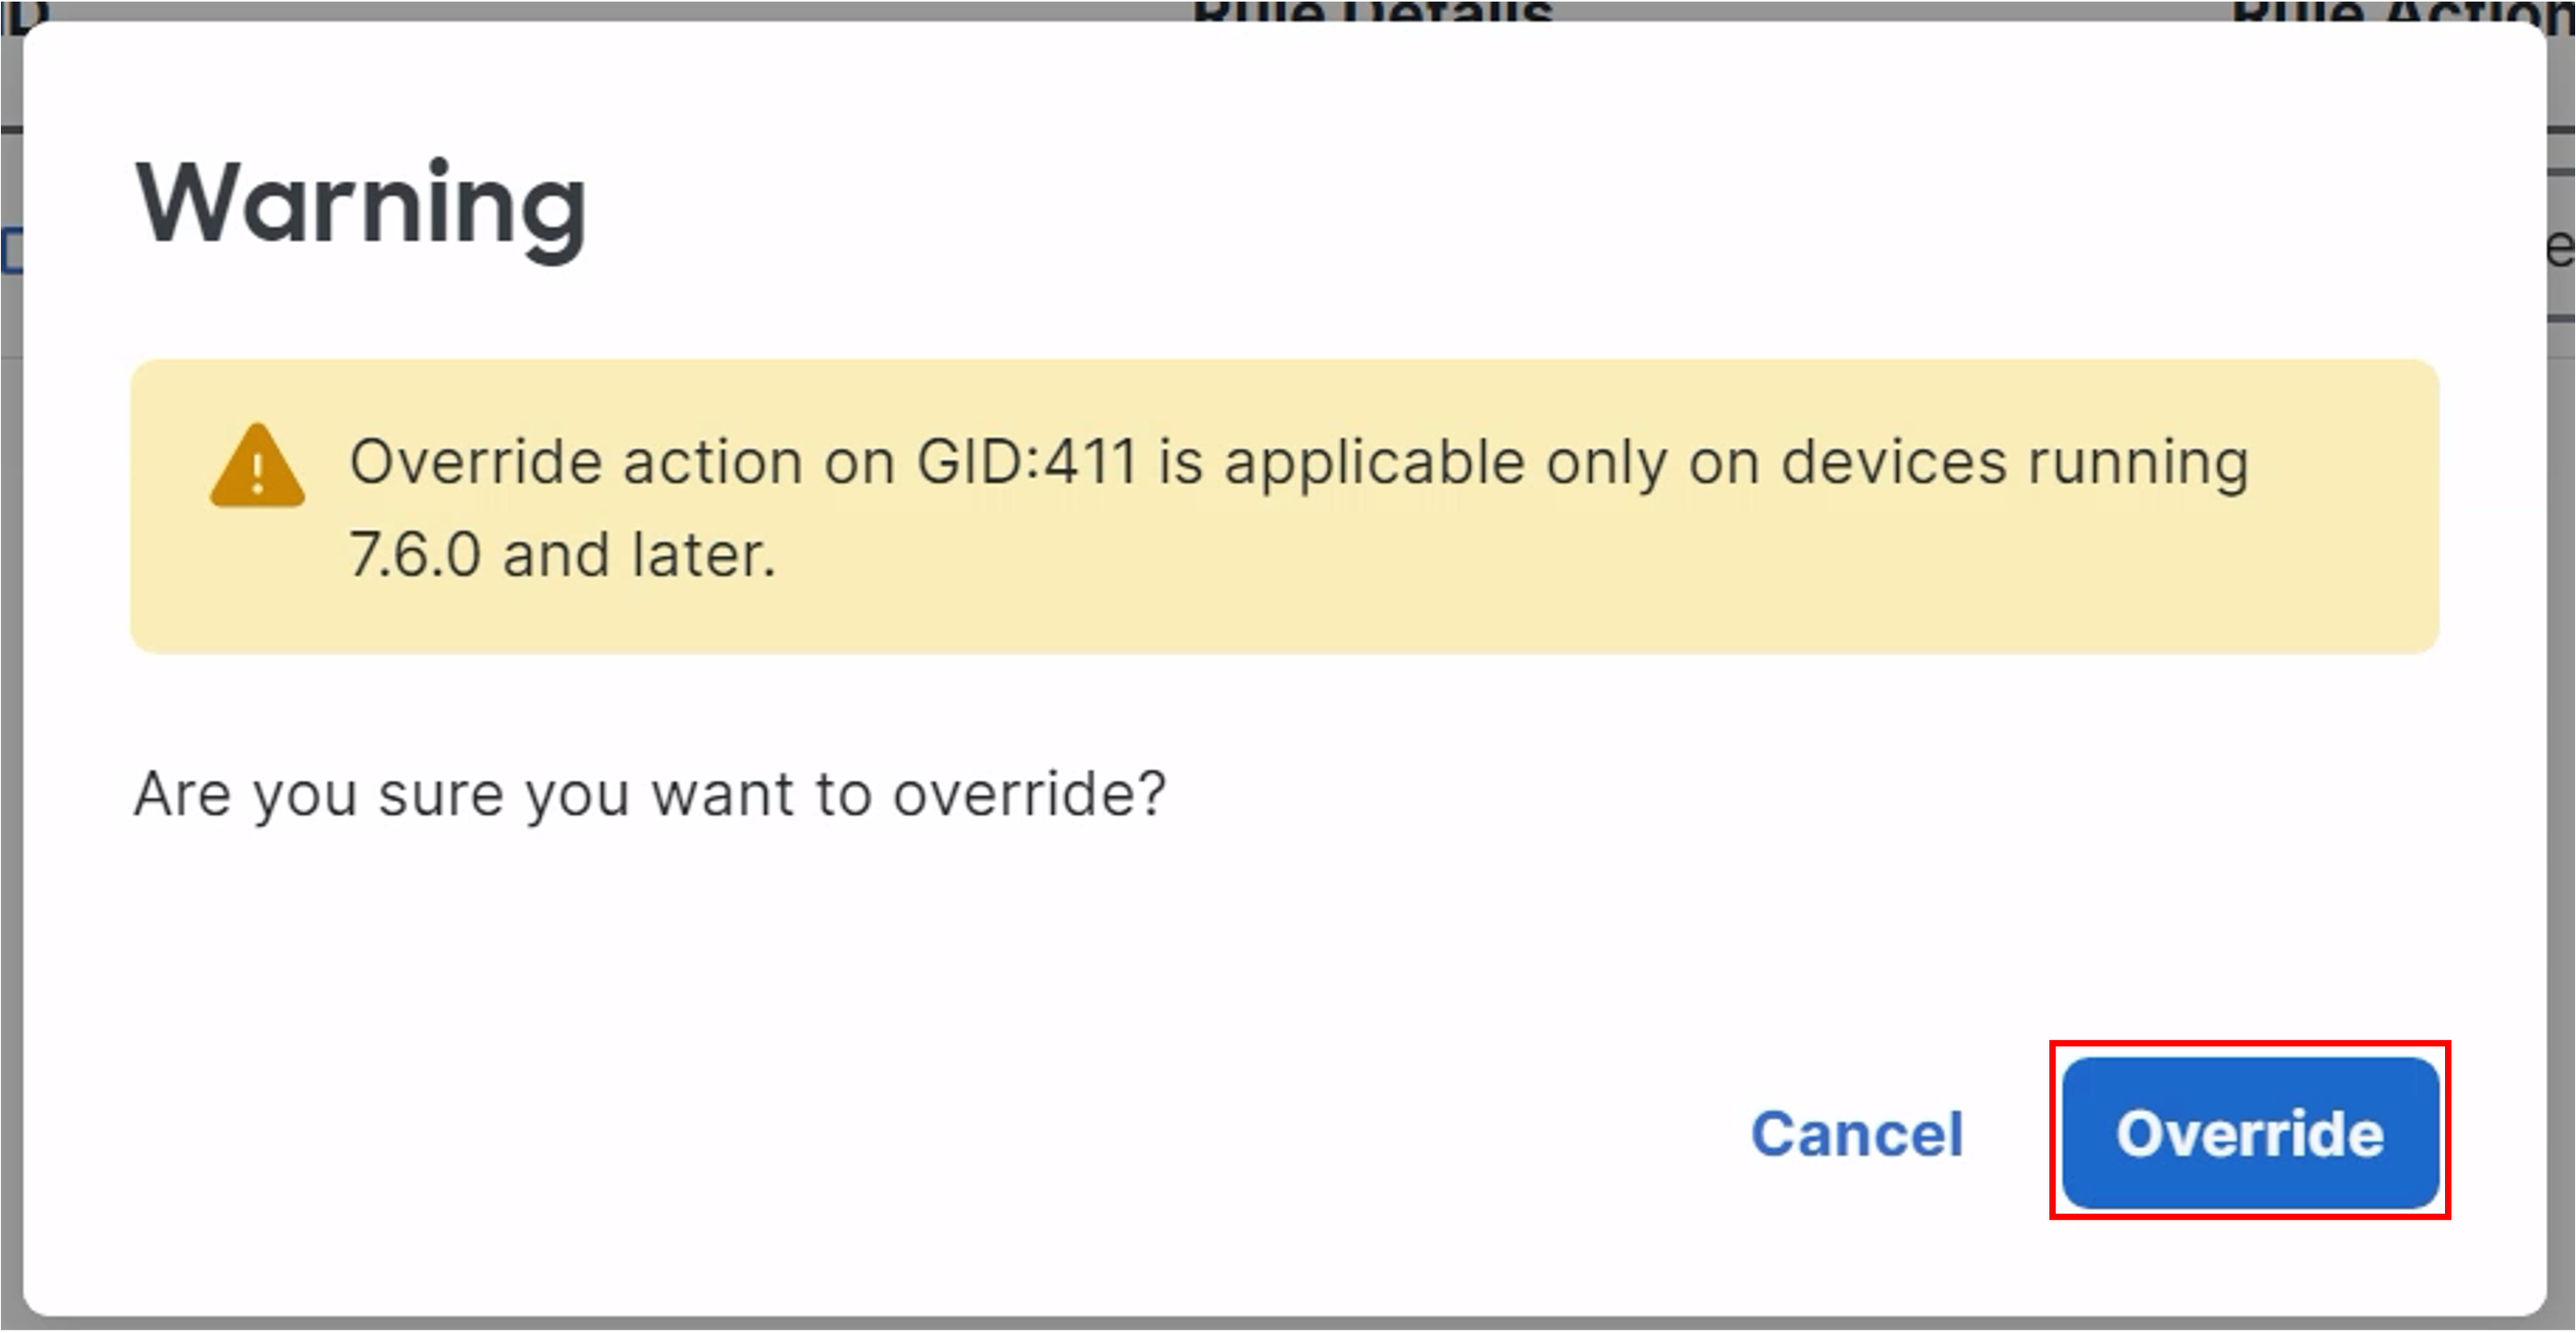
- Click All Rules in the left drop-down, apply GID=411 filter in the search bar, and change the Rule Action for rule 411:1 from Disable (Default) to Block.

- A pop-up will appear noting that an override is only applicable to devices running 7.6.0 or later. Click Override to acknowledge the warning message.
IV. ACCESS CONTROL POLICY
Access Control Policy comprises of firewall rules that allow, block, monitor or trust traffic based on various parameters like IP addresses, ports, applications, URL categories, Users, dynamic attributes etc. The traffic is matched to the rules in top-down order by ascending rule number.
Each managed device can have only one access control policy assigned to it.
- Go to Policies > Access Control > Access Control. Click on the edit icon of 'NGFW1-Caldera'.
- As an early line of defense against malicious internet content, Security Intelligence uses reputation intelligence to quickly block connections to or from less reputed IP addresses, URLs, and domain names. This is called the Security Intelligence block listing.
- Security Intelligence is an early phase of access control before the system performs more resource-intensive evaluation. Using a Block list improves performance by quickly excluding traffic that does not require inspection.
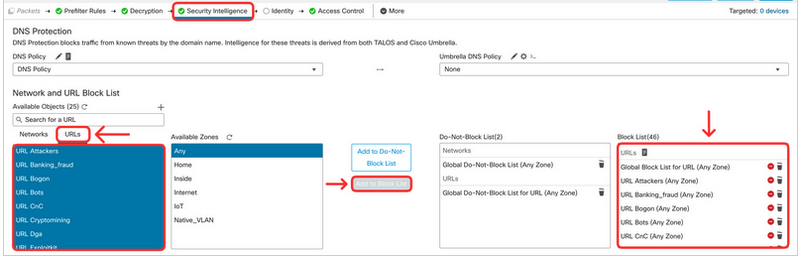
Click on the Security Intelligence tab and select DNS Policy from the drop-down menu as shown below.

- Next, add Talos-provided networks to the Block List. Locate the Network and URL Block List section, and click on Networks tab. Select all objects representing malicious networks (from Attackers to Tor_exit_node) and click on Add to Block List.
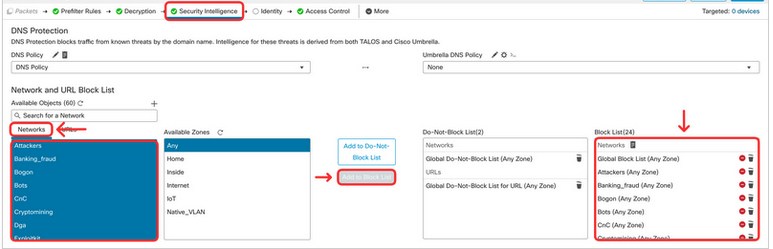
Repeat the same for URLs. Click on URLs tab. Select all objects representing malicious URLs (from URL Attackers to URL Tor_exit_node) and click on Add to Block List.
- In the upcoming tasks, you will configure 3 firewall rules:
- Block Unwanted URLs - block malicious or non-acceptable URL categories in the organization
- Block Unwanted Applications - block malicious or non-acceptable Applications in the organization
- Inspect All - permit and inspect the rest of the traffic
Click on Access Control tab.
Note
For firewall rules allowing traffic it is recommended to use log at end of connection option, and not enable log at beginning of connection at the same time. Using both may negatively affect the performance of your firewall.
- Create a block rule for the URL categories as per below.
Click on + Add Rule.
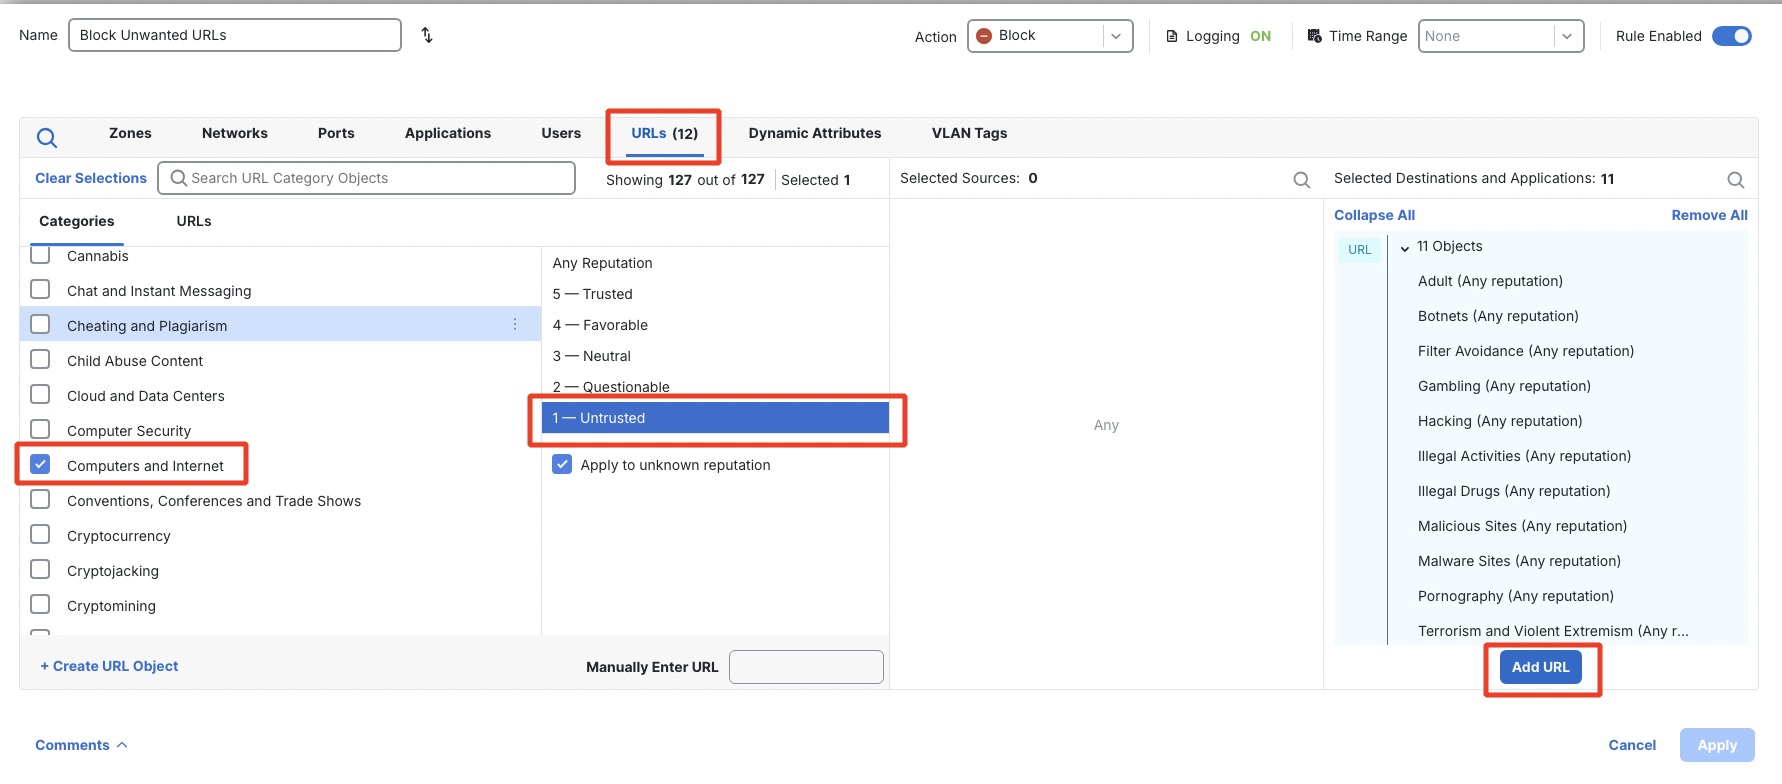
Name: Block Unwanted URLs
Action: Block
Switch to URLs tab and select the following Categorieswith Any Reputation, then click Add URL.
- Adult (Any reputation)
- Botnets (Any reputation)
- Filter Avoidance (Any reputation)
- Gambling (Any reputation)
- Hacking (Any reputation)
- Illegal Activities (Any reputation)
- Illegal Drugs (Any reputation)
- Malicious Sites (Any reputation)
- Malware Sites (Any reputation)
- Pornography (Any reputation)
- Terrorism and Violent Extremism (Any reputation)

Add a content category with a bad reputation as below:
- Computers and Internet (Untrusted reputation)
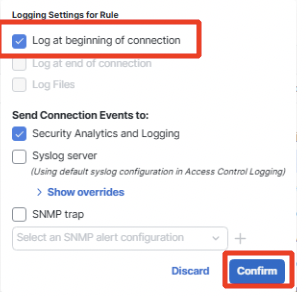
Click on Logging and configure Log at Beginning of Connection.

Note
Observe that Log at end of connection is disabled for rules with action Block.
Click Confirm to set logging and then Add to save the rule.
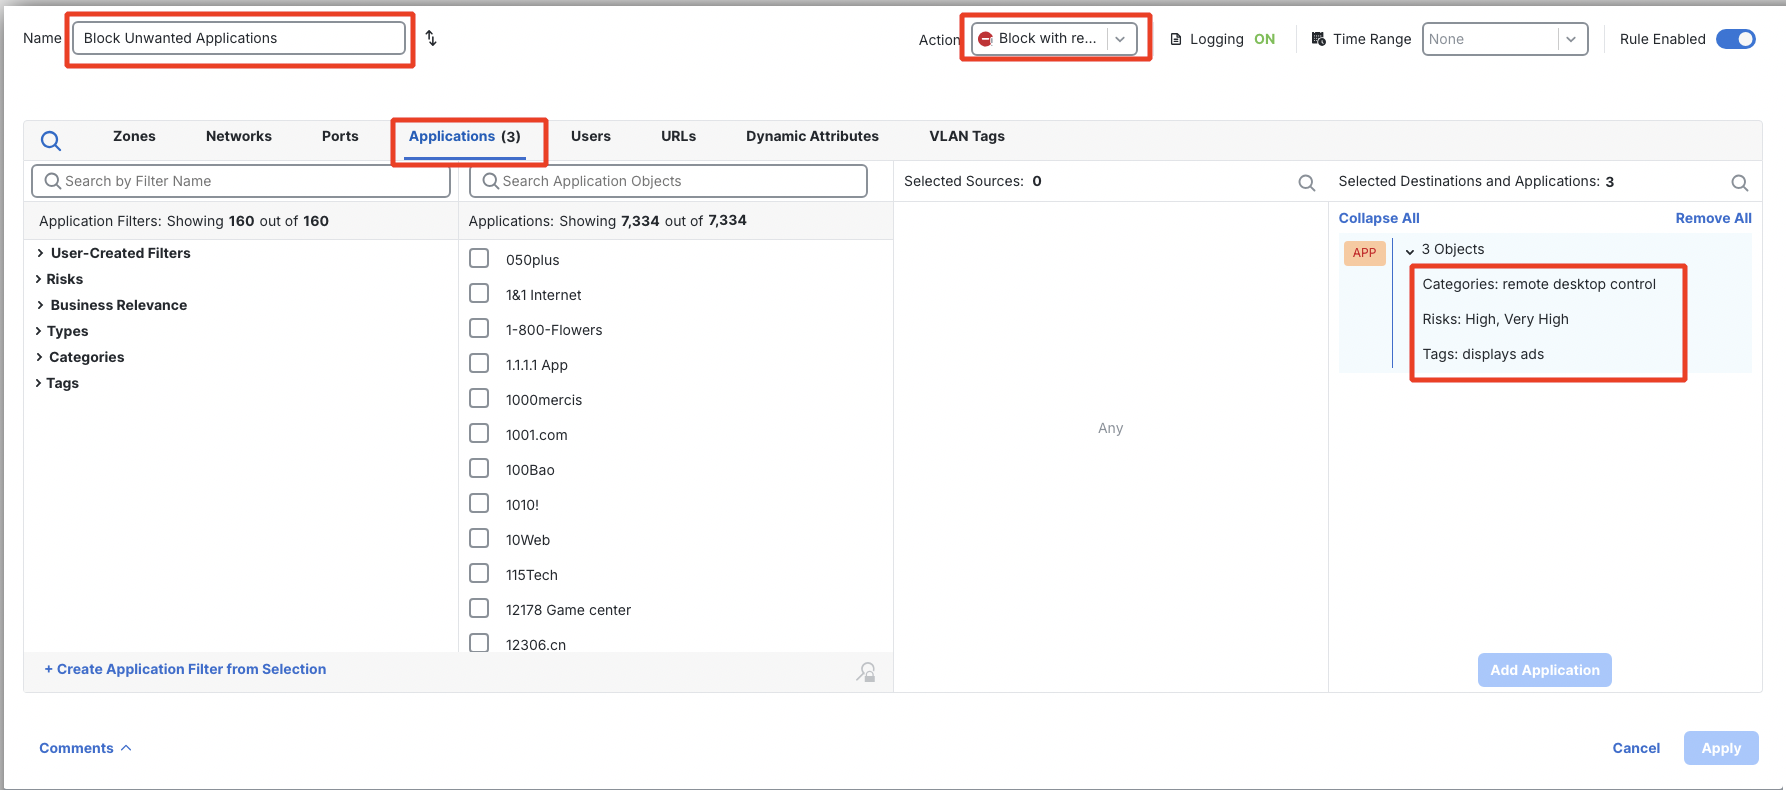
- Create another rule to block applications with high risk, unwanted tag and unwanted category.
Name: Block Unwanted Applications
Action: Block with reset
Switch to Applications. Use the search field to find application filters from the list below. Select each individually and click Add Application Filter button. Ensure that the objects are added as 3 objects and not as 1 object.
- Categories: remote desktop control
- Risks: Very High, High
- Tags: displays ads
Click on Logging and configure Log at Beginning of Connection.
Click Confirm to set logging and then Add to save the rule.
- Finally, you set a final rule which is to allow and inspect the rest of the traffic. You can either edit the existing Allow All, or delete it and create a new one. If you are editing the existing rule, then click on pencil icon for Allow All rule and then click on the reposition icon and position it below the last rule as shown below:
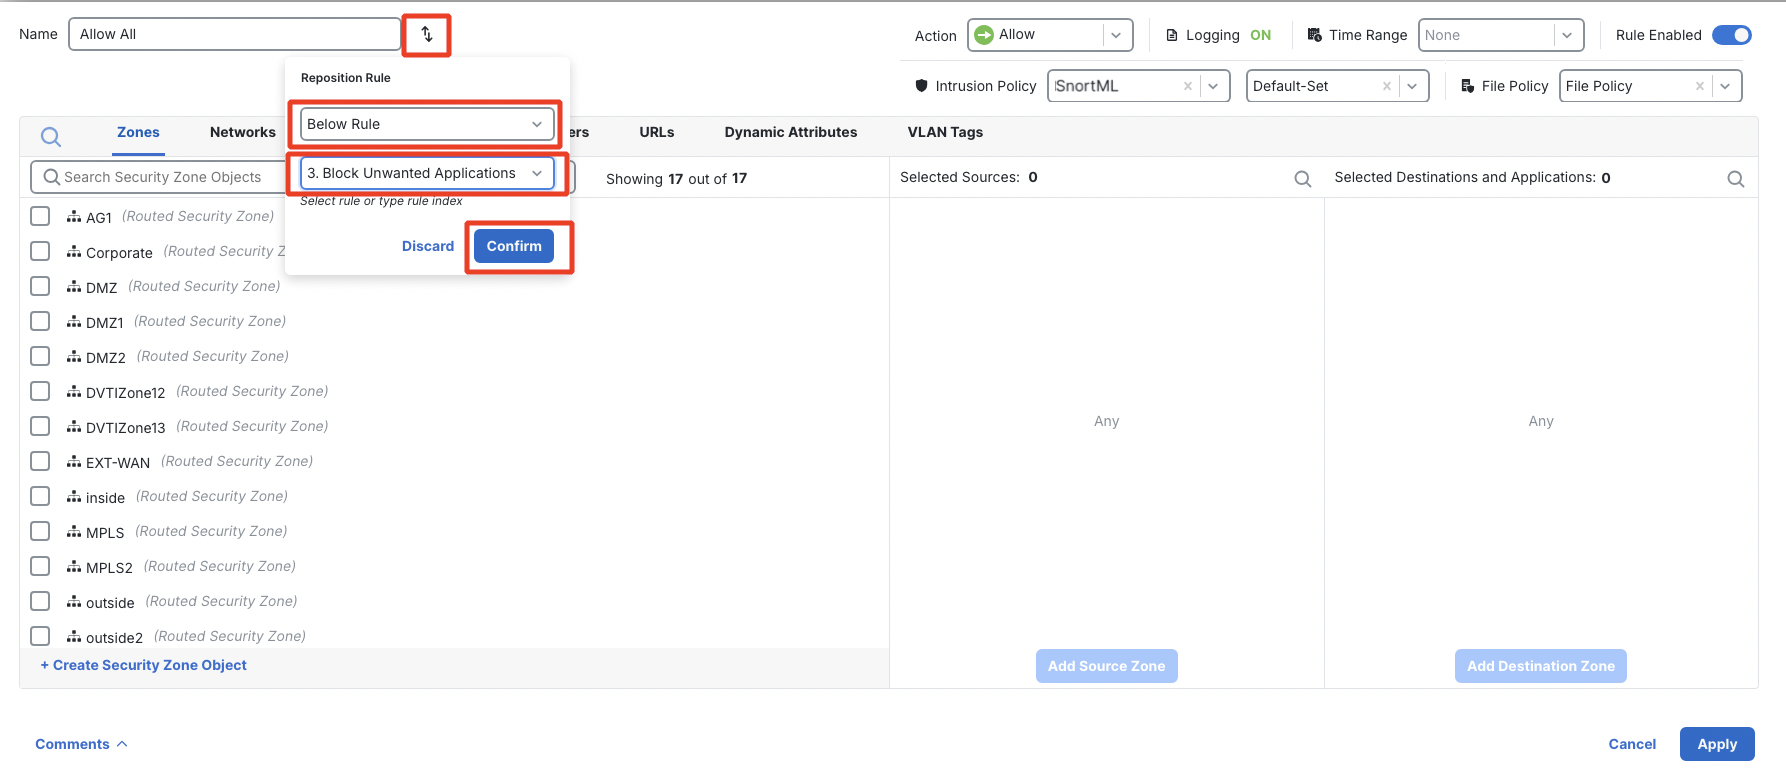
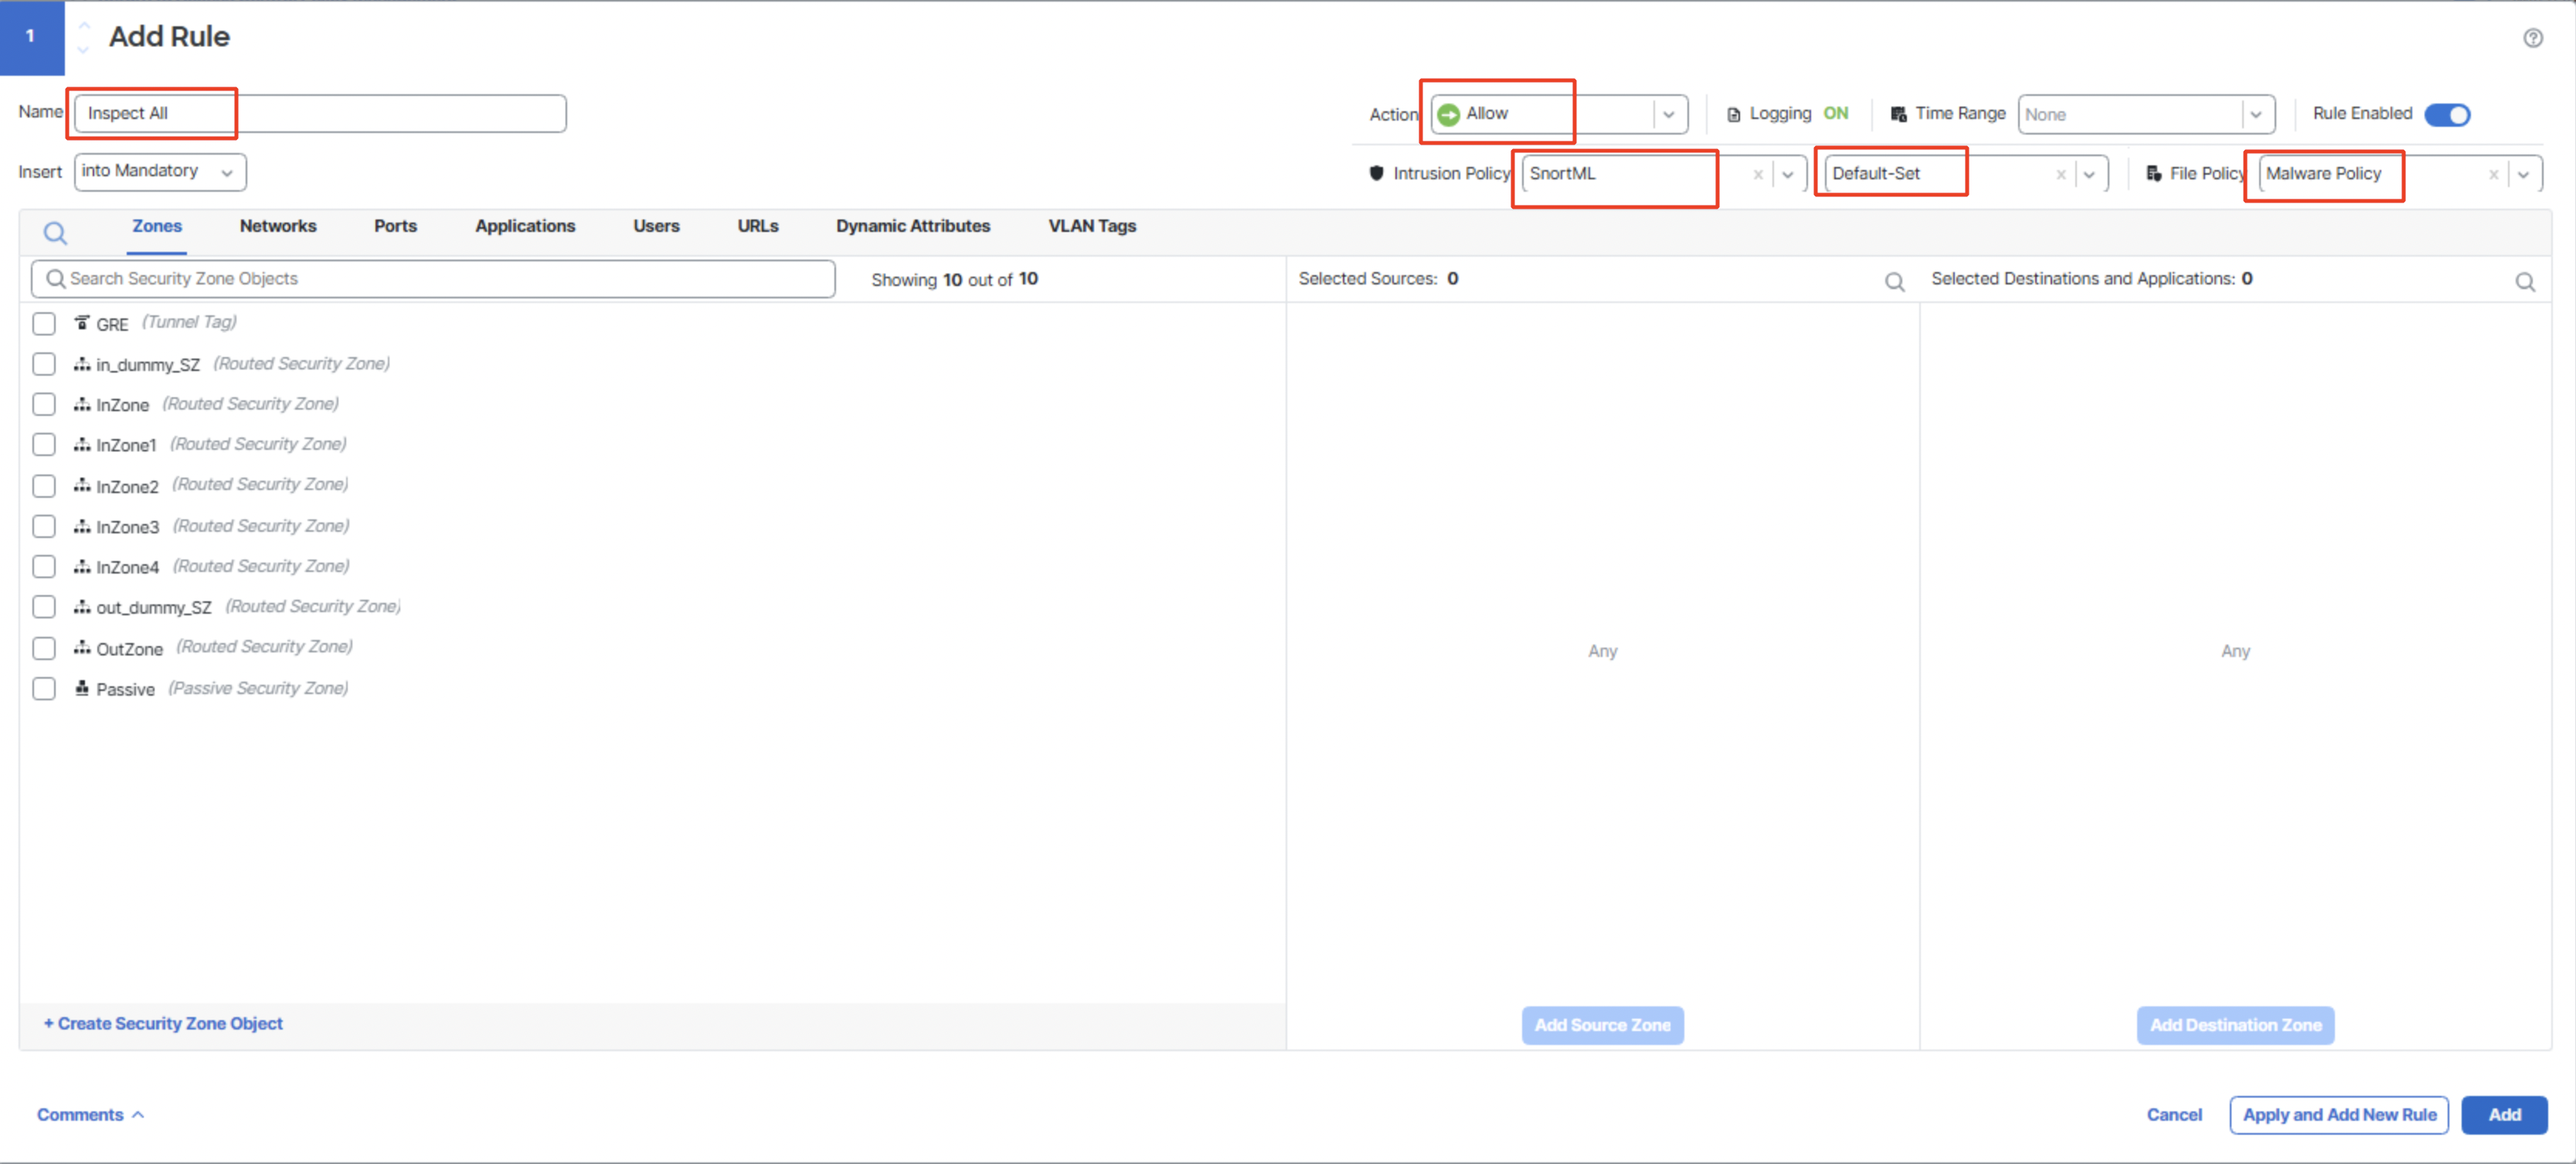
Configure the existing Allow All rule (rename it to Inspect All) as per below:
Action: Allow
Intrusion Policy:SnortML with Default-Set
File Policy: Malware Policy
Click on Logging and configure Log at End of Connection along with Log Files.
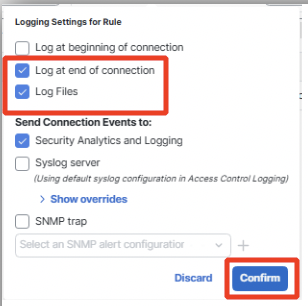
Click Confirm to set logging and then Apply to save the rule.
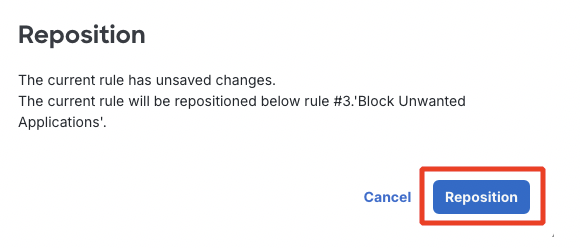
Ignore the Warning about the rule having no objects in the source or destination if you get any and click on Apply.
Click on Reposition if you are editing the existing rule.
At this moment your Access Control Policy should look like on the screenshot below. Review and confirm:
- order of the rules
- there are only three rules in the policy (if there are any leftovers from the previous lab tasks either delete them or move the new rules to the top of the policy)
- matching conditions for all the rules are set according to the lab guide
- Prefilter Rules and Security Intelligence policies are attached.

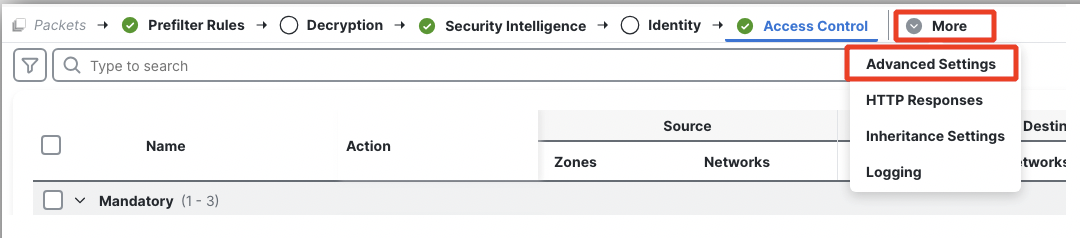
- Finally, you will review a few significant knobs in the Advanced Settings of the Access Control Policy that tend to be forgotten. Click More and then Advanced Settings.
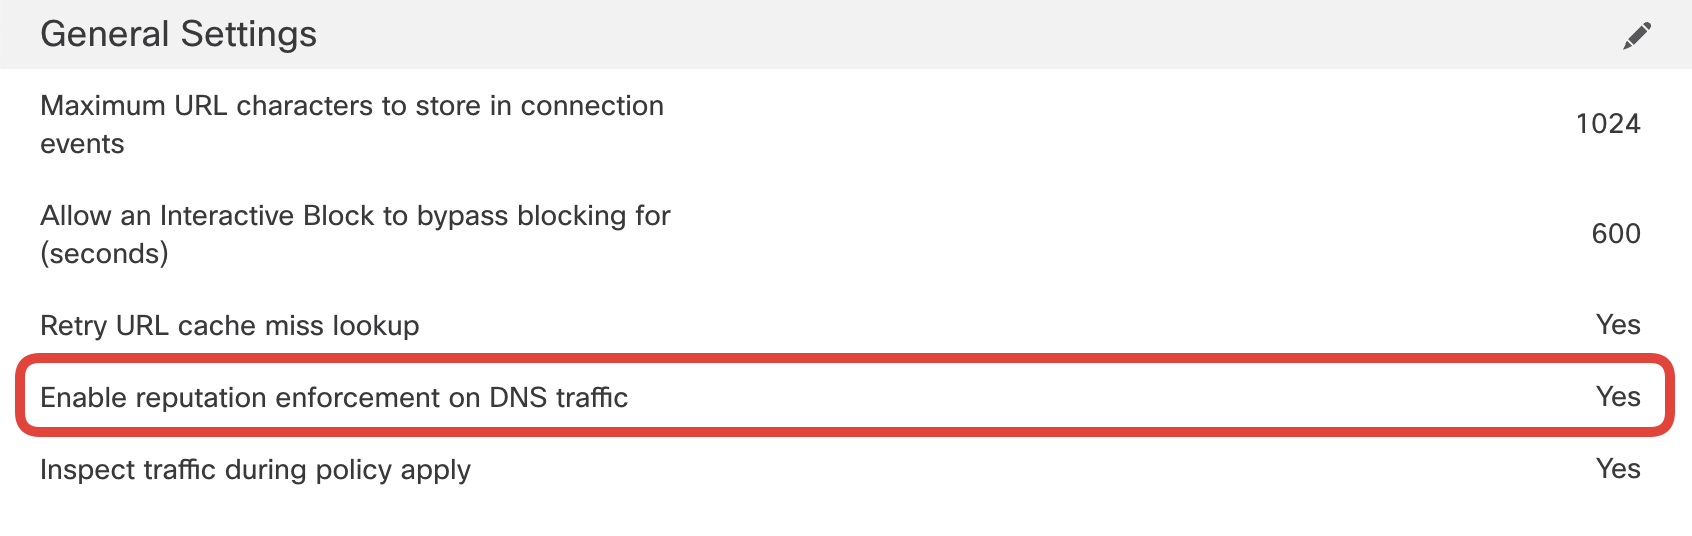
First, confirm if Enable reputation enforcement on DNS traffic is enabled. Without this option the rule Block Bad DNS wouldn't work.
- Ensure that Early application detection and URL categorization is enabled. If not, enable it.

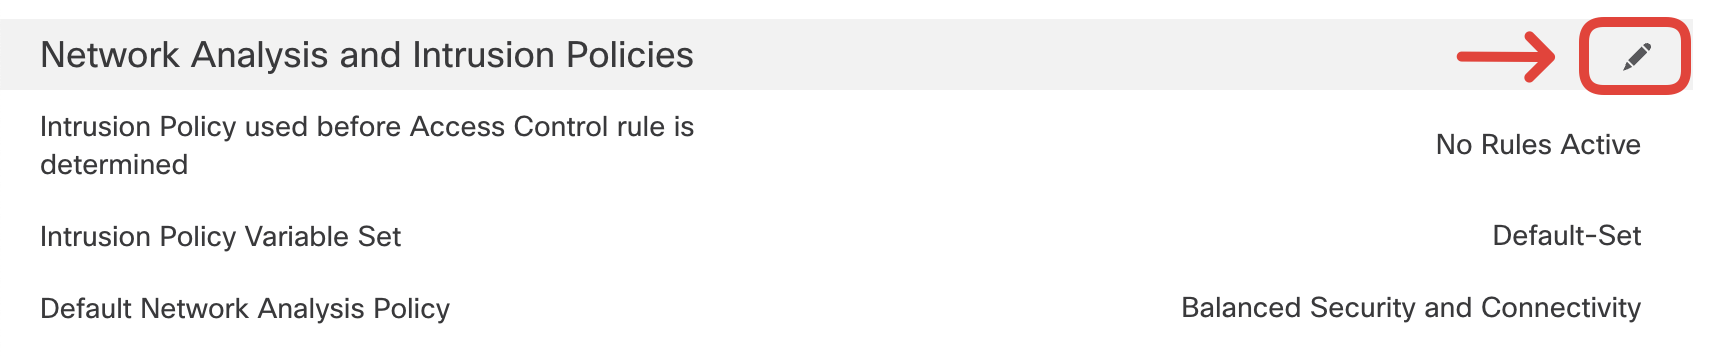
- By default, the firewall has no IPS rules active for traffic yet to be matched by a specific Access Control Policy rule. You can specify an IPS policy for that traffic in the Network Analysis and Intrusion Policies section. Click on the pencil icon to edit.
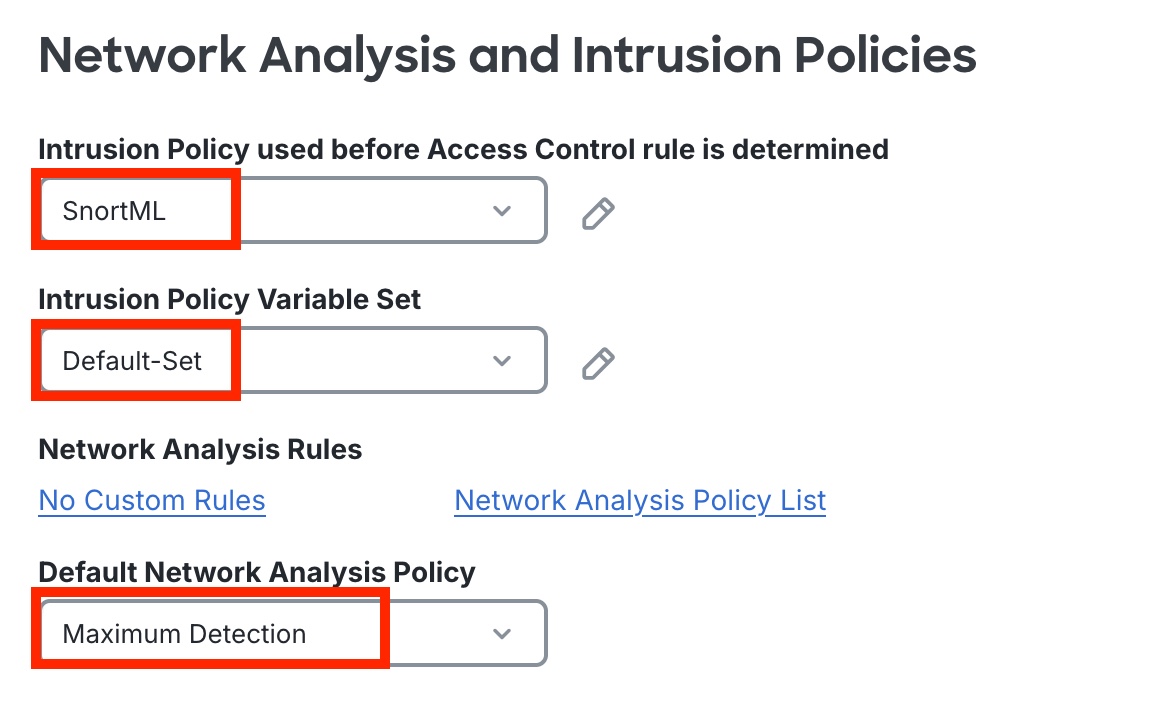
Select SnortML with the Default-Set along with Maximum Detection created previously as shown below. The packets that pass through the firewall before the access control rule is determined will be subjected to the Intrusion Policy selected in this lab. Click OK to save.
Click Save on the top far right to save the changes and proceed to deploy them to NGFW1 by clicking on Deploy as shown below.
Note
If any warnings seen, click on Ignore warnings and proceed with Deploy.
(Optional) Click on Advanced Deploy to view the details of the changes made.
Wait till the deployment completes.
Task 4- Re-run the Caldera Assessment
- Go back to the Assessment page on the Jumpbox and click on Run Validation Test.
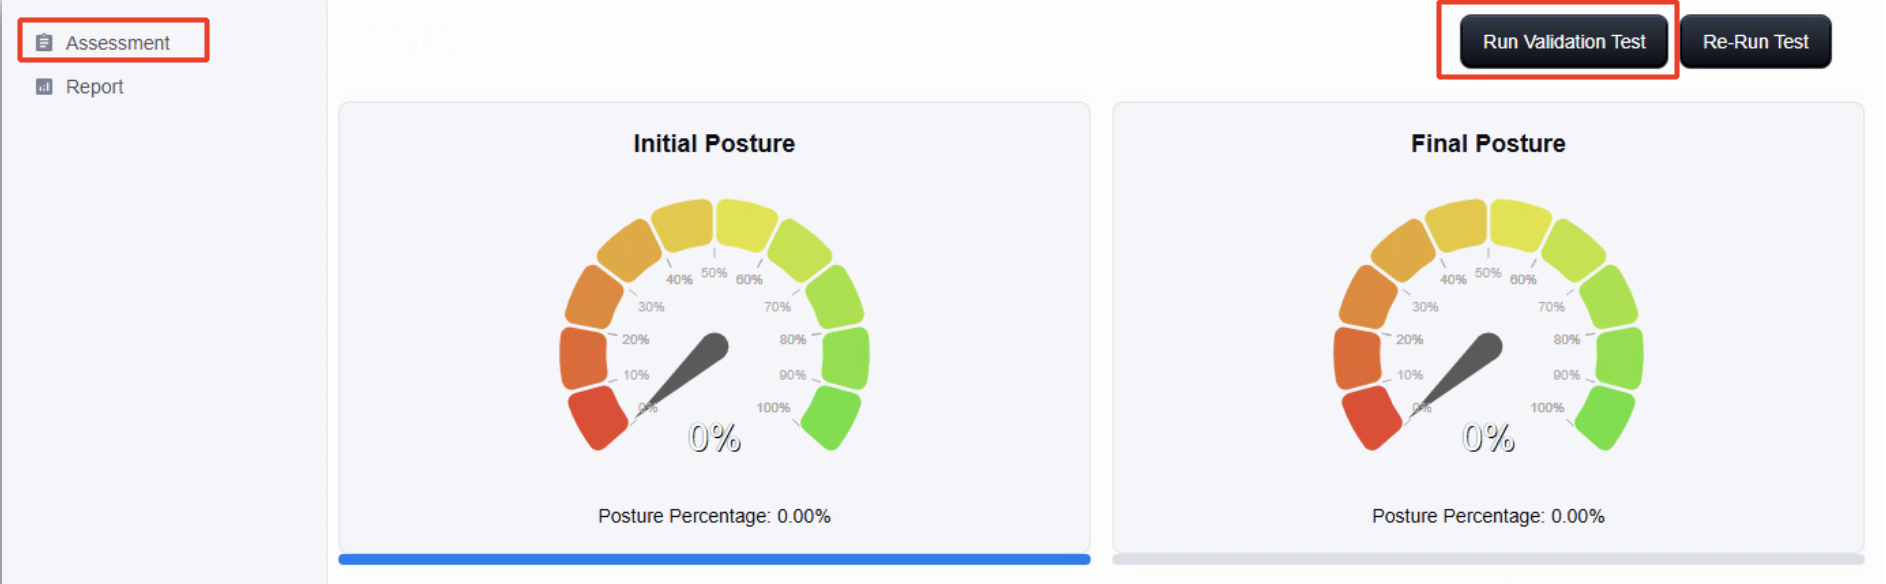
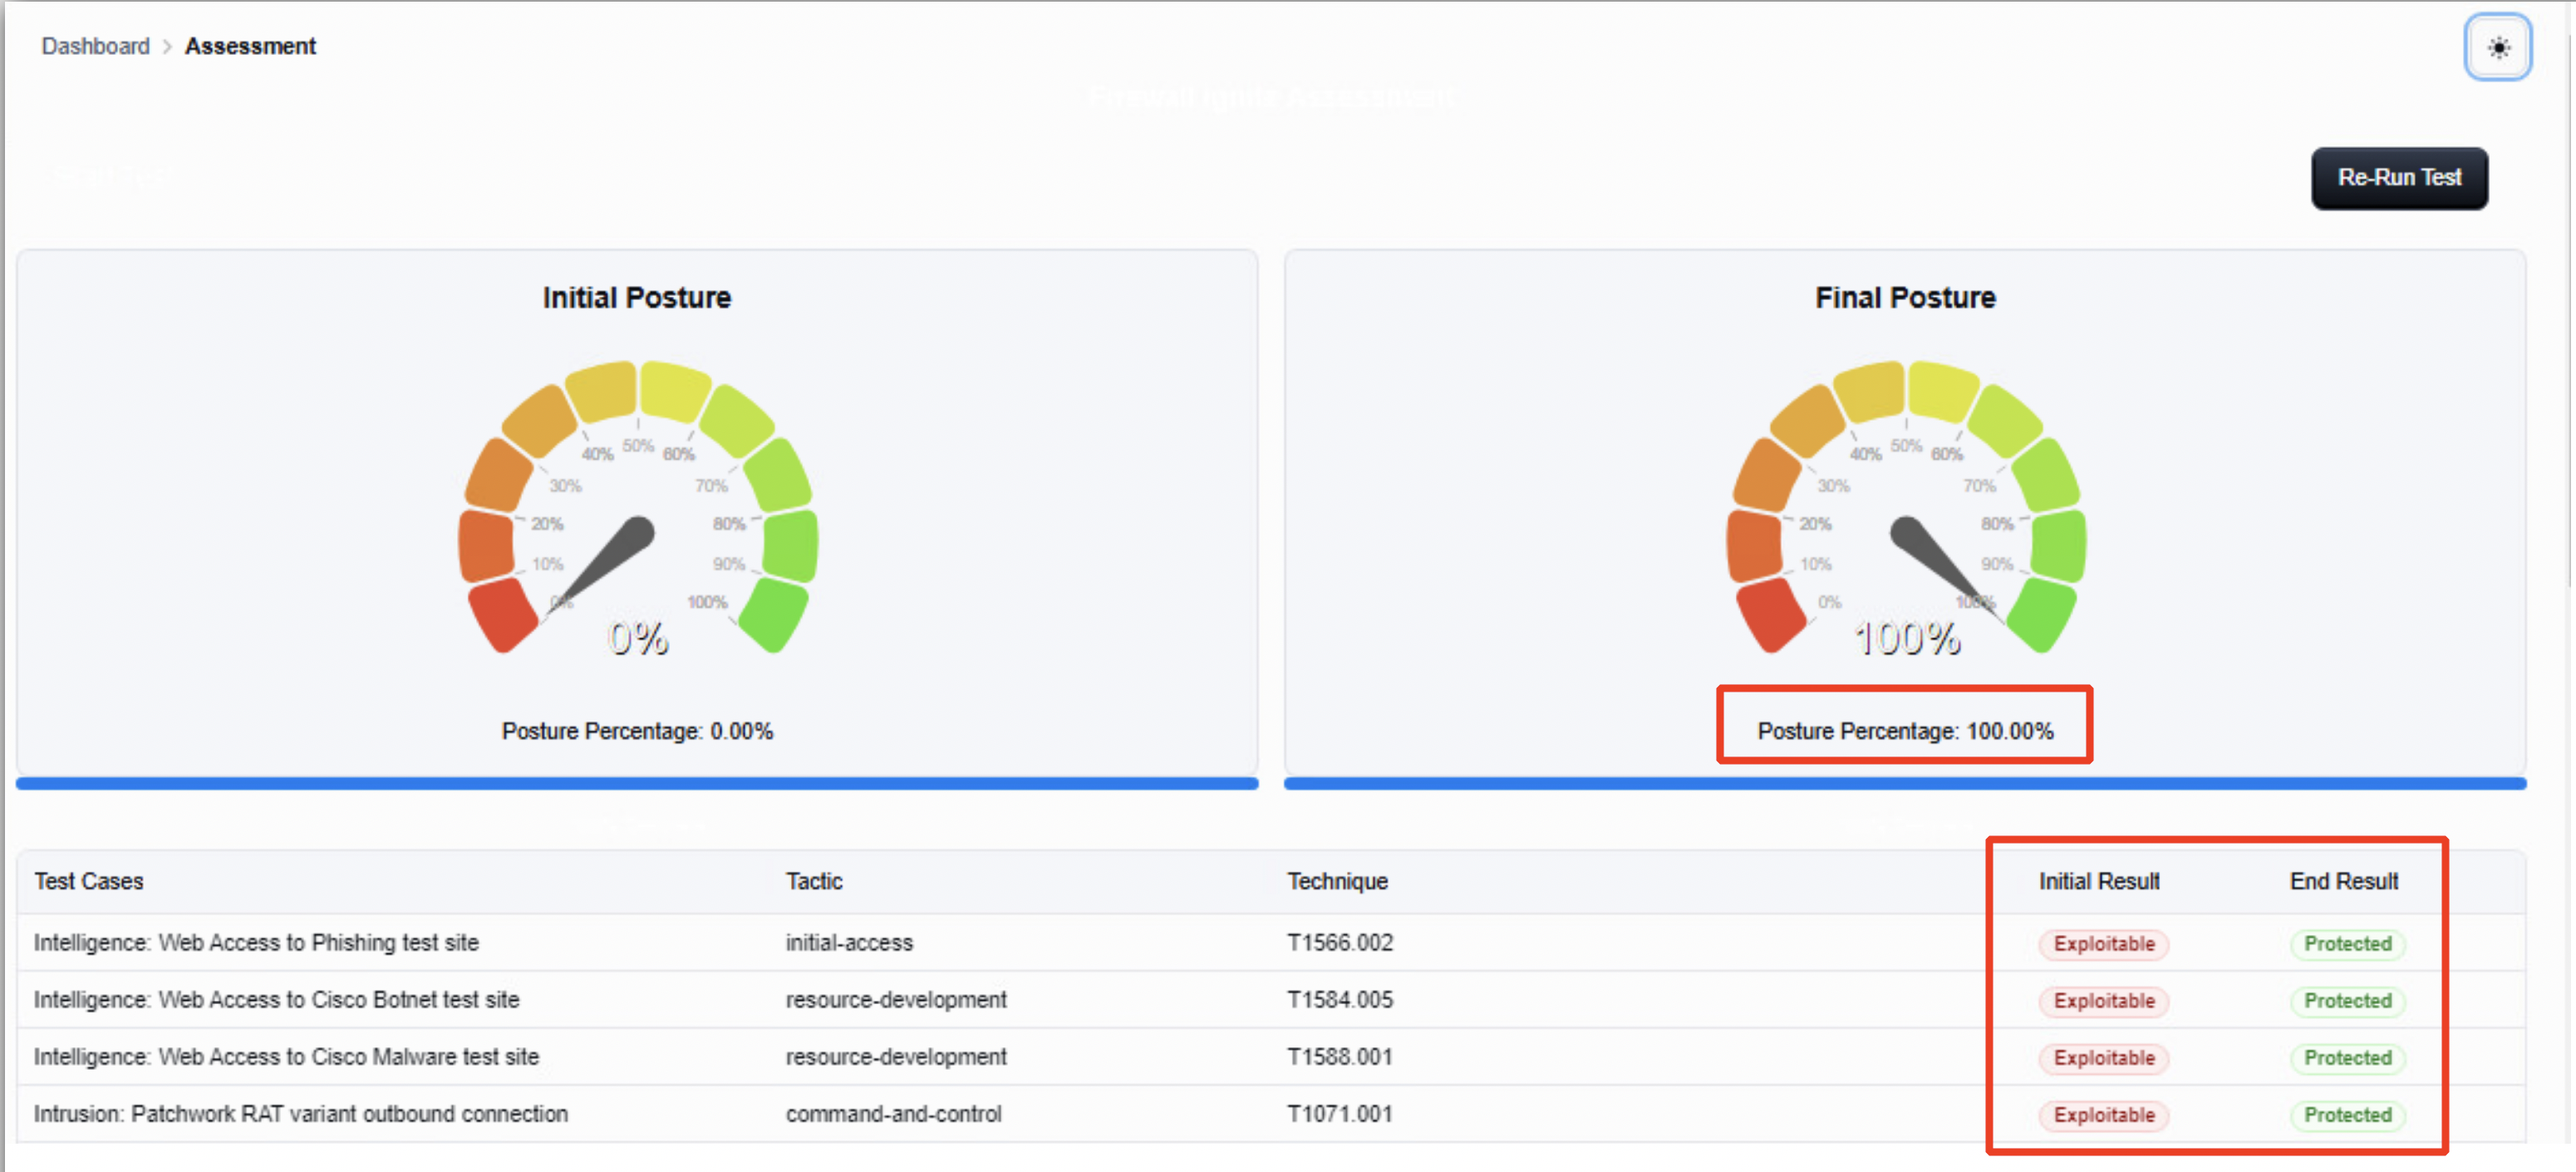
Note the column End Result being added here which displays the test result of the test cases being run for the Final Posture check. Compare the output of Initial Result with End Result. The Final Posture graph displays the live Posture Percentage for the second assessment being run.
Post the execution of all the test cases, view the final posture graph which should ideally display 100% referring to all the test cases being blocked by the firewall post the required configuration. Click on Report to view the details of the test case results.
Stop
If the Final Posture does not show 100%, review the logs and try to figure out the reason. Verify and correct the configuration and click on Re-Run Test to re-run the Final Posture.
Task 5 - View the events on FMC Unified Event Viewer
Navigate to Analysis > Unified Events.
Click on the Search bar and select Device. Type in NGFW1.
Click on the time range shown on the top right, you can change it to Sliding Time Range and select last 1 hour and click on Apply.
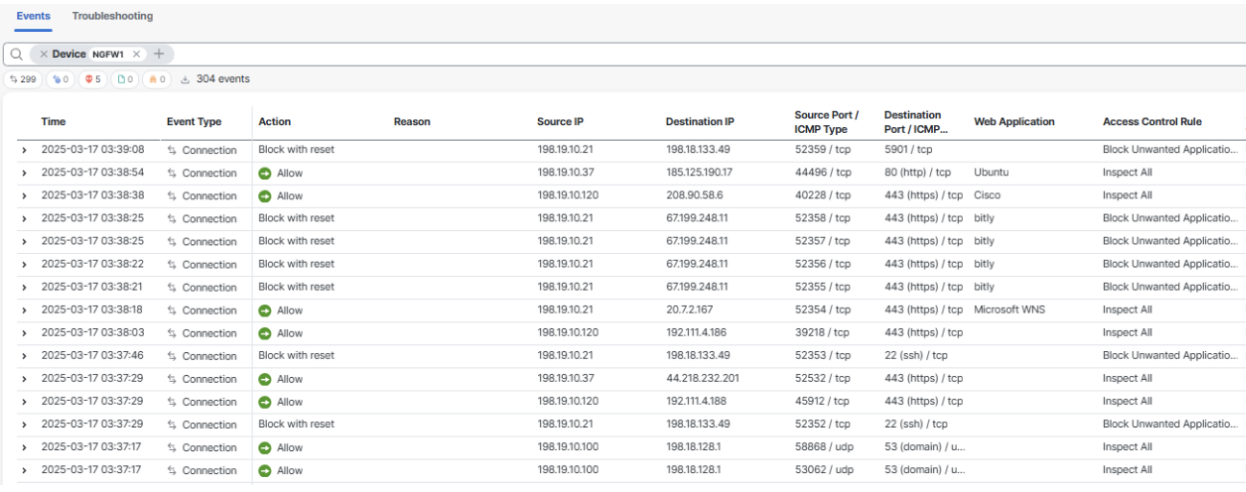
Observe the events generated as a result of the Caldera assessment and map them to the test cases under Caldera.
Summary
This lab task summarizes various threat protection capabilities provided by the firewall, as a result of the Caldera assessment. Caldera provides validation of these security controls by running the most common and high-risk attacks through the firewall and generating a detailed report. To achieve maximum security, it is important to utilize most of the aforementioned features.