
Operational Technology (OT) Configuration
Introduction
Cisco Secure Firewall has extensive capabilities for securing OT networks and controlling OT protocols. These capabilities extend across our firewall line, from the ruggedized ISA3000, to small office and enterprise rack mounted models, to the virtual Firewall Threat Defense (FTD). Management and configuration options are provided uniformly for all firewall models via the Firewall Management Center (FMC), delivering a consistent admin experience for both IT and OT networks. This document covers the following capabilities and configurations:
• Intrusion rules for OT networks
• Application detection for OT Protocols
• Snort inspectors for OT Protocols
All of the above configurations can be deployed to any FTD hardware or software model that is running a supported version. The configurations shown for OT intrusion rules can also be achieved with Snort 2, though the configuration workflows will be different. For Snort 2 configuration, please see the User Guide.
Lastly, this guide is focused solely on OT related configuration for Cisco Secure Firewall. For design guidance on fitting Cisco Secure Firewall into a broader OT security deployment, please see the Industrial Security Design Guide.

Intrusion Rules for OT Networks
Overview
Cisco Talos is the largest non-government threat intelligence group in the world. In addition to IT threat research, Talos devotes resources to tracking threats and threat actors that specifically target OT environments. Talos also performs research into zero day vulnerabilities for OT product lines, and releases obfuscated intrusion rule coverage (as Trufflehunter rules) even before CVE details are disclosed for found vulnerabilities. While there are many intrusion rules that cover general attack types and should be enabled for any network (IT or OT), the rules written specifically for OT warrant special attention for OT environments.
Intrusion rules for OT networks are grouped together under the SCADA keyword. These rules can also be enabled as a group with settings for low or maximum detection, or enabled or disabled individually.
Configuration
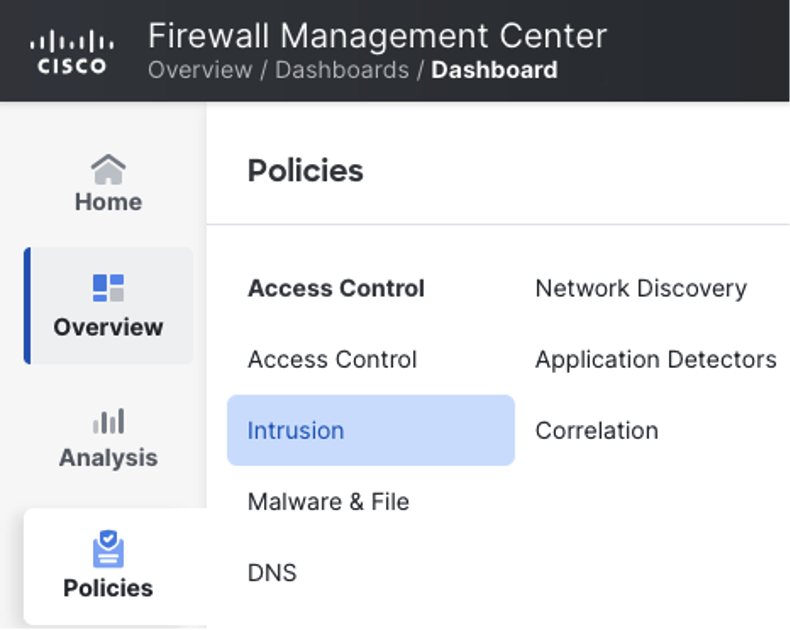
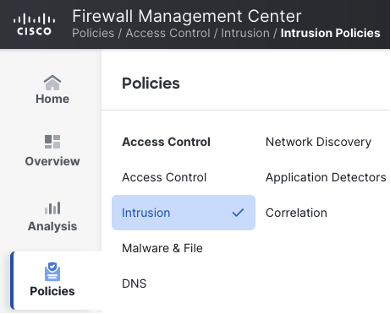
From the FMC, navigate to policies > intrusion.
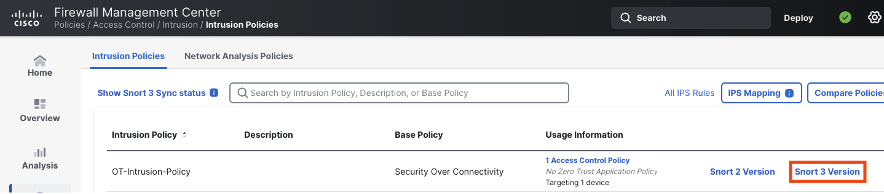
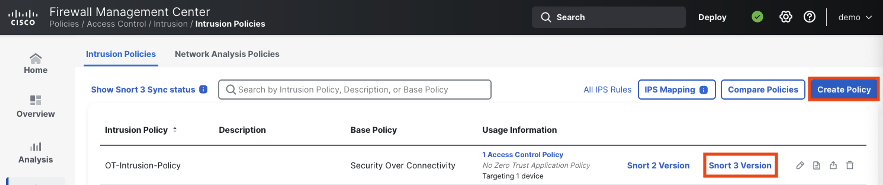
Click on Snort 3 for the desired intrusion policy.
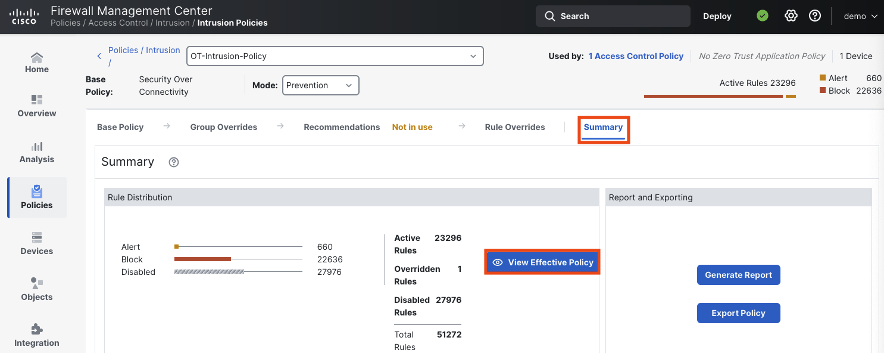
Click on view effective policy.

There are multiple ways to access the OT specific rules within the Intrusion policy. The most straightforward way is to search for “scada”.

Press enter to see the search results, which will include any rules that match the SCADA keyword.
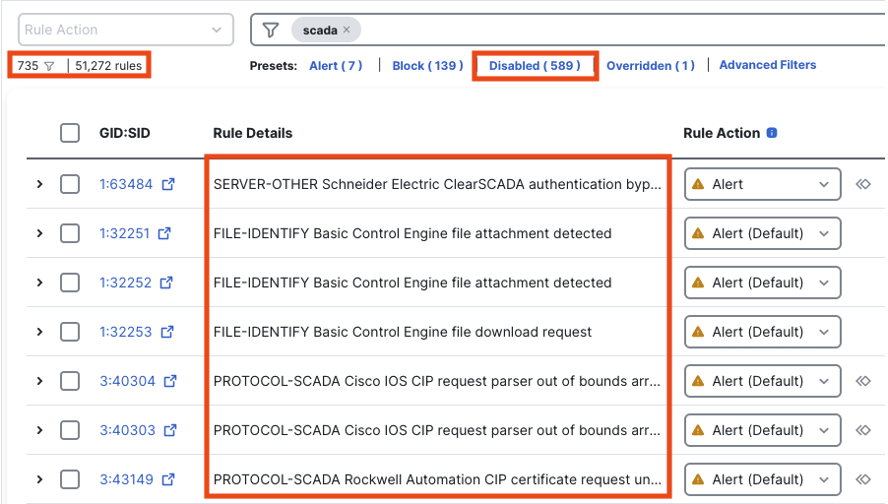
There are several things to note in these filtered results. (1) In the top left corner, we can see the number of rules in our filter: 735/51,272. As covered in the introduction, many standard rules have security value for OT networks, but the 735 rules (at the time of writing) in the SCADA filter are directly for OT. (2) In the top middle we can see that the majority of the OT rules are disabled by default. This makes sense, since IT networks are more common than OT networks, but this also means that OT users will want to review the disabled rules and determine whether some should be enabled for their policy. (3) The rule details column lists basic information about each rule, such as vendor (for rules that detect vulnerabilities in a specific vendor product), protocol (CIP appears several times in the screenshot above), and information on the type of activity that the rule is meant to detect.
Clicking the dropdown arrow next to any rule will display the full rule criteria and reference documentation.

Note that rules with GID 3 are Trufflehunter rules. These rules are the result of original zero day research by Talos, and do not show their detection criteria (such as the content matches shown above) since this could reveal unreleased information about the underlying vulnerability.

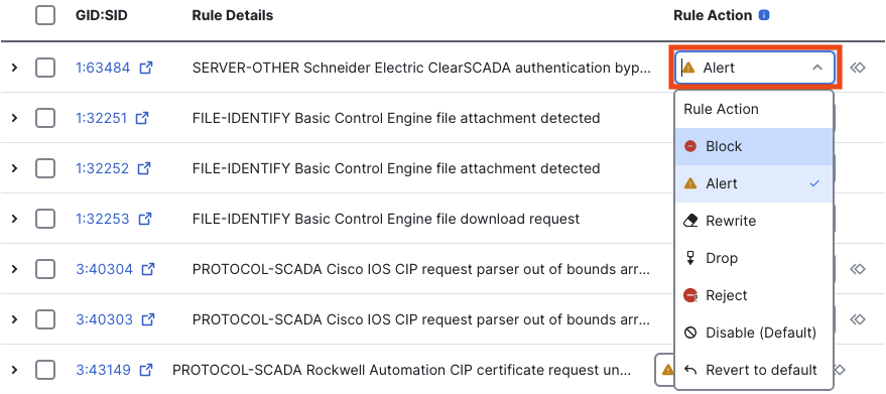
The action of any individual rule can be changed by clicking on the rule action dropdown.
OT intrusion rules can also be configured as a group. To do this from the same screen as the prior screenshots, click on rule categories > protocol > SCADA (note: the number of entries under protocol may vary depending on whether you have a balanced or security over connectivity policy).

The SCADA category groups OT rules together, facilitating easy review and configuration. Note that the rule count is different than the prior search, as that was a keyword based search while this search is matching all rules specifically labeled with the PROTOCOL-SCADA label.
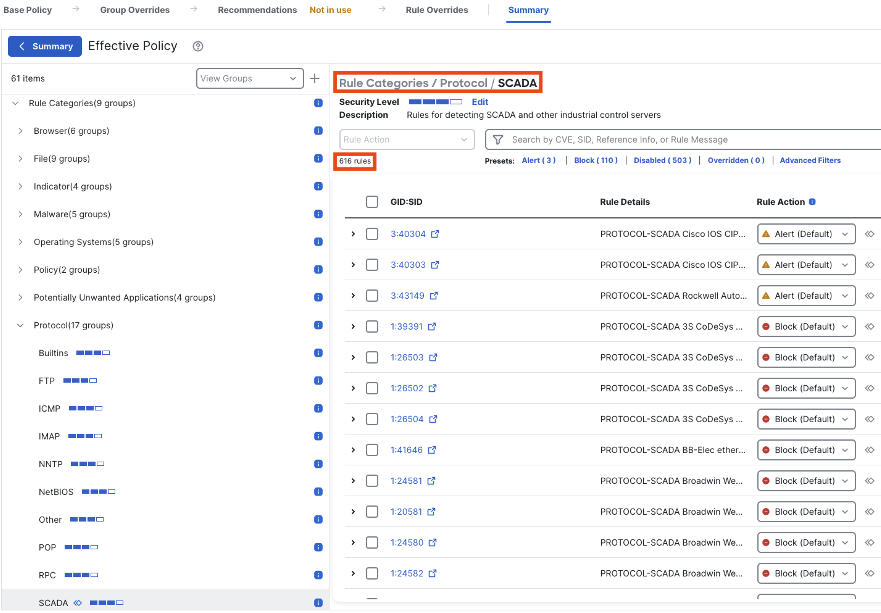
We can modify settings for the OT rules as a group by editing the security level.

Clicking on any of the four bars will change the rule settings for the SCADA group.
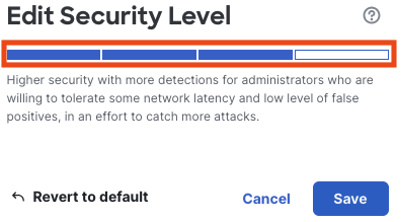
After changing the security level, review the rule actions to confirm the change.

While the rule presets offer easier configuration, it is still recommended to review the rules individually and enable any that directly apply to your environment.
Application Detection for OT Protocols
Overview
Application detections are handled by a dedicated team within Cisco that is separate from Cisco Talos. Application detections are publicly available on appid.cisco.com, and are free for anyone to view without the need for an account. As with intrusion rules, OT specific application detections are available for protocols that are unique to OT environments. Application detections extend to individual functions for protocols like S7CommPlus and Modbus.
Configuration
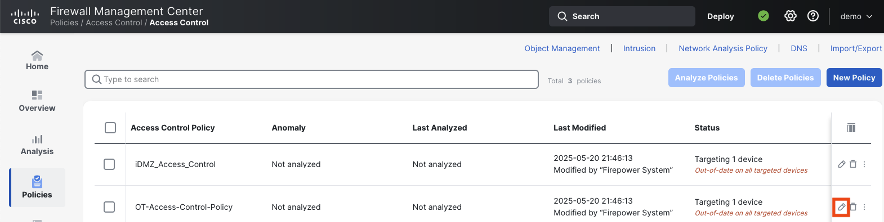
To configure OT application detection, navigate to policies > access control.

Either create a new policy or click the pencil icon next to an existing policy.
Either click on add rule, or click the pencil icon to edit an existing rule.
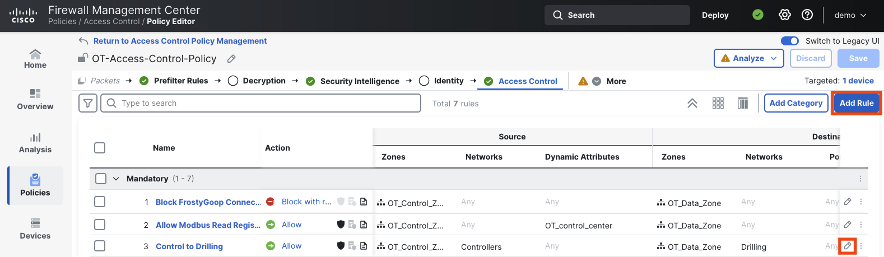
Within the rule, click on applications.
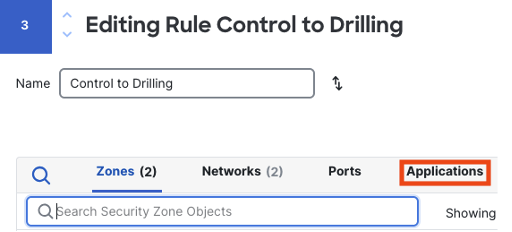
As with intrusion rules, we can search directly for OT applications using the SCADA keyword, which will bring up the ‘scada protocol’ entry under tags.
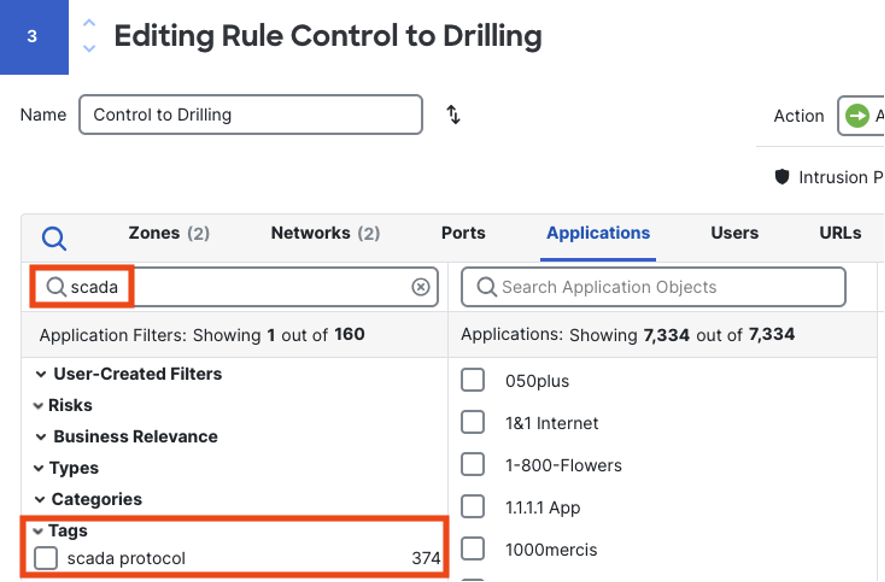
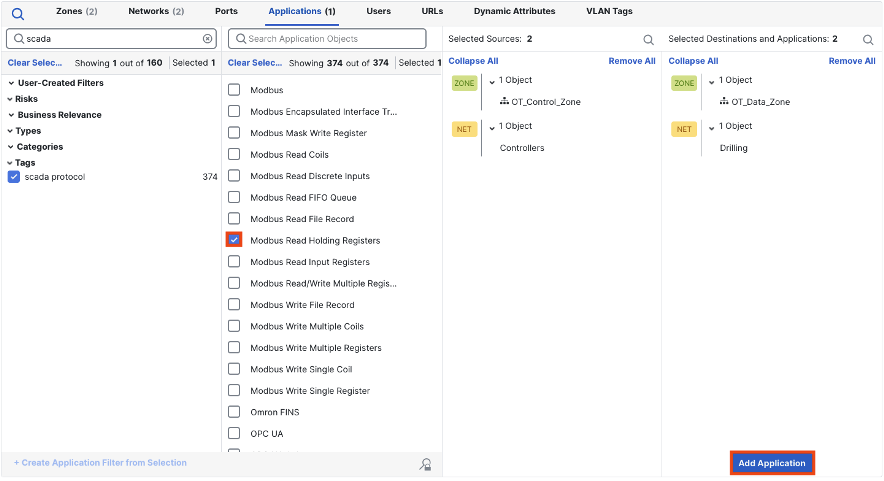
Check the box for scada protocol to view the set of application detections for OT protocols.

As covered in the introduction, application detections for OT protocols include detections for individual protocol functions, such as Modbus Read and Write. To use an application detection, check the box for it and click add application. Then, save and deploy policy as normal.
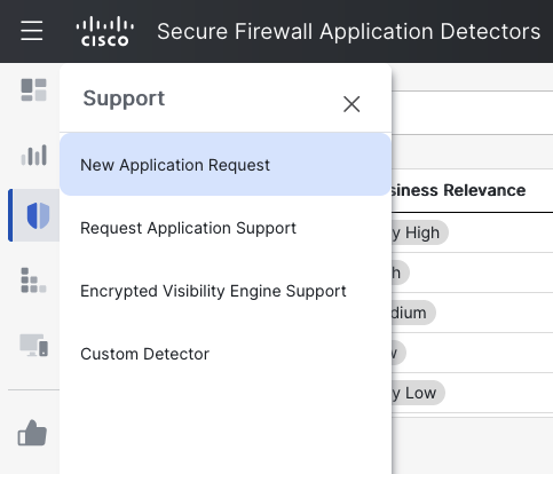
Cisco’s application team will also take requests for additional detection support. This can be done at appid.cisco.com by clicking on support > new application request.
OT Protocol Inspectors & Inspector Rules
Overview
The Snort detection engine is responsible for both intrusion prevention, and detection of non-RFC compliant traffic for different protocols (traffic for a given protocol that does not adhere to the written specifications of that protocol). Detection of traffic that violates protocol RFCs is performed by Snort inspectors, which also collect data to inform intrusion rules. Inspector specific intrusion rules are used to identify deviations from the protocol RFC, and to detect forms of malicious activity specifically related to a given protocol.
There are six inspectors for OT protocols:
• CIP
• DNP3
• IEC 104
• MMS (Manufacturing Message Specification)
• Modbus
• S7CommPlus
Configuration of inspectors is done in the network analysis policy (NAP). Each inspector also has associated intrusion rules that can be configured in the intrusion policy. Enabling the intrusion rules for any inspector will auto-enable the corresponding inspector in the NAP. This means that it isn't necessary to modify the NAP to benefit from the OT specific inspectors, as enabling an intrusion rule related to the inspector will silently enable the inspector.
Intrusion Rules for OT Inspectors
This portion of the guide covers how to locate and enable intrusion rules that are related to OT inspectors. To configure rules for OT inspectors, navigate to policies > intrusion.
Click on 'Snort 3 version' to modify an existing policy (if needed, click on create policy to build a new one).
In the summary tab, click on view effective policy.
Each inspector has a unique GID for its rules. The GIDs for the OT inspectors are as follows:
• CIP: GID 148
• DNP3: GID 145
• IEC 104: GID 151
• MMS: no inspector rules
• Modbus: GID 144
• S7CommPlus: GID 149
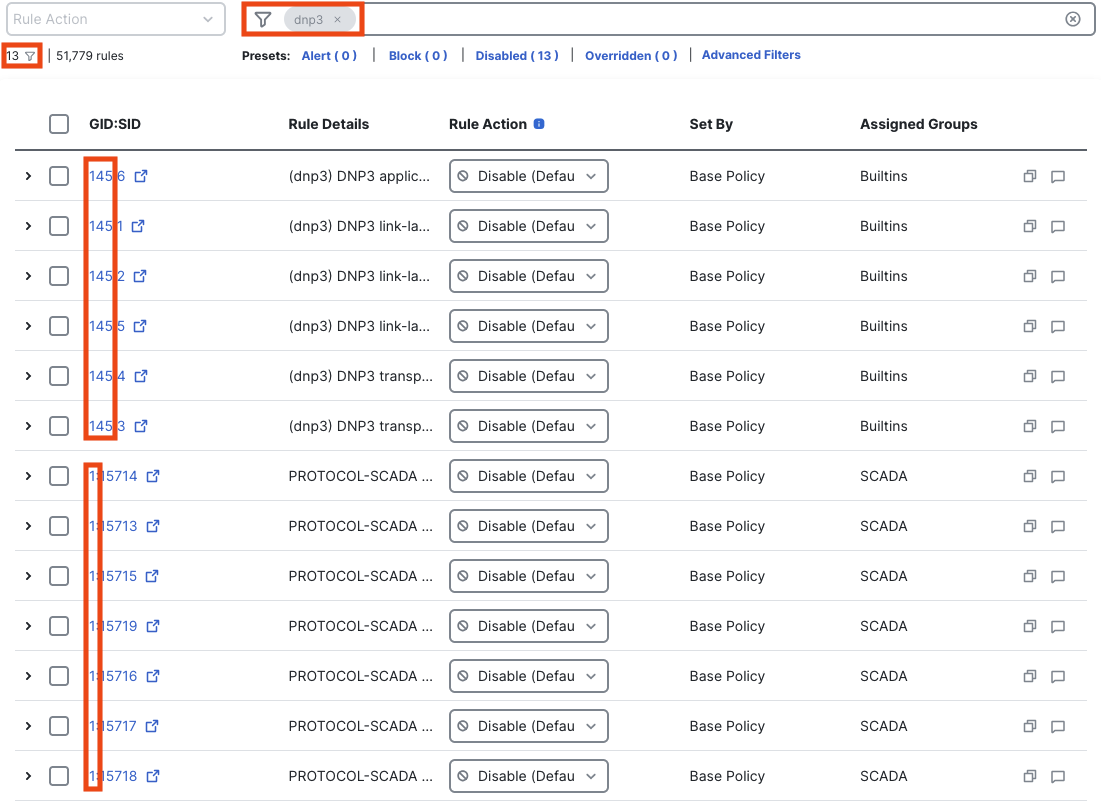
To find an inspector ruleset, it is most effective to search for the GID. The below screenshot shows a search for GID 145 (searched in the format GID:145), which is associated with the DNP3 protocol.
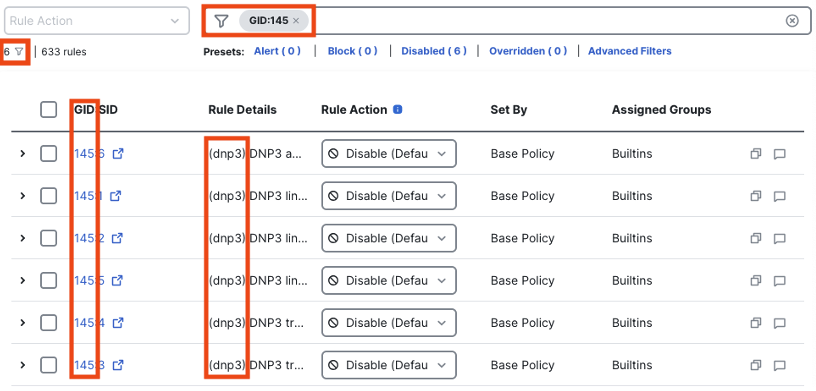
Directly searching for ‘dnp3’ is a simple string query that will return the DNP3 inspector rules shown above, along with any rules that match the dnp3 string. This can be useful for reviewing non-inspector intrusion rules that are also related to DNP3.
We can expand any of the rules to get more information. Let’s expand rule 145:1.

Inspector rules are similar to Trufflehunter rules in that they don’t have clearly readable detection criteria, which can make determining true/false positive status difficult. However, we can get a solid idea of what the rule is looking for from the message: ‘DNP3 link-layer frame contains bad CRC’. A Cyclic Redundancy Check (CRC) is a mechanism used by protocols to ensure integrity and reliability in data transmission.
The most common cause of bad CRCs are network problems, and bad CRCs are less likely to tie back to a security event than you would typically expect of a Snort rule. Is rule 145:1 worth turning on for networks that use the DNP3 protocol? That depends. If there’s a network issue that is causing a large number of bad CRCs in DNP3 traffic, then this rule could be very noisy. Identifying the source of the problem would involve reviewing the source(s) and destination(s) of the traffic and other details like volume, frequency, and time of day. An admin would need to be willing to comprehensively investigate their network to identify the source of the problem and determine whether a fix can be implemented.
With the right amount of effort, 145:1 events could lead an admin to a network problem, a software problem, and potentially even a security problem. But it’s an investigation path that will likely take more time engagement and be less likely to identify a security threat than standard rules. You never know what you’ll find unless you look, but every organization must also deal with resource limitation. Administrators should review all of the available inspector rules for a given protocol and determine which ones are worth testing and which are worth taking action on.
The Network Analysis Policy (NAP)
The network analysis policy is intentionally left at default settings for most deployments. This is recommended, as modifying the NAP can have performance or detection repercussions. The NAP contains granular configuration for different Snort 3 inspectors, including the OT inspectors covered in the prior section. Because most networks do not have traffic for OT protocols, the OT protocol inspectors are disabled by default.
The good news is that OT protocol inspectors are silently enabled when a corresponding inspector rule is enabled. For example, enabling the DNP3 inspector rule 145:1 shown in the last section will automatically enable the DNP3 inspector for better handling of the DNP3 protocol traffic that the rule inspects.
Auto-enablement of inspectors is also utilized for standard intrusion rules (GID 1) that have detection criteria that depends on an inspector. For example, rule 1:29201 is a GID 1 rule, not an inspector specific rule. However, rule 1:29201 does have detection criteria that directly relates to the inspection of the Modbus protocol.

Because rule 1:29201 has detection criteria related to the Modbus inspector, the Modbus inspector within the NAP will be auto-enabled if rule 1:29201 is enabled.
Updated 10 months ago