Advanced Lab - Capabilities
Capabilities built into the dCloud pods allow users to go far beyond the published lab exercises.
Overview
The dCloud lab pods support capabilities beyond the lab exercises presented in the lab guides. As a lab pod user, you should consider the lab pod as a generic testing environment. To take full advantage of this environment, it is important for you to know the capabilities of the lab.
List of Lab Scenarios
- CSDAC in FMC
- Zero Trust Access (ZTA)
- Secure Firewall with SD-WAN Capabilities
- Packet-Tracer in Firewall Threat Defense
- Remote Access VPN Dashboard
- Threat Features in 7.6
- AI Assistant & Policy Analyzer and Optimizer
Scenario 0: Familiarization with dCloud Environment
Environment Overview
The below is the topology of the dCloud lab.
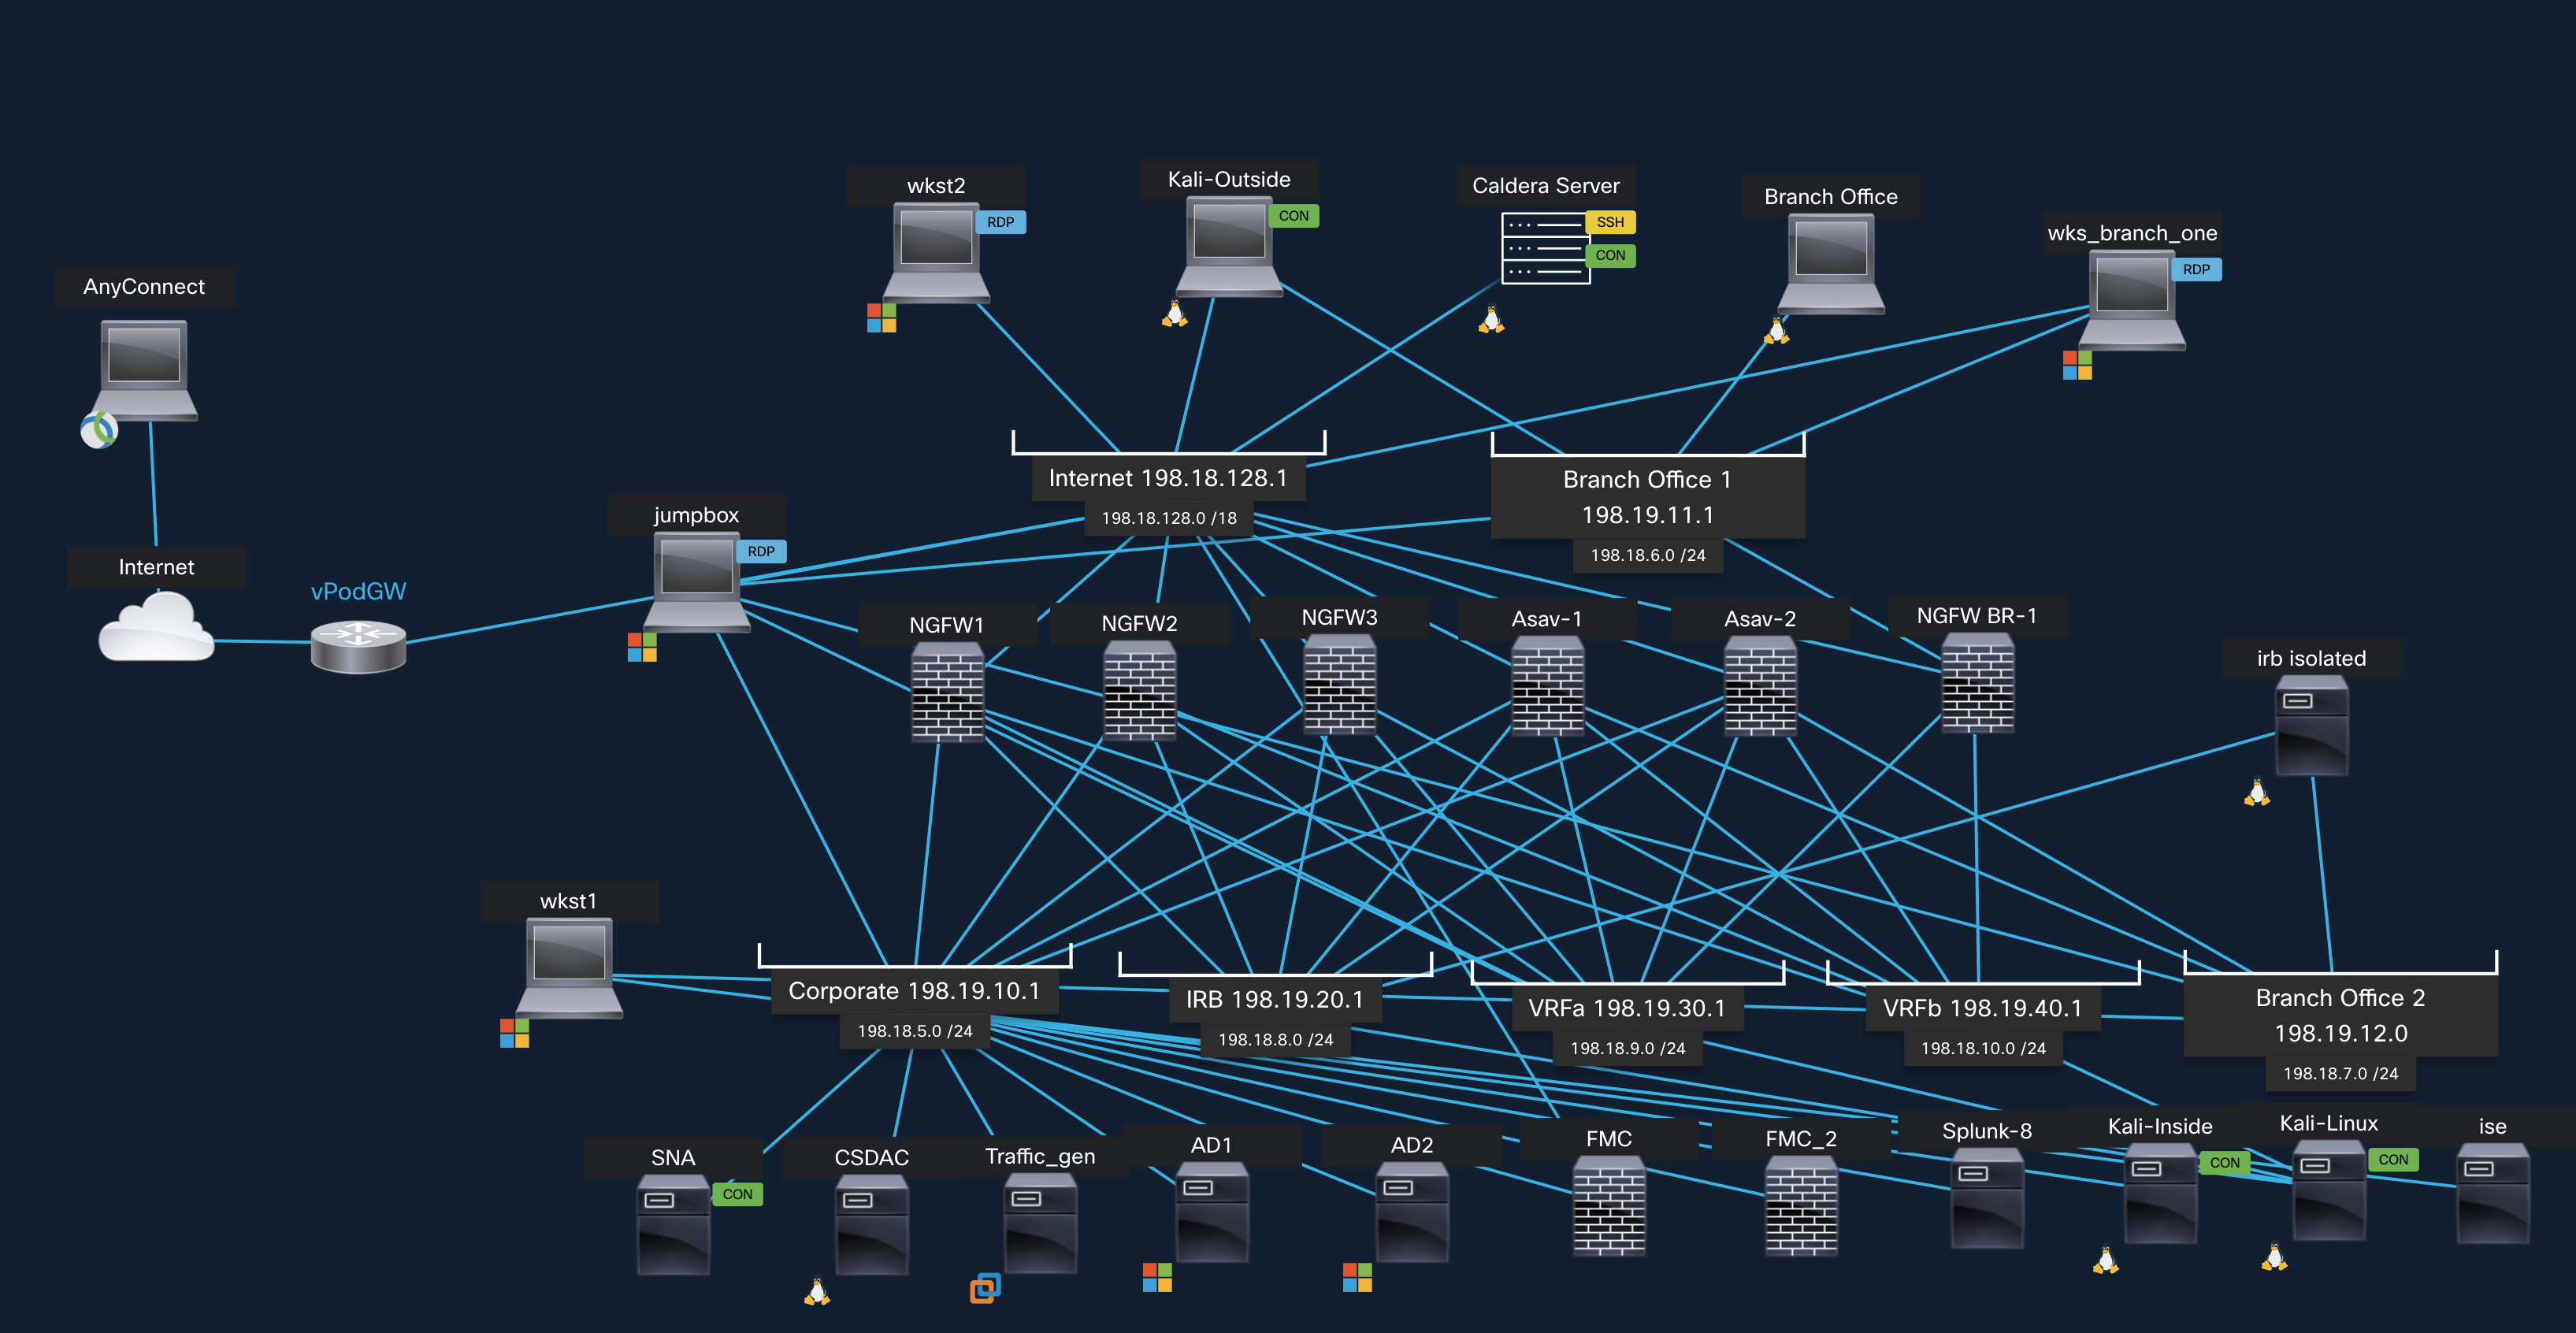
dCloud topology
- On the topology window, locate the Jumpbox. Click on its icon (on the computer screen). Options for the Jumpbox should open on the left-most panel. The Jumpbox is a Windows machine and has multiple Network Interface Cards (NICs) and therefore will be a host on different subnets, depending on the lab scenario. The credentials for the Jumpbox and all other Windows machines are administrator / C1sco12345.
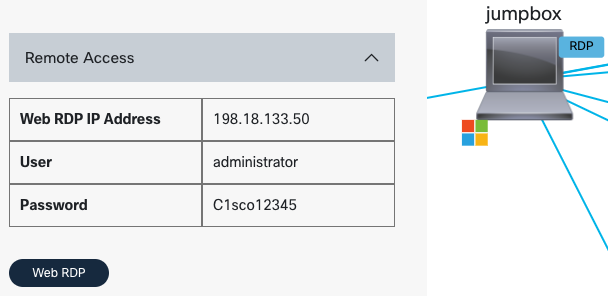
Jumpbox Credentials
From the Jumpbox popup, click Web RDP to connect to it.
- The first time you connect to the Jumpbox, Windows will automatically launch Quick Launch. This is a web page providing you shortcut access to devices used in our lab scenarios. Have a look at some of the names on the menu. You will recognize devices also seen on the topology found at the beginning of this document.
- Blue buttons open Putty SSH sessions.
- Green buttons open browser sessions.
- Red buttons open RDP sessions.
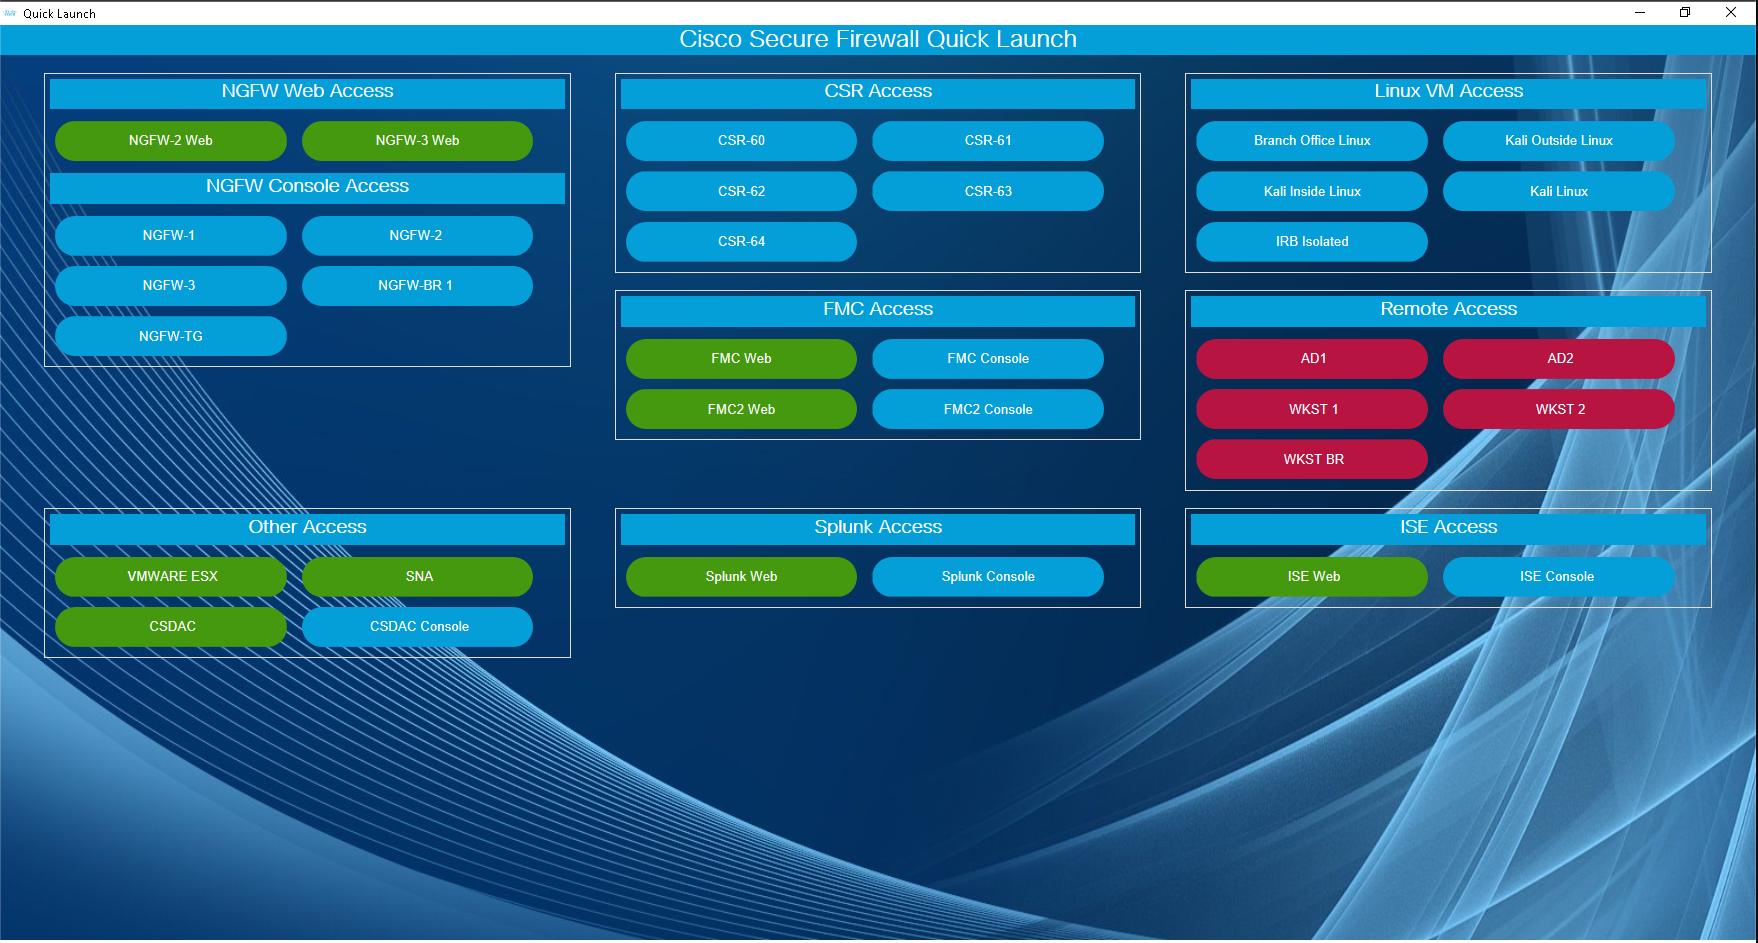
Jumpbox Quick Launch Application
- If you close the Quick Launch and want to open it again use the icon on the desktop.
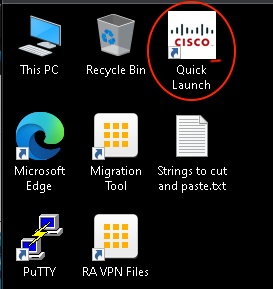
Closing Quick Launch Application
Display Improvements
- To get crisper fonts on Jumpbox, perform a Windows search for ClearType.

ClearType Search
- Turn on ClearType. The improvement will be immediate.
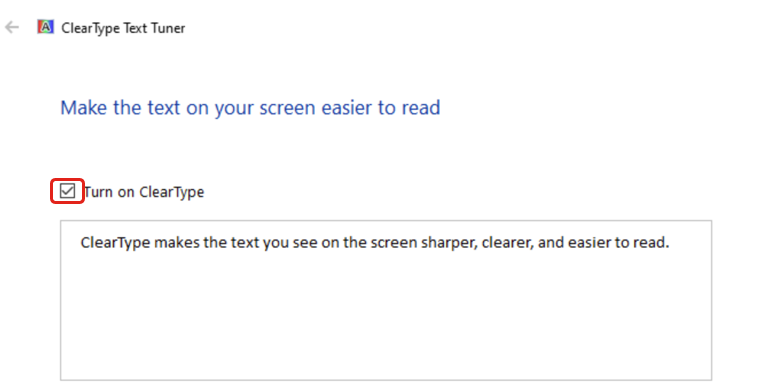
ClearType Activation
Time Synchronization (Important)
-
Next, the time on the Jumpbox must be properly synchronized. Right click on the time in the lower right corner and select Adjust date/time from the menu. Adjust the time zone to your local time if desired.
-
If this time is not correct, resynchronize the clock using the following procedure:
i. Click the Sync now button in the dialog
ii. Confirm the Jumpbox time is now set correctly.
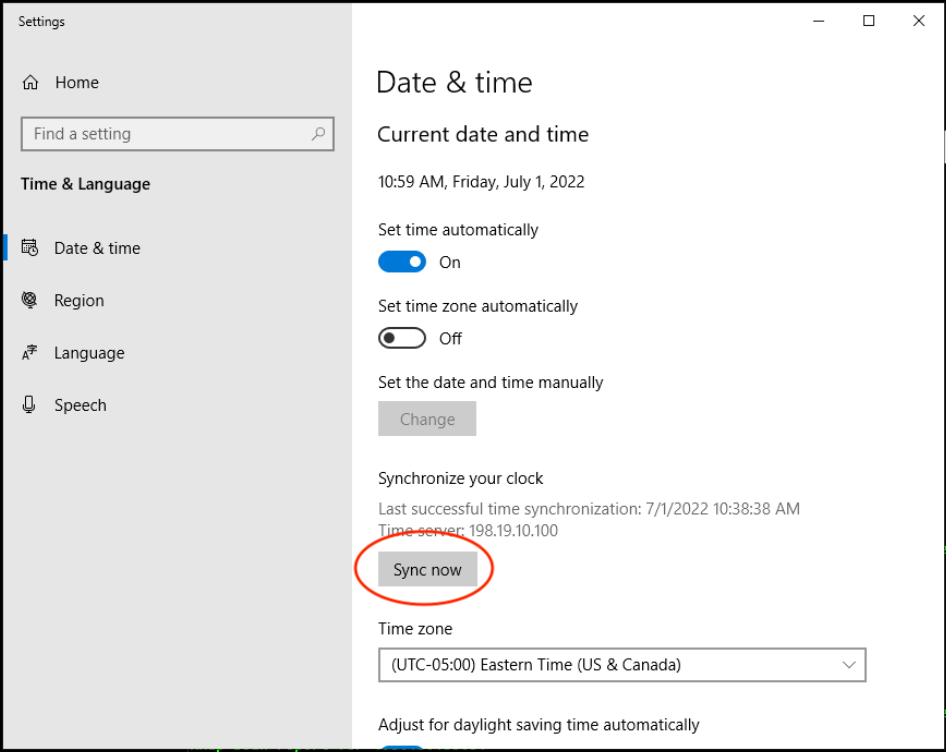
Date & Time Synchronization
You may now start the lab by scrolling to the WHAT'S NEXT section at the bottom of the page. To learn more about the lab capabilities and environment, see below.
Capabilities
The rest of this document is a supplement to the existing lab material. It will be of particular use to lab pod users who have already performed a few exercises, but who now want to go beyond what the exercises present. To continue with the labs immediately, you can scroll to the bottom of the screen and click the link in the WHAT'S NEXT section.
One key simplification: you can ignore the Cisco Cloud Services Routers (CSRs) when considering the high-level network design of the pods. The pod does not rely on CSRs for connectivity.
Most exercises involve two VLANs - Internet and Corporate:
- Internet (198.18.128.0/18). As the name suggests, this VLAN can simulate the Internet. There are two servers on this VLAN.
- WKST2. A windows server used to test RA VPN
- Kali Outside. A Linux server that functions as a generic Internet server
This VLAN also provides access to the real Internet through a gateway 192.18.128.1. This gateway is part of the dCloud infrastructure and is not accessible from the pod.
- Corporate VLAN (198.19.10.0/24). This is the VLAN inside the FTDvs. Most the VMs are located on this VLAN. This VLAN is also the management VLAN. In other words, the lab pods use in-band management.
These two VLANs can connect through three FTD devices. This allows you to configure FTD HA, or an FTD cluster, and even configure a third device to FDM, if you wish. The FMC has a universal permanent license registration (uPLR), so you should not run into any license limitations with using devices registered to the FMC.
There is a second FMC (FMC2) so you can configure FMC-HA if desired.
Other VLANs facilitate specific lab features and exercises
- Branch Office 1 (198.19.11.0/24). This VLAN contains a windows server and Linux server. It connects to the Internet VLAN through the FTD called NGFWBR1. You can use this VLAN, for example, to demonstrate site-to-site VPN.
- IRB (198.19.20.0/24), VRFa (198.19.30.0/24), VRFb (198.19.40.0/24). These VLANs, along with the Corporate VLAN provide four internal networks. This is useful for working with VRFs. You also use the IRB VLAN, as the name suggests, for IRB testing, as explained later in this document.
- Branch Office 2 VLAN (198.19.12.0/24). The name is of this VLAN is misleading and derives from a discontinued lab exercise. Instead, this VLAN provides secondary interfaces for 2 VMs (WKST1 and IRB Isolated) and the five Cisco Cloud Services Routers (CSRs). This allows the student to change the IP address on the primary interface without losing connectivity to these VMs. You can think of this VLAN as providing console access to these VMs, although this is not technically correct. You use this VLAN in conjunction with other lab features described later in this document.
- Anything involving Cisco Cloud Services Routers
- RADIUS Simulator
- IRB and Inline Pair Support
Cisco Cloud Services Routers
The pod contains five CSRs: CSR60, CSR61, CSR62, CSR63 and CSR64. You do not need these routers to interconnect VLANs. All VLANs in the pod connect through one or more FTDs. However, you can use the CSRs to enhance the pods as follows.
- Provide alternate topologies to the default topology of the pod.
- Use loop-back interfaces to simulate remote networks.
- Participate in dynamic routing protocols with each other or with the FTDs.
Each CSR has interfaces GigabitEthernet1-6 on VLANs Internet (198.18.128.0/18), Corporate VLAN (198.19.10.0/24), IRB (198.19.20.0/24), VRFa (198.19.30.0/24), VRFb (198.19.40.0/24), and Branch Office 2 VLAN (198.19.12.0/24), respectively. CSR60-64 interfaces have IP addresses ending in .60 through .64, respectively.
By default, most the interfaces on the CSRs are administratively down. However, interface GigabitEthernet6 is always enabled and provisioned on the Branch Office 2 VLAN (198.19.12.0/24). When using the Quick Launch, you will access the CSRs through this interface. In a sense, you use GigabitEthernet6 as a console connection to the CSRs.
Splunk
The pod contains an enterprise version of Splunk installed on the Corporate VLAN. The IP address is 198.19.10.12. The Chrome browser on the jump box has a bookmark to access Splunk on port 8000.
Splunk is fully licensed, but only has minimal configuration. If you wish to use Splunk, you must configure the FMC to send data to Splunk, either via Syslog or eStreamer.
Traffic Generator
Each pod has a traffic generator to provide a rich set of events. The traffic generator is enabled by default. You should not need to perform any configuration.
The traffic generator traffic has source or destination in 192.168.0.0/16. You may wish to filter out these events. When using the Unified Events page in the FMC, you can filter these out by setting Device to !NGFWTG.
A virtual ESXi server hosts the traffic generator. You may access the ESXi server from the jump box. The IP address is 198.19.10.27. The CLI and UI credentials are root/C1sco12345. The ESXi server contains an FTD (registered to the FMC) and a Linux server that is generating the traffic. A detailed description of the traffic generator implementation and configuration is beyond the scope of this document.
Active Directory Users and Groups
There are many users and groups configured in the AD server and in ISE. These exist to facilitate a wide range of exercises. But four of the users intended for generic use (using passive or active authentication) have mnemonic group memberships.
- The user Dilbert is a member of the Engineering group. Dilbert is, of course, a notorious engineer.
- The user Harry is a member of the HR group. Remember HaRry.
- The user Ira is a member of the Investment group. An IRA is an investment vehicle.
- The user Rita is a member of the IT group. Remember rITa.
RADIUS Simulator
The RADIUS Simulator facilitates passive authentication testing and demonstration. ISE recognizes the jump box IP 198.19.10.50 as a switch and accepts RADIUS messages from this address. The RADIUS simulator lives on the jump box desktop in the RADIUS Simulator folder.
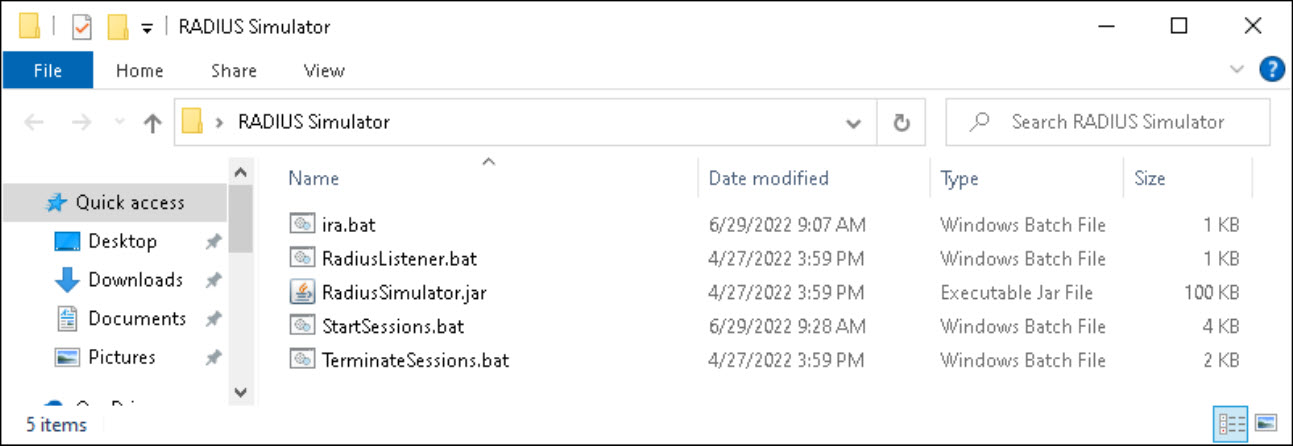
Figure 2. RADIUS Simulator folder on jump box desktop.
The RADIUS simulator generated login (StartSessions.bat) and logout (TerminateSessions.bat) RADIUS events and can listen for RADIUS messages (RadiusListener.bat). These BAT files are editable, but the existing configuration should suffice. The login and logout scripts generate IP addresses and MAC addresses (with real-world OUIs) for Dilbert, Harry, Ira, Rite, Eric, John, and William. These users exist in the AD server.
You will use the RADIUS simulator in conjunction with WKST1. WKST1 has scripts that can change the primary interface IP to match the radius login message. There are two relevant folders on the WKST1 desktop: Users > NGFW1 is your gateway and Users > NGFW2 is your gateway.
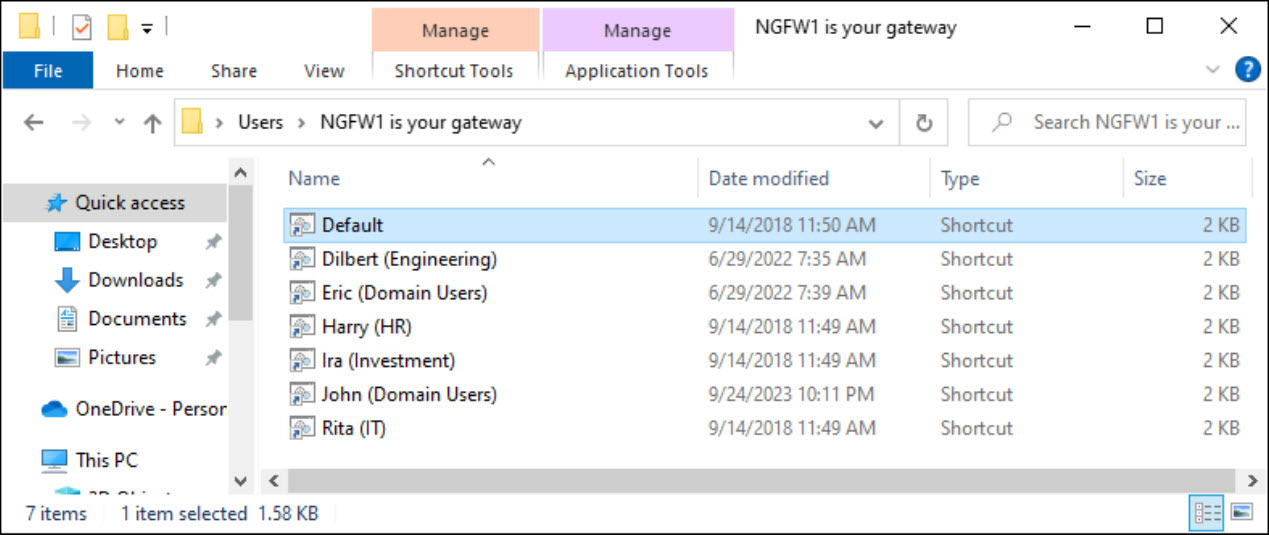
Figure 3. Scripts on WKST1 to set IP address and default gateway.
Note that you always log into WKST1 as administrator/C1sco12345. You then use the scripts to change the IP address to match the user you wish to become. You do not log out of WKST1 to change your user identity. The RADIUS simulator generates the login and logout events, not WKST1.
IRB and Inline Pair Support
The pod supports IRB and inline pair testing and demonstration. Two elements of the lab are relevant.
- The VLAN labeled IRB. The firewalls NGFW1, NGFW2 and NGFW3 have GigabitEthernet0/2 on this VLAN. By default, they have IP addresses in the CIDR 198.19.20.l0/24. However, you can create a bridge group or inline pair and assume IRB is an extension of the Corporate VLAN, sharing the CIDR 198.19.10.0/24.
- The VLAN labeled Branch Office 2 VLAN (198.19.12.0/24). You can use this to connect to the IRB Isolated Linux server. The primary interface of this Linux server is on the IRB VLAN and has IP addresses 198.19.10.220, 198.19.10.221, and 198.19.10.222. In other works, the Linux server configuration assumes that the IRB VLAN and Corporate VLAN have the same CIDR.
All you need to do is set up a bridge group or inline pair on one of the FTDs using GigabitEthernet0/1 and GigabitEthernet0/2. Then use the IRB isolated Linux server for testing.
Updated 9 months ago
